标签:
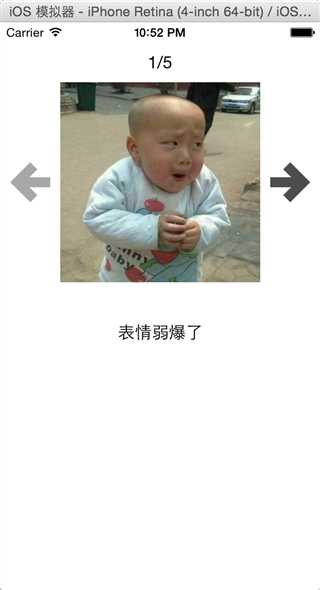
//
//  UYViewController.m
//  3.0图片查看器
//
//  Created by jiangys on 15/8/19.
//  Copyright (c) 2015年 uxiaoyuan. All rights reserved.
//

#import "UYViewController.h"

@interface UYViewController ()
@property(nonatomic,strong) UILabel *noLabel;
@property(nonatomic,strong) UIImageView *iconImage;
@property(nonatomic,strong) UILabel *descLable;
@property(nonatomic,strong) UIButton *leftButton;
@property(nonatomic,strong) UIButton *rightButton;

//显示当前的照片索引
@property(nonatomic,assign) int index;

//图片信息的数组
@property(nonatomic,strong) NSArray *imageList;

@end

@implementation UYViewController

-(NSArray *)imageList
{
    if (_imageList==nil) {
        NSString *path=[[NSBundle mainBundle] pathForResource:@"ImageList" ofType:@"plist"];

        //在OC中,通常需要完整的路径
        _imageList=[NSArray arrayWithContentsOfFile:path];
    }
    return _imageList;
}

- (void)viewDidLoad
{
    [super viewDidLoad];

    //1.索引
    _noLabel=[[UILabel alloc] initWithFrame:CGRectMake(0, 20, self.view.frame.size.width, 40)];
    _noLabel.text=@"1/5";
    _noLabel.textAlignment=NSTextAlignmentCenter;
    [self.view addSubview:_noLabel];

    //2.图片
    CGFloat imageW=200;
    CGFloat imageH=200;
    CGFloat imageX=(self.view.frame.size.width-imageW)*0.5;
    CGFloat imageY=CGRectGetMidY(self.noLabel.frame)+20;

    _iconImage=[[UIImageView alloc] initWithFrame:CGRectMake(imageX, imageY, imageW, imageH)];
    _iconImage.image=[UIImage imageNamed:@"biaoqingdi"];
    [self.view addSubview:_iconImage];

    //3.描述
    _descLable=[[UILabel alloc] initWithFrame:CGRectMake(0, CGRectGetMaxY(self.iconImage.frame), self.view.frame.size.width, 100)];
    _descLable.text=@"测试的拉";
    _descLable.textAlignment=NSTextAlignmentCenter;
    //需要Label具有“足够的高度”,不限制显示的行数
    _descLable.numberOfLines=0;
    [self.view addSubview:_descLable];

    //4.左边的按钮
    _leftButton=[[UIButton alloc] initWithFrame:CGRectMake(0, 0, 40, 40)];
    CGFloat centerX=self.iconImage.frame.origin.x*0.5;
    CGFloat centerY=self.iconImage.center.y;
    _leftButton.center=CGPointMake(centerX, centerY);
    _leftButton.tag=-1;

    [_leftButton setBackgroundImage:[UIImage imageNamed:@"left_normal"] forState:UIControlStateNormal];
    [_leftButton setBackgroundImage:[UIImage imageNamed:@"left_highlighted"] forState:UIControlStateHighlighted];
    [_leftButton addTarget:self action:@selector(clickButton:) forControlEvents:UIControlEventTouchUpInside];

    [self.view addSubview:_leftButton];

    //5.右边的按钮
    _rightButton=[[UIButton alloc] initWithFrame:CGRectMake(0, 0, 40, 40)];
    _rightButton.center=CGPointMake(self.view.bounds.size.width-centerX, centerY);

    [_rightButton setBackgroundImage:[UIImage imageNamed:@"right_normal"] forState:UIControlStateNormal];
    [_rightButton setBackgroundImage:[UIImage imageNamed:@"rigth_highlighted"] forState:UIControlStateHighlighted];
    [self.view addSubview:_rightButton];
    _rightButton.tag=1;
    [_rightButton addTarget:self action:@selector(clickButton:) forControlEvents:UIControlEventTouchUpInside];

    [self showPhotoInfo];
}

-(void)clickButton:(UIButton *)button
{
    //根据按钮调整当前显示图片的索引
    self.index+=(int)button.tag;
    [self showPhotoInfo];
}

-(void)showPhotoInfo
{
    self.noLabel.text=[NSString stringWithFormat:@"%d/%d",self.index+1,5];
    self.iconImage.image=[UIImage imageNamed:self.imageList[self.index][@"name"]];
    self.descLable.text=self.imageList[self.index][@"desc"];

    self.rightButton.enabled=(self.index!=4);
    self.leftButton.enabled=(self.index!=0);
}

@end
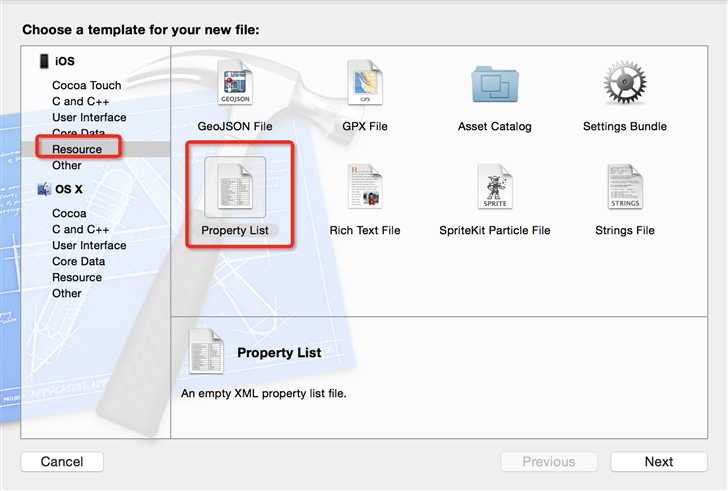
plist文件的使用:
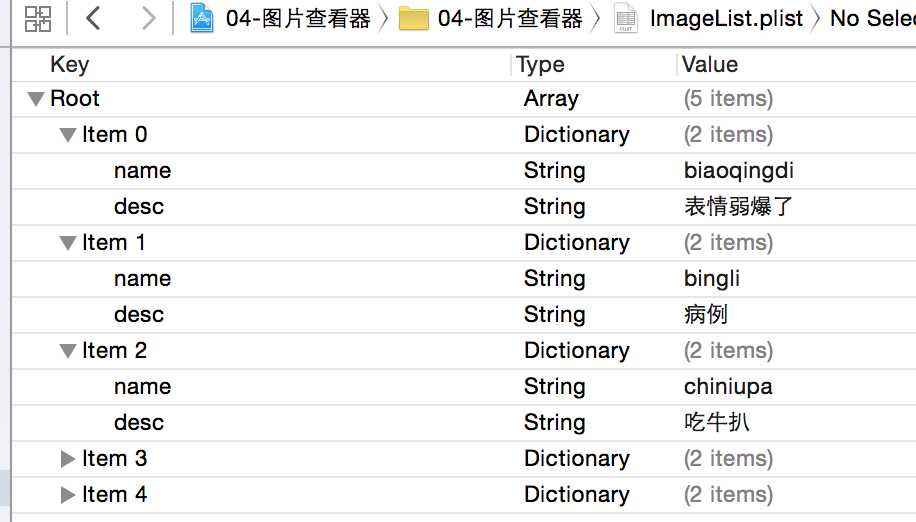
1.创建一个plist
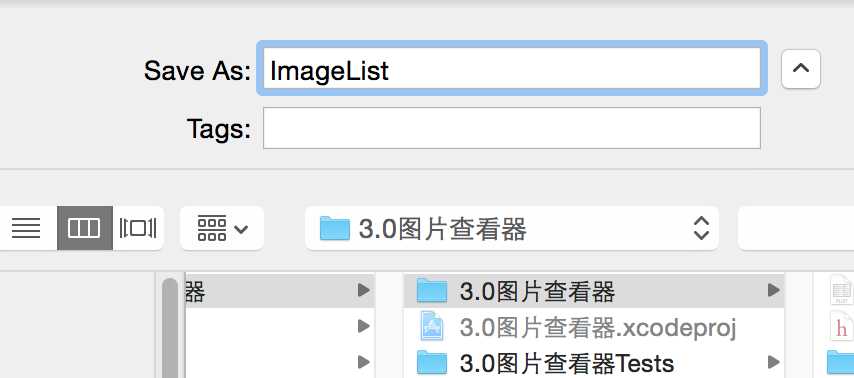
2.填写为ImageList.plist
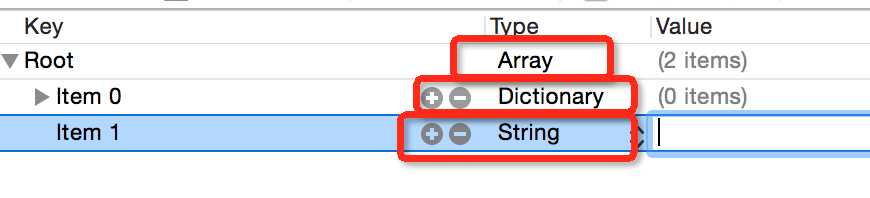
3.填入数据
4.完成
标签:
原文地址:http://www.cnblogs.com/jys509/p/4746475.html