标签:
可以使用脚本/插件来给vim添加各种神奇的功能,从更换颜色主题、到代码智能提示,甚至项目管理。无数开发者通过开源社区贡献自己开发的插件,使得vim有可能变得无比强大。这儿http://vim-scripts.org/vim/scripts.html 是一份vim扩展脚本的列表。
然而,我的思想是尽量不要使用vim插件,除了那些非常优先且对自己的工作而言所必需的。这样,当需要配置一台新电脑或者临时要在别人的电脑上工作时,最起码能比较方便地配置好环境,或者直接使用默认环境熟练地完成任务,而不是离开了插件什么也不会。
对我自己而言,我基本上只需要4个(种)插件:
除了颜色主题因个人喜好和环境不同各不相同外,其余插件我都只会选择最流行,且公认最优、最好用的那个。下文将分别介绍这几种插件,并给出在Linux(Ubuntu, CentOS)和Mac OSX上配置的方法。但是在这之前,最好确认以下几个条件:
Vundle是一个流行的vim插件管理器,它的网址是https://github.com/Valloric/YouCompleteMe
以下是安装步骤:
""""""""""""""""""""""""""""""""""""""""""""""""""""""""""""""
" Vundle
set nocompatible              " be iMproved, required
filetype off                  " required

" set the runtime path to include Vundle and initialize
set rtp+=~/.vim/bundle/Vundle.vim
call vundle#begin()
" alternatively, pass a path where Vundle should install plugins
"call vundle#begin(‘~/some/path/here‘)

" let Vundle manage Vundle, required
Plugin ‘VundleVim/Vundle.vim‘

" The following are examples of different formats supported.
" Keep Plugin commands between vundle#begin/end.
" plugin on GitHub repo
"Plugin ‘tpope/vim-fugitive‘
" plugin from http://vim-scripts.org/vim/scripts.html
"Plugin ‘L9‘
" Git plugin not hosted on GitHub
"Plugin ‘git://git.wincent.com/command-t.git‘
" git repos on your local machine (i.e. when working on your own plugin)
"Plugin ‘file:///home/gmarik/path/to/plugin‘
" The sparkup vim script is in a subdirectory of this repo called vim.
" Pass the path to set the runtimepath properly.
"Plugin ‘rstacruz/sparkup‘, {‘rtp‘: ‘vim/‘}
" Avoid a name conflict with L9
"Plugin ‘user/L9‘, {‘name‘: ‘newL9‘}

" All of your Plugins must be added before the following line
call vundle#end()            " required
filetype plugin indent on    " required
" To ignore plugin indent changes, instead use:
"filetype plugin on
"
" Brief help
" :PluginList       - lists configured plugins
" :PluginInstall    - installs plugins; append `!` to update or just :PluginUpdate
" :PluginSearch foo - searches for foo; append `!` to refresh local cache
" :PluginClean      - confirms removal of unused plugins; append `!` to auto-approve removal
"
" see :h vundle for more details or wiki for FAQ
" Put your non-Plugin stuff after this line


"""""""""""""""""""""""""""""""""""""""""""""""""""""""""""""""
从其中的注释可以知道,Vundle支持多种形式的插件源,并给出了示例。这些插件源包括:github上的插件、http://vim-scripts.org/vim/scripts.html上的插件、非github上的git插件、本地硬盘上的插件等。
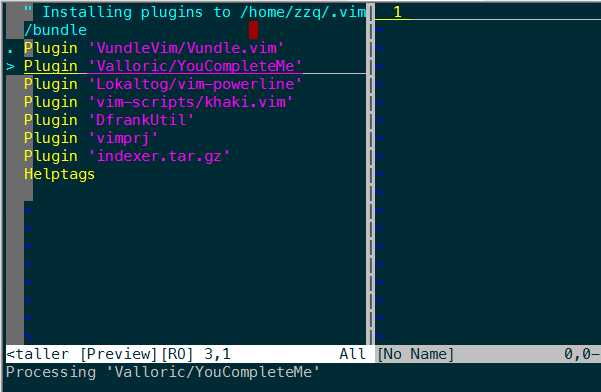
Vundle正在自动安装在.vimrc中指定的插件:
O]_ZYSDQGQETE`55.png)

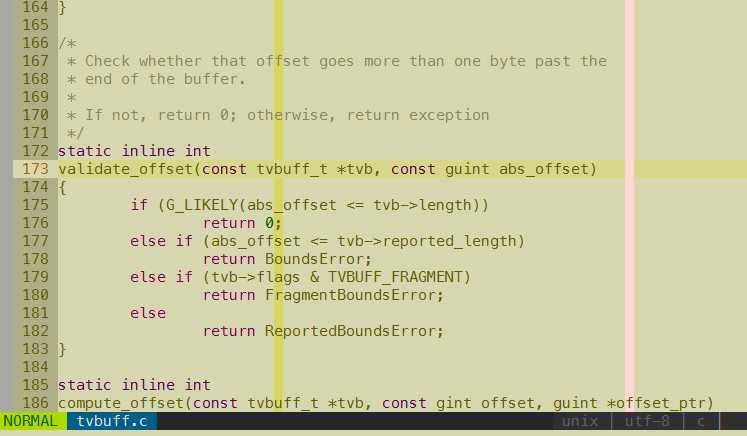
vim默认有一些配色方案,如果这些都不喜欢,可以从网上下载安装别的配色方案。solarized和molokai都是流行的配色方案,然而这两个主题在终端(terminal)模式下或者SecureCRT上使用都会有一些问题,而我目前最喜欢的khaki没有这个问题,它的样子如下图所示(其中设置了行号、当前号高亮、语法高亮等)

安装步骤:
if !has("gui_running")
    set t_Co=256
endif
colorscheme khaki
保存后重启vim即可。
为自己的代码写好注释是一个良好的习惯,而编写Doxygen风格的注释更是可以通过doxygen工具为代码自己生成文档,非常好用。DoxygenToolkit(https://github.com/vim-scripts/DoxygenToolkit.vim)就是这样的一个插件。安装和使用:
let g:DoxygenToolkit_authorName="zzq@moon.net"
  /**
   * @file test.cpp
   * @brief
   * @author zzp@moon.net
   * @version 1.0
   * @date 2015-08-21
   */
并把光标停留在@brief 后面,等待输入文件描述。
在光标定位到数据结构声明或函数声明的第一行,运行:Dox,将生成数据结构或函数的注释骨架,如下:
/**
   * @brief
   */
  struct foo
  {
      char str;
      void* ptr;
  };

  /**
   * @brief
   *
   * @param a
   * @param b
   *
   * @return
   */
  int bar(int a, int b)
  {
      return a+b;
  }
并把光标定位在@brief 后,期待你输入具体的注释内容。
写代码的时候,变量名、函数名、类名等代码符号的智能提示和补全功能是非常有用的,可以大大提高编码效率。然而,在YouCompleteMe(简称YCM)这个神奇的插件出现之前,vim一直使用tag机制来完成这个功能。由于tag只会笨拙地分析代码中的字符串,并不能识别其语法说语义,导致代码的提示并不好用。随着clang的出现,使开发人员可以对程序代码进行事实上的语义分析(调用clang分析器之类的),于是真正的智能提示和补全插件出现了,它就是由 google 的工程师 Strahinja Val Markovic 所开发的YCM(https://github.com/Valloric/YouCompleteMe)。
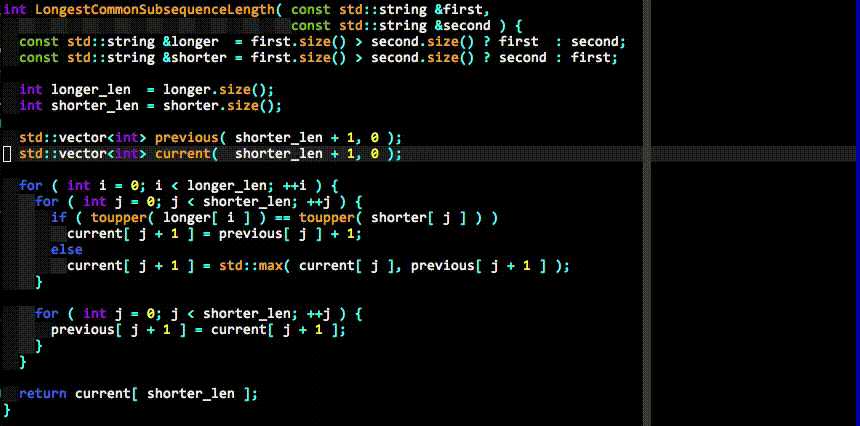
YCM使用C++和python开发,是一个复杂的插件,光是通过Vundle下载的文件就达到120多MB。另外YCM不只是有新的开发的功能,它还包含了其他一些有用的插件。下图是作者本人提示的演示动图:

安装与配置步骤:
# These are the compilation flags that will be used in case there‘s no
# compilation database set (by default, one is not set).
# CHANGE THIS LIST OF FLAGS. YES, THIS IS THE DROID YOU HAVE BEEN LOOKING FOR.
flags = [
‘-Wall‘,
‘-Wextra‘,
‘-Werror‘,
‘-Wc++98-compat‘,
‘-Wno-long-long‘,
‘-Wno-variadic-macros‘,
‘-fexceptions‘,
‘-DNDEBUG‘,
# You 100% do NOT need -DUSE_CLANG_COMPLETER in your flags; only the YCM
# source code needs it.
‘-DUSE_CLANG_COMPLETER‘,
# THIS IS IMPORTANT! Without a "-std=<something>" flag, clang won‘t know which
# language to use when compiling headers. So it will guess. Badly. So C++
# headers will be compiled as C headers. You don‘t want that so ALWAYS specify
# a "-std=<something>".
# For a C project, you would set this to something like ‘c99‘ instead of
# ‘c++11‘.
‘-std=c++11‘,
# ...and the same thing goes for the magic -x option which specifies the
# language that the files to be compiled are written in. This is mostly
# relevant for c++ headers.
# For a C project, you would set this to ‘c‘ instead of ‘c++‘.
‘-x‘,
‘c++‘,
‘-isystem‘,
‘../BoostParts‘,
‘-isystem‘,
# This path will only work on OS X, but extra paths that don‘t exist are not
# harmful
‘/System/Library/Frameworks/Python.framework/Headers‘,
‘-isystem‘,
‘../llvm/include‘,
‘-isystem‘,
‘../llvm/tools/clang/include‘,
‘-I‘,
‘.‘,
‘-I‘,
‘./ClangCompleter‘,
‘-isystem‘,
‘./tests/gmock/gtest‘,
‘-isystem‘,
‘./tests/gmock/gtest/include‘,
‘-isystem‘,
‘./tests/gmock‘,
‘-isystem‘,
‘./tests/gmock/include‘,
]
b. 在.vimrc中添加以下配置项
" YCM
" 允许自动加载.ycm_extra_conf.py,不再提示
let g:ycm_confirm_extra_conf=0
" 补全功能在注释中同样有效
let g:ycm_complete_in_comments=1
" 开启tags补全引擎
let g:ycm_collect_identifiers_from_tags_files=1
" 键入第一个字符时就开始列出匹配项
let g:ycm_min_num_of_chars_for_completion=1
" YCM相关快捷键,分别是\gl, \gf, \gg
nnoremap <leader>gl :YcmCompleter GoToDeclaration<CR>
nnoremap <leader>gf :YcmCompleter GoToDefinition<CR>
nnoremap <leader>gg :YcmCompleter GoToDefinitionElseDeclaration<CR>
//TODO
标签:
原文地址:http://www.cnblogs.com/zzqcn/p/4660615.html