标签:
装好Ubuntu15.04系统之后呢,玩了玩 Ubuntu,感觉还是很不错的。比windows快,一开机就可以打开你想要的程序,但是在windows下你要等他启动一些必须项才可以正常启用。感觉 Linux 和 MacOs 有得一比。只是在linux下软件会少很多。
之前写过一篇博文是关于Vim的简单使用,也是从零开始去接触和使用Vim,了解了那篇博文里的命令后,就可以使用vim来高效地完成你的编辑工作了,当然,如果需要到格式的控制,使用vim还是不够的,需要到 markdown 了,如果Vim能加上Markdown的话,那编辑起来堪称完美了吧,哈哈。
Vim 不仅是“编辑器之神”,而且Vim的插件丰富,完全可以打造成开发环境IDE,接下来就记录一下我的vim,整个过程下来,感觉就像是自己搭建了一个IDE,不错哦。
Vim作为IDE,可以达到的效果,先来解解馋:
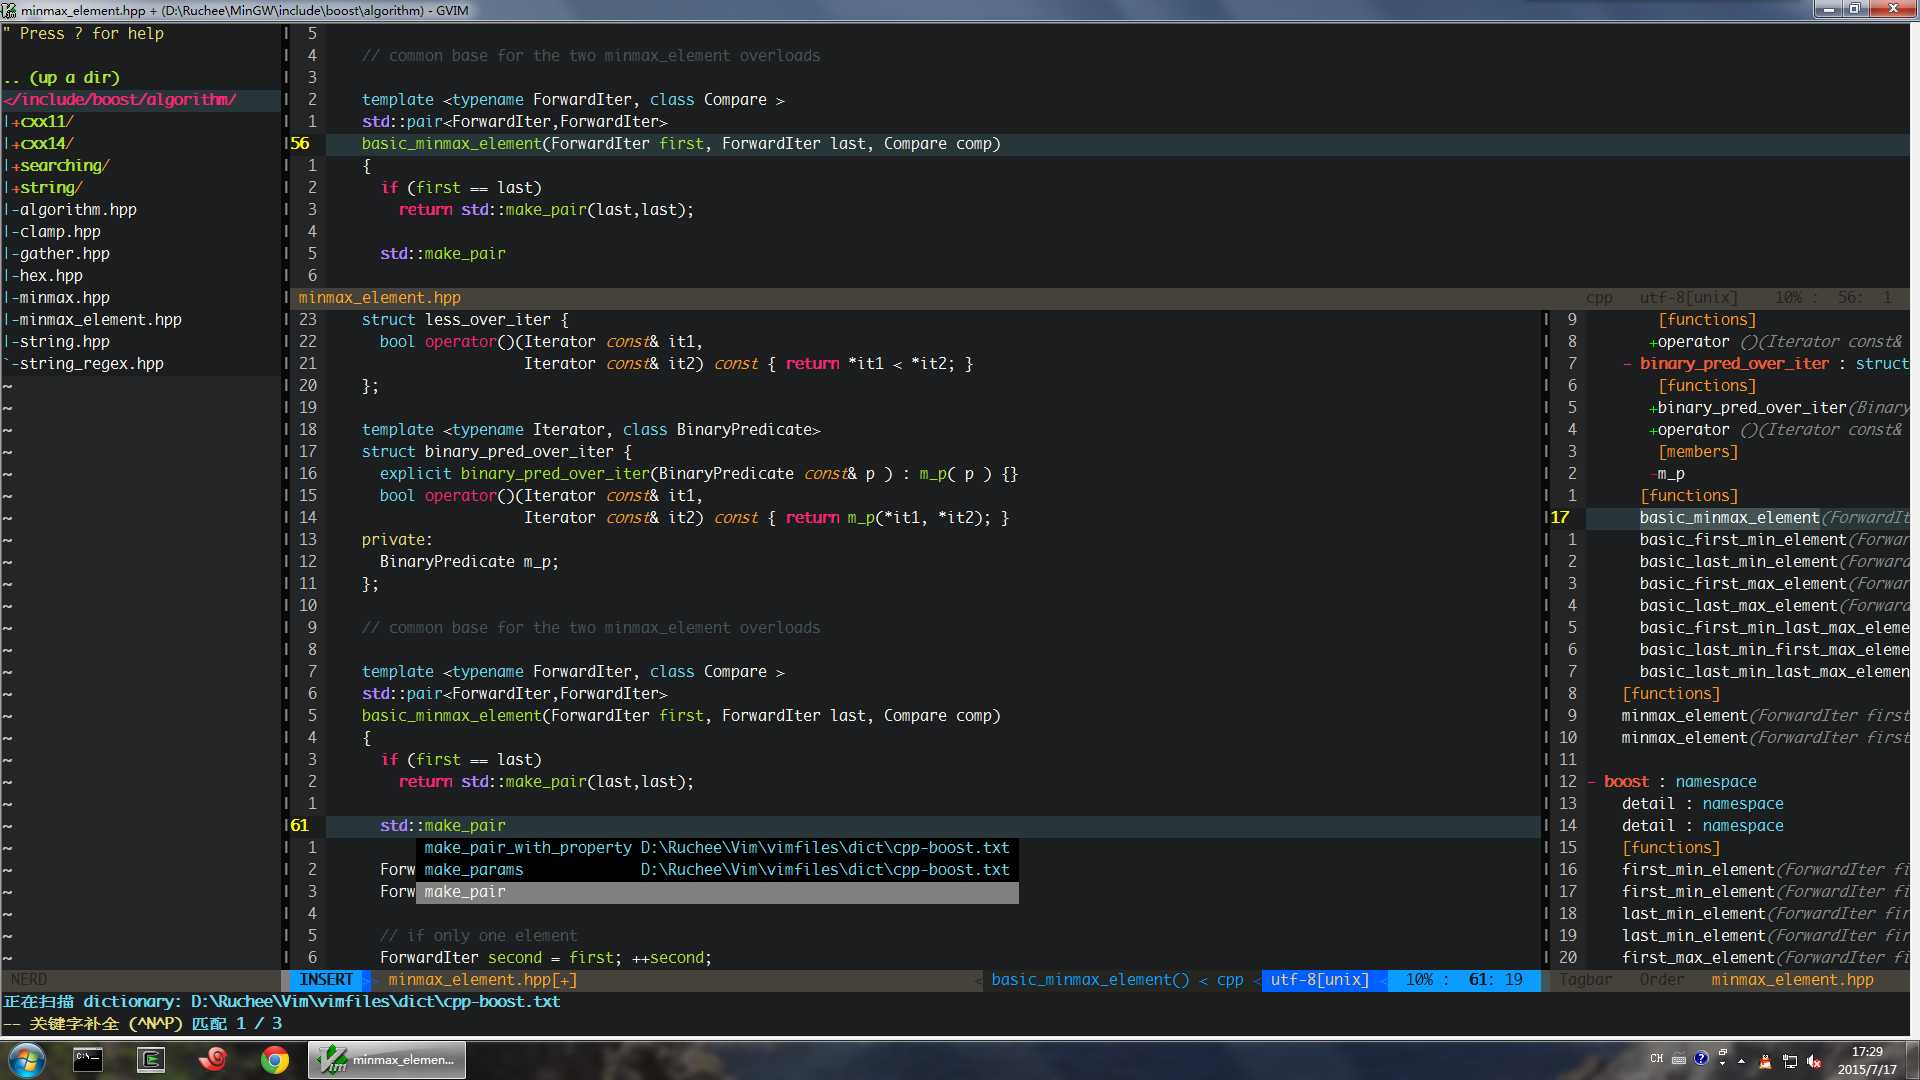
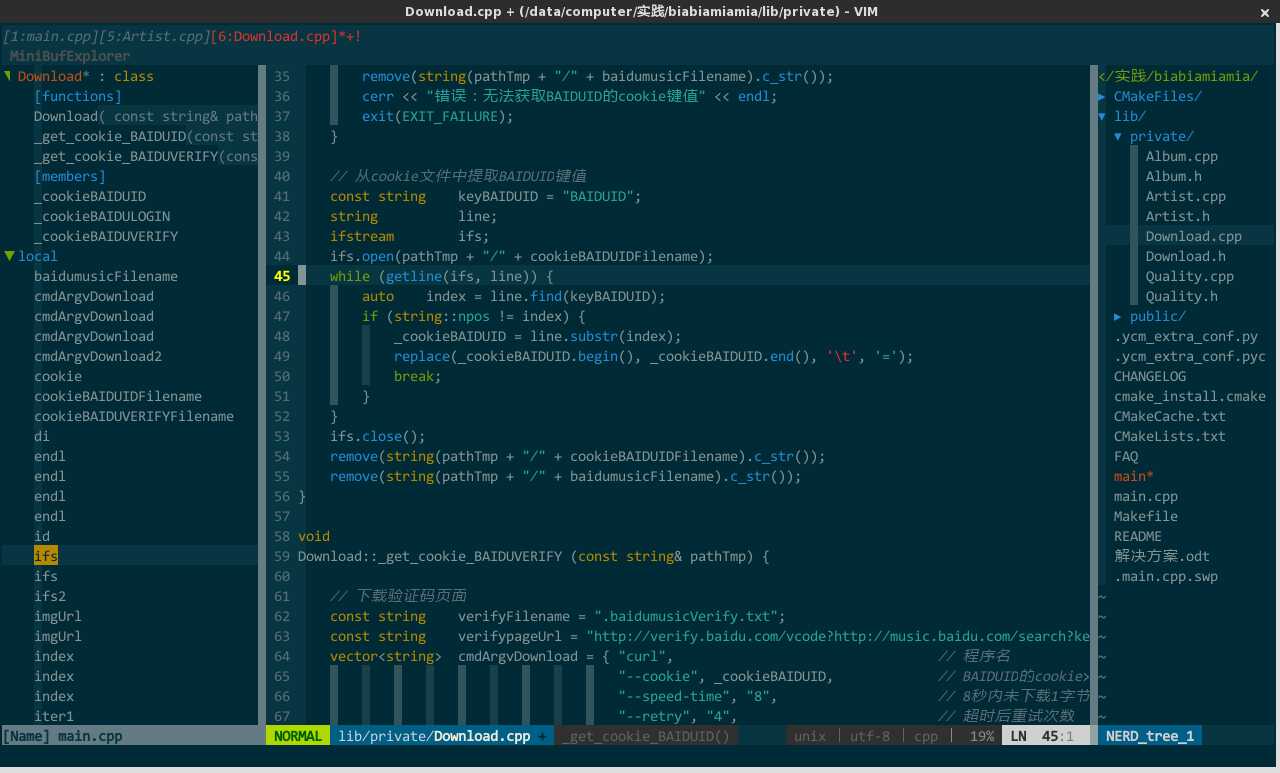
安装的话,在 Linux 下是很简单的,打开终端,输入几条命令就可以完成了。
sudo apt-get install vim
sudo apt-get install gvim
sudo apt-get install git (这个很重要,到后面下载插件的时候要用 git 来下载)
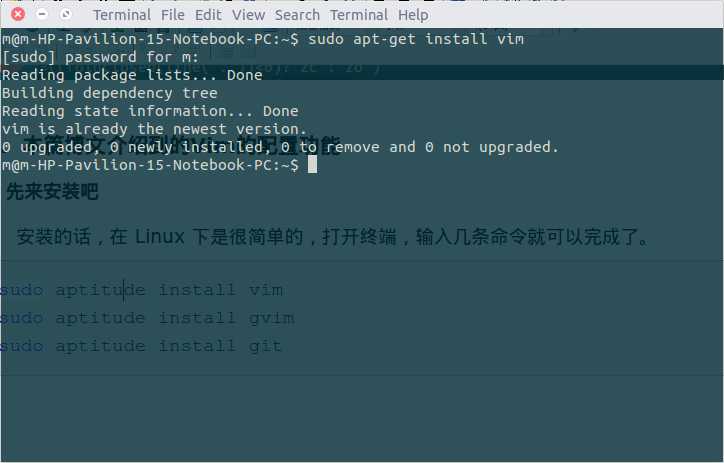
这是第一条命令,这里说我已经安装好了,不必安装。装好以后在终端直接输入 vim 或 git 或 gvim 就可以知道有没有装好了。
还可一使用 aptitude 来安装,在使用 aptitude 来安装之前要先安装 aptitude
  sudo aptitude install vim
  sudo aptitude install gvim
  sudo aptitude install git
然后,在用户的主目录中建立 .vim 目录,在 .vim 目录中建立 bundle 目录,以后Vundle自动下载的插件都保存在这里。
vundle可以自动下载和安装插件,只需要在“My Bundles Here”注释后面使用 Bundle 命令把所需要的插件列出来,每个插件一行,然后运行 :BundleInstall 命令即可。Vundle支持 github.com 和Vim的官网 vim.org 。
mkdir .vim/bundle
然后,进入 Bundle 目录,使用 git clone 命令下载vundle。
git clone https://github.com/gmarik/vundle.git ~/.vim/bundle/vundle
执行下载完成的话就可以在 bundle 下看到 vundle 目录了。
可以在终端输入 vim 然后输入 :echo $VIM 看到自己的 vim 目录,然后在该目录下看看有没有 .vimrc 文件,没有的话就自己创建。
我的 .vimrc 文件是在 /usr/share/vim 目录下(不知道大家的.vimrc是不是也是在这个目录下),没有的话就自己用命令创建:touch .vimrc
先来基本的配置,不要插件,映射那些比较高级的东西先吧。可以完成:代码配色,tab缩进,自动保存,特别显示当前编辑行,括号匹配,查找搜索,与系统公用剪贴板,代码折叠等。如下:
注:更改.vimrc文件需要 sudo vim vimrc使用vim来修改,也可以使用 sudo gedit vimrc
我的基本配置:
"-----------------------------------基本------------------------------------
"处理未保存或只读文件时,弹出确认
set confirm

"自动保存
set autowrite

"历史记录数
set history=1000

"编码设置
set fenc=utf-8
set fencs=utf-8,ucs-bom,shift-jis,gb18030,gbk,gb2313,cp936

"语法高亮
if has("syntax")
syntax on
endif

"设置配色方案
colorscheme ron
"设置行号
set nu

"设置缩进
set tabstop=4
set sts=4
set smartindent
set expandtab
set softtabstop=4
set shiftwidth=4
"设置自动格式化(格式出问题就删掉这行)
set formatoptions=tcrqn

"设置括号配对情况
set showmatch
set matchtime=2

"设置没有自动备份
set noswapfile
set nobackup

"设置纵向虚线对齐

"底部显示光标的位置的状态行
set ruler

"设置查找
"搜索模式忽略大小写
set ignorecase
"如果搜索模式包含大小写则不适用ignorecase
set smartcase
"禁止搜索到文件两端时重新搜索
set nowrapscan
"高亮显示搜索到的文本
set hlsearch
"逐字符高亮
set incsearch
"使用鼠标
"按住 shift 才由鼠标右键处理操作
set mouse=a

"和系统共用剪贴板
set clipboard+=unnamed

"突出显示当前行
set cursorline

"开启折叠,并设置空格来开关折叠
set foldenable
set foldmethod=syntax
set foldcolumn=0
setlocal foldlevel=1
set foldclose=all
nnoremap <space> @=((foldclosed(line(‘.‘))<0)?‘zc‘:‘zo‘)<CR>
"搜索和undo时不展开设置好的折叠
set foldopen-=search
set foldopen-=undo
完成到这里,就可以去敲代码了,但是还不够啊,作为IDE还不够啊,怎么没有树状目录?没有一键编译,运行?没有语法补全?
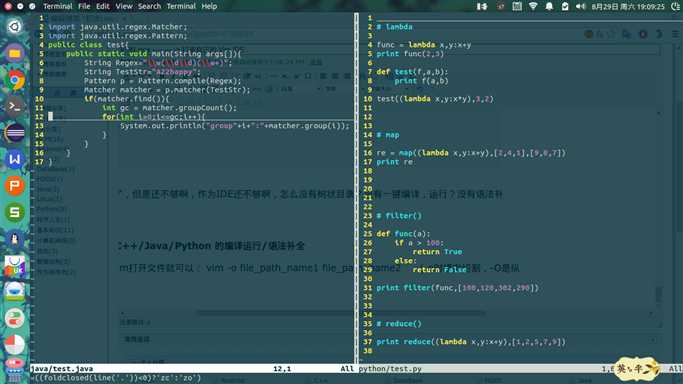
分割窗口:
分割窗口很简单,这样用vim打开文件就可以: vim -o file_path_name1 file_path_name2 (-o时横向切割,-O是纵向切割)
左侧目录:
要有左侧目录的话,这里就需要用到插件了。之前讲到,用Vundle可以很方便地下载和管理插件,现在就要用到了。
先来配置一下 .vimrc ,在 .vimrc 文件后添加:
set nocompatible
filetype off
set rtp+=~/.vim/bundle/vundle/
call vundle#rc()

在vimrc文件中添加以下插件配置:
Bundle ‘The-NERD-tree‘
Bundle ‘The-NERD-Commenter‘
按下esc,输入:wq 保存退出
再次进入vim后使用:BundleInstall 进行安装
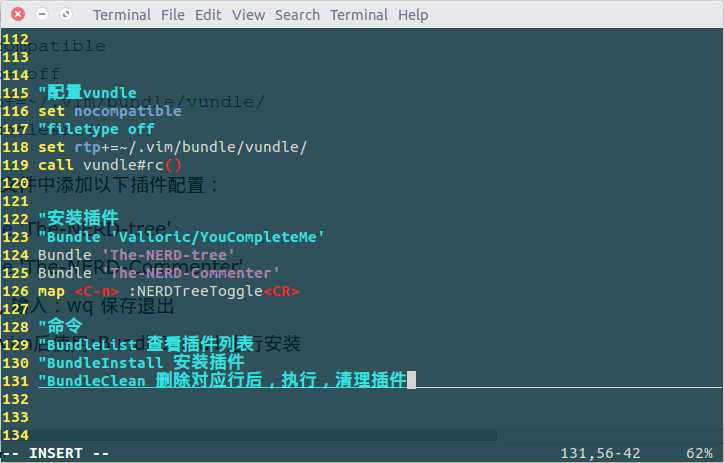
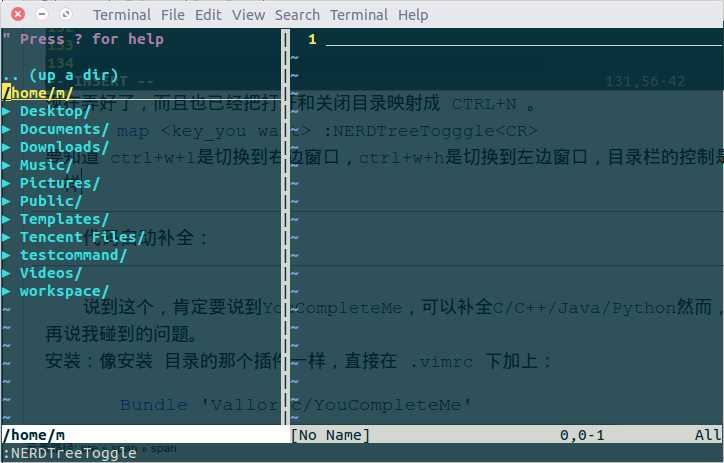
现在弄好了,而且也已经把打开和关闭目录映射成 CTRL+N 。
    map <key_you want> :NERDTreeTogggle<CR>
要知道 ctrl+w+l是切换到右边窗口,ctrl+w+h是切换到左边窗口,目录栏的控制是:Enter进入目录,光标的上下移动和vim一样
代码自动补全:
  说到这个,肯定要说到YouCompleteMe,可以补全C/C++/Java/Python然而,我却并不能安装成功,唉。先说怎么安装,再说我碰到的问题。
安装:像安装 目录的那个插件一样,直接在 .vimrc 下加上:
Bundle ‘Valloric/YouCompleteMe‘
然后保存退出,再进入 vim 输入:BundleInstall来安装。安装的话肯定会遇到这个提示:
到 .vim/bundle/YouCompleteMe 下打开终端
输入:./install.sh --clang-completer
参数是为了支持c/c++ 的补全。
然后就去编译YouCompleteMe:然后我就出现错误了:
Some folders in /home/sky-tm/.vim/bundle/YouCompleteMe/third_party/ycmd/third_party are empty; you probably forgot to run: git submodule update --init --recursive
解决:
按照提示输入:git submodule update --init --recursive
结束后输入: ./install.sh --clang-completer
然而,我的却并没有起到作用。
推荐几篇安装YouCompleteMe 的博文吧!
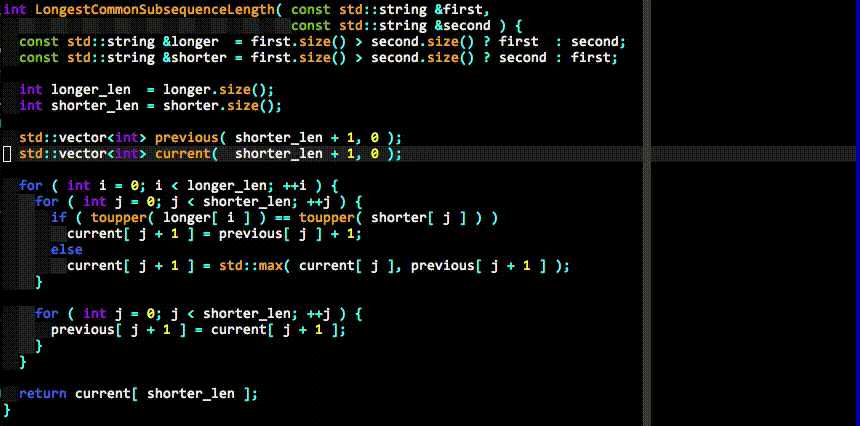
虽然没有装YouCompleteMe,但是我发现,在编写代码的时候,有些关键字还是可以用 CTRL+N来进行补全的,还会自动添加你敲过的关键字进入备选项。期待效果:
没有YouCompleteMe也没关系,我装了 Python 的自动补全插件
来自:http://www.linuxidc.com/Linux/2014-04/99669.htm
1.下载:git clone https://github.com/vim-scripts/Pydiction ~/下载目录
包括三个文件
python_pydiction.vim #vim插件
complete-dict #python关键字和模块列表,
pydiction.py #python脚本,可以添加更多的模块
2.配置
#1.查看家目录下是否有.vim目录,若没有则创建。
mkdir -p ~/.vim/after/ftplugin/pydiction
#2.把上面下载的三个文件放到指定的位置
mv python_pydiction.vim ~/.vim/after/ftplugin/
mv complete-dict pydiction.py ~/.vim/after/ftplugin/pydiction/
#3.修改 ~/.vimrc文件,若没有则创建,在该文件中添加下面两行。
filetype plugin on
let g:pydiction_location=‘~/.vim/after/ftplugin/pydiction/complete-dict‘
编译与运行
每次敲好想要调试一下都要退vim肯定是不怎么友好的,所以就去查了怎么在写完后可以 一键编译运行 。
不多说了,直接贴上我的 .vimrc 配置吧:
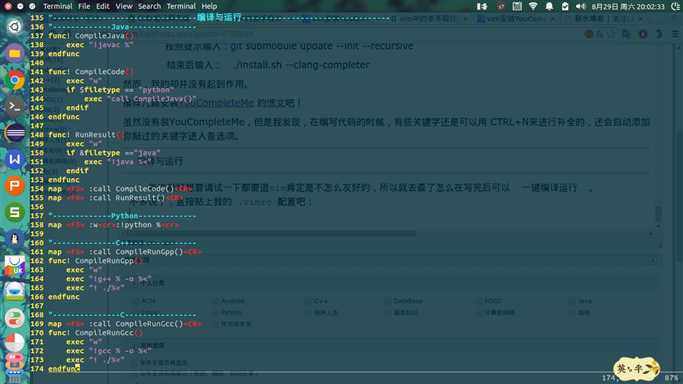
我的编译与运行(C/C++/JAVA/PYTHON)

"--------------------------------编译与运行---------------------------------

"-------------Java---------------

func! CompileJava()
    exec "!javac %"
endfunc

func! CompileCode()
    exec "w"
    if $filetype == "python"
        exec "call CompileJava()"
    endif
endfunc

func! RunResult()
    exec "w"
    if &filetype =="java"
        exec "!java %<"
    endif
endfunc
map <F5> :call CompileCode()<CR>
map <F6> :call RunResult()<CR>


"-------------Python-------------

map <F5> :w<cr>:!python %<cr>


"--------------C++---------------

map <F5> :call CompileRunGpp()<CR>
func! CompileRunGpp()
    exec "w"
    exec "!g++ % -o %<"
    exec "! ./%<"
endfunc


"---------------C----------------

map <F5> :call CompileRunGcc()<CR>
func! CompileRunGcc()
    exec "w"
    exec "!gcc % -o %<"
    exec "! ./%<"
endfunc
特别说明一下,java的运行需要先按下 F5然后F6才行,第一次编译嘛!
最后再贴我的 .vimrc(未完成 YouCompleteMe)

" system-wide defaults are set in $VIMRUNTIME/debian.vim and sourced by
" the call to :runtime you can find below. If you wish to change any of those
" settings, you should do it in this file (/etc/vim/vimrc), since debian.vim
" will be overwritten everytime an upgrade of the vim packages is performed.
" It is recommended to make changes after sourcing debian.vim since it alters
" the value of the ‘compatible‘ option.

" This line should not be removed as it ensures that various options are
" properly set to work with the Vim-related packages available in Debian.
runtime! debian.vim

" Uncomment the next line to make Vim more Vi-compatible
" NOTE: debian.vim sets ‘nocompatible‘. Setting ‘compatible‘ changes numerous
" options, so any other options should be set AFTER setting ‘compatible‘.
"set compatible

" Vim5 and later versions support syntax highlighting. Uncommenting the next
" line enables syntax highlighting by default.


"-----------------------------------基本------------------------------------
"处理未保存或只读文件时,弹出确认
set confirm

"自动保存
set autowrite

"历史记录数
set history=1000

"编码设置
set fenc=utf-8
set fencs=utf-8,ucs-bom,shift-jis,gb18030,gbk,gb2313,cp936

"语法高亮
if has("syntax")
syntax on
endif

"设置配色方案
colorscheme ron
"设置行号
set nu

"设置缩进
set tabstop=4
set sts=4
set smartindent
set expandtab
set softtabstop=4
set shiftwidth=4
"设置自动格式化(格式出问题就删掉这行)
set formatoptions=tcrqn

"设置括号配对情况
set showmatch
set matchtime=2

"设置没有自动备份
set noswapfile
set nobackup

"设置纵向虚线对齐

"底部显示光标的位置的状态行
set ruler

"设置查找
"搜索模式忽略大小写
set ignorecase
"如果搜索模式包含大小写则不适用ignorecase
set smartcase
"禁止搜索到文件两端时重新搜索
set nowrapscan
"高亮显示搜索到的文本
set hlsearch
"逐字符高亮
set incsearch
"使用鼠标
"按住 shift 才由鼠标右键处理操作
set mouse=a

"和系统共用剪贴板
set clipboard+=unnamed

"突出显示当前行
set cursorline

"开启折叠,并设置空格来开关折叠
set foldenable
set foldmethod=syntax
set foldcolumn=0
setlocal foldlevel=1
set foldclose=all
nnoremap <space> @=((foldclosed(line(‘.‘))<0)?‘zc‘:‘zo‘)<CR>
"搜索和undo时不展开设置好的折叠
set foldopen-=search
set foldopen-=undo


"----------------------------------插件-------------------------------------
"侦测文件类型
filetype on
"载入插件
filetype plugin on
"为特定文件类型载入相关缩进文件
filetype indent on

"------------Pyghon----------------
let g:pydiction_location=‘~/.vim/after/ftplugin/pydiction/complete-dict‘


"配置vundle
set nocompatible
"filetype off
set rtp+=~/.vim/bundle/vundle/
call vundle#rc()


"安装插件
"Bundle ‘Valloric/YouCompleteMe‘
Bundle ‘The-NERD-tree‘
Bundle ‘The-NERD-Commenter‘
map <C-n> :NERDTreeToggle<CR>

"命令
"BundleList
"BundleInstall
"BundleClean


"--------------------------------编译与运行---------------------------------

"-------------Java---------------

func! CompileJava()
exec "!javac %"
endfunc

func! CompileCode()
exec "w"
if $filetype == "python"
exec "call CompileJava()"
endif
endfunc

func! RunResult()
exec "w"
if &filetype =="java"
exec "!java %<"
endif
endfunc
map <F5> :call CompileCode()<CR>
map <F6> :call RunResult()<CR>


"-------------Python-------------

map <F5> :w<cr>:!python %<cr>


"--------------C++---------------

map <F5> :call CompileRunGpp()<CR>
func! CompileRunGpp()
exec "w"
exec "!g++ % -o %<"
exec "! ./%<"
endfunc


"---------------C----------------

map <F5> :call CompileRunGcc()<CR>
func! CompileRunGcc()
exec "w"
exec "!gcc % -o %<"
exec "! ./%<"
endfunc


"--------------------------------------------------------------------------
"set ignorecase " Do case insensitive matching
"set smartcase " Do smart case matching
"set incsearch " Incremental search
"set autowrite " Automatically save before commands like :next and :make
"set hidden " Hide buffers when they are abandoned
"set mouse=a " Enable mouse usage (all modes)

" Source a global configuration file if available

if filereadable("/etc/vim/vimrc.local")
source /etc/vim/vimrc.local
endif
折腾了几天,虽然最终也基本达到了想要的效果,但是却浪费了不少时间,建议还是用现成的IDE吧,功能齐全,安装方便简单,至少不费心费力啊!!!
我现在的vim图:
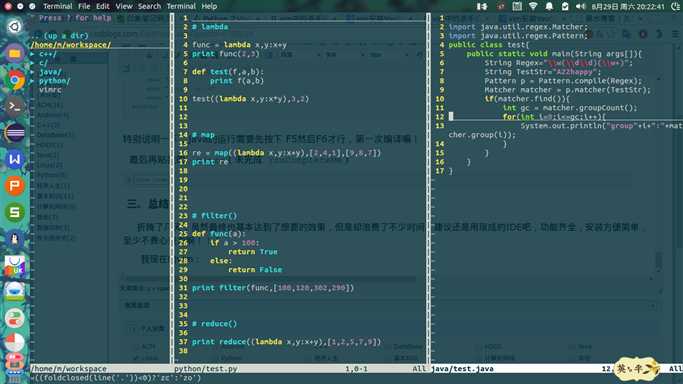
(图片显示越界的话,请刷新)期待各位的交流和指导!
初涉Linux ----------> 打造自己的 Vim IDE
标签:
原文地址:http://www.cnblogs.com/tianjintou/p/4769548.html