标签:style blog http color 使用 strong


 1 //
 2 //  YYTextView.h
 3 //  21-微博自定义UITextView
 4 //
 5
 6 #import <UIKit/UIKit.h>
 7
 8 @interface YYTextView : UITextView
 9 @property(nonatomic,copy)NSString *placehoder;
10 @property(nonatomic,strong)UIColor *placehoderColor;
11 @end
YYTextView.m文件代码
  1 //
  2 //  YYTextView.m
  3 //  21-微博自定义UITextView
  4 //
  5
  6 #import "YYTextView.h"
  7
  8 @interface YYTextView()
  9 @property(nonatomic,weak)UILabel *placehoderLabel;
 10 @end
 11 @implementation YYTextView
 12
 13 - (id)initWithFrame:(CGRect)frame
 14 {
 15     self = [super initWithFrame:frame];
 16     if (self) {
 17         self.backgroundColor=[UIColor clearColor];
 18
 19         // 1.添加一个显示提醒文字的label(显示占位文字的label)
 20         UILabel *placehoderLabel=[[UILabel alloc]init];
 21         //2.设置相关的属性
 22         //设置支持多行格式
 23         placehoderLabel.numberOfLines=0;
 24         //设置清除背景颜色
 25         placehoderLabel.backgroundColor=[UIColor clearColor];
 26         //3.把控件添加到view上
 27         [self  addSubview:placehoderLabel];
 28
 29         //4.使用全局变量来记录
 30         self.placehoderLabel=placehoderLabel;
 31
 32         //设置默认的占位文字的颜色为亮灰色
 33         self.placehoderColor=[UIColor lightGrayColor];
 34         //设置默认的字体为14号字体
 35         self.font=[UIFont systemFontOfSize:14];
 36
 37         //注册一个通知中心,监听文字的改变
 38         [[NSNotificationCenter defaultCenter]addObserver:self selector:@selector(textDidChange) name:UITextViewTextDidChangeNotification object:self];
 39
 40     }
 41     return self;
 42 }
 43
 44 -(void)dealloc
 45 {
 46     [[NSNotificationCenter defaultCenter]removeObserver:self];
 47 }
 48
 49
 50 #pragma mark-监听文字的改变
 51 -(void)textDidChange
 52 {
 53     if (self.text.length==0) {//显示占位文字
 54         self.placehoderLabel.hidden=NO;
 55     }else{  //隐藏占位文字
 56         self.placehoderLabel.hidden=YES;
 57     }
 58
 59     self.placehoderLabel.hidden=(self.text.length!=0);
 60 }
 61
 62 #pragma mark 设置占位文字
 63 -(void)setPlacehoder:(NSString *)placehoder
 64 {
 65 #warning 如果是copy策略,setter最好这么写
 66     _placehoder=[placehoder copy];
 67     //设置文字
 68     self.placehoderLabel.text=placehoder;
 69     //重新计算文字的frame
 70     [self setNeedsLayout];
 71 }
 72
 73 #pragma mark 设置占位文字的颜色
 74 -(void)setPlacehoderColor:(UIColor *)placehoderColor
 75 {
 76     _placehoderColor=placehoderColor;
 77     self.placehoderLabel.textColor=placehoderColor;
 78 }
 79
 80 - (void)layoutSubviews
 81 {
 82     [super layoutSubviews];
 83
 84     self.placehoderLabel.y = 8;
 85     self.placehoderLabel.x = 5;
 86     self.placehoderLabel.width = self.width - 2 * self.placehoderLabel.x;
 87
 88     // 根据文字计算label的高度
 89     CGSize maxSize = CGSizeMake(self.placehoderLabel.width, MAXFLOAT);
 90     CGSize placehoderSize = [self.placehoder sizeWithFont:self.placehoderLabel.font constrainedToSize:maxSize];
 91     self.placehoderLabel.height = placehoderSize.height;
 92 }
 93
 94 -(void)setFont:(UIFont *)font
 95 {
 96     //该属性是继承来的,因此需要调用父类的方法
 97     [super setFont:font];
 98     self.placehoderLabel.font=font;
 99     //重新计算子控件的frame
100     [self setNeedsLayout];
101 }
102
103 -(void)setText:(NSString *)text
104 {
105     [super setText:text];
106     [self textDidChange];
107 }
108 @end
在发送微博控制器中:
YYComposeViewController.m文件代码
 1 //
 2 //  YYComposeViewController.m
 3 //
 4
 5 #import "YYComposeViewController.h"
 6 #import "YYTextView.h"
 7
 8 @interface YYComposeViewController ()
 9 @property(nonatomic,weak)YYTextView *textView;
10 @end
11
12 @implementation YYComposeViewController
13
14
15 - (void)viewDidLoad
16 {
17     [super viewDidLoad];
18
19     //设置导航栏
20     [self setupNavBar];
21
22     //添加子控件
23     [self setupTextView];
24
25 }
26 //添加子控件
27 -(void)setupTextView
28 {
29     //1.创建输入控件
30     YYTextView *textView=[[YYTextView alloc]init];
31     //设置frame
32     textView.frame=self.view.bounds;
33     [self.view addSubview:textView];
34     self.textView=textView;
35
36     //2.设置占位文字提醒
37     textView.placehoder=@"分享新鲜事···分享新鲜事···分享新鲜事···分享新鲜事···分享新鲜事···分享新鲜事···";
38     //3.设置字体(说明:该控件继承自UITextfeild,font是其父类继承下来的属性)
39     textView.font=[UIFont systemFontOfSize:15];
40     //设置占位文字的颜色为棕色
41     textView.placehoderColor=[UIColor brownColor];
42 }
43
44 //设置导航栏
45 -(void)setupNavBar
46 {
47     self.title=@"发消息";
48     self.view.backgroundColor=[UIColor whiteColor];
49     self.navigationItem.leftBarButtonItem=[[UIBarButtonItem alloc]initWithTitle:@"取消" style:UIBarButtonItemStyleBordered target:self action:@selector(cancel)];
50     self.navigationItem.rightBarButtonItem=[[UIBarButtonItem alloc]initWithTitle:@"发送" style:UIBarButtonItemStyleBordered target:self action:@selector(send)];
51     self.navigationItem.rightBarButtonItem.enabled=NO;
52 }
53
54 -(void)send
55 {
56     YYLog(@"发送----");
57 }
58
59 -(void)cancel
60 {
61 //    [self dismissViewControllerAnimated:YES completion:nil];
62     self.textView.text=@"测试";
63 }
64 @end
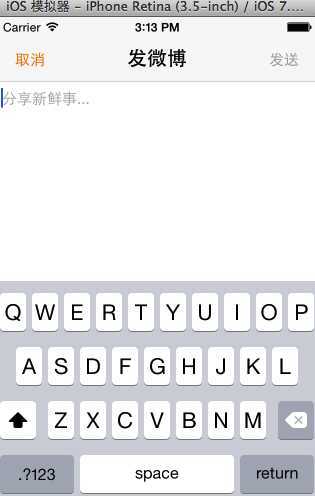
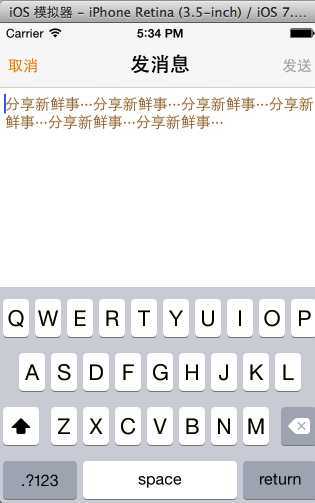
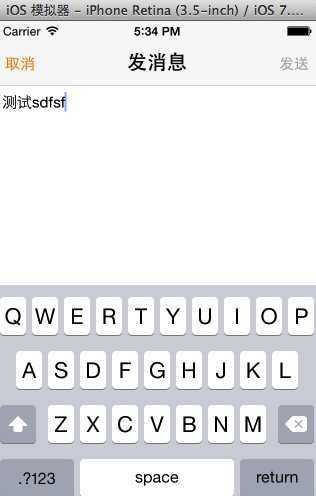
实现效果:


注意:计算frame的代码段
 1 - (void)layoutSubviews
 2 {
 3     [super layoutSubviews];
 4
 5     self.placehoderLabel.y = 8;
 6     self.placehoderLabel.x = 5;
 7     self.placehoderLabel.width = self.width - 2 * self.placehoderLabel.x;
 8
 9     // 根据文字计算label的高度
10     CGSize maxSize = CGSizeMake(self.placehoderLabel.width, MAXFLOAT);
11     CGSize placehoderSize = [self.placehoder sizeWithFont:self.placehoderLabel.font constrainedToSize:maxSize];
12     self.placehoderLabel.height = placehoderSize.height;
13 }
iOS开发项目篇—28自定义UITextView,布布扣,bubuko.com
标签:style blog http color 使用 strong
原文地址:http://www.cnblogs.com/wendingding/p/3841340.html