标签:
上一篇主要做了MAKA APP的需求分析,功能结构分解,架构分析,API分析,API数据结构分析。
这篇主要讲如何从零做iOS应用架构。
【HELLO MAKA】MAKA iOS客户端 之一 APP分析篇
【HELLO MAKA】MAKA iOS客户端 之二 架构设计与实现篇
【HELLO MAKA】MAKA iOS客户端 之三 创作模块分析与实现篇
1. iOS客户端架构
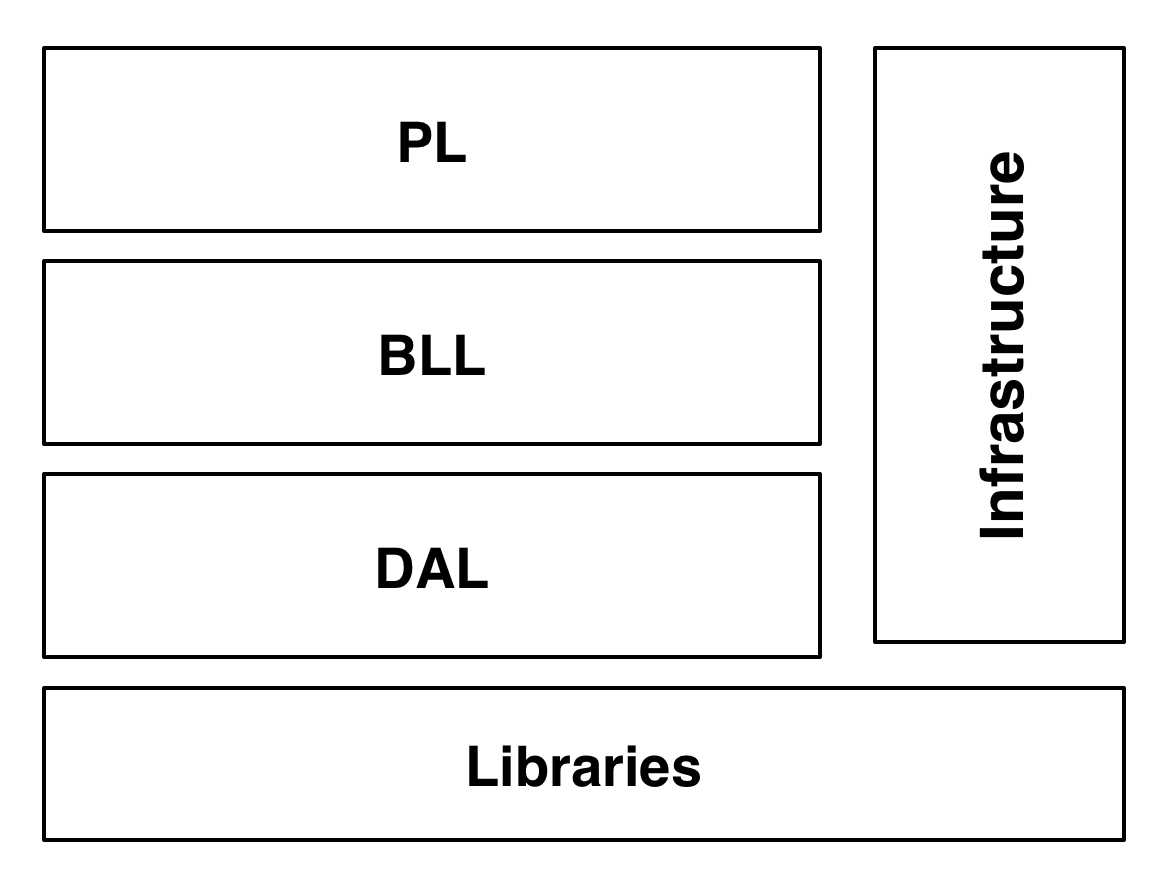
按照功能模块划分。这里可以使用二层设计也可以使用三层设计。MVC, MVCS, MVVM, MVP, VIPER, DDD, 洋葱模型等。理论补充可以自行google。
个人倾向三层设计。由于PL层使用DDD方式还没完全掌握,所以暂时使用VM来替代DDD。降级为二层设计+MVVM。
1) DAL。使用ReactiveCocoa。采用响应式编程。
2) BLL。这层使用DDD。但是还没有使用熟练,所以暂时还是使用VM来替代DDD。这样其实降级为二层设计
3) PL。使用MVVM+MVC模式。比较复杂的界面使用MVVM模式,简单界面还是使用MVC模式。
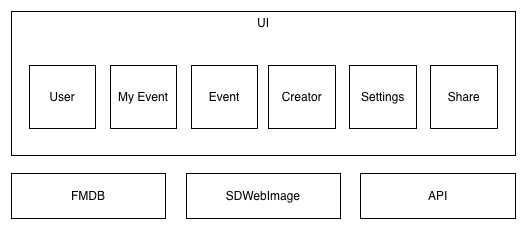
下图是按照功能结构的划分。
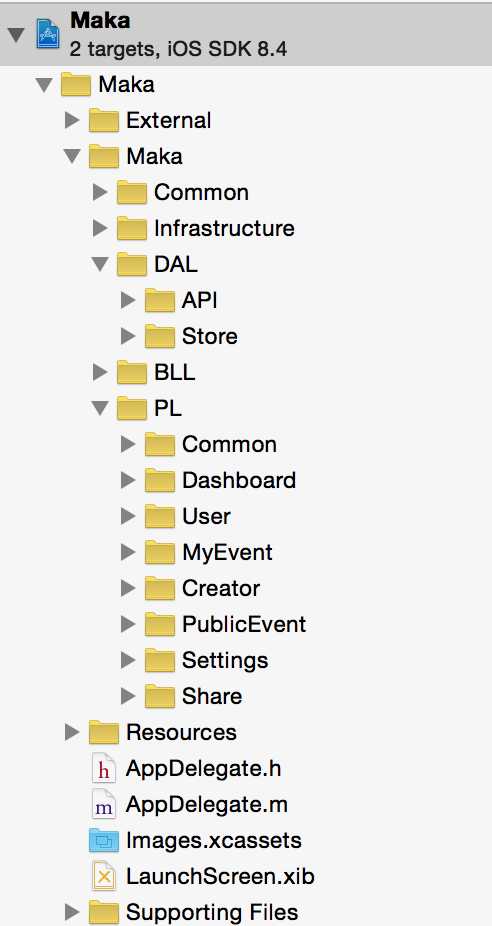
2. 工程结构
二层设计 + 按模块划分 + MVVM
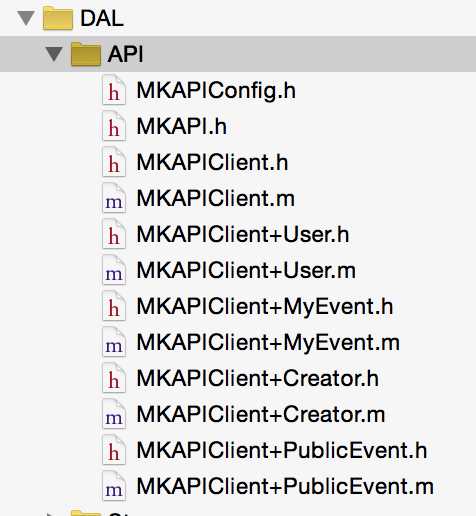
3. DAL层之API设计
1. 库使用:AFNetworking + ReactiveCocoa + AFNetworking-RACExtensions。采用响应式编程方式。
2. 类设计。
1)使用单件模式。只通过访问MKAPIClient类来访问接口。保持接口统一访问,参数统一配置。
2)使用类扩展的方式。既保证各模块代码分类又保证了访问的统一性,并且容易横向扩展。
3) 面向函数编程。
4)面向响应编程方式。参考:http://reactivex.io
5)面向轨道编程方式(应该是非正式名称)。参考:面向轨道编程 - Swift中的异常处理
用户接口模块定义

 1 @interface MKAPIClient (User)
 2
 3 /**
 4  *  用户注册
 5  *
 6  *  @param email    邮箱
 7  *  @param password 密码
 8  *
 9  *  @return 信号
10  */
11 - (RACSignal *)registWithEmail:(NSString *)email password:(NSString *)password;
12
13
14 /**
15  *  用户登陆
16  *
17  *  @param email    邮箱
18  *  @param password 密码
19  *
20  *  @return 信号
21  */
22 - (RACSignal *)loginWithEmail:(NSString *)email password:(NSString *)password;
23
24
25 /**
26  *  忘记密码
27  *
28  *  @param email 邮箱
29  *
30  *  @return 信号
31  */
32 - (RACSignal *)forgetPasswordWithEmail:(NSString *)email;
33
34
35 /**
36  *  用户信息
37  *
38  *  @return 信号
39  */
40 - (RACSignal *)userInfo;
41
42 /**
43  *  修改用户信息
44  *
45  *  @param key   字段
46  *  @param value 值
47  *
48  *  @return 信号
49  */
50 - (RACSignal *)updateUserInfoWithKey:(NSString *)key value:(NSString *)value;
51
52 @end
登陆接口实现

/**
 *  用户登陆
 *
 *  @param email    邮箱
 *  @param password 密码
 *
 *  @return 信号
 */
- (RACSignal *)loginWithEmail:(NSString *)email password:(NSString *)password {
    NSParameterAssert(email);
    NSParameterAssert(password);

    NSDictionary *params = @{@"email" : email, @"password" : password};

    @weakify(self);
    return [[RACSignal createSignal:^RACDisposable *(id<RACSubscriber> subscriber) {
        @strongify(self);
        return [[self.client rac_POST:@"/app/user/login" parameters:params] subscribeNext:^(RACTuple *x) {
            NSDictionary *result = x.first;

            @try {
                if ([result[@"code"] intValue] == 200) {
                    NSDictionary *data = result[@"data"];
                    self.uid = [data[@"uid"] intValue];
                    self.token = data[@"token"];

                    [subscriber sendNext:data];
                } else {
                    NSError *err = [NSError errorWithDomain:MKAPIClientErrorDomain code:[result[@"code"] intValue] userInfo:nil];
                    [subscriber sendError:err];
                }
            } @catch (NSException *exception) {
                NSError *err = [NSError errorWithDomain:MKAPIClientErrorDomain code:10001 userInfo:nil];
                [subscriber sendError:err];
            }
        } error:^(NSError *error) {
            [subscriber sendError:error];
        } completed:^{
            [subscriber sendCompleted];
        }];
    }] setNameWithFormat:@"%s", __FUNCTION__];
}
3. BLL - 业务逻辑层
这层还没想好怎么做比较好。暂时使用MVVM的VM来替代业务逻辑层。
4. PL - UI模块实现
主要采用MVVM模式,简单界面还是使用MVC实现。
说明:
1. 下图中的MKPublicEventItem为MKPublicEventCell的属性,不是Domain。参考:UINavigationItem设计。
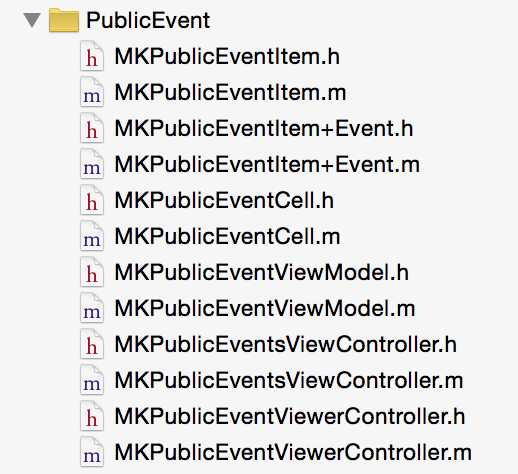
2. Domain与Item关系。Item为PL层数据。
说明:MKItem为所有表现层数据的基类,提供与Domain映射的基本功能。 参考Three20的Item设计和UIView tag值设计。
1 @interface MKItem : NSObject
2
3 @property(nonatomic, weak)NSObject *weakRef;
4 @property(nonatomic, strong)NSObject *ref;
5 @property(nonatomic, strong)NSIndexPath *indexPath;
6 @property(nonatomic, assign)int tag;
7
8 @end
XXXItem只提供UI显示的数据。属于贫血模型。
1 @interface MKPublicEventItem : MKItem
2
3 @property(nonatomic, copy)NSString *title;
4 @property(nonatomic, copy)NSString *cover;
5 @property(nonatomic, copy)NSString *username;
6 @property(nonatomic, copy)NSString *publishTime;
7
8 @end
MKPublicEventItem+Event。该扩展用于从Domain创建Item方法。功能与reformer相同。参考: iOS应用架构谈 网络层设计方案
 1 @implementation MKPublicEventItem (Event)
 2
 3
 4 + (instancetype)itemWithDictionary:(NSDictionary *)event {
 5     MKPublicEventItem *item = [[MKPublicEventItem alloc] init];
 6     item.title = event[@"title"];
 7     item.cover = event[@"firstImgUrl"];
 8     item.username = event[@"author"];
 9     item.publishTime = event[@"publishTime"];
10     item.ref = event;
11
12     return item;
13 }
14
15 - (NSString *)eventId {
16     return [(NSDictionary *)self.ref objectForKey:@"id"];
17 }
18
19 @end
MKPublicEventCell
说明:
1. 属性使用lazy load方式创建。
 1 @interface MKPublicEventCell : UICollectionViewCell
 2
 3
 4 @property(nonatomic, strong)MKPublicEventItem *item;
 5
 6 + (float)cellHeightWithWidth:(float)width;
 7
 8 @end
 9
10
11 @interface MKPublicEventCell ()
12
13 @property(nonatomic, strong)UIImageView *imageView;
14 @property(nonatomic, strong)MKPublicEventToolbar *toolbar;
15
16 @end
17
18 @implementation MKPublicEventCell
19
20 + (float)cellHeightWithWidth:(float)width {
21     return width * 504/320 + [MKPublicEventToolbar toolbarHeight];
22 }
23
24 - (instancetype)initWithFrame:(CGRect)frame {
25     if (self = [super initWithFrame:frame]) {
26         [self setup];
27     }
28
29     return self;
30 }
31
32 - (UIImageView *)imageView {
33     if (!_imageView) {
34         UIImageView *imageView = [[UIImageView alloc] initWithFrame:CGRectZero];
35         imageView.backgroundColor = [UIColor randomLightColor];
36         imageView.contentMode = UIViewContentModeScaleAspectFill;
37         imageView.clipsToBounds = YES;
38         _imageView = imageView;
39     }
40
41     return _imageView;
42 }
43
44 - (MKPublicEventToolbar *)toolbar {
45     if (!_toolbar) {
46         MKPublicEventToolbar *toolbar = [[MKPublicEventToolbar alloc] initWithFrame:CGRectZero];
47         _toolbar = toolbar;
48     }
49
50     return _toolbar;
51 }
52
53 - (void)setup {
54     [self.contentView addSubview:self.imageView];
55     [self.contentView addSubview:self.toolbar];
56 }
57
58 - (void)layoutSubviews {
59     [super layoutSubviews];
60     // h‘/w‘ = h/w
61     self.imageView.frame = CGRectMake(0, 0, self.bounds.size.width, [MKPublicEventCell cellHeightWithWidth:self.bounds.size.width] - [MKPublicEventToolbar toolbarHeight]);
62     self.toolbar.frame = CGRectMake(0, self.imageView.bounds.size.height, self.bounds.size.width, [MKPublicEventToolbar toolbarHeight]);
63 }
64
65 - (void)setItem:(MKPublicEventItem *)item {
66     _item = item;
67
68     [self.imageView sd_setImageWithURL:[NSURL URLWithString:item.cover] placeholderImage:nil];
69     self.toolbar.usernameLabel.text = item.username;
70     self.toolbar.titleLabel.text = item.title;
71     self.toolbar.dateLabel.text = item.publishTime;
72 }
73
74 @end
5. 单元测试
使用Specta + Expecta+ReactiveCocoa
 1 SpecBegin(User)
 2
 3 describe(@"用户", ^{
 4
 5     __block MKAPIClient *client;
 6     beforeAll(^{
 7         client = [MKAPIClient defaultClient];
 8     });
 9
10     beforeEach(^{
11
12     });
13
14     context(@"当登陆", ^{
15         it(@"应该成功", ^{
16             RACSignal *signal = [client loginWithEmail:@"test@test.com" password:@"password"];
17             expect(signal).will.complete();
18         });
19     });
20
21     afterEach(^{
22
23     });
24
25     afterAll(^{
26
27     });
28 });
29
30 SpecEnd
6. 效果
周末花了2天时间做分析并且实现。
1. API层对接完毕。
2. 基础框架搭建完毕。
3. 实现热门基本UI。

7. 总结
以上为架构设计与实现。
从功能来说整体还是相对简单。
由于时间比较仓促。只实现了热门模块的部分功能。
另外,还没有对创作模块做详细分析。下篇会做更深入的了解。
【HELLO MAKA】MAKA iOS客户端 之二 架构设计与实现篇
标签:
原文地址:http://www.cnblogs.com/kim4apple/p/4777525.html