标签:
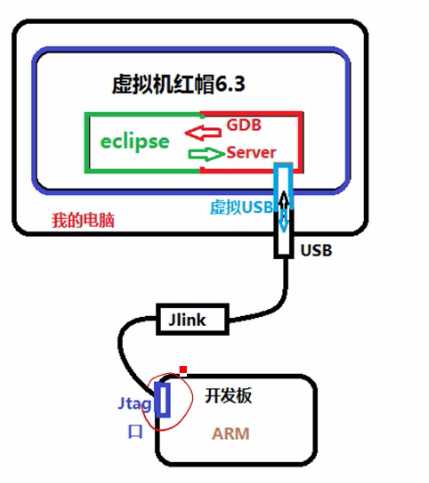
1. 格式化nandflash
PATH路径优先用前面的
Arm-linux-gdb
?
# .bashrc
?
# User specific aliases and functions
?
alias rm=‘rm -i‘
alias cp=‘cp -i‘
alias mv=‘mv -i‘
?
# Source global definitions
if [ -f /etc/bashrc ]; then
. /etc/bashrc
fi
export PATH=$PATH:/opt/arm-linux-gdb/bin
export PATH=$PATH:/usr/local/arm/4.3.2/bin
2. 安装JLink驱动
[root@cfm880 ARM-tools]# tar xvzf JLink_Linux_V434a.tgz
[root@cfm880 ARM-tools]# cd JLink_Linux_V434a
[root@cfm880 JLink_Linux_V434a]# cp -d libjlinkarm.so.* /usr/lib/ -f
[root@cfm880 JLink_Linux_V434a]# cp 45-jlink.rules /etc/udev/rules.d/
[root@cfm880 JLink_Linux_V434a]# ./JLinkGDBServer
SEGGER J-Link GDB Server V4.34a
?
JLinkARM.dll V4.34a (DLL compiled Aug 31 2011 11:51:40)
?
Listening on TCP/IP port 2331
?
J-Link connected
Firmware: J-Link ARM V8 compiled Nov 14 2012 22:34:52
Hardware: V8.00
S/N: 99991999
Feature(s): RDI,FlashDL,FlashBP,JFlash,GDBFULL
?
J-Link found 2 JTAG devices, Total IRLen = 5
JTAG ID: 0x07B76F0F (ARM11)
所对应的开发板芯片信息
3 安装eclipse
[root@cfm880 ~]# cd /home/S3-ARM/Part1/lesson1
[root@cfm880 lesson1]# cd ARM-tools/
[root@cfm880 ARM-tools]# ls
arm-linux-gcc-4.3.2.tgz dnw_usb.ko
arm-linux-gdb-7.5 eclipse-cpp-helios-SR2-linux-gtk.tar.gz
arm-linux-gdb-7.5.tar.gz JLink_Linux_V434a
dnw JLink_Linux_V434a.tgz
[root@cfm880 ARM-tools]# tar xzf eclipse-cpp-helios-SR2-linux-gtk.tar.gz
[root@cfm880 ARM-tools]# cd eclipse
[root@cfm880 eclipse]# ./eclipse
安装eclipse插件
http://opensource.zylin.com/zylincdt
在lessn5中新建led目录,将led.S????led.lds????Makefile考到/home/S3-ARM/Part1/lesson5/led中
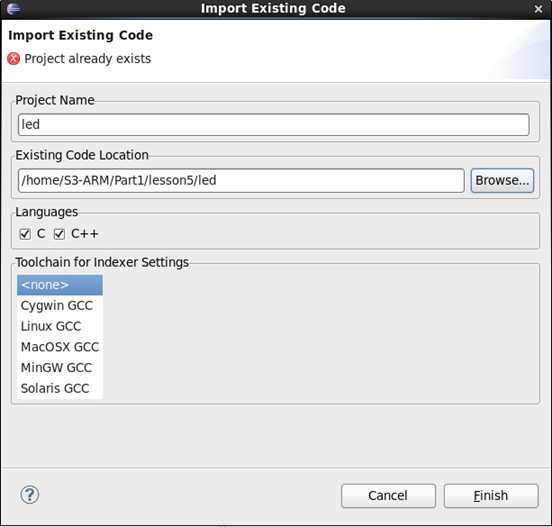
新建工程
1. FileàNewàMakefile Project with Existing Code
Project Name
Led
Finsh
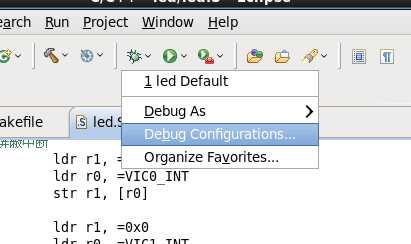
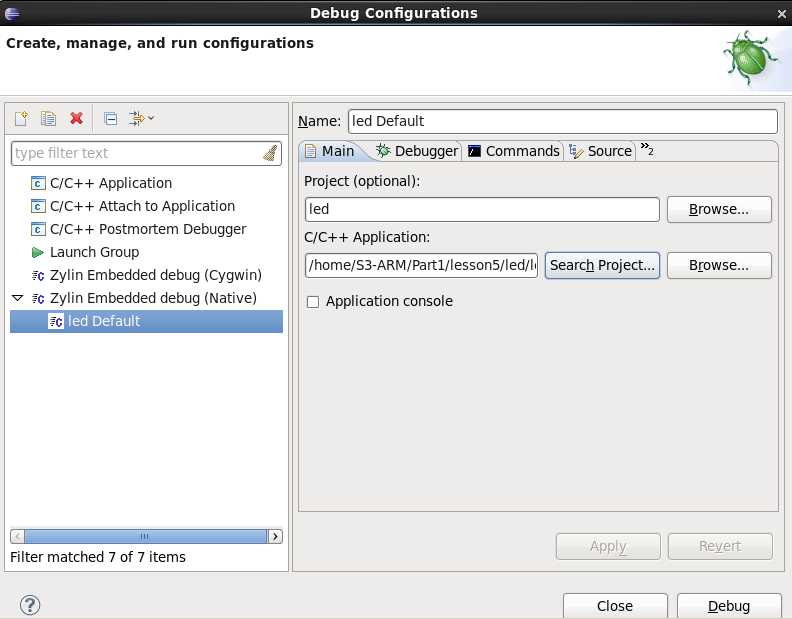
C/C++ Appliction选择led.elf
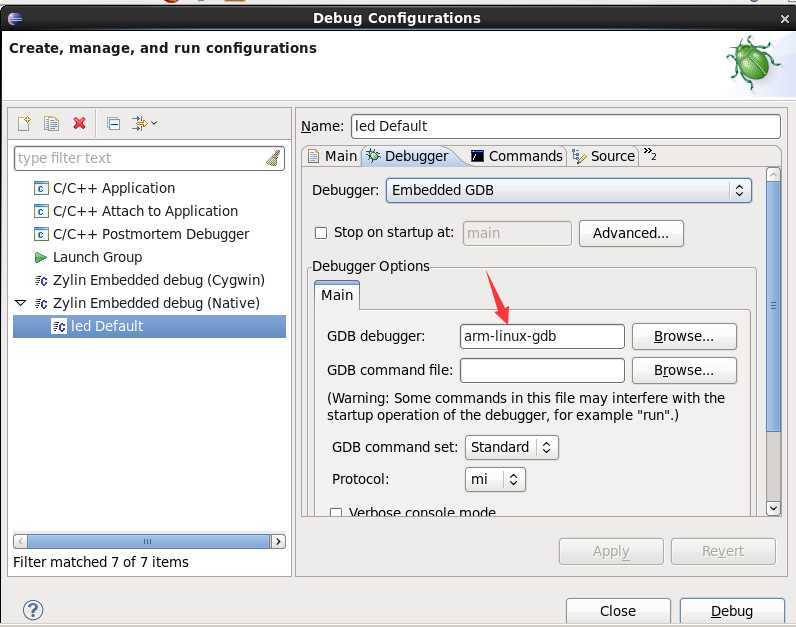
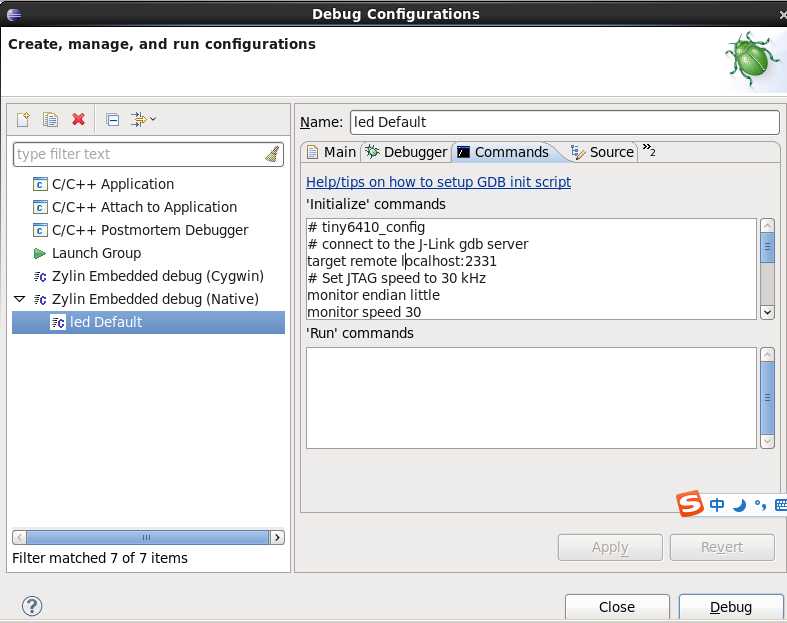
Initialza commands填写
# tiny6410_config
# connect to the J-Link gdb server
target remote localhost:2331
# Set JTAG speed to 30 kHz
monitor endian little
monitor speed 30
# Reset the target
monitor reset
monitor sleep 10
#
# CPU core initialization (to be done by user)
#
# Set the processor mode
monitor reg cpsr = 0xd3
#config MMU
#flush v3/v4 cache
monitor cp15 7, 7, 0, 0 = 0x0
#/* flush v4 TLB */
monitor cp15 8, 7, 0, 0 = 0x0
#disable MMU stuff and caches
monitor cp15 1, 0, 0, 0 =0x1002
#Peri port setup
monitor cp15 15, 2, 0, 4 = 0x70000013
#disable watchdog
monitor MemU32 0x7e004000 = 0x00000000
monitor sleep 10
#disable interrupt
monitor MemU32 0x71200014 = 0x00000000
monitor MemU32 0x71300014 = 0x00000000
monitor MemU32 0x7120000C = 0x00000000
monitor MemU32 0x7130000C = 0x00000000
monitor MemU32 0x71200F00 = 0x00000000
monitor MemU32 0x71300F00 = 0x00000000
#set clock
monitor MemU32 0x7e00f900 = 0x0000801e
monitor MemU32 0x7e00f000 = 0x0000ffff
monitor MemU32 0x7e00f004 = 0x0000ffff
monitor MemU32 0x7e00f020 = 0x01043310
monitor MemU32 0x7e00f00C = 0xc2150601
monitor MemU32 0x7e00f010 = 0xc2150601
monitor MemU32 0x7e00f024 = 0x00000003
monitor MemU32 0x7e00f014 = 0x00200102
monitor MemU32 0x7e00f018 = 0x00000000
monitor MemU32 0x7e00f01C = 0x14000007
#config sdram
monitor MemU32 0x7e00f120 = 0x00000008
monitor MemU32 0x7e001004 = 0x00000004
monitor MemU32 0x7e001010 = 0x0000040f
monitor MemU32 0x7e001014 = 0x00000006
monitor MemU32 0x7e001018 = 0x00000001
monitor MemU32 0x7e00101c = 0x00000002
monitor MemU32 0x7e001020 = 0x00000006
monitor MemU32 0x7e001024 = 0x0000000a
monitor MemU32 0x7e001028 = 0x0000000c
monitor MemU32 0x7e00102c = 0x0000018f
monitor MemU32 0x7e001030 = 0x0000000c
monitor MemU32 0x7e001034 = 0x00000002
monitor MemU32 0x7e001038 = 0x00000002
monitor MemU32 0x7e00103c = 0x00000002
monitor MemU32 0x7e001040 = 0x00000002
monitor MemU32 0x7e001044 = 0x00000013
monitor MemU32 0x7e001048 = 0x00000013
monitor MemU32 0x7e00100C = 0x00010012
monitor MemU32 0x7e00104C = 0x00000b45
monitor MemU32 0x7e001200 = 0x000150f8
monitor MemU32 0x7e001304 = 0x00000000
monitor MemU32 0x7e001008 = 0x000c0000
monitor MemU32 0x7e001008 = 0x00000000
monitor MemU32 0x7e001008 = 0x00040000
monitor MemU32 0x7e001008 = 0x00040000
monitor MemU32 0x7e001008 = 0x000a0000
monitor MemU32 0x7e001008 = 0x00080032
monitor MemU32 0x7e001004 = 0x00000000
# Setup GDB for faster downloads
#set remote memory-write-packet-size 1024
set remote memory-write-packet-size 4096
set remote memory-write-packet-size fixed
monitor speed 12000
break _start
load
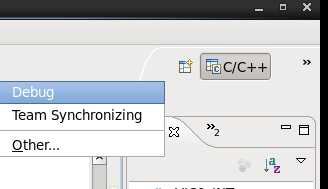
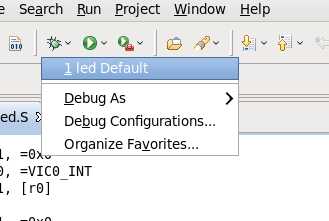
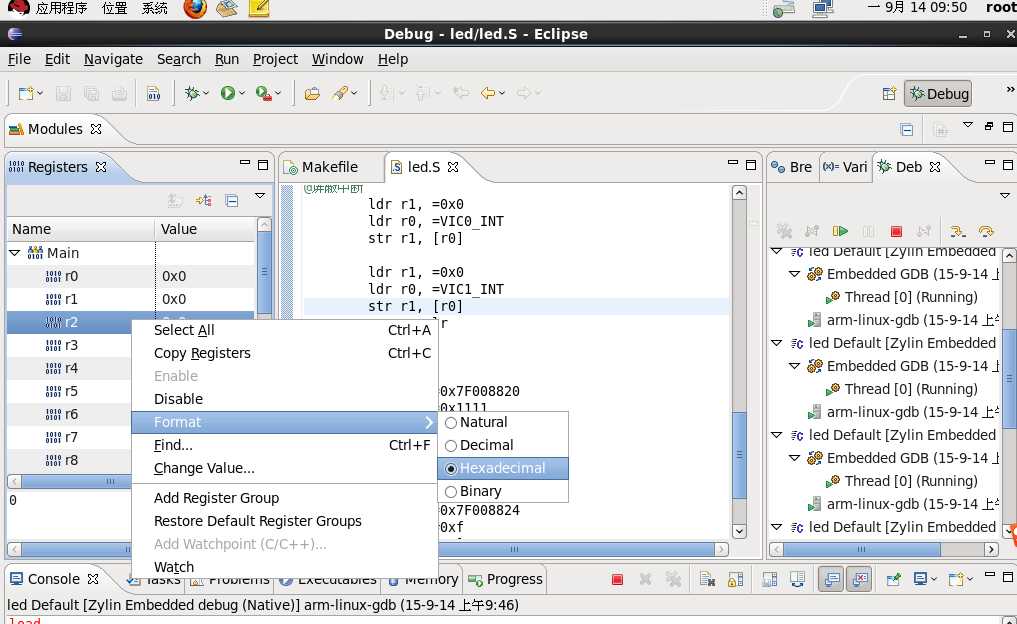
注意在JLink调试时必须运行JLinkGDBServer
[root@cfm880 JLink_Linux_V434a]# ./JLinkGDBServer
标签:
原文地址:http://www.cnblogs.com/chengfangming/p/4805430.html