标签:
这一部分挺简单的,其实就是在页面上放一个链接,引导用户跳转即可
链接的格式如下:
这里对参数做一下说明
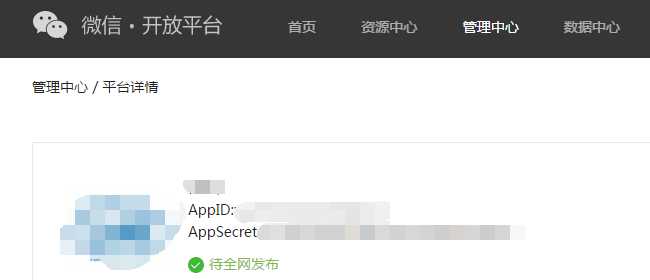
component_appid即第三方平台的APPID(如下图)
pre_auth_code为预授权码,用获得的第三方平台AccessToken作为参数进行获取,具体看下面的代码
redirect_uri为用户同意授权之后跳转的链接,同时会向该页面发送用户的授权码auth_code,通过这个授权码即可请求到公众号的授权信息

获取预授权码的函数
        /// <summary>
        /// 用于获取预授权码。预授权码用于公众号授权时的第三方平台方安全验证
        /// </summary>
        /// <param name="component_verify_ticket"></param>
        /// <returns></returns>
        public static ResponseCreatePreauthCode Create_preauthcode(string component_access_token)
        {
            var urlFormat = "https://api.weixin.qq.com/cgi-bin/component/api_create_preauthcode?component_access_token={0}";
            object data = null;
            data = new
            {
                component_appid = Config.ServerAppID,
            };
            return CommonJsonSend.Send<ResponseCreatePreauthCode>(component_access_token, urlFormat, data, timeOut: Config.TIME_OUT);
        }
返回结果示例
{
"pre_auth_code":"Cx_Dk6qiBE0Dmx4EmlT3oRfArPvwSQ-oa3NL_fwHM7VI08r52wazoZX2Rhpz1dEw",
"expires_in":600
}
获得用户授权码之后,用auth_Code作为参数请求公众号信息。
component_access_token为第三方平台accessToken
        /// <summary>
        /// 使用授权码换取公众号的授权信息
        /// </summary>
        /// <param name="component_access_token"></param>
        /// <returns></returns>
        public static PublicWechatAuthorizerInfo Query_auth(string component_access_token, string auth_code_value)
        {
            var urlFormat = "https://api.weixin.qq.com/cgi-bin/component/api_query_auth?component_access_token={0}";
            object data = null;
            data = new
            {
                component_appid = Config.ServerAppID,
                authorization_code = auth_code_value
            };
            return CommonJsonSend.Send<PublicWechatAuthorizerInfo>(component_access_token, urlFormat, data, timeOut: Config.TIME_OUT);
        }
返回结果示例
{
"authorization_info": {
"authorizer_appid": "wxf8b4f85f3a794e77",
"authorizer_access_token": "QXjUqNqfYVH0yBE1iI_7vuN_9gQbpjfK7hYwJ3P7xOa88a89-Aga5x1NMYJyB8G2yKt1KCl0nPC3W9GJzw0Zzq_dBxc8pxIGUNi_bFes0qM",
"expires_in": 7200,
"authorizer_refresh_token": "dTo-YCXPL4llX-u1W1pPpnp8Hgm4wpJtlR6iV0doKdY",
"func_info": [
{
"funcscope_category": {
"id": 1
}
},
{
"funcscope_category": {
"id": 2
}
},
{
"funcscope_category": {
"id": 3
}
}
]
}
标签:
原文地址:http://www.cnblogs.com/iCoffee/p/4813830.html