标签:
使用Xcode做iOS项目,经常会和Xib文件打交道,因为Xib文件直观的展现出运行时视图的外观,所以上手非常容易,使用也很方便,但对于从未用纯代码写过视图的童鞋,多数对Xib的理解有些片面。
Xib文件是什么?
A nib file describes the visual elements of your application’s user interface, including windows, views, controls, and many others. It can also describe non-visual elements, such as the objects in your application that manage your windows and views.
上面是Guides上的定义,nib文件(就是Xib文件)是描述应用外观的视觉元素,包含了窗口、视图、控制和其他,它也可以描述非视觉元素,如你应用中管理窗口和视图的对象。
也就是说,Xib就是一个描述文档,这里面包含了用户界面和用户界面相关元素。这样做的主要原因是,方便程序员,因为其是“所见即所得”的,程序员不需要像原来一样写一堆代码,然后运行出来才能看到界面元素的执行结果,这样是很低效的。更多内容可参看官网
Xib文件是如何做到“所见即所得”?
在Xcode中,以“source code”的方式,打开Xib文件,发现它是一份以XML编码的文件,也就是说Xib文件的本质是用一份XML的脚本描述了程序员在Xcode中对文件中View及其子类等的设置,这里我们已经知道在Xcode中的设置是如何保存下来的,接着Xib文件如何在应用执行是重建到内存中。
在Xcode中新建一份空白的Xib文件,会得到如下代码:

这里对XML进行了解析并图形显示,可以看到Xib文件还是比较复杂的,前面展开的这几项均是系统和版本描述,可以先忽略,重点是蓝色框內的内容(以下解释均非官方版本,请谨慎阅读)。

我们可以从名称“IBDocument.IntegratedClassDependencies”直接看出,这个数组是完成对IBDocument相关类的描述,默认会有IBProxyObject(与File‘s owner有关)、IBUIView(与主视图有关),如果我们拖进一个label进入view,这里便会有UILabel类的描述,如果选择layout,会有NSLayoutConstraint。

这块有Metadata,暂时还不知道是如何使用的,但接下,我们将看到View的全貌

如同RootObjects的名字,这个数组包含了所有的Xib文件中的对象,第一个是Files Owner,第二个是FirstResponder,可以看到其都使用ProxyObject。这里就有一个关于Xib文件实现的细节,当我们的应用里是谁要去读入和使用到这份用户界面时,想到的是我们代码里的ViewController,这时ViewController已经在内存中,那从Xib文件读出的这些配置如何与ViewController关联就是一个问题了,这里使用ProxyObject在Xib文件中做ViewController的代理对象,如下图

接着看XML:

IBClassDescriber中,在我们设置关联后,将有IBOutlet和IBAction与Xib的相互关联描述在这里,IBObjectContainer包含了对象之间的关系,
通过记录的这些内容,在Xib被unarchive后,将新创建的对象(通过Xib文件创建)的设置成相互的reference。
这应该是个复杂的过程,参看官方文档Xib文件载入的步骤如下:
1 加载nib文件的内容和其引用的资源文件到内存:
2 unarchives nib文件的object graph数据并且实例化的这些对象。根据对象的类型和其在文档中的编码来初始化每个新对象。
3 通过初始化方法,它重建的所有连接(actions, outlets, and bindings)在nib文件中的对象。
以上3步,iOS与OS X不太相同,这里主要说下在iOS中,也就是nib文件中的创建的对象,重新连接每没一个outlet指向时,是基于NSKeyValueCoding Protocol ,通过setValue:forKey: 来完成的。
以上主要是通过看Xib文件XML的数据和官方文档,完成了对Xib文件中内容的大致理解,对其细节实现并没有深入分析,主要的目的让我们在使用Xib文件,对它不再陌生,出现Xib文件执行时错误,可以根据错误信息来推测出错的地方。
一、简单介绍
xib和storyboard的比较,一个轻量级一个重量级。
共同点:
都用来描述软件界面
都用Interface Builder工具来编辑
不同点:
Xib是轻量级的,用来描述局部的UI界面
Storyboard是重量级的,用来描述整个软件的多个界面,并且能展示多个界面之间的跳转关系
二、xib的简单使用
1.建立xib文件
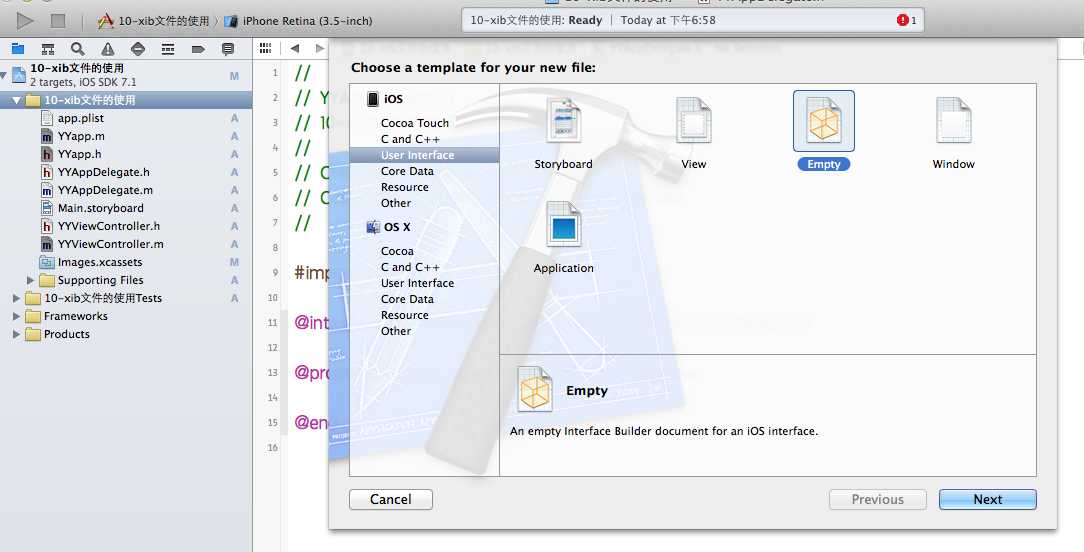
建立的xib文件命名为appxib.xib
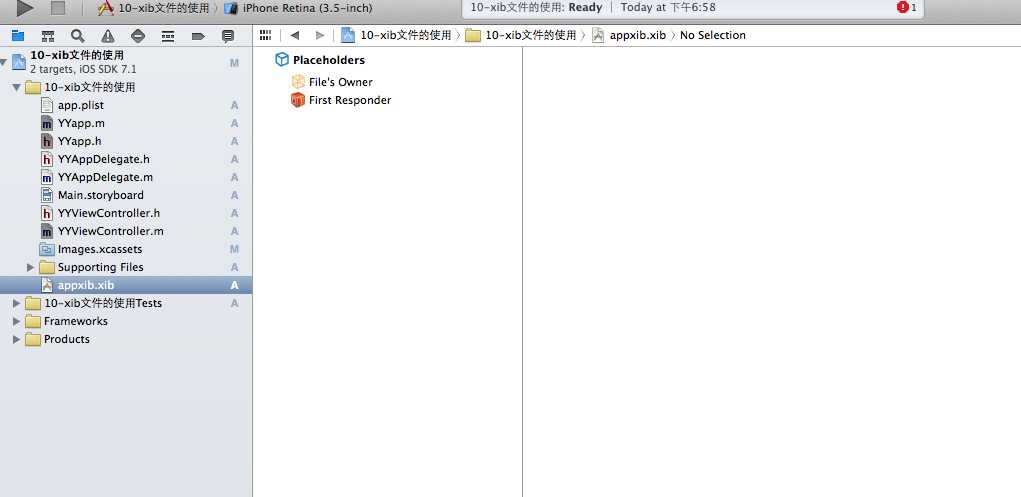
2.对xib进行设置
根据程序的需要,这里把view调整为自由布局
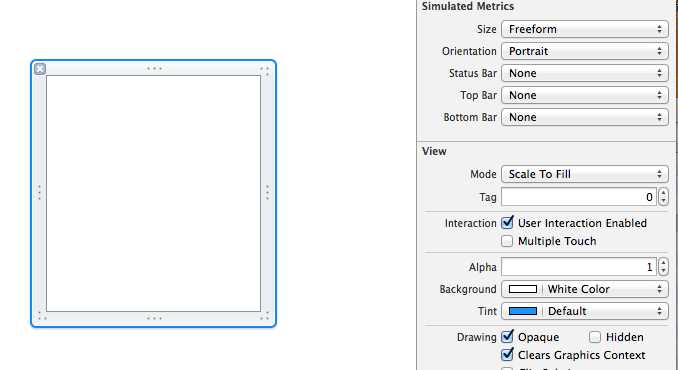
建立view模型(设置长宽等参数)

调整布局和内部的控件
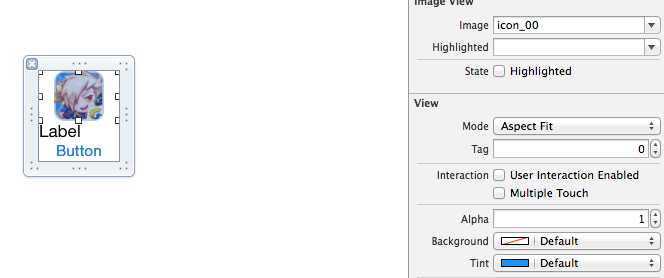
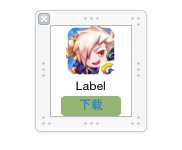
完成后的单个view
3.使用xib文件的代码示例
YYViewController.m文件代码如下:

 1 //
 2 //  YYViewController.m
 3 //  10-xib文件的使用
 4 //
 5 //  Created by apple on 14-5-24.
 6 //  Copyright (c) 2014年 itcase. All rights reserved.
 7 //
 8
 9 #import "YYViewController.h"
10 #import "YYapp.h"
11
12 @interface YYViewController ()
13 @property(nonatomic,strong)NSArray *app;
14 @end
15
16 @implementation YYViewController
17
18 //1.加载数据信息
19 -(NSArray *)app
20 {
21     if (!_app) {
22         NSString *path=[[NSBundle mainBundle]pathForResource:@"app.plist" ofType:nil];
23         NSArray *temparray=[NSArray arrayWithContentsOfFile:path];
24
25         //字典转模型
26         NSMutableArray *arrayM=[NSMutableArray array ];
27         for (NSDictionary *dict in temparray) {
28             [arrayM addObject:[YYapp appWithDict:dict]];
29         }
30         _app=arrayM;
31     }
32     return _app;
33 }
34
35 //创建界面原型
36 - (void)viewDidLoad
37 {
38     [super viewDidLoad];
39     NSLog(@"%d",self.app.count);
40
41     //九宫格布局
42     int totalloc=3;
43     CGFloat appviewW=80;
44     CGFloat appviewH=90;
45     CGFloat margin=(self.view.frame.size.width-totalloc*appviewW)/(totalloc+1);
46
47     int count=self.app.count;
48     for (int i=0; i<count; i++) {
49
50         int row=i/totalloc;
51         int loc=i%totalloc;
52         CGFloat appviewX=margin + (margin +appviewW)*loc;
53         CGFloat appviewY=margin + (margin +appviewH)*row;
54         YYapp *app=self.app[i];
55
56         //拿出xib视图
57        NSArray  *apparray= [[NSBundle mainBundle]loadNibNamed:@"appxib" owner:nil options:nil];
58         UIView *appview=[apparray firstObject];
59         //加载视图
60         appview.frame=CGRectMake(appviewX, appviewY, appviewW, appviewH);
61
62         UIImageView *appviewImg=(UIImageView *)[appview viewWithTag:1];
63         appviewImg.image=app.image;
64
65         UILabel *appviewlab=(UILabel *)[appview viewWithTag:2];
66         appviewlab.text=app.name;
67
68         UIButton *appviewbtn=(UIButton *)[appview viewWithTag:3];
69         [appviewbtn addTarget:self action:@selector(appviewbtnClick:) forControlEvents:UIControlEventTouchUpInside];
70         appviewbtn.tag=i;
71
72         [self.view addSubview:appview];
73     }
74 }
75
76 /**按钮的点击事件*/
77 -(void)appviewbtnClick:(UIButton *)btn
78 {
79     YYapp *apps=self.app[btn.tag];
80     UILabel *showlab=[[UILabel alloc]initWithFrame:CGRectMake(60, 450, 200, 20)];
81     [showlab setText:[NSString stringWithFormat: @"%@下载成功",apps.name]];
82     [showlab setBackgroundColor:[UIColor lightGrayColor]];
83     [self.view addSubview:showlab];
84     showlab.alpha=1.0;
85
86     //简单的动画效果
87     [UIView animateWithDuration:2.0 animations:^{
88         showlab.alpha=0;
89     } completion:^(BOOL finished) {
90         [showlab removeFromSuperview];
91     }];
92 }
93
94 @end
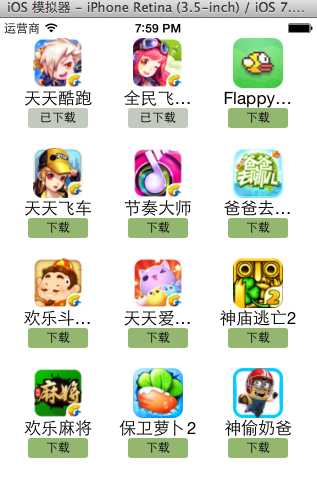
运行效果:
三、对xib进行连线示例
1.连线示例
新建一个xib对应的视图类,继承自Uiview
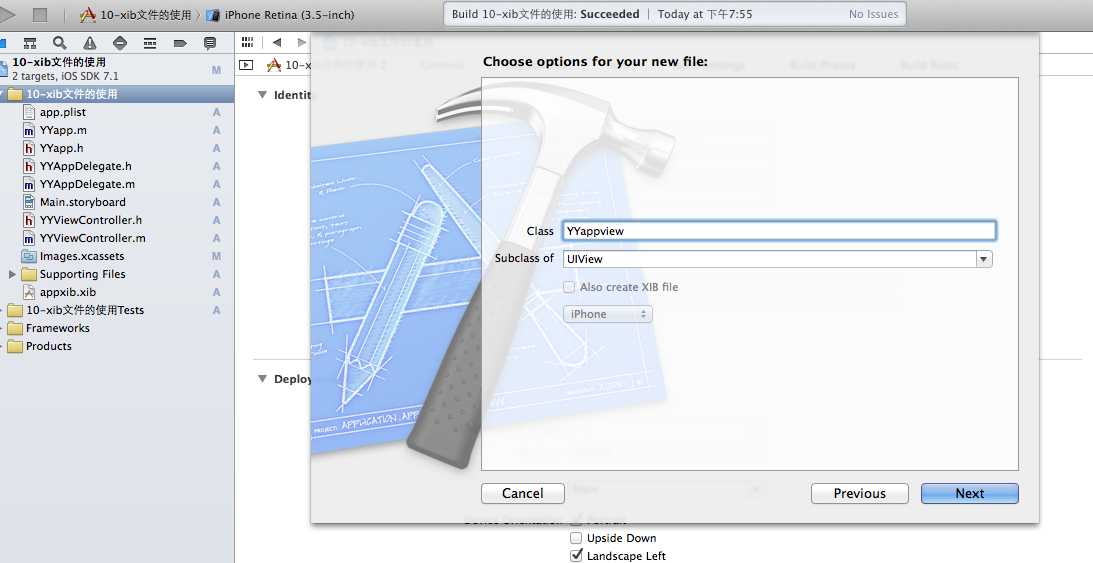
在xib界面右上角与新建的视图类进行关联
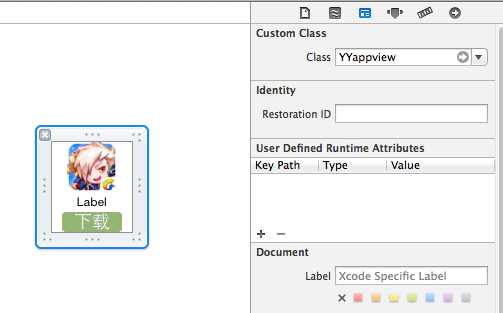
把xib和视图类进行连线
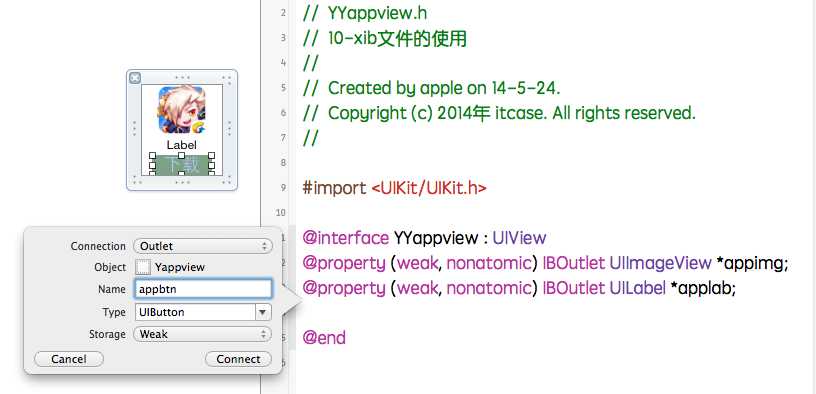
注意:在使用中把weak改成为强引用。否则...
2.连线后的代码示例
YYViewController.m文件代码如下:
 1 //
 2 //  YYViewController.m
 3 //  10-xib文件的使用
 4 //
 5 //  Created by apple on 14-5-24.
 6 //  Copyright (c) 2014年 itcase. All rights reserved.
 7 //
 8
 9 #import "YYViewController.h"
10 #import "YYapp.h"
11 #import "YYappview.h"
12
13 @interface YYViewController ()
14 @property(nonatomic,strong)NSArray *app;
15 @end
16
17 @implementation YYViewController
18
19 //1.加载数据信息
20 -(NSArray *)app
21 {
22     if (!_app) {
23         NSString *path=[[NSBundle mainBundle]pathForResource:@"app.plist" ofType:nil];
24         NSArray *temparray=[NSArray arrayWithContentsOfFile:path];
25
26         //字典转模型
27         NSMutableArray *arrayM=[NSMutableArray array ];
28         for (NSDictionary *dict in temparray) {
29             [arrayM addObject:[YYapp appWithDict:dict]];
30         }
31         _app=arrayM;
32     }
33     return _app;
34 }
35
36 //创建界面原型
37 - (void)viewDidLoad
38 {
39     [super viewDidLoad];
40     NSLog(@"%d",self.app.count);
41
42     //九宫格布局
43     int totalloc=3;
44     CGFloat appviewW=80;
45     CGFloat appviewH=90;
46     CGFloat margin=(self.view.frame.size.width-totalloc*appviewW)/(totalloc+1);
47
48     int count=self.app.count;
49     for (int i=0; i<count; i++) {
50
51         int row=i/totalloc;
52         int loc=i%totalloc;
53         CGFloat appviewX=margin + (margin +appviewW)*loc;
54         CGFloat appviewY=margin + (margin +appviewH)*row;
55         YYapp *app=self.app[i];
56
57         //拿出xib视图
58        NSArray  *apparray= [[NSBundle mainBundle]loadNibNamed:@"appxib" owner:nil options:nil];
59
60         //注意这里的类型名!
61         //UIView *appview=[apparray firstObject];
62         YYappview  *appview=[apparray firstObject];
63
64         //加载视图
65         appview.frame=CGRectMake(appviewX, appviewY, appviewW, appviewH);
66           [self.view addSubview:appview];
67
68         appview.appimg.image=app.image;
69         appview.applab.text=app.name;
70         appview.appbtn.tag=i;
71
72         [ appview.appbtn addTarget:self action:@selector(appviewbtnClick:) forControlEvents:UIControlEventTouchUpInside];
73
74     }
75 }
76
77 /**按钮的点击事件*/
78 -(void)appviewbtnClick:(UIButton *)btn
79 {
80     YYapp *apps=self.app[btn.tag];
81     UILabel *showlab=[[UILabel alloc]initWithFrame:CGRectMake(60, 450, 200, 20)];
82     [showlab setText:[NSString stringWithFormat: @"%@下载成功",apps.name]];
83     [showlab setBackgroundColor:[UIColor lightGrayColor]];
84     [self.view addSubview:showlab];
85     showlab.alpha=1.0;
86
87     //简单的动画效果
88     [UIView animateWithDuration:2.0 animations:^{
89         showlab.alpha=0;
90     } completion:^(BOOL finished) {
91         [showlab removeFromSuperview];
92     }];
93 }
94
95 @end
YYappview.h文件代码(已经连线)
#import <UIKit/UIKit.h>

@interface YYappview : UIView
@property (strong, nonatomic) IBOutlet UIImageView *appimg;
@property (strong, nonatomic) IBOutlet UILabel *applab;
@property (strong, nonatomic) IBOutlet UIButton *appbtn;
@end
**IOS:xib文件解析(xib和storyboard的比较,一个轻量级一个重量级)
标签:
原文地址:http://www.cnblogs.com/kenshinobiy/p/4820494.html