标签:
1、简介
什么是UIDynamic
UIDynamic是从iOS 7开始引入的一种新技术,隶属于UIKit框架
可以认为是一种物理引擎,能模拟和仿真现实生活中的物理现象
重力、弹性碰撞等现象
物理引擎的价值
广泛用于游戏开发,经典成功案例是“愤怒的小鸟”
让开发人员可以在远离物理学公式的情况下,实现炫酷的物理仿真效果
提高了游戏开发效率,产生更多优秀好玩的物理仿真游戏
知名的2D物理引擎
Box2d
Chipmunk
2、使用步骤
要想使用UIDynamic来实现物理仿真效果,大致的步骤如下
创建一个物理仿真器(顺便设置仿真范围)
创建相应的物理仿真行为(顺便添加物理仿真元素)
将物理仿真行为添加到物理仿真器中 ? 开始仿真
物理仿真元素(Dynamic Item)
谁要进行物理仿真?
物理仿真行为(Dynamic Behavior)
执行怎样的物理仿真效果?怎样的动画效果?
物理仿真器(Dynamic Animator)
让物理仿真元素执行具体的物理仿真行为
1、物理仿真元素
注意
不是任何对象都能做物理仿真元素
不是任何对象都能进行物理仿真
哪些对象才能做物理仿真元素
任何遵守了UIDynamicItem协议的对象
UIView默认已经遵守了UIDynamicItem协议,因此任何UI控件都能做物理仿真
UICollectionViewLayoutAttributes类默认也遵守UIDynamicItem协议
2、物理仿真行为
UIDynamic提供了以下几种物理仿真行为
UIGravityBehavior:重力行为
UICollisionBehavior:碰撞行为
UISnapBehavior:捕捉行为
UIPushBehavior:推动行为
UIAttachmentBehavior:附着行为
UIDynamicItemBehavior:动力元素行为
物理仿真行为须知
上述所有物理仿真行为都继承自UIDynamicBehavior
所有的UIDynamicBehavior都可以独立进行
组合使用多种行为时,可以实现一些比较复杂的效果
3、物理仿真器
物理仿真器须知
它可以让物理仿真元素执行物理仿真行为
它是UIDynamicAnimator类型的对象
1)UIDynamicAnimator的初始化
- (instancetype)initWithReferenceView:(UIView *)view;
view参数:是一个参照视图,表示物理仿真的范围
2)UIDynamicAnimator的常见方法
- (void)addBehavior:(UIDynamicBehavior *)behavior;
添加1个物理仿真行为
- (void)removeBehavior:(UIDynamicBehavior *)behavior;
移除1个物理仿真行为
- (void)removeAllBehaviors;
移除之前添加过的所有物理仿真行为
3)UIDynamicAnimator的常见属性
@property (nonatomic, readonly) UIView* referenceView;
参照视图
@property (nonatomic, readonly, copy) NSArray* behaviors;
添加到物理仿真器中的所有物理仿真行为
@property (nonatomic, readonly, getter = isRunning) BOOL running;
是否正在进行物理仿真
@property (nonatomic, assign) id <UIDynamicAnimatorDelegate> delegate;
代理对象(能监听物理仿真器的仿真过程,比如开始和结束)
1、简介
给定重力方向、加速度,让物体朝着重力方向掉落
UIGravityBehavior的初始化
- (instancetype)initWithItems:(NSArray *)items;
item参数 :里面存放着物理仿真元素
UIGravityBehavior常见方法
- (void)addItem:(id <UIDynamicItem>)item;
添加1个物理仿真元素
- (void)removeItem:(id <UIDynamicItem>)item;
移除1个物理仿真元素
2、UIGravityBehavior常见属性
@property (nonatomic, readonly, copy) NSArray* items;
添加到重力行为中的所有物理仿真元素
@property (readwrite, nonatomic) CGVector gravityDirection;
重力方向(是一个二维向量)
@property (readwrite, nonatomic) CGFloat angle;
重力方向(是一个角度,以x轴正方向为0°,顺时针正数,逆时针负数)
@property (readwrite, nonatomic) CGFloat magnitude;
量级(用来控制加速度,1.0代表加速度是1000 points /second²)
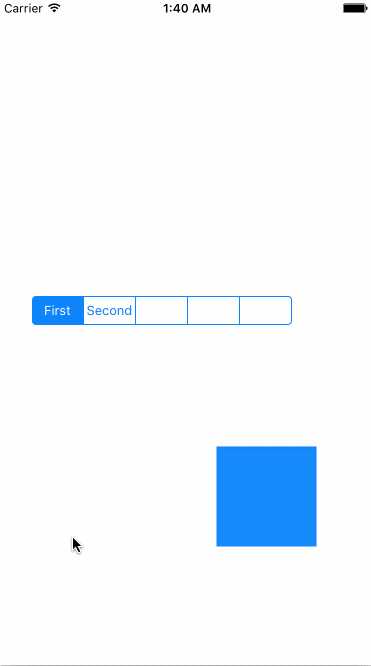
3、实战演练
/** 物理仿真器 */
@property (nonatomic, strong) UIDynamicAnimator *animator;
@property (weak, nonatomic) IBOutlet UIView *blueView;

- (UIDynamicAnimator *)animator
{
    if (!_animator) {
        // 创建物理仿真器(ReferenceView, 参照视图, 其实就是设置仿真范围)
        _animator = [[UIDynamicAnimator alloc] initWithReferenceView:self.view];
    }
    return _animator;
}

    // 1.创建物理仿真行为 - 重力行为
    UIGravityBehavior *gravity = [[UIGravityBehavior alloc] init];
    [gravity addItem:self.blueView];
    // 重力方向
    //    gravity.gravityDirection = CGVectorMake(100, 100);
    // 重力加速度()
    gravity.magnitude = 10;
    // 100 point/s²
    // 移动的距离 = 1/2 * magnitude * 时间²

    // 2.添加 物理仿真行为 到 物理仿真器 中, 开始物理仿真
    [self.animator addBehavior:gravity];
1、简介
可以让物体之间实现碰撞效果
可以通过添加边界(boundary),让物理碰撞局限在某个空间中
UICollisionBehavior边界相关的方法
- (void)addBoundaryWithIdentifier:(id <NSCopying>)identifier forPath:(UIBezierPath*)bezierPath;
- (void)addBoundaryWithIdentifier:(id <NSCopying>)identifier fromPoint:(CGPoint)p1 toPoint:(CGPoint)p2;
- (UIBezierPath*)boundaryWithIdentifier:(id <NSCopying>)identifier;
- (void)removeBoundaryWithIdentifier:(id <NSCopying>)identifier;
@property (nonatomic, readonly, copy) NSArray* boundaryIdentifiers;
- (void)removeAllBoundaries;
2、UICollisionBehavior常见用法
@property (nonatomic, readwrite) BOOL translatesReferenceBoundsIntoBoundary;
是否以参照视图的bounds为边界
- (void)setTranslatesReferenceBoundsIntoBoundaryWithInsets:(UIEdgeInsets)insets;
设置参照视图的bounds为边界,并且设置内边距
@property (nonatomic, readwrite) UICollisionBehaviorMode collisionMode;
碰撞模式(分为3种,元素碰撞、边界碰撞、全体碰撞)
@property (nonatomic, assign, readwrite) id <UICollisionBehaviorDelegate> collisionDelegate;
代理对象(可以监听元素的碰撞过程)
3、碰撞实战演练
@property (weak, nonatomic) IBOutlet UISegmentedControl *segmentControl;
/** 物理仿真器 */
@property (nonatomic, strong) UIDynamicAnimator *animator;
@property (weak, nonatomic) IBOutlet UIView *blueView;

- (UIDynamicAnimator *)animator
{
    if (!_animator) {
        // 创建物理仿真器(ReferenceView, 参照视图, 其实就是设置仿真范围)
        _animator = [[UIDynamicAnimator alloc] initWithReferenceView:self.view];
    }
    return _animator;
}

  // 1.创建 碰撞行为
    UICollisionBehavior *collision = [[UICollisionBehavior alloc] init];
    // 让参照视图的bounds变为碰撞检测的边框
    collision.translatesReferenceBoundsIntoBoundary = YES;
    [collision addItem:self.blueView];
    [collision addItem:self.segmentControl];

    // 2.创建物理仿真行为 - 重力行为
    UIGravityBehavior *gravity = [[UIGravityBehavior alloc] init];
    gravity.magnitude = 100;
    [gravity addItem:self.blueView];

    // 3.添加行为
    [self.animator addBehavior:collision];
    [self.animator addBehavior:gravity];

4、碰撞演练——添加边界
// 1.创建 碰撞行为
    UICollisionBehavior *collision = [[UICollisionBehavior alloc] init];
    [collision addItem:self.blueView];
    //    [collision addItem:self.segmentControl];

    // 添加边界
    //    CGFloat startX = 0;
    //    CGFloat startY = self.view.frame.size.height * 0.5;
    //    CGFloat endX = self.view.frame.size.width;
    //    CGFloat endY = self.view.frame.size.height;
    //    [collision addBoundaryWithIdentifier:@"line1" fromPoint:CGPointMake(startX, startY) toPoint:CGPointMake(endX, endY)];
    //    [collision addBoundaryWithIdentifier:@"line2" fromPoint:CGPointMake(endX, 0) toPoint:CGPointMake(endX, endY)];

    CGFloat width = self.view.frame.size.width;
    UIBezierPath *path = [UIBezierPath bezierPathWithOvalInRect:CGRectMake(0, 0, width, width)];
    [collision addBoundaryWithIdentifier:@"circle" forPath:path];

    // 2.创建物理仿真行为 - 重力行为
    UIGravityBehavior *gravity = [[UIGravityBehavior alloc] init];
    gravity.magnitude = 10;
    [gravity addItem:self.blueView];

    // 3.添加行为
    [self.animator addBehavior:collision];
    [self.animator addBehavior:gravity];
斜线边界
圆弧为边界
1、简介
可以让物体迅速冲到某个位置(捕捉位置),捕捉到位置之后会带有一定的震动
UISnapBehavior的初始化
- (instancetype)initWithItem:(id <UIDynamicItem>)item snapToPoint:(CGPoint)point;
UISnapBehavior常见属性
@property (nonatomic, assign) CGFloat damping;
用于减幅、减震(取值范围是0.0 ~ 1.0,值越大,震动幅度越小)
UISnapBehavior使用注意
如果要进行连续的捕捉行为,需要先把前面的捕捉行为从物理仿真器中移除
2、捕捉实战演练
// 获得触摸点
    UITouch *touch = [touches anyObject];
    CGPoint point = [touch locationInView:self.view];

    // 创建吸附\捕捉行为
    UISnapBehavior *snap = [[UISnapBehavior alloc] initWithItem:self.blueView snapToPoint:point];
    // 防抖系数(值越小, 越抖)
    snap.damping = 1.0;

    // 移除所有行为
    [self.animator removeAllBehaviors];
    // 添加行为
    [self.animator addBehavior:snap];
其他的仿真行为就不一一演示了
标签:
原文地址:http://www.cnblogs.com/chglog/p/4837070.html