标签:
Java语言本身是由Java语言规格说明(JLS)所定义的,而Java虚拟机的可执行字节码则是由一个完全独立的标准,即Java虚拟机规格说明(通常也被称为VMSpec)所定义的。
JVM字节码是通过javac对Java源代码文件进行编译后生成的,生成的字节码与原本的Java语言存在着很大的不同。比方说,在Java语言中为人熟知的一些高级特性,在编译过程中会被移除,在字节码中完全不见踪影。
这方面最明显的一个例子莫过于Java中的各种循环关键字了(for、while等等),这些关键字在编译过程中会被消除,并替换为字节码中的分支指令。这就意味着在字节码中,每个方法内部的流程控制只包含if语句与jump指令(用于循环)。
在阅读本文前,我假设读者对于字节码已经有了基本的了解。如果你需要了解一些基本的背景知识,请参考《Java程序员修炼之道》(Well-Grounded Java Developer)一书(作者为Evans与Verburg,由Manning于 2012年出版),或是来自于RebelLabs的这篇报告(下载PDF需要注册)。
让我们来看一下这个示例,它对于还不熟悉的JVM字节码的新手来说很可能会感到困惑。该示例使用了javap工具,它本质上是一个Java字节码的反汇编工具,在下载的JDK或JRE中可以找到它。在这个示例中,我们将讨论一个简单的类,它实现了Callable接口:
public class ExampleCallable implements Callable {
    public Double call() {
        return 3.1415;
    }}
我们可以通过对javap工具进行最简单形式的使用,对这个类进行反汇编后得到以下结果:
$ javap kathik/java/bytecode_examples/ExampleCallable.classCompiled from "ExampleCallable.java"public class kathik.java.bytecode_examples.ExampleCallable
       implements java.util.concurrent.Callable {
  public kathik.java.bytecode_examples.ExampleCallable();
  public java.lang.Double call();
  public java.lang.Object call() throws java.lang.Exception;}
这个反汇编后的结果看上去似乎是错误的,毕竟我们只写一个call方法,而不是两个。而且即使我们尝试手工创建这两个方法,javac也会提示,代码中有两个具有相同名称和参数的方法,它们仅有返回类型的不同,因此这段代码是无法编译的。然而,这个类确确实实是由上面那个真实的、有效的Java源文件所生成的。
这个示例能够清晰地表明在使用Java中广为人知的一种限制:不可对返回类型进行重载,其实这只是Java语言的一种限制,而不是JVM字符码本身的强制要求。javac确实会在代码中插入一些不存在于原始的类文件中的内容,如果你为此感到担忧,那大可放心,因为这种事每时每刻都在发生!每一位Java程序员最先学到的一个知识点就是:“如果你不提供一个构造函数,那么编译器会为你自动添加一个简单的构造函数”。在javap的输出中,你也能看到其中有一个构造函数存在,而它并不存在于我们的代码中。
这些额外的方法从某种程度上表明,语言规格说明的需求比VM规格说明中的细节更为严格。如果我们能够直接编写字节码,就可以实现许多“不可能”实现的功能,而这种字节码虽然是合法的,却没有任何一个Java编译器能够生成它们。
举例来说,我们可以创建出完全不含构造函数的类。Java语言规格说明中要求每个类至少要包含一个构造函数,而如果我们在代码中没有加入构造函数,javac会自动加入一个简单的void构造函数。但是,如果我们能够直接编写字节码,我们完全可以忽略构造函数。这种类是无法实例化的,即使通过反射也不行。
我们的最后一个例子已经接近成功了,但还是差一口气。在字节码中,我们可以编写一个方法,它将试图调用一个其它类中定义的私有方法。这段字节码是有效的,但如果任何程序打算加载它,它将无法正确地进行链接。这是因为在类型加载器中(classloader)的校验器会检测出这个方法调用的访问控制限制,并且拒绝这个非法访问。
如果我们打算在创建的代码中实现这些超越Java语言的行为,那就需要完全手动创建这样的一个类文件。由于这个类文件的格式是两进制的,因此可以选择使用某种类库,它能够让我们对某个抽象的数据结构进行操作,随后将其转换为字节码,并通过流方式将其写入磁盘。
具备这种功能的类库有多个选择,但在本文中我们将关注于ASM。这是一个非常常见的类库,在Java 8分发包中有一个以内部API的形式提供的版本(其内容稍有不同)。对于用户代码来说,我们选择使用通用的开源类库,而不是JDK中提供的版本,毕竟我们不应当依赖于内部API来实现所需的功能。
ASM的核心功能在于,它提供了一种API,虽然它看上去有些神秘莫测(有时也会显得有些粗糙),但能够以一种直接的方式反映出字节码的数据结构。
我们看到的Java运行时是由多年之前的各种设计决策所产生的结果,而在后续各个版本的类文件格式中,我们能够清晰地看到各种新增的内容。
ASM致力于尽量使构建的类文件接近于真实形态,因此它的基础API会分解为一系列相对简单的方法片段(而这些片段正是用于建模的二进制所关注的)。
如果程序员打算完全手动编写类文件,就必需理解类文件的整体结构,而这种结构是会随时改变的。幸运的是,ASM能够处理多个不同Java版本中的类文件格式之间的细微差别,而Java平台本身对于可兼容性的高要求也侧面帮助了我们。
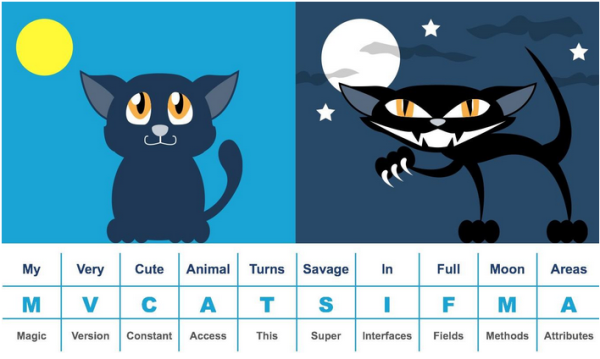
一个类文件依次包含以下内容:
某个特殊的数字(在传统的Unix平台上,Java中的特殊数字是这个历史悠久的、人见人爱的0xCAFEBABE)
正在使用中的类文件格式版本号
常量
访问控制标记(例如类的访问范围是public、protected还是package等等)
该类的类型名称
该类的超类
该类所实现的接口
该类拥有的字段(处于超类中的字段上方)
该类拥有的方法(处于超类中的方法上方)
属性(类级别的注解)
可以用下面这个方法帮助你记忆JVM类文件中的主要部分:
ASM中提供了两个API,其中最简单的那个依赖于访问者模式。在常见的形式中,ASM只包含最简单的字段以及ClassWrite类(当已经熟悉了ASM的使用和直接操作字节码的方式之后,许多开发者会发现CheckClassAdapter是一个很实用的起点,作为一个ClassVisitor,它对代码进行检查的方式,与Java的类加载子系统中的校验器的工作方式非常想像。)
可以查看ASM OSChina 网页
让我们看几个简单的类生成的例子,它们都是按照常规的模式创建的:
启动一个ClassVisitor(在我们的示例中就是一个ClassWriter)
写入头信息
生成必要的方法和构造函数
将ClassVisitor转换为字节数组,并写入输出
public class Simple implements ClassGenerator {
 // Helpful constants private static final String GEN_CLASS_NAME = "GetterSetter";
 private static final String GEN_CLASS_STR = PKG_STR + GEN_CLASS_NAME;

 @Override public byte[] generateClass() {
   ClassWriter cw = new ClassWriter(0);
   CheckClassAdapter cv = new CheckClassAdapter(cw);
   // Visit the class header   cv.visit(V1_7, ACC_PUBLIC, GEN_CLASS_STR, null, J_L_O, new String[0]);
   generateGetterSetter(cv);
   generateCtor(cv);
   cv.visitEnd();
   return cw.toByteArray();
 }

 private void generateGetterSetter(ClassVisitor cv) {
   // Create the private field myInt of type int. Effectively:   // private int myInt;   cv.visitField(ACC_PRIVATE, "myInt", "I", null, 1).visitEnd();

   // Create a public getter method   // public int getMyInt();   MethodVisitor getterVisitor =
      cv.visitMethod(ACC_PUBLIC, "getMyInt", "()I", null, null);
   // Get ready to start writing out the bytecode for the method   getterVisitor.visitCode();
   // Write ALOAD_0 bytecode (push the this reference onto stack)   getterVisitor.visitVarInsn(ALOAD, 0);
   // Write the GETFIELD instruction, which uses the instance on   // the stack (& consumes it) and puts the current value of the   // field onto the top of the stack   getterVisitor.visitFieldInsn(GETFIELD, GEN_CLASS_STR, "myInt", "I");
   // Write IRETURN instruction - this returns an int to caller.   // To be valid bytecode, stack must have only one thing on it   // (which must be an int) when the method returns   getterVisitor.visitInsn(IRETURN);
   // Indicate the maximum stack depth and local variables this   // method requires   getterVisitor.visitMaxs(1, 1);
   // Mark that we‘ve reached the end of writing out the method   getterVisitor.visitEnd();

   // Create a setter   // public void setMyInt(int i);   MethodVisitor setterVisitor =
       cv.visitMethod(ACC_PUBLIC, "setMyInt", "(I)V", null, null);
   setterVisitor.visitCode();
   // Load this onto the stack   setterVisitor.visitVarInsn(ALOAD, 0);
   // Load the method parameter (which is an int) onto the stack   setterVisitor.visitVarInsn(ILOAD, 1);
   // Write the PUTFIELD instruction, which takes the top two
   // entries on the execution stack (the object instance and   // the int that was passed as a parameter) and set the field
   // myInt to be the value of the int on top of the stack.
   // Consumes the top two entries from the stack   setterVisitor.visitFieldInsn(PUTFIELD, GEN_CLASS_STR, "myInt", "I");
   setterVisitor.visitInsn(RETURN);
   setterVisitor.visitMaxs(2, 2);
   setterVisitor.visitEnd();
 }

 private void generateCtor(ClassVisitor cv) {
   // Constructor bodies are methods with special name
   MethodVisitor mv =
       cv.visitMethod(ACC_PUBLIC, INST_CTOR, VOID_SIG, null, null);
   mv.visitCode();
   mv.visitVarInsn(ALOAD, 0);
   // Invoke the superclass constructor (we are basically
   // mimicing the behaviour of the default constructor
   // inserted by javac)   // Invoking the superclass constructor consumes the entry on the top   // of the stack.   mv.visitMethodInsn(INVOKESPECIAL, J_L_O, INST_CTOR, VOID_SIG);
   // The void return instruction   mv.visitInsn(RETURN);
   mv.visitMaxs(2, 2);
   mv.visitEnd();
 }

 @Override public String getGenClassName() {
   return GEN_CLASS_NAME;
 }}
这段代码使用了一个简单的接口,用一个单一的方法生成类的字节,一个辅助方法以返回生成的类名,以及一些实用的常量:
interface ClassGenerator {public byte[] generateClass();public String getGenClassName();// Helpful constantspublic static final String PKG_STR = "kathik/java/bytecode_examples/";public static final String INST_CTOR = "";public static final String CL_INST_CTOR = "";public static final String J_L_O = "java/lang/Object";public static final String VOID_SIG = "()V";}
为了驾驭生成的类,我们需要使用一个harness类,它叫做Main。Main类提供了一个简单的类加载器,并且提供了一种反射式的方式对生成类中的方法进行回调。为了简便起见,我们将生成的类定入Maven的目标文件夹的正确位置,让IDE中的classpath能够顺利地找到它:
public class Main {public static void main(String[] args) {
   Main m = new Main();
   ClassGenerator cg = new Simple();
   byte[] b = cg.generateClass();
   try {
     Files.write(Paths.get("target/classes/" + PKG_STR +
       cg.getGenClassName() + ".class"), b, StandardOpenOption.CREATE);
   } catch (IOException ex) {
     Logger.getLogger(Simple.class.getName()).log(Level.SEVERE, null, ex);
   }
   m.callReflexive(cg.getGenClassName(), "getMyInt");}
下面的类提供了一种方法,能够对受保护的defineClass()进行访问,这样一来我们就能够将一个字节数组转换为某个类对象,以便在反射中使用。
private static class SimpleClassLoader extends ClassLoader {
 public Class simpleDefineClass(byte[] clazzBytes) {
   return defineClass(null, clazzBytes, 0, clazzBytes.length);
 }}private void callReflexive(String typeName, String methodName) {
 byte[] buffy = null;
 try {
   buffy = Files.readAllBytes(Paths.get("target/classes/" + PKG_STR +
     typeName + ".class"));
   if (buffy != null) {
     SimpleClassLoader myCl = new SimpleClassLoader();
     Class newClz = myCl.simpleDefineClass(buffy);
     Object o = newClz.newInstance();
     Method m = newClz.getMethod(methodName, new Class[0]);
     if (o != null && m != null) {
       Object res = m.invoke(o, new Object[0]);
       System.out.println("Result: " + res);
     }
   }
 } catch (IOException | InstantiationException | IllegalAccessException |
         NoSuchMethodException | SecurityException |
         IllegalArgumentException | InvocationTargetException ex) {
   Logger.getLogger(Simple.class.getName()).log(Level.SEVERE, null, ex);
 }}
有了这个类以后,我们只要通过细微的改动,就可以方便地测试各种不同的类生成器,以此对字节码生成器的各个方面进行探索。
实现无构造函数的类的方式也很相似。举例来说,以下这种方式可以在生成的类中仅包含一个静态字段,以及它的getter和setter(生成器不会调用generateCtor()方法):
private void generateStaticGetterSetter(ClassVisitor cv) {// Generate the static field  cv.visitField(ACC_PRIVATE | ACC_STATIC, "myStaticInt", "I", null,
     1).visitEnd();

  MethodVisitor getterVisitor = cv.visitMethod(ACC_PUBLIC | ACC_STATIC,
                                         "getMyInt", "()I", null, null);
  getterVisitor.visitCode();
  getterVisitor.visitFieldInsn(GETSTATIC, GEN_CLASS_STR, "myStaticInt", "I");

  getterVisitor.visitInsn(IRETURN);
  getterVisitor.visitMaxs(1, 1);
  getterVisitor.visitEnd();

  MethodVisitor setterVisitor = cv.visitMethod(ACC_PUBLIC | ACC_STATIC, "setMyInt",
                                         "(I)V", null, null);
  setterVisitor.visitCode();
  setterVisitor.visitVarInsn(ILOAD, 0);
  setterVisitor.visitFieldInsn(PUTSTATIC, GEN_CLASS_STR, "myStaticInt", "I");}setterVisitor.visitInsn(RETURN);setterVisitor.visitMaxs(2,2);setterVisitor.visitEnd();
请留意一下该方法在生成时使用了ACC_STATIC标记,此外还请注意方法的参数是位于本地变量列表中的最前面的(这里使用的ILOAD 0 模式暗示了这一点 —— 而在生成实例方法时,此处应该改为ILOAD 1,这是因为实例方法中的“this”引用存储在本地变量表中的偏移量为0)。
通过使用javap,我们就能够确认在生成的类中确实不包括任何构造函数:
$ javap -c kathik/java/bytecode_examples/StaticOnly.class public class kathik.StaticOnly {public static int getMyInt(); Code:0: getstatic #11 // Field myStaticInt:I3: ireturnpublic static void setMyInt(int); Code:0: iload_01: putstatic #11 // Field myStaticInt:I4: return}
目前为止,我们是使用反射的方式调用我们通过ASM所生成的类的。这有助于保持这个示例的自包含性,但在很多情况下,我们希望能够将这些代码生成在常规的Java文件中。要实现这一点非常简单。以下示例将生成的类保存在Maven的目标目录下,写法很简单:
$ cd target/classes
$ jar cvf gen-asm.jar kathik/java/bytecode_examples/GetterSetter.class kathik/java/bytecode_examples/StaticOnly.class$ mv gen-asm.jar ../../lib/gen-asm.jar
这样一来我们就得到了一个JAR文件,可以作为依赖项在其它代码中使用。比方说,我们可以这样使用这个GetterSetter类:
import kathik.java.bytecode_examples.GetterSetter;public class UseGenCodeExamples {
 public static void main(String[] args) {
   UseGenCodeExamples ugcx = new UseGenCodeExamples();
   ugcx.run();
 }

 private void run() {
   GetterSetter gs = new GetterSetter();
   gs.setMyInt(42);
   System.out.println(gs.getMyInt());
 }}
这段代码在IDE中是无法通过编译的(因为GetterSetter类没有配置在classpath中)。但如果我们直接使用命令行,并且在classpath中指向正确的依赖,就可以正确地运行了:
$ cd ../../src/main/java/$ javac -cp ../../../lib/gen-asm.jar kathik/java/bytecode_examples/withgen/UseGenCodeExamples.java
$ java -cp .:../../../lib/gen-asm.jar kathik.java.bytecode_examples.withgen.UseGenCodeExamples42
在本文中,我们通过使用ASM类库中所提供的简单API,学习了完全手动生成类文件的基础知识。我们也为读者展示了Java语言和字节码有哪些不同的要求,并且了解到Java中的某些规则其实只是语言本身的规范,而不是运行时所强制的要求。我们还看到,一个正确编写的手工类文件可以直接在语言中使用,与通过javac生成的文件没有区别。这一点也是Java与其它非Java语言,例如Groovy或Scala进行互操作的基础。
这方面的应用还有许多高级技巧,通过本文的学习,读者应该已经掌握了基本的知识,并且能够进一步深入研究JVM的运行时,以及如何对它进行各种操作的技术。
标签:
原文地址:http://my.oschina.net/u/2308739/blog/517806