标签:
遮罩效果
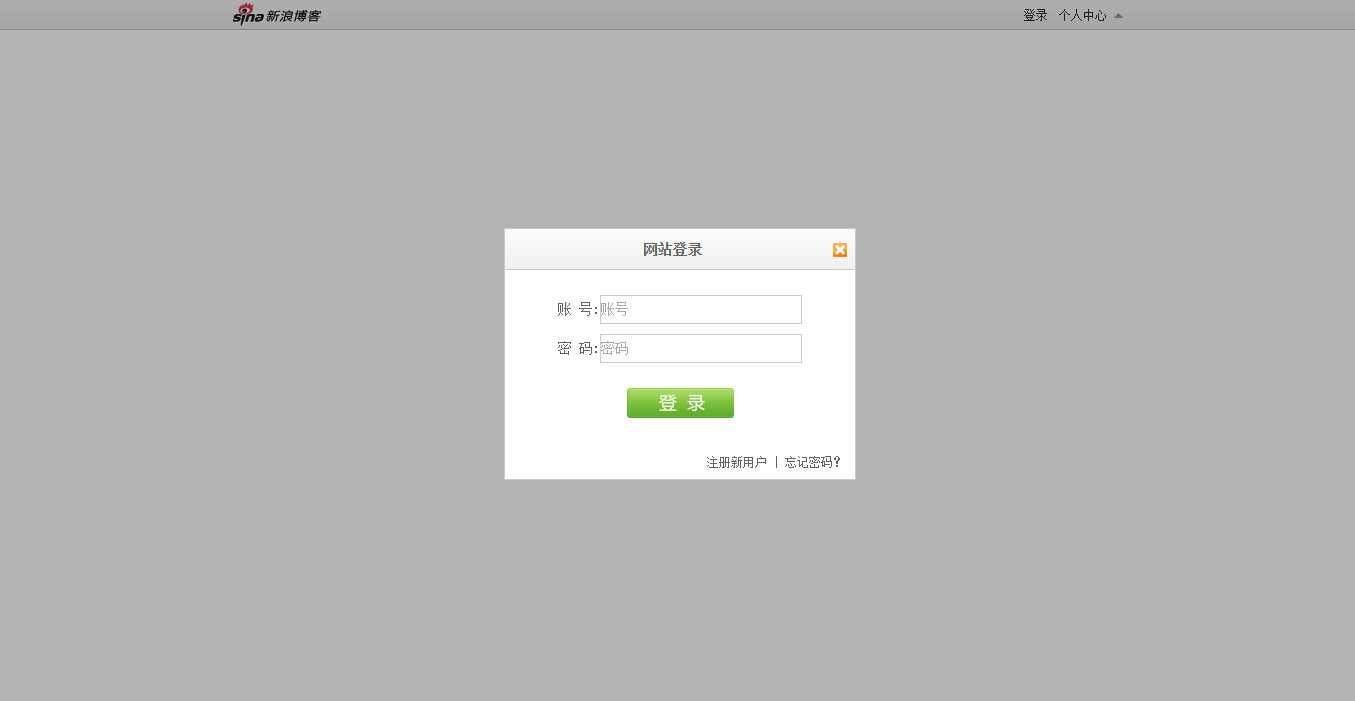
遮罩效果的应用还是很多的,效果如图:
实现原理是通过一个div作为遮罩,它要绝对行为,高度和宽度为浏览器的高度和宽度,背景为半透明,这里半透明的效果若要兼容IE的话,通过filter:alpha(opacity=30),它等价于在其他的浏览器opacity:0.3.下面为代码:
#screen{
    position: absolute;
    top:0;
    left:0;
    background: #000;
    opacity: 0.3;
    z-index: 9998;
    display: none;
}
这里会看到有两个没有提到的属性,z-index和display。
z-index是为了当遮罩出现的时候,使后面的区域不可操作。
display:none;在开始的时候是没有遮罩的,需要通过点击登录,注册等类似的按钮,使它出现,所以在此之前它是不可见的。
这里我们的登录框的样式要做一个更新:
#login{
    ......
    z-index: 9999;
}
为什么呢?因为登录框在遮罩上面所以登录框的z-index一定比遮罩要大。
好了,我们做完了准备工作,开始考虑如何让遮罩的宽和高为浏览器宽和高。
我们创建一个lock()方法:
Tar.prototype.lock = function() {
    for(var i = 0; i < this.elements.length; i++) {
        this.elements[i].style.display = "block";
        this.elements[i].style.height = document.documentElement.clientHeight + ‘px‘;
        this.elements[i].style.width = document.documentElement.clientWidth + ‘px‘;
    }
    return this;
}
这里我们只是改变元素的display,height,width,利用了document.documentElement.clientHeight和document.documentElement.clientWidth
既然我们有了lock()方法,那么理所应当有一个解除遮罩的方法unlock():
//解除遮罩
Tar.prototype.unlock = function() {
    for(var i = 0; i < this.elements.length; i++) {
        this.elements[i].style.display = "none";
    }
    return this;
}
很简单,display:none;
然后我们利用这两个方法来实现完整的遮罩效果:
//登录框
    var login = $().getId("login");
    var screen = $().getId("screen");
    login.center(350,250);
    login.resize(function() {
        login.center(350,250);
        if(login.css("display") == "block") {
            screen.lock();
        }
    });
    $().getClass("close").click(function() {
        login.css("display","none");
        screen.unlock();
    });
    $().getClass("login").click(function() {
        login.css("display","block");
        screen.lock();
    });
当点击登录的时候,遮罩出现。当点击“X”,遮罩消失。在改变浏览器窗口大小的时候,遮罩也要随之改变,但是不是浏览器窗口大小改变,就要出现遮罩,所以要添加条件:
当登录框出现的时候,遮罩出现,并随浏览器改变而改变。否则只要你一改变浏览器大小,就会出现遮罩。
tool.js
tool.js用来存储一些基本的工具方法。比如:跨浏览器获取视口大小,跨浏览器获取Style,判断class是否存在,跨浏览器添加link规则,跨浏览器删除link规则.我们将他们提取出来供以后重新利用。
//跨浏览器获取视口大小
function getInner() {
    if(typeof window.innerHeight != ‘undefined‘) {
        //alert("1");
        return {
            width : document.documentElement.clientWidth,
            height : document.documentElement.clientHeight
        }
    }else{
        //alert("2");
        return {
            width : window.innerWidth,
            height : window.innerHeight
        }
    }
}
//跨浏览器获取Style
function getStyle(element, attr) {
    if(typeof window.getComputedStyle != ‘undefined‘) {//W3C
        return window.getComputedStyle(element, null)[attr];
    }else if(typeof element.currentStyle != ‘undefined‘) {//IE
        return element.currentStyle[attr];
    }
}
//判断class是否存在
function hasClass(element, className) {
    return this.elements[i].className.match(new RegExp(‘(\\s|^)‘ + className + ‘(\\s|$)‘));
}
//跨浏览器添加link规则
function inertRule(sheet, selectorText, cssText, position) {
    if(typeof sheet.insertRule != ‘undefined‘) {//W3C
        sheet.insertRule(selectorText + ‘{‘ + cssText + ‘}‘, position);
    }else if(typeof sheet.addRule != ‘undefined‘) {//IE
        sheet.addRule(selectorText, cssText, position);
    }
}
//跨浏览器删除link规则
function deleteRule(sheet, index) {
    if(typeof sheet.deleteRule != ‘undefined‘) {//W3C
        sheet.deleteRule(index);
    }else if(typeof sheet.removeRule != ‘undefined‘) {//IE
        sheet.removeRule(index);
    }
}
待续。。。。
标签:
原文地址:http://www.cnblogs.com/targeral/p/4915494.html