标签:
由于手机屏幕有限,所以我们要尽量充分利用屏幕资源。在我们的应用程序中通常有多个Activity,而且会经常切换显示,这样我们就可以用TabActivity来显示。先看一下效果:
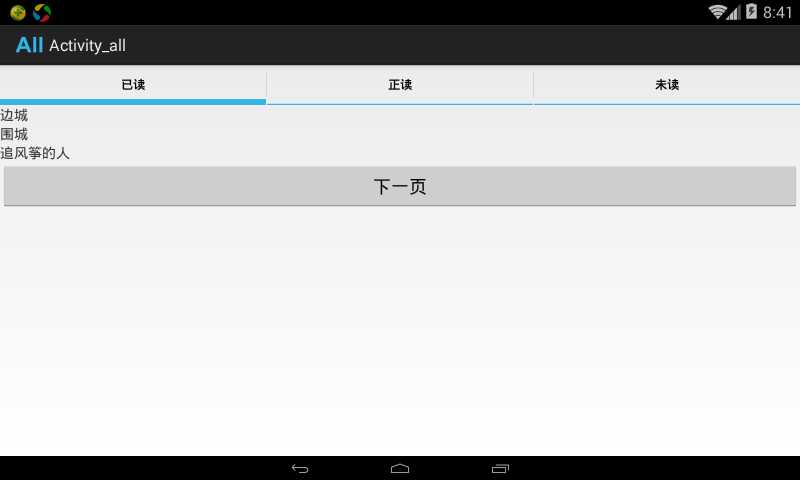
下面我先带领大家实现一下最简单的一种实现:
首先我们的布局文件:
<RelativeLayout xmlns:android="http://schemas.android.com/apk/res/android"
    xmlns:tools="http://schemas.android.com/tools"
    android:layout_width="match_parent"
    android:layout_height="match_parent"
    tools:context=".Activitytwo" >

    <TabHost
        android:id="@+id/bookTabHost"
        android:layout_width="wrap_content"
        android:layout_height="wrap_content"
        >
        <LinearLayout
            android:id="@+id/doneBook"
            android:orientation="vertical"
            android:layout_height="wrap_content"
            android:layout_width="wrap_content"
            >
            <TextView
                android:text="边城"
                android:layout_width="wrap_content"
                android:layout_height="wrap_content"
                />
            <TextView
                android:text="围城"
                android:layout_width="wrap_content"
                android:layout_height="wrap_content"
                />
            <TextView
                android:text="追风筝的人"
                android:layout_width="wrap_content"
                android:layout_height="wrap_content"
                />
        </LinearLayout>

        <LinearLayout
            android:id="@+id/doingBook"
            android:orientation="vertical"
            android:layout_height="wrap_content"
            android:layout_width="wrap_content"
            >
            <TextView
                android:text="倾城之恋"
                android:layout_width="wrap_content"
                android:layout_height="wrap_content"
                />
            <TextView
                android:text="灿烂千阳"
                android:layout_width="wrap_content"
                android:layout_height="wrap_content"
                />
            <TextView
                android:text="活着"
                android:layout_width="wrap_content"
                android:layout_height="wrap_content"
                />
        </LinearLayout>

        <LinearLayout
            android:id="@+id/willBook"
            android:orientation="vertical"
            android:layout_height="wrap_content"
            android:layout_width="wrap_content"
            >
            <TextView
                android:text="百年孤独"
                android:layout_width="wrap_content"
                android:layout_height="wrap_content"
                />
            <TextView
                android:text="房子里的大象"
                android:layout_width="wrap_content"
                android:layout_height="wrap_content"
                />
            <TextView
                android:text="忏悔"
                android:layout_width="wrap_content"
                android:layout_height="wrap_content"
                />
        </LinearLayout>
    </TabHost>

</RelativeLayout>
我们的主Activity代码:
public class MainActivity extends TabActivity{
    public Button button_two;
    public TabHost bookth = null;
    @Override
    protected void onCreate(Bundle savedInstanceState) {
        super.onCreate(savedInstanceState);
        bookth = getTabHost();
        LayoutInflater.from(this).inflate(R.layout.activity_two, bookth.getTabContentView(), true);
        bookth.addTab(bookth.newTabSpec("done").setIndicator("已读").setContent(R.id.doneBook));
        bookth.addTab(bookth.newTabSpec("doing").setIndicator("正读").setContent(R.id.doingBook));
        bookth.addTab(bookth.newTabSpec("will").setIndicator("未读").setContent(R.id.willBook));
    }
}
ok我们的上图效果就已经完成了,代码很简单,就不再多做解释。下面我们来一起看一下另一种实现方式:
我们的布局文件:
<RelativeLayout xmlns:android="http://schemas.android.com/apk/res/android"
    xmlns:tools="http://schemas.android.com/tools"
    android:layout_width="match_parent"
    android:layout_height="match_parent"
    tools:context="${relativePackage}.${activityClass}" >
    <TabHost
        android:id="@android:id/tabhost"
        android:layout_width="match_parent"
        android:layout_height="match_parent">
        <LinearLayout
            android:orientation="vertical"
            android:layout_width="match_parent"
            android:layout_height="match_parent"
            >
            <FrameLayout
                android:id="@+id/framelayout"
                android:layout_width="match_parent"
                android:layout_height="match_parent"
                android:padding="5dp"
                />
            <TabWidget
                android:layout_alignParentBottom="true"
                android:id="@+id/tabwidget"
                android:layout_width="wrap_content"
                android:layout_height="wrap_content"
                />
        </LinearLayout>
    </TabHost>
</RelativeLayout>
我们的主Activity代码:
public class Activityone extends TabActivity {

    @Override
    protected void onCreate(Bundle savedInstanceState) {
        super.onCreate(savedInstanceState);

        Resources res = getResources();
        TabHost tabHost = getTabHost();
        TabHost.TabSpec spec;
        Intent intent;

        LayoutInflater.from(this).inflate(R.layout.activity_one, tabHost.getTabContentView(), true);

        intent = new Intent().setClass(Activityone.this, Activitytwo.class);
        tabHost.addTab(tabHost.newTabSpec("拨号").setIndicator("拨号", res.getDrawable(R.drawable.ic_tab_artists))
        .setContent(intent));

//        intent = new Intent().setClass(Activityone.this,Activitytwo.class);
//
//        spec = tabHost.newTabSpec("拨号").setIndicator("拨号", res.getDrawable(R.drawable.ic_tab_artists))
//            .setContent(intent);
//        tabHost.addTab(spec);

        intent = new Intent().setClass(Activityone.this, Activitythree.class);

        spec = tabHost.newTabSpec("联系人").setIndicator("联系人", res.getDrawable(R.drawable.ic_tab_albums))
                .setContent(intent);
        tabHost.addTab(spec);

        intent = new Intent().setClass(Activityone.this, Activityfour.class);

        spec = tabHost.newTabSpec("通话记录").setIndicator("通话记录", res.getDrawable(R.drawable.ic_tab_songs))
                .setContent(intent);
        tabHost.addTab(spec);

        tabHost.setCurrentTab(1);

    }
}
请注意红色字体部分,这里使用了一个图片的配置文件(ic_tab_albums.xml):
<?xml version="1.0" encoding="UTF-8"?>
<selector xmlns:android="http://schemas.android.com/apk/res/android">
    <!-- When selected, use grey -->
    <item android:drawable="@drawable/ic_tab_albums_grey"
          android:state_selected="true" />
    <!-- When not selected, use white-->
    <item android:drawable="@drawable/ic_tab_albums_white"
        android:state_selected="false" />
</selector>
好了到这里我们关于TabActivity的介绍内容完成了,这部分知识并不难,相信大家一定已经掌握了。新手学习,高手交流。
标签:
原文地址:http://www.cnblogs.com/AndroidJotting/p/4943624.html