标签:
项目中要实现高斯模糊的效果,今天看了下Core Image这块的内容, 主要包括CIImage、CIFilter、CIContext、CIDetector(检测)、CIFeature(特征)等类。
今天先记录下CIImage、CIFilter、CIContext三个类的使用。
一、基本的滤镜效果需要以下步骤
1.创建CIImage对象
2.创建CIContext对象用作画布
3.创建CIFilter对象
4.输出滤镜
二、创建上面三个对象的API
1.创建CIImage对象 主要通过以下方法( 方法有好多种 具体查看类CIImage)
+ (CIImage *)imageWithCGImage:(CGImageRef)image;
+ (CIImage *)imageWithCGLayer:(CGLayerRef)layer;
+ (nullable CIImage *)imageWithContentsOfURL:(NSURL *)url;
+ (nullable CIImage *)imageWithData:(NSData *)data;
- (instancetype)initWithCGImage:(CGImageRef)image;
- (nullable instancetype)initWithData:(NSData *)data;
- (nullable instancetype)initWithContentsOfURL:(NSURL *)url;
- (instancetype)initWithColor:(CIColor *)color;
2.创建CIContext对象
CIContext 构造函数contextWithOptions:的输入是一个NSDictionary。 它规定了各种选项,包括颜色格式以及内容是否应该运行在CPU或是GPU上。
CIContext *context=[CIContext contextWithOptions:nil];
在该类中还有一些其他方法
- (void)drawImage:(CIImage *)image
          atPoint:(CGPoint)atPoint
         fromRect:(CGRect)fromRect NS_DEPRECATED(10_4,10_8, 5_0,6_0);

/* Render the rectangle ‘fromRect‘ of ‘image‘ to the rectangle ‘inRect‘ in the
 * context‘s destination. */
- (void)drawImage:(CIImage *)image
           inRect:(CGRect)inRect
         fromRect:(CGRect)fromRect;

/* Render the region ‘fromRect‘ of image ‘image‘ into a temporary buffer using
 * the context, then create and return a new CoreGraphics image with
 * the results. The caller is responsible for releasing the returned
 * image. */
- (CGImageRef)createCGImage:(CIImage *)image
                   fromRect:(CGRect)fromRect
CF_RETURNS_RETAINED;

/* Create a new CGImage from the specified subrect of the image. If
 * non-nil the new image will be created in the specified format and
 * colorspace. */
- (CGImageRef)createCGImage:(CIImage *)image
                   fromRect:(CGRect)fromRect
                     format:(CIFormat)format
                 colorSpace:(nullable CGColorSpaceRef)colorSpace
3.创建CIFilter对象
1、创建滤镜对象
+ (nullable CIFilter *) filterWithName:(NSString *) name;

/** Creates a new filter of type ‘name‘.
 The filter‘s input parameters are set from the list of key-value pairs which must be nil-terminated.
 On OSX, any of the filter input parameters not specified in the list will be undefined.
 On iOS, any of the filter input parameters not specified in the list will be set to default values. */
+ (nullable CIFilter *)filterWithName:(NSString *)name
                        keysAndValues:key0, ... NS_REQUIRES_NIL_TERMINATION NS_SWIFT_UNAVAILABLE("");

/** Creates a new filter of type ‘name‘.
 The filter‘s input parameters are set from the dictionary of key-value pairs.
 On OSX, any of the filter input parameters not specified in the dictionary will be undefined.
 On iOS, any of the filter input parameters not specified in the dictionary will be set to default values. */
+ (nullable CIFilter *)filterWithName:(NSString *)name
                  withInputParameters:(nullable CI_DICTIONARY(NSString*,id) *)params NS_AVAILABLE(10_10, 8_0);
2、上面创建滤镜对象时需要filterName,那怎么查看name以及每个CIFilter对象的属性呢?
CIFilter *filter = [CIFilter filterWithName:@"CIGaussianBlur"];
    NSLog(@"%@",filter.attributes);
在上面的代码中输出以下代码
2015-11-10 16:15:46.697 CoreImage[22672:246714] {
    "CIAttributeFilterAvailable_Mac" = "10.4";
    "CIAttributeFilterAvailable_iOS" = 6;
    CIAttributeFilterCategories =     (
        CICategoryBlur,
        CICategoryStillImage,
        CICategoryVideo,
        CICategoryBuiltIn
    );
    CIAttributeFilterDisplayName = "Gaussian Blur";
    CIAttributeFilterName = CIGaussianBlur;
    CIAttributeReferenceDocumentation = "http://developer.apple.com/cgi-bin/apple_ref.cgi?apple_ref=//apple_ref/doc/filter/ci/CIGaussianBlur";
    inputImage =     {
        CIAttributeClass = CIImage;
        CIAttributeDescription = "The image to use as an input image. For filters that also use a background image, this is the foreground image.";
        CIAttributeDisplayName = Image;
        CIAttributeType = CIAttributeTypeImage;
    };
    inputRadius =     {
        CIAttributeClass = NSNumber;
        CIAttributeDefault = 10;
        CIAttributeDescription = "The radius determines how many pixels are used to create the blur. The larger the radius, the blurrier the result.";
        CIAttributeDisplayName = Radius;
        CIAttributeIdentity = 0;
        CIAttributeMin = 0;
        CIAttributeSliderMax = 100;
        CIAttributeSliderMin = 0;
        CIAttributeType = CIAttributeTypeScalar;
    };
}
从上面的输出结果我们可以看到filter有CIAttributeFilterCategories、CIAttributeFilterDisplayName、CIAttributeFilterName、inputImage、inputRadius等属性。
在CIAttributeFilterCategories中可以看到滤镜有CICategoryBlur, CICategoryStillImage,CICategoryVideo, CICategoryBuiltIn种,在CIFilter类中有下面的两个方法能遍历出所有的滤镜名
/** Returns an array containing all published filter names in a category. */
+ (CI_ARRAY(NSString*) *)filterNamesInCategory:(nullable NSString *)category;

/** Returns an array containing all published filter names that belong to all listed categories. */
+ (CI_ARRAY(NSString*) *)filterNamesInCategories:(nullable CI_ARRAY(NSString*) *)categories;
获得到滤镜名之后就可以通过attributes属性查看filter对象的属性 ,通过KVC来设置属性值
 //和UIButton类似 通过简单参数确定CIFilter子类  简单工厂
    CIFilter *filter = [CIFilter filterWithName:@"CIAffineTransform"];
    //  NSLog(@"%@",filter.attributes);
    //将图片输入到滤镜中,打个比方:滤镜是个具有某个功能的容器,任何东西放进去,拿出来的时候就会附上效果。 KVC
    [filter setValue:ciimage forKey:@"inputImage"];
    [filter setValue: [NSValue valueWithCGAffineTransform:CGAffineTransformMakeRotation(30)] forKey:@"inputTransform"];
4.输出滤镜
1、通过UIImage的imageWithCIImage方法
//从滤镜容器中取出图片  这里还有一种输出方式:使用CIcontext  不知道这两种有什么优缺点,欢迎留言
    //CIImage *new = [filter valueForKey:kCIOutputImageKey];
    CIImage *outputImage = filter.outputImage;

    UIImageView *img = [[UIImageView alloc] initWithFrame:self.view.frame];
    img.image = [UIImage imageWithCIImage:outputImage];
    //img.image=[UIImage imageWithCIImage:outputImage scale:30 orientation:UIImageOrientationDown];
    [self.view addSubview:img];
2、通过通过UIImage的imageWithCGImage方法 此方法要用到CIContext
 //CIImage *new = [filter valueForKey:kCIOutputImageKey];
    CIImage *outputImage = filter.outputImage;

    CIContext *context=[CIContext contextWithOptions:nil];
    CGImageRef cgimg =[context createCGImage:outputImage fromRect:[outputImage extent]];

    UIImageView *img = [[UIImageView alloc] initWithFrame:self.view.frame];
    img.image=[UIImage imageWithCGImage:cgimg];
    [self.view addSubview:img];
    CGImageRelease(cgimg);
上面两种方法中,第一个每次调用都会生成一个CIContext。CIContext本来是可以重用以便提高性能和效率的。
5.完整代码
//
//  ViewController.m
//  CoreImage
//
//  Created by City--Online on 15/11/10.
//  Copyright © 2015年 City--Online. All rights reserved.
//

#import "ViewController.h"
#import <CoreImage/CoreImage.h>

@interface ViewController ()

@end

@implementation ViewController

- (void)viewDidLoad {
    [super viewDidLoad];
    CIImage *inputImg = [[CIImage alloc]initWithCGImage:[UIImage imageNamed:@"1.jpg"].CGImage];

    //和UIButton类似 通过简单参数确定CIFilter子类  简单工厂
    CIFilter *filter = [CIFilter filterWithName:@"CIAffineTransform"];

    //输出属性
    NSLog(@"%@",filter.attributes);

    //将图片输入到滤镜中,打个比方:滤镜是个具有某个功能的容器,任何东西放进去,拿出来的时候就会附上效果。 KVC
    [filter setValue:inputImg forKey:@"inputImage"];
    [filter setValue: [NSValue valueWithCGAffineTransform:CGAffineTransformMakeRotation(30)] forKey:@"inputTransform"];

    //从滤镜容器中取出图片  这里还有一种输出方式:使用CIcontext  不知道这两种有什么优缺点,欢迎留言
    //CIImage *new = [filter valueForKey:kCIOutputImageKey];
    CIImage *outputImage = filter.outputImage;

    //通过CIContext上下文 、imageWithCGImage输出滤镜
    CIContext *context=[CIContext contextWithOptions:nil];
    CGImageRef cgimg =[context createCGImage:outputImage fromRect:[outputImage extent]];

    UIImageView *img = [[UIImageView alloc] initWithFrame:self.view.frame];
    img.image=[UIImage imageWithCGImage:cgimg];
    [self.view addSubview:img];
    CGImageRelease(cgimg);

    //遍历每种滤镜下的滤镜名
    NSLog(@"%@",[CIFilter filterNamesInCategories:@[@"CICategoryBlur"]]);
    NSLog(@"%@",[CIFilter filterNamesInCategories:@[@"CICategoryVideo"]]);
    NSLog(@"%@",[CIFilter filterNamesInCategories:@[@"CICategoryStillImage"]]);
    NSLog(@"%@",[CIFilter filterNamesInCategories:@[@"CICategoryBuiltIn"]]);


}

- (void)didReceiveMemoryWarning {
    [super didReceiveMemoryWarning];
    // Dispose of any resources that can be recreated.
}

@end
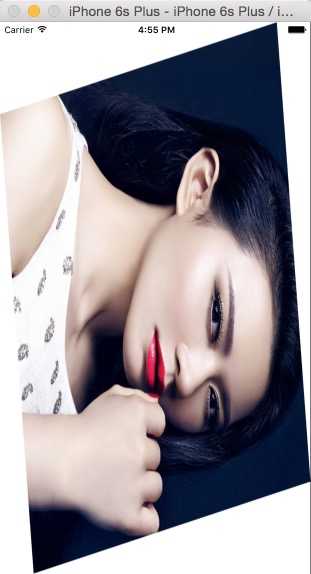
6.效果
标签:
原文地址:http://www.cnblogs.com/5ishare/p/4953584.html