标签:
最近经常要给2D游戏写一些新的shader来做特效。比起粒子特效,着色器特效可能更适合UI和2D元素上的表现。
先看一下效果:

关于在shaderlab种实现流光的文章很多,但很少有给UI实现的,并且常常只是Add一层颜色,并没有去表现“光”的效果。
以下是shader全文,后面会介绍一些细节:
  1 Shader "UI/Unlit/Flowlight"
  2 {
  3     Properties
  4     {
  5         [PerRendererData] _MainTex ("Sprite Texture", 2D) = "white" {}
  6         _Color ("Tint", Color) = (1, 1, 1, 1)
  7         [MaterialToggle] PixelSnap ("Pixel snap", float) = 0
  8
  9         /* Flowlight */
 10         _FlowlightTex ("Add Move Texture", 2D) = "white" {}
 11         _FlowlightColor ("Flowlight Color", Color) = (0, 0, 0, 1)
 12         _Power ("Power", float) = 1
 13         _SpeedX ("SpeedX", float) = 1
 14         _SpeedY ("SpeedY", float) = 0
 15         /* --------- */
 16
 17         /* UI */
 18         _StencilComp ("Stencil Comparison", Float) = 8
 19         _Stencil ("Stencil ID", Float) = 0
 20         _StencilOp ("Stencil Operation", Float) = 0
 21         _StencilWriteMask ("Stencil Write Mask", Float) = 255
 22         _StencilReadMask ("Stencil Read Mask", Float) = 255
 23         /* -- */
 24     }
 25
 26     SubShader
 27     {
 28         Tags
 29         {
 30             "Queue"="Transparent"
 31             "IgnoreProjector"="True"
 32             "RenderType"="Transparent"
 33             "PreviewType"="Plane"
 34             "CanUseSpriteAtlas"="True"
 35         }
 36
 37         Cull Off
 38         Lighting Off
 39         ZWrite Off
 40         Blend One OneMinusSrcAlpha
 41
 42         /* UI */
 43         Stencil
 44         {
 45             Ref [_Stencil]
 46             Comp [_StencilComp]
 47             Pass [_StencilOp]
 48             ReadMask [_StencilReadMask]
 49             WriteMask [_StencilWriteMask]
 50         }
 51         /* -- */
 52
 53         Pass
 54         {
 55         CGPROGRAM
 56             #pragma vertex vert
 57             #pragma fragment frag
 58             #pragma multi_compile _ PIXELSNAP_ON
 59             #include "UnityCG.cginc"
 60
 61             struct appdata_t
 62             {
 63                 float4 vertex : POSITION;
 64                 float4 color : COLOR;
 65                 float2 texcoord : TEXCOORD0;
 66             };
 67
 68             struct v2f
 69             {
 70                 float4 vertex : SV_POSITION;
 71                 fixed4 color : COLOR;
 72                 half2 texcoord : TEXCOORD0;
 73
 74                 /* Flowlight */
 75                 half2 texflowlight : TEXCOORD1;
 76                 /* --------- */
 77             };
 78
 79             fixed4 _Color;
 80
 81             /* Flowlight */
 82             fixed4 _FlowlightColor;
 83             float _Power;
 84             sampler2D _FlowlightTex;
 85             fixed4 _FlowlightTex_ST;
 86             fixed _SpeedX;
 87             fixed _SpeedY;
 88             /* --------- */
 89
 90             v2f vert(appdata_t IN)
 91             {
 92                 v2f OUT;
 93                 OUT.vertex = mul(UNITY_MATRIX_MVP, IN.vertex);
 94                 OUT.texcoord = IN.texcoord;
 95
 96                 /* Flowlight */
 97                 OUT.texflowlight = TRANSFORM_TEX(IN.texcoord, _FlowlightTex);
 98                 OUT.texflowlight.x += _Time * _SpeedX;
 99                 OUT.texflowlight.y += _Time * _SpeedY;
100                 /* --------- */
101
102                 OUT.color = IN.color * _Color;
103                 #ifdef PIXELSNAP_ON
104                 OUT.vertex = UnityPixelSnap (OUT.vertex);
105                 #endif
106
107                 return OUT;
108             }
109
110             sampler2D _MainTex;
111
112             fixed4 frag(v2f IN) : SV_Target
113             {
114                 fixed4 c = tex2D(_MainTex, IN.texcoord);
115
116                 /* Flowlight */
117                 fixed4 cadd = tex2D(_FlowlightTex, IN.texflowlight) * _Power;
118                 cadd.rgb *= c.rgb;
119                 c.rgb += cadd.rgb;
120                 c.rgb *= c.a;
121                 /* --------- */
122
123                 return c;
124             }
125         ENDCG
126         }
127     }
128 }
其实博文发出来之后这个改过一次,因为是用的Sprite-Default改的,能用在UI上但没有实现遮罩等等功能,这次补上。
/* UI */里的就是添加上的属于UI shader的部分,如果只是用在Sprite上的话这部分可以删掉。
而/* Flowlight */里的是从Sprite-Default基础上添加的部分,去掉之后就变成Sprite-Default原文了(
其实流程和正常的UV滚动叠加没有什么区别,注意要用UI传入的UV计算纹理坐标。
97 OUT.texflow = TRANSFORM_TEX(IN.texcoord, _FlowlightTex);
之后两张纹理在frag中叠加输出,需要注意的只有一行:
118 cadd.rgb *= c.rgb;
很多shader作者在写流光的时候只是把叠加纹理的颜色+=在了主纹理上,但如果先将叠加纹理乘以主纹理的颜色,就会让暗色变得更暗,更符合光吸收的感觉,再配合Power控制光强度可以更好地表现光。
当然这样一来的副作用就是流光纹理本身的颜色就没有用了,因为变成了只用灰度,毕竟本来目的只是在打光。需要颜色的话可以在这行的下一行乘以自定义颜色,这里就不写了。
以上是需要留意的部分。
具体流程上,在vert中先获得流光纹理的纹理坐标OUT.texflow,而后使用_Time时间参数让纹理坐标随时间偏移,注意偏移操作在顶点着色vert部分进行而不是在片段着色frag,这样不会浪费计算量。
之后在frag中进行叠加将流光纹理与主纹理叠加,注意是c.rgb += cadd.rgb,否则c += cadd会导致透明通道也被叠加上去,对下一步c的预乘透明通道产生影响。
在纹理的制作上,因为是循环滚动,所以为了不会让光出现过度频繁,需要在流光纹理的旁边加上合适宽度的黑色区域。
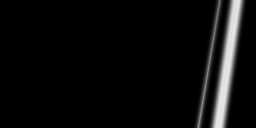
下面是本文开头动图使用的流光纹理:

它在光线纹理(正方形)的左侧加上了等宽的黑色区域,让纹理变为了2x1的宽高,这样再将材质的Tiling改为X:0.5 Y:1就可以让光出现的频率减半了,当然还可以把光线区域在PS再缩小为66%,这样就可以让光线的出现频率变为最初的1/3了(别忘了改Tilling),其他频率以此类推。
下一次会分享一下uGui用的溶解。说是uGui用,其实使用了UI或Sprite Shader的东西都可以用。
[Unity] Simple Shaderlab 1 // UI用的简单shader 1 - 流光
标签:
原文地址:http://www.cnblogs.com/twelveh/p/4963031.html