标签:
我的个人项目《丁丁印记》中加入了远程推送功能,按照操作说明去做还是比较容易实现的,但是学的不够不系统,因此这篇文章希望总结一下最新的iOS推送功能,因为iOS8之后的推送和致之前的版本是有所不同的,也希望想能帮助到需要的朋友。这篇文章将从零开始,向大家介绍远程推送功能的原理和使用。
什么是远程推送通知
顾名思义,就是从远程服务器推送给客户端的通知(需要联网)远程推送服务,又称为APNs(Apple Push Notification Services)。
为什么程序中需要远程推送功能
1.传统获取数据的局限性 只要用户关闭了app,就无法跟app的服务器沟通,无法从服务器上获得最新的数据内容
2.远程推送通知可以解决以上问题 不管用户打开还是关闭app,只要联网了,都能接收到服务器推送的远程通知
远程推送的注意点
1.所有的苹果设备,在联网状态下,都会与苹果的服务器建立长连接 什么是长连接 只要联网了,就一直建立连接
2.长连接的作用。比如:时间校准、系统升级、查找我的iPhone
3.长连接的好处 数据传输速度快 数据保持最新状态
iOS的推送机制
图中的各个部分的说明如下:
1.Provider:手机应用发出推送消息的服务器。
2.APNS:APNS(Apple Push Notification Service)则是苹果消息推送服务器
3.Client App:我们开发的应用。
你本地的服务器当需要给应用推送一条消息的时候,先要将消息发出到苹果推送服务器,然后再由苹果推送服务器将消息发到安装了该应用的手机。
用下面这张图更能清晰的说明推送的机制:
根据上图的逻辑我来给大家解释一下:
1.你的IOS应用需要去注册APNS消息推送功能。
2.当苹果APNS推送服收到来自你应用的注册消息就会返回一串device token给你(很重要)
3.将应用收到的device Token传给你本地的Push服务器。
4.当你需要为应用推送消息的时候,你本地的推送服务器会将消息,以及Device Token打包发送到苹果的APNS服
5.APNS再将消息推送给目的iphone然后推送给App
远程推送的具体实现:
我们公司的服务器,经过苹果的APNs服务器找到我们的设备,给我们设备上的客户端应用推送消息。那APNs服务器是如何找到我们的设备和设备上的应用呢,答案就是DeviceToken,DeviceToken需要配置推送证书才可以获得,推送证书需要知道我们的APP ID(应用的BundleID,应用唯一标识)和UDID(设备唯一标识),还有自己服务器的UDID,我们先来打一个推送证书,登录开发者中心,点击证书模块:
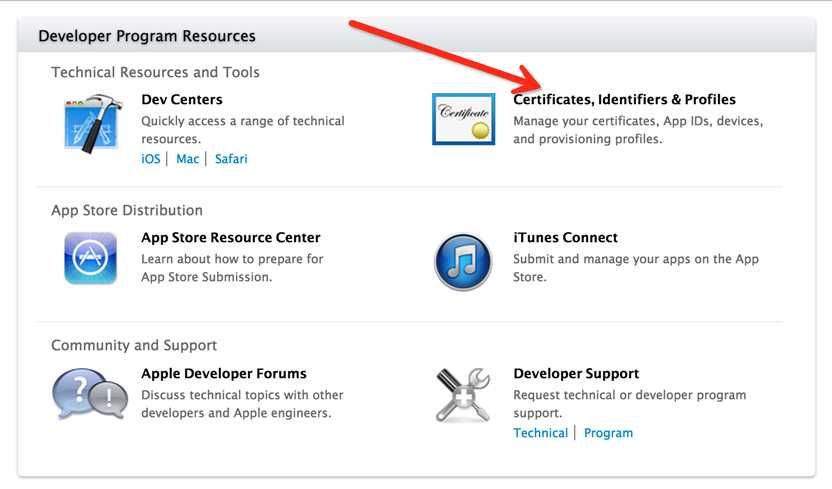
点击iOS Apps的证书(certificates )
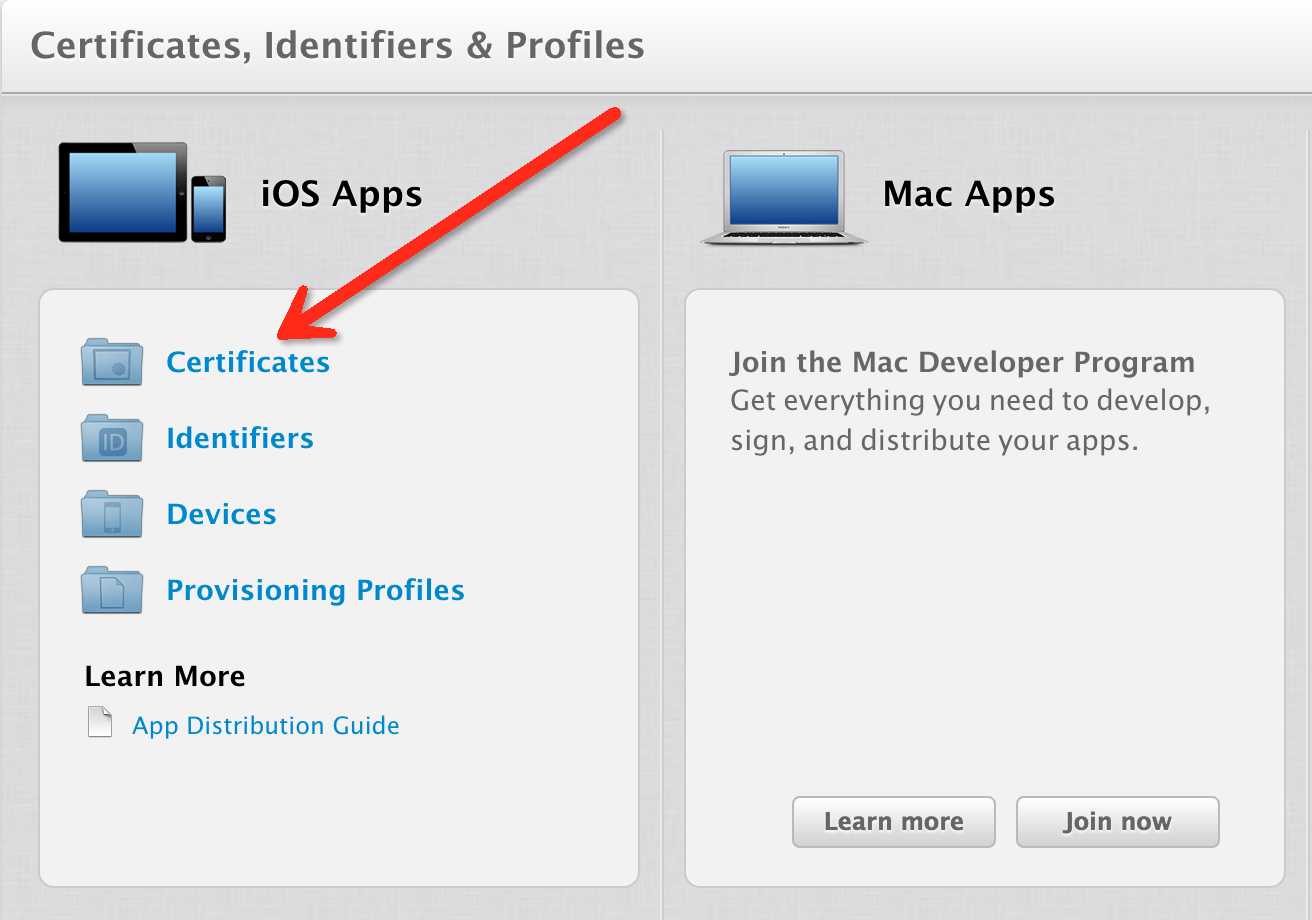
进入这样的界面
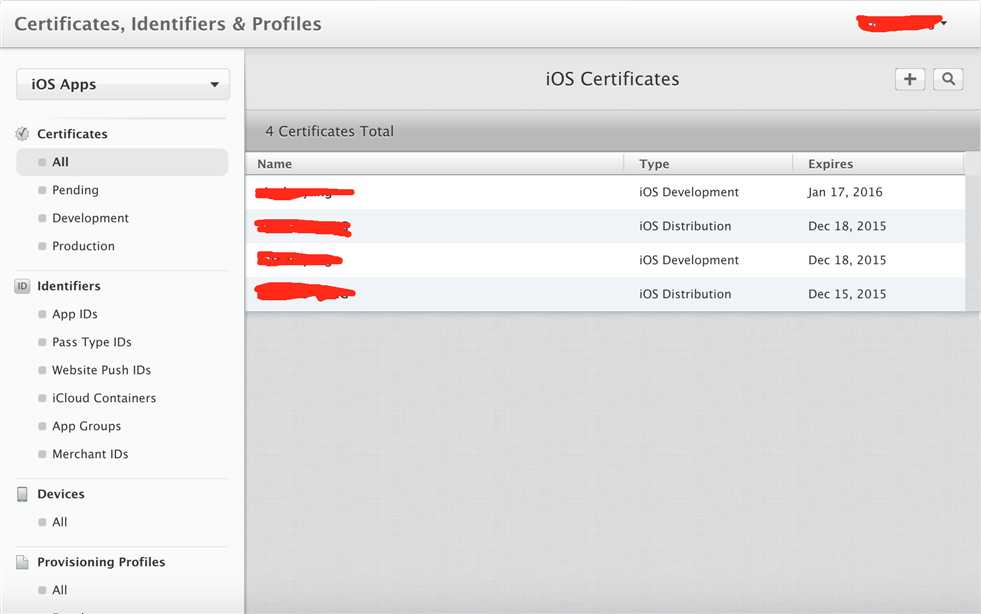
点击App IDs,然后点右上角的加号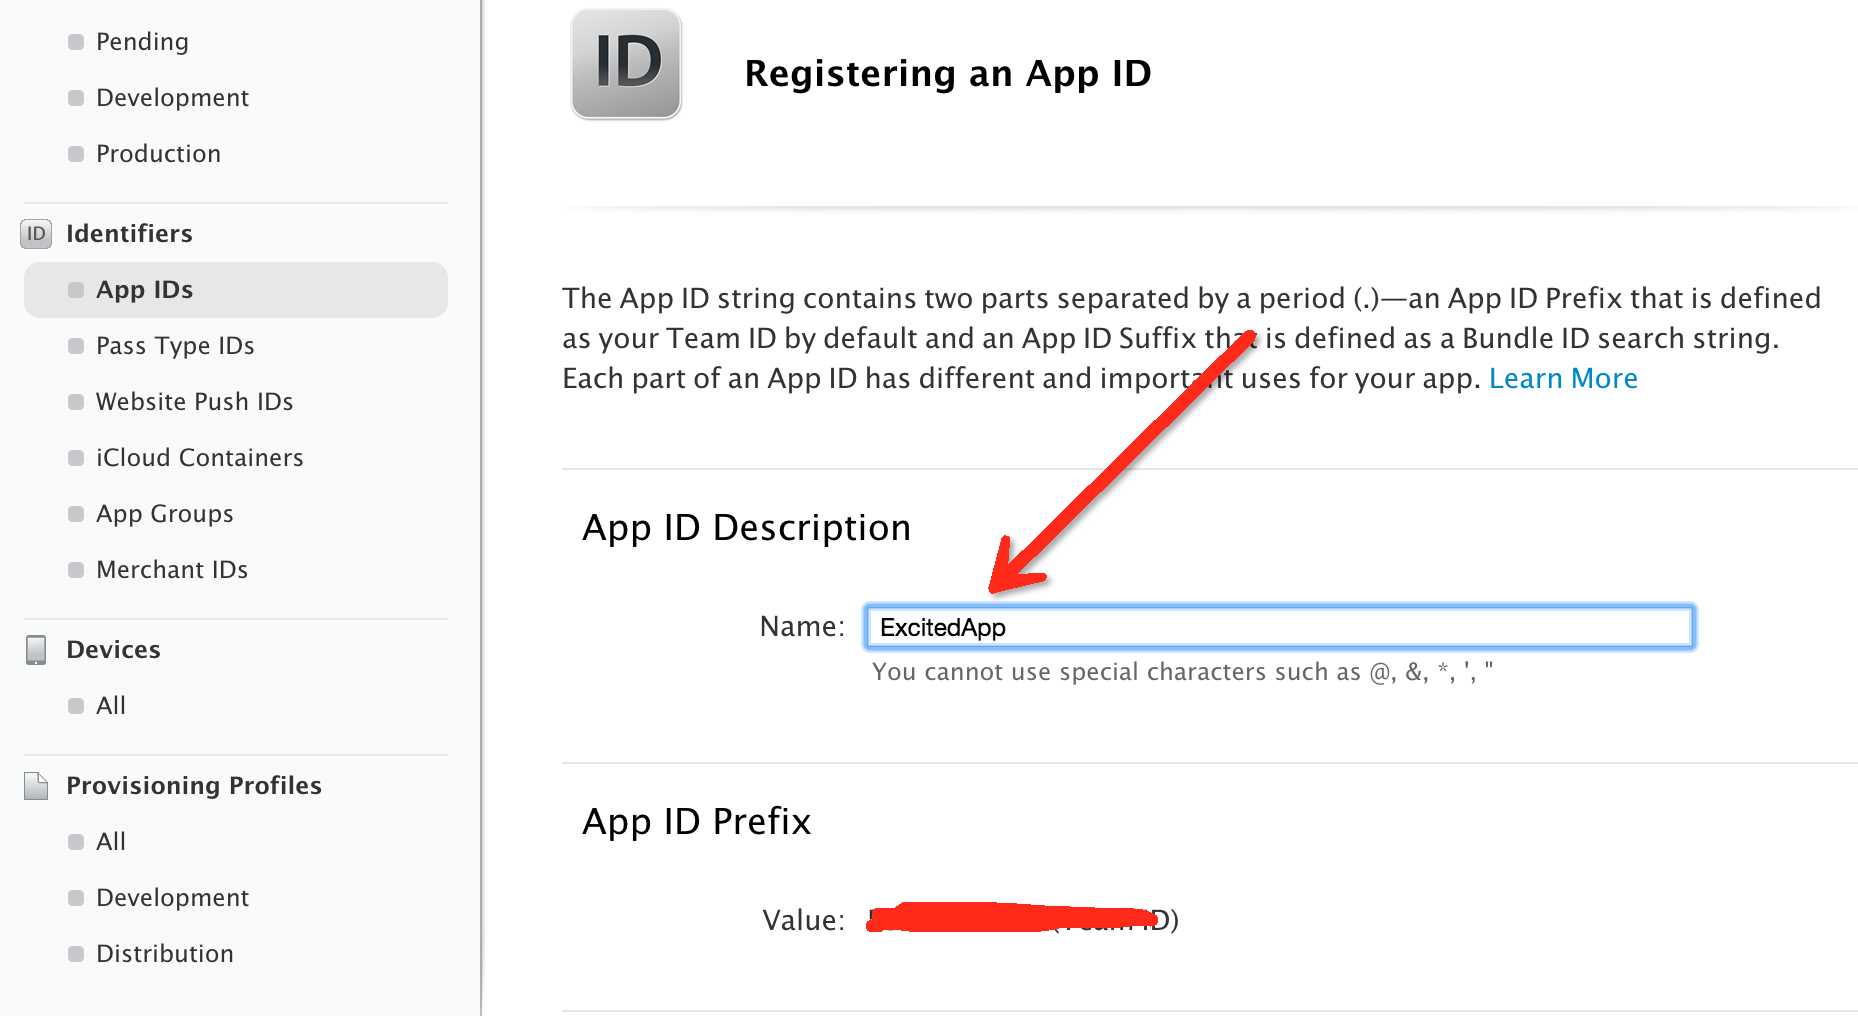
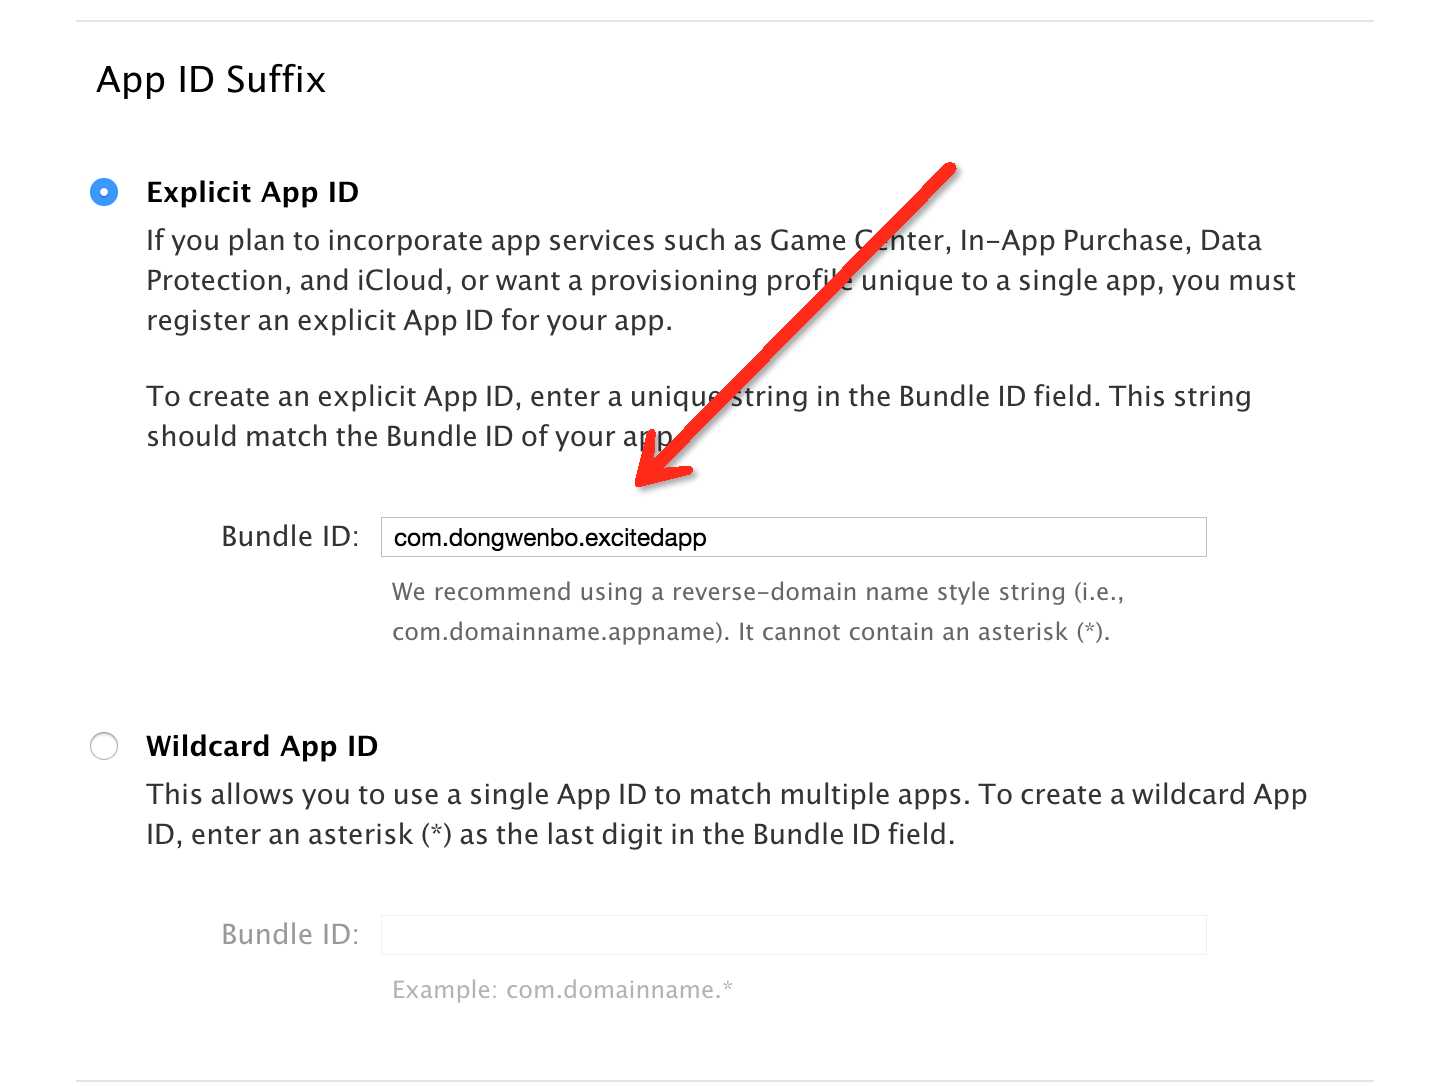
箭头所指为应用ID描述,我们假设写了一个很牛逼的应用,ExcitedApp,接下来我们填入App ID,注意这里的App ID是固定的,不能有星号
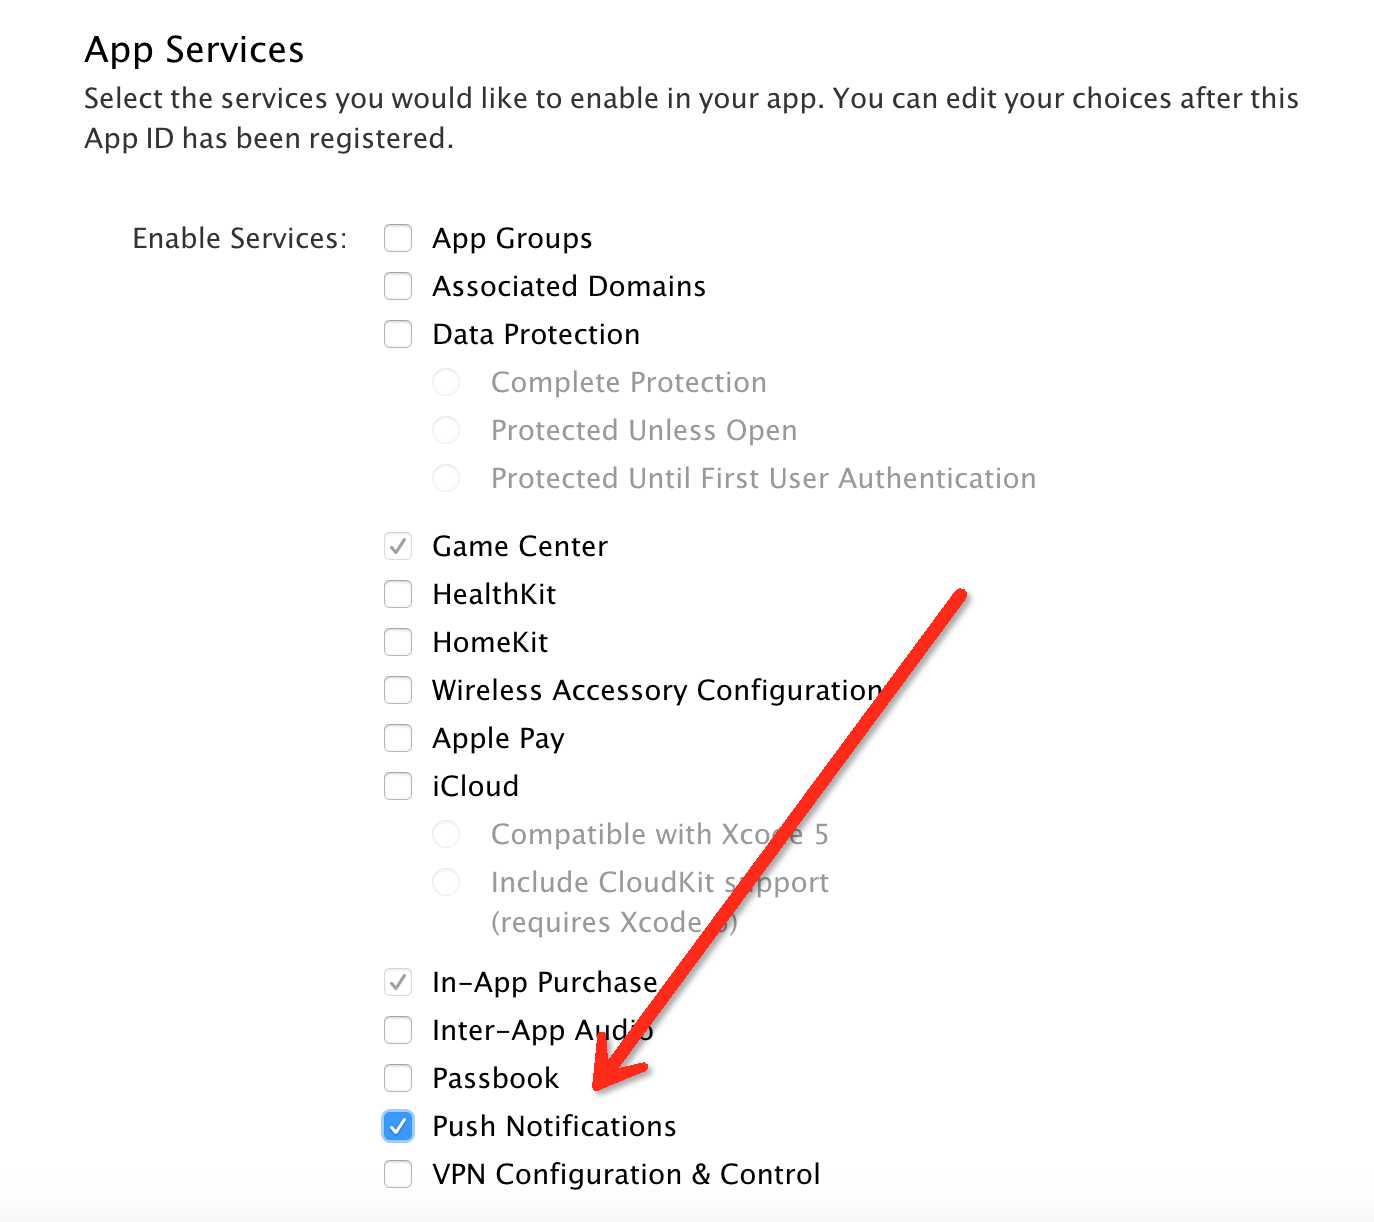
接下来我们添加App所需要的服务,然后点击Continue
一直点击下一步,完成,在App IDs 列表里面找到我们的ExcitedApp,我们看到
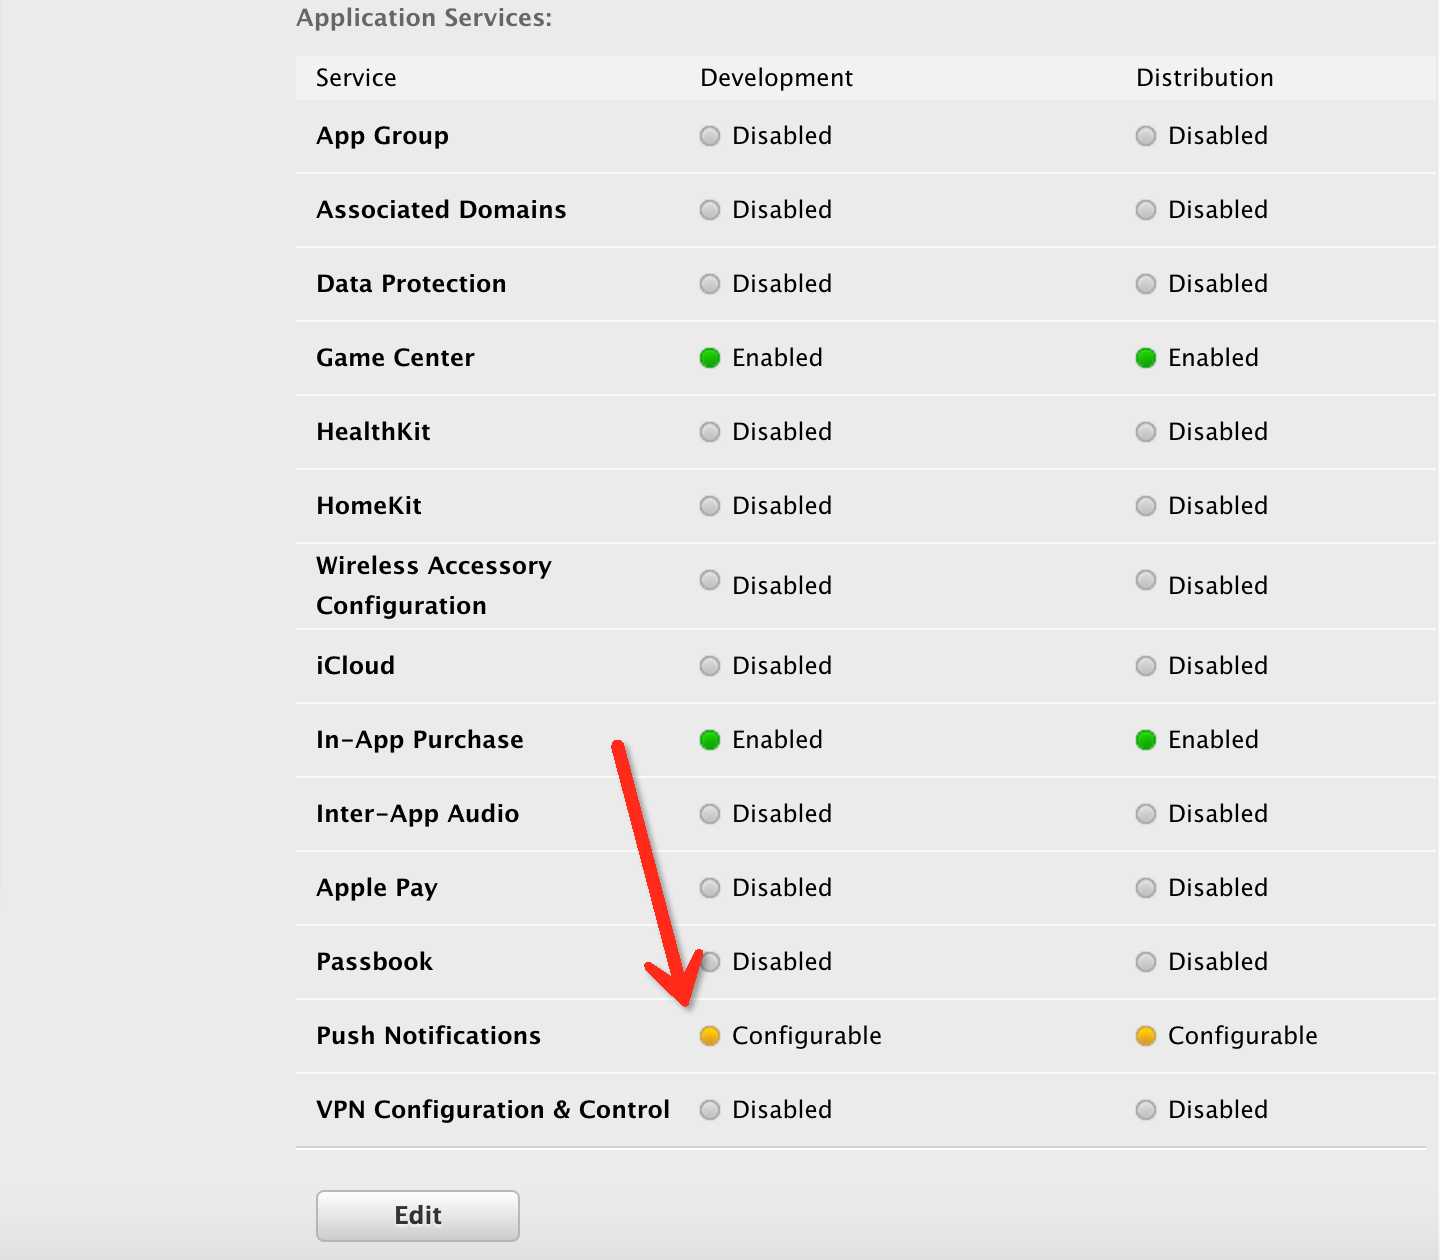
发现Push服务是黄色警告,这时点击Edit,找到推送模块,我们需要配置推送证书了,点击红色箭头所指的位置
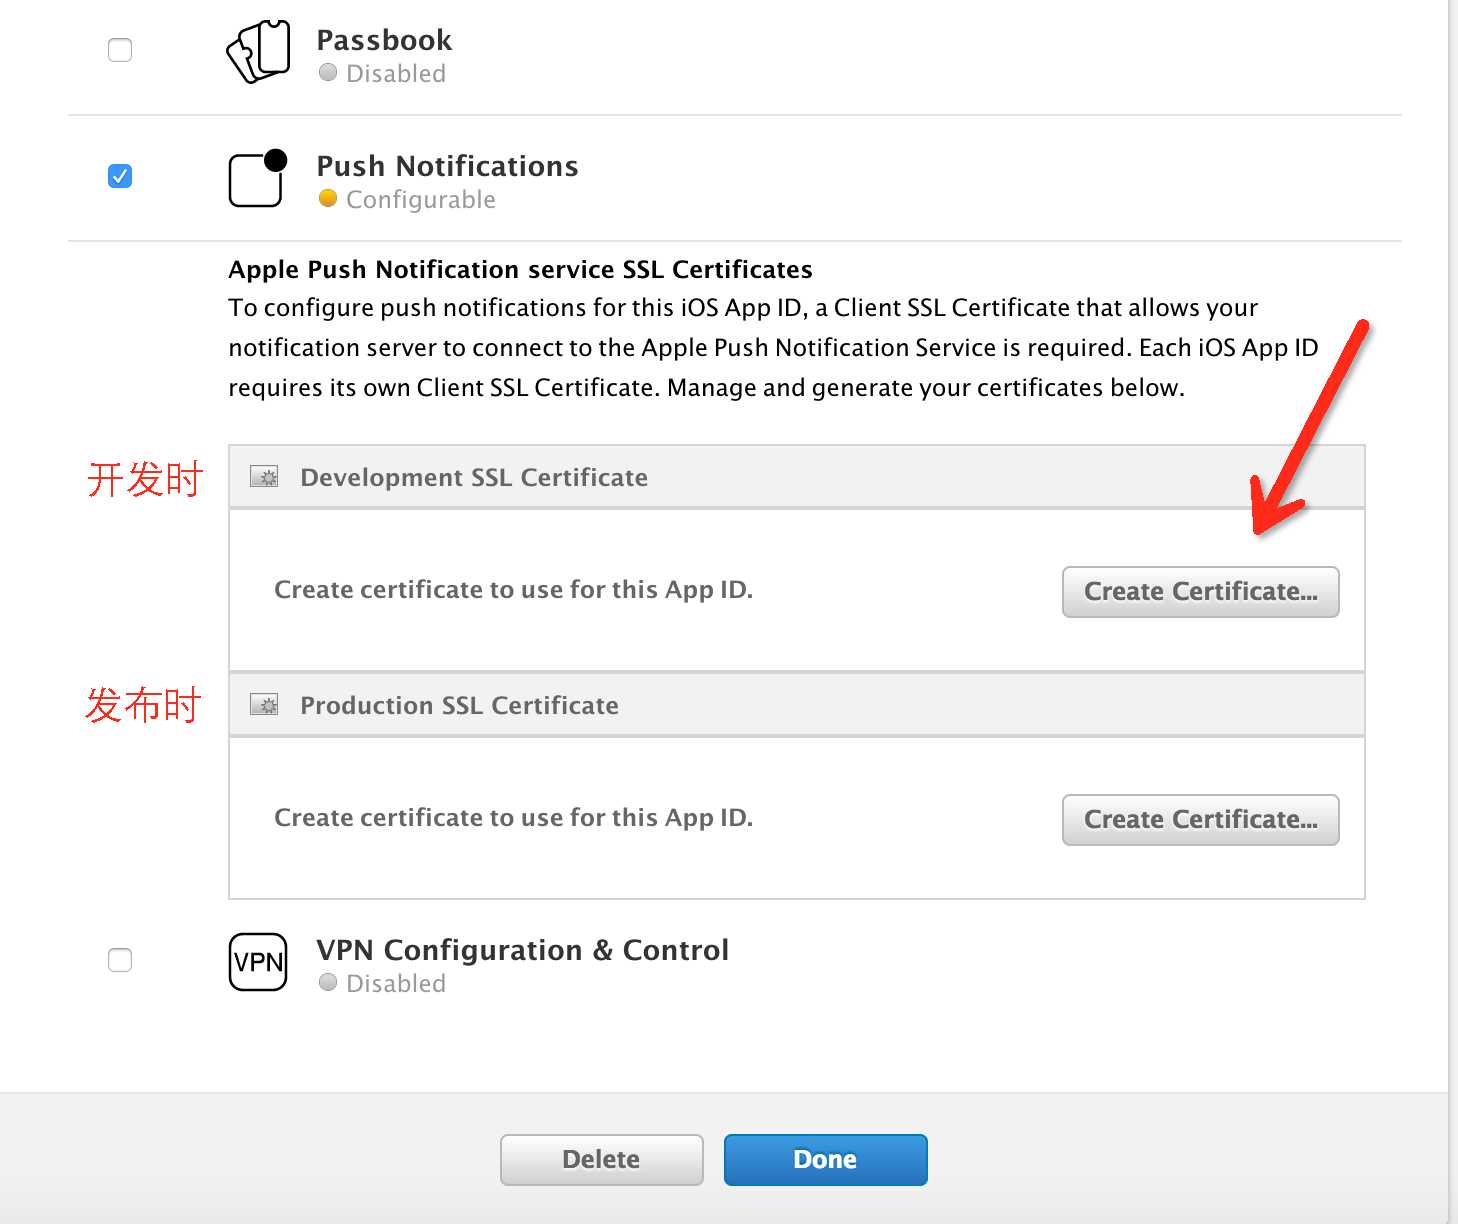
我们需要一个CSR文件,CSR是一个签名请求文件,意思就是让我们的MAC具有调试推送的权限,点击继续
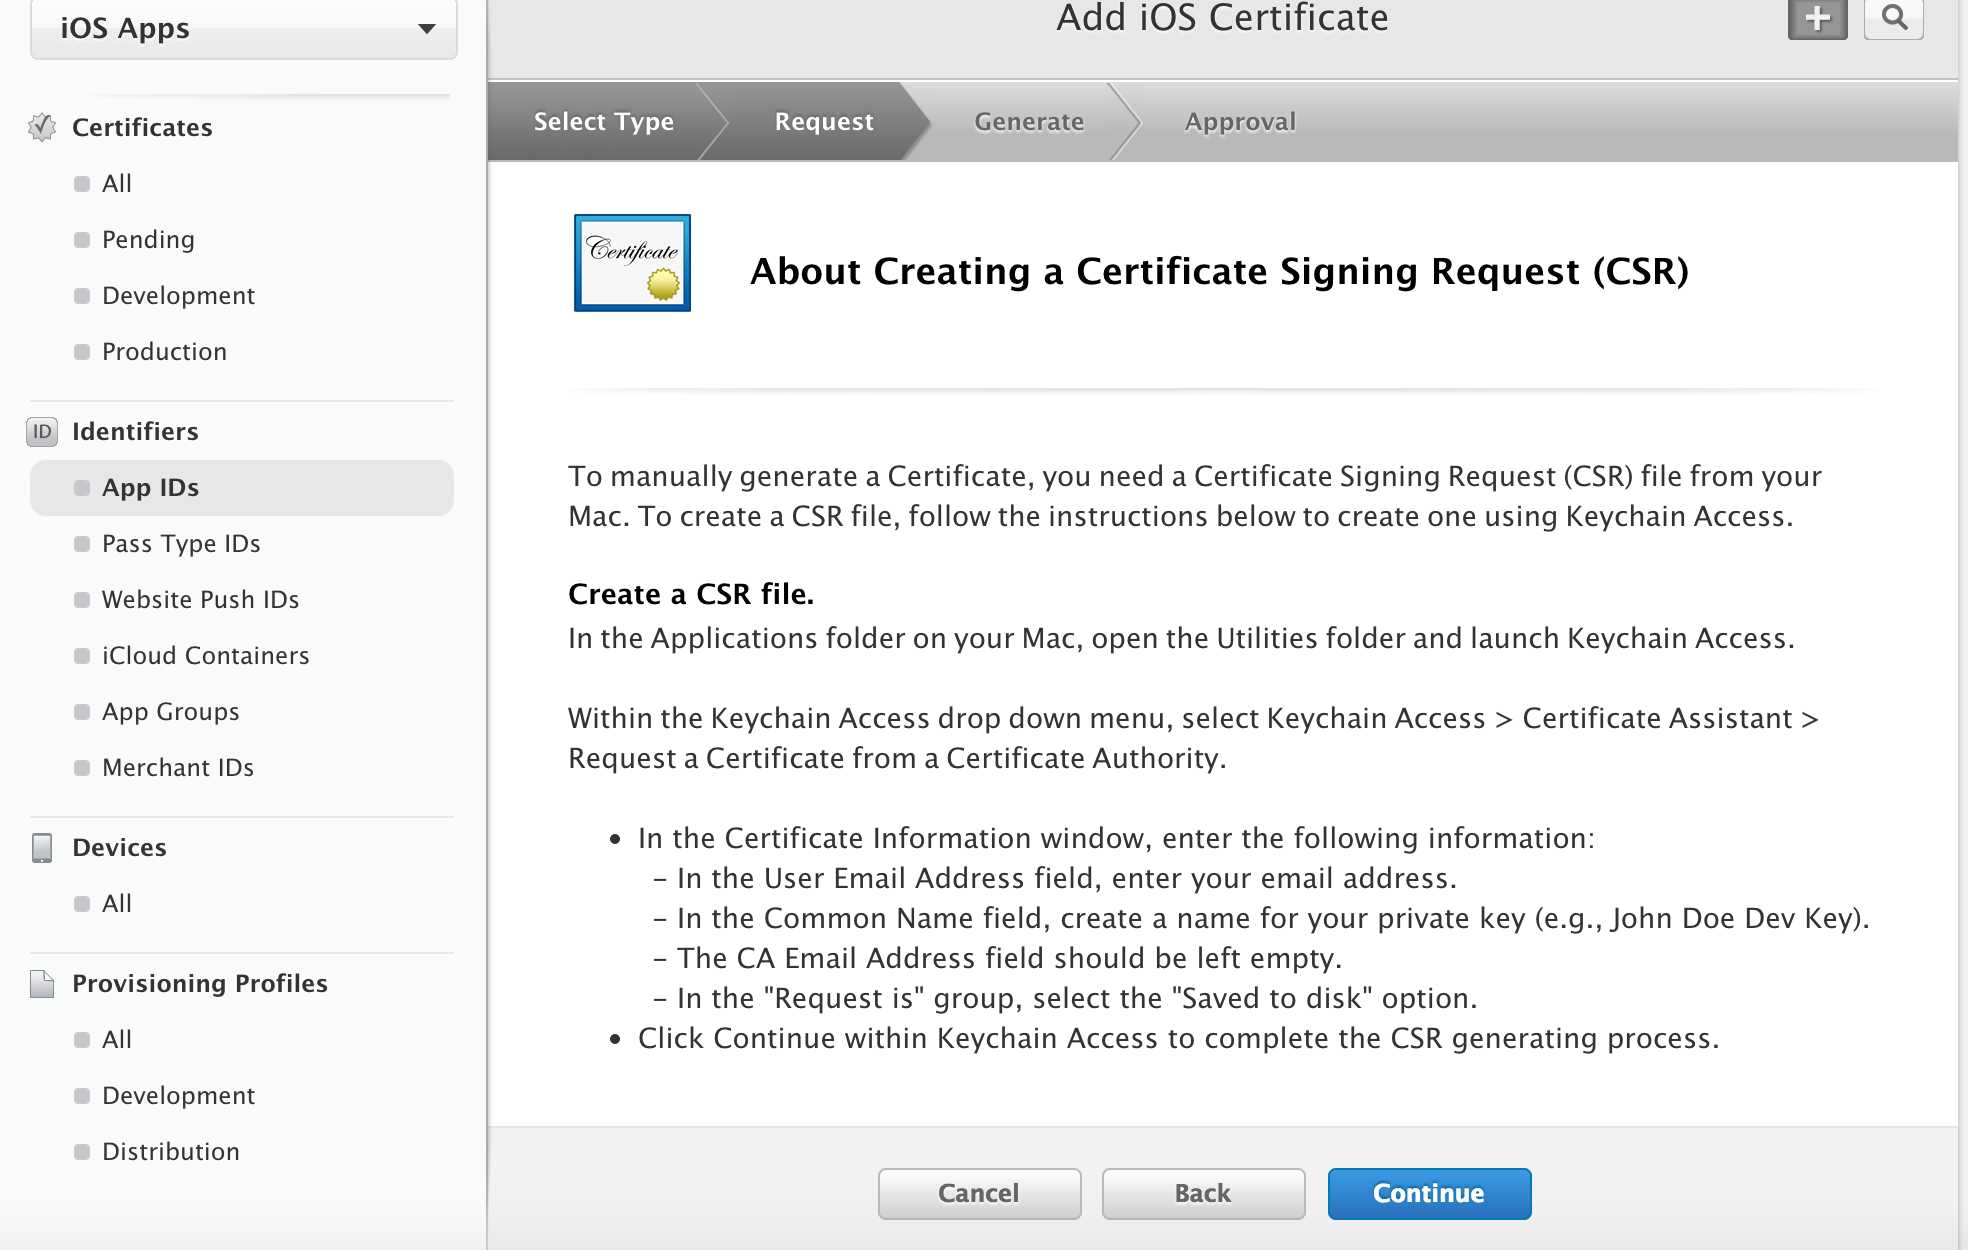
点击了继续我们看到
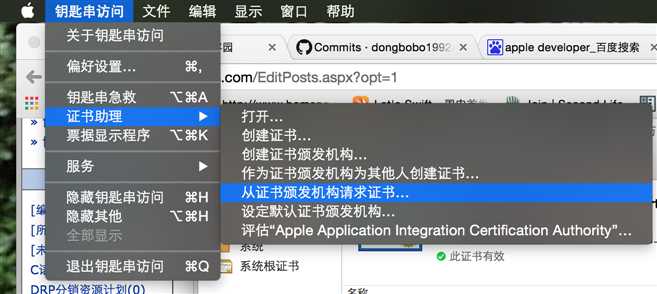
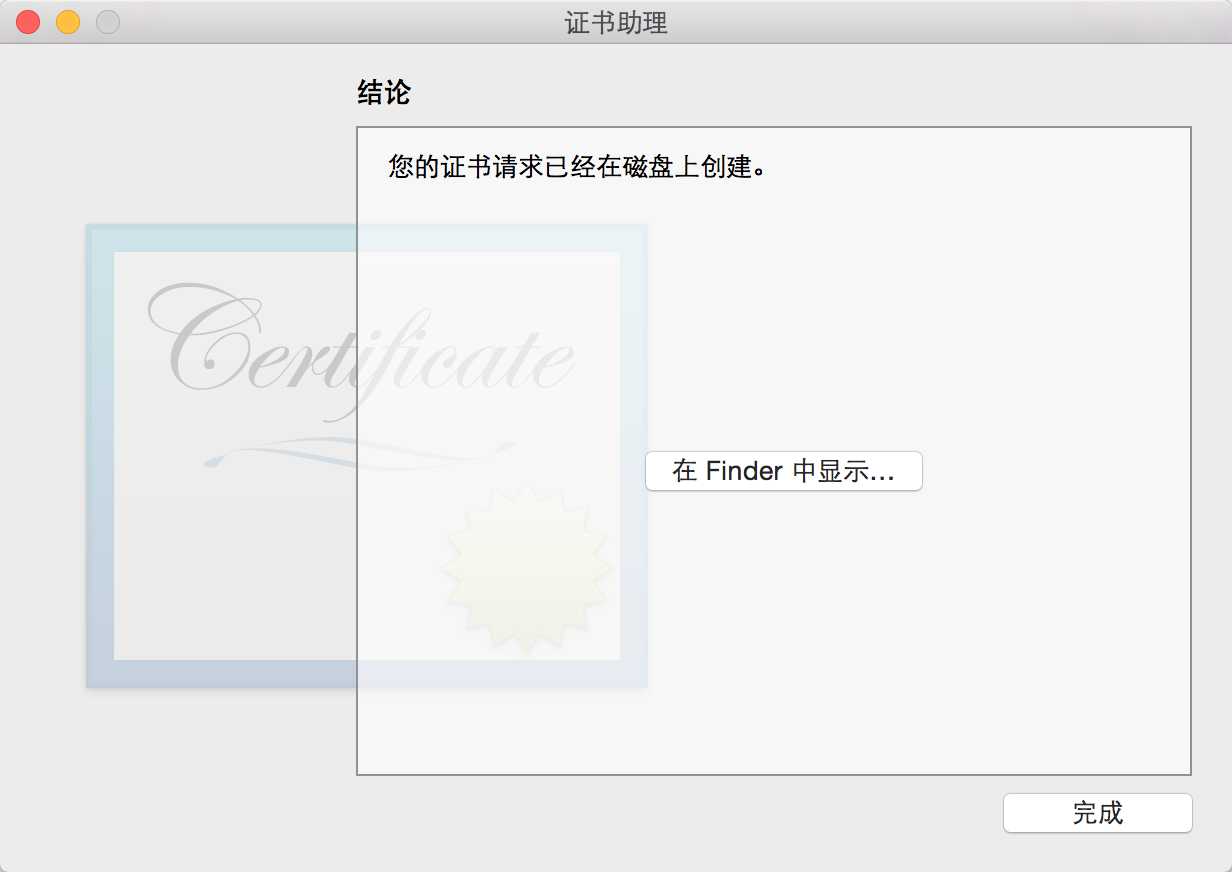
然后我们打开Mac上的钥匙串,从证书颁发机构请求证书
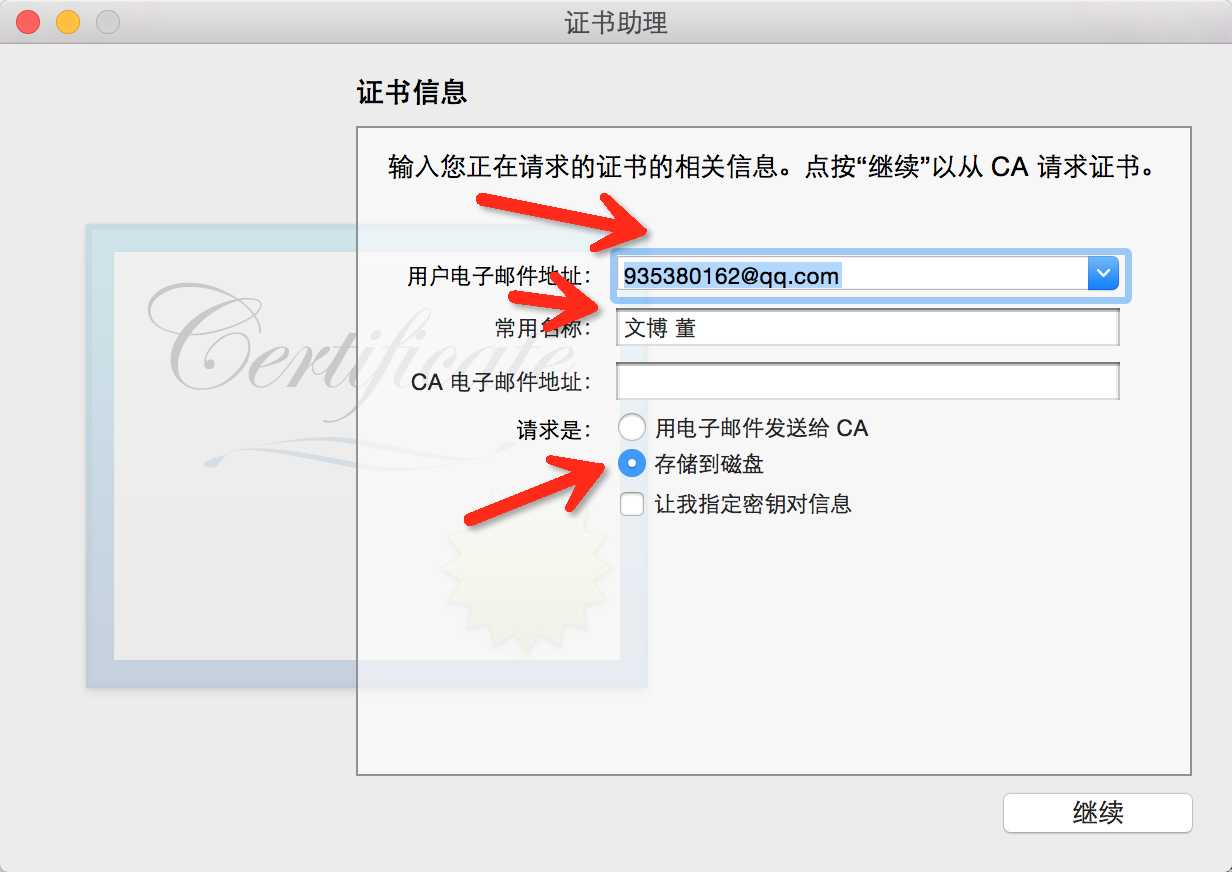
前两个随便写,最后选择存到磁盘
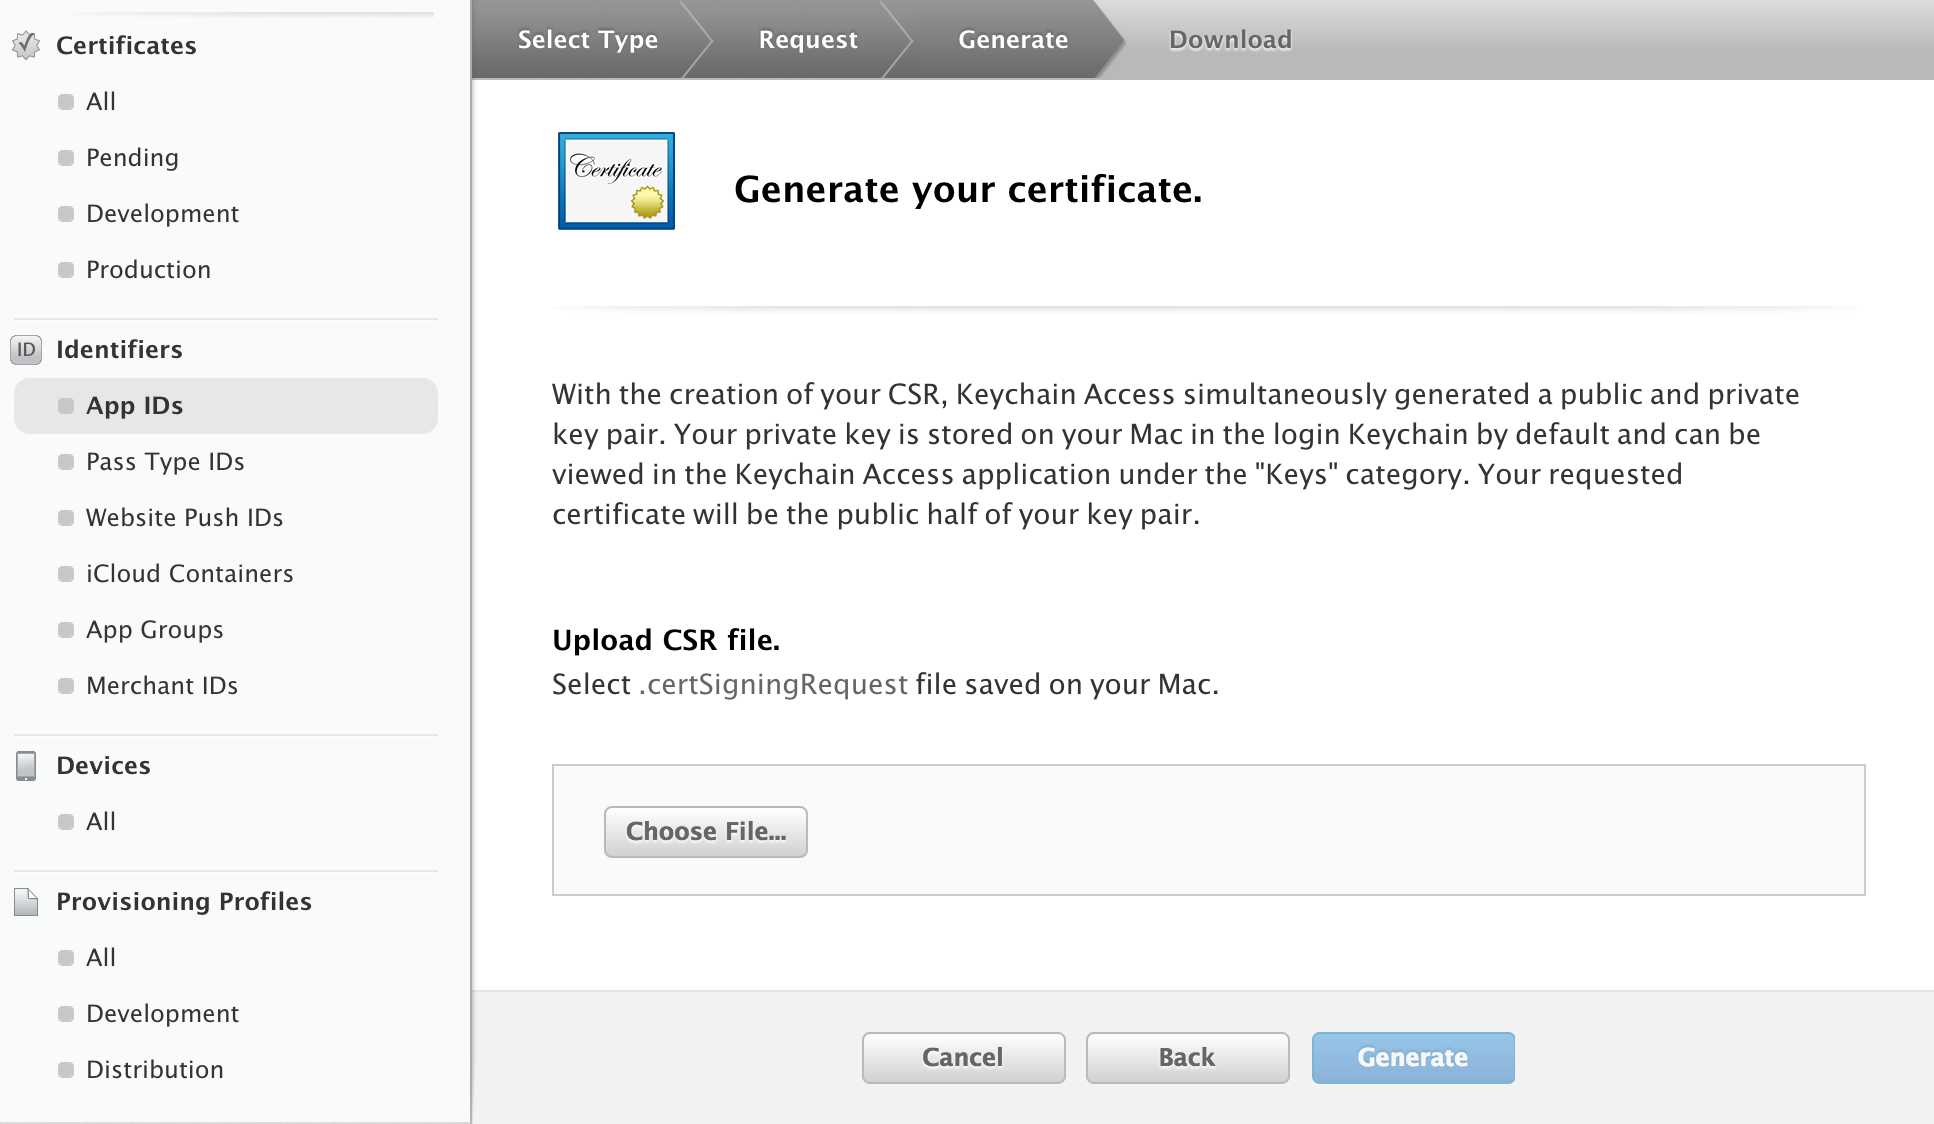
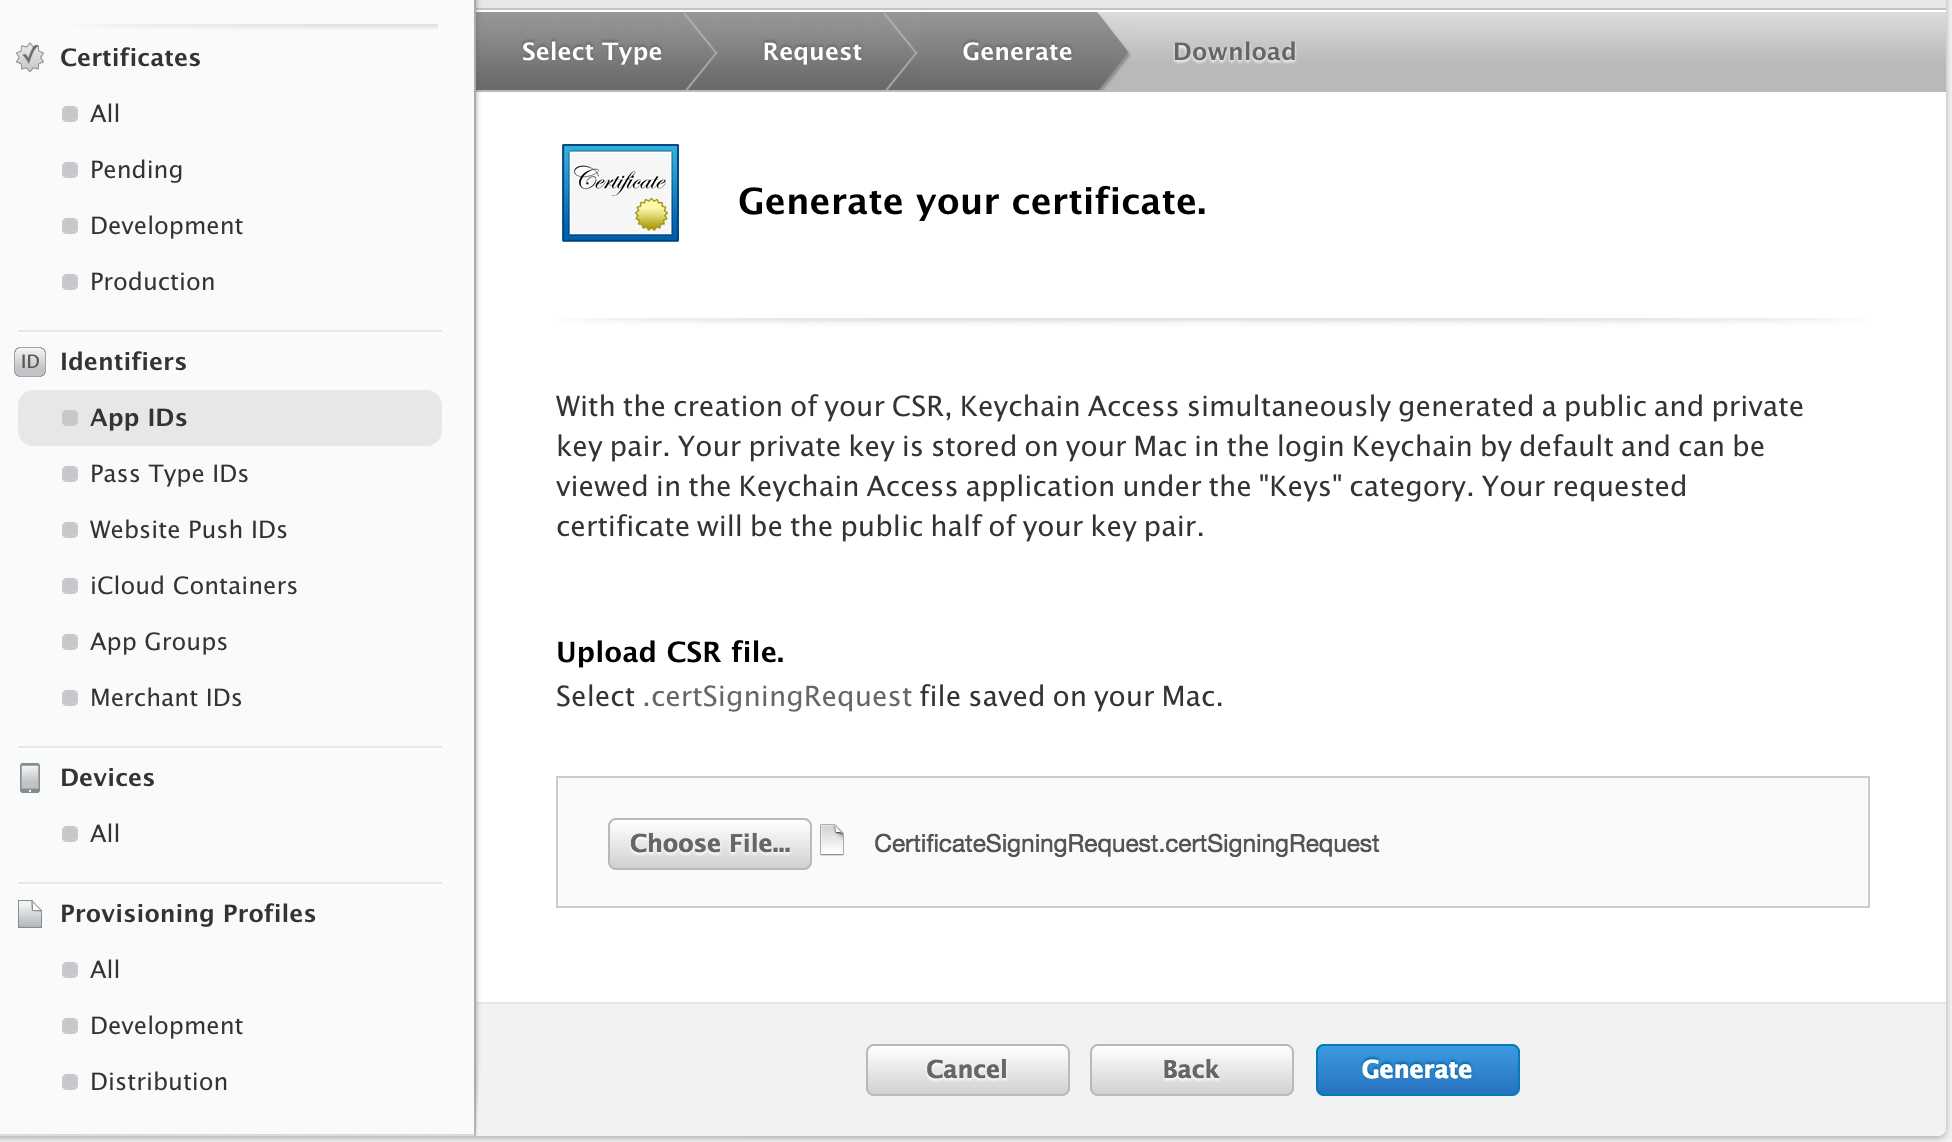
完成之后,接下来我们就可以添加CSR文件了
添加完,选择生成
证书配好了,下载下来
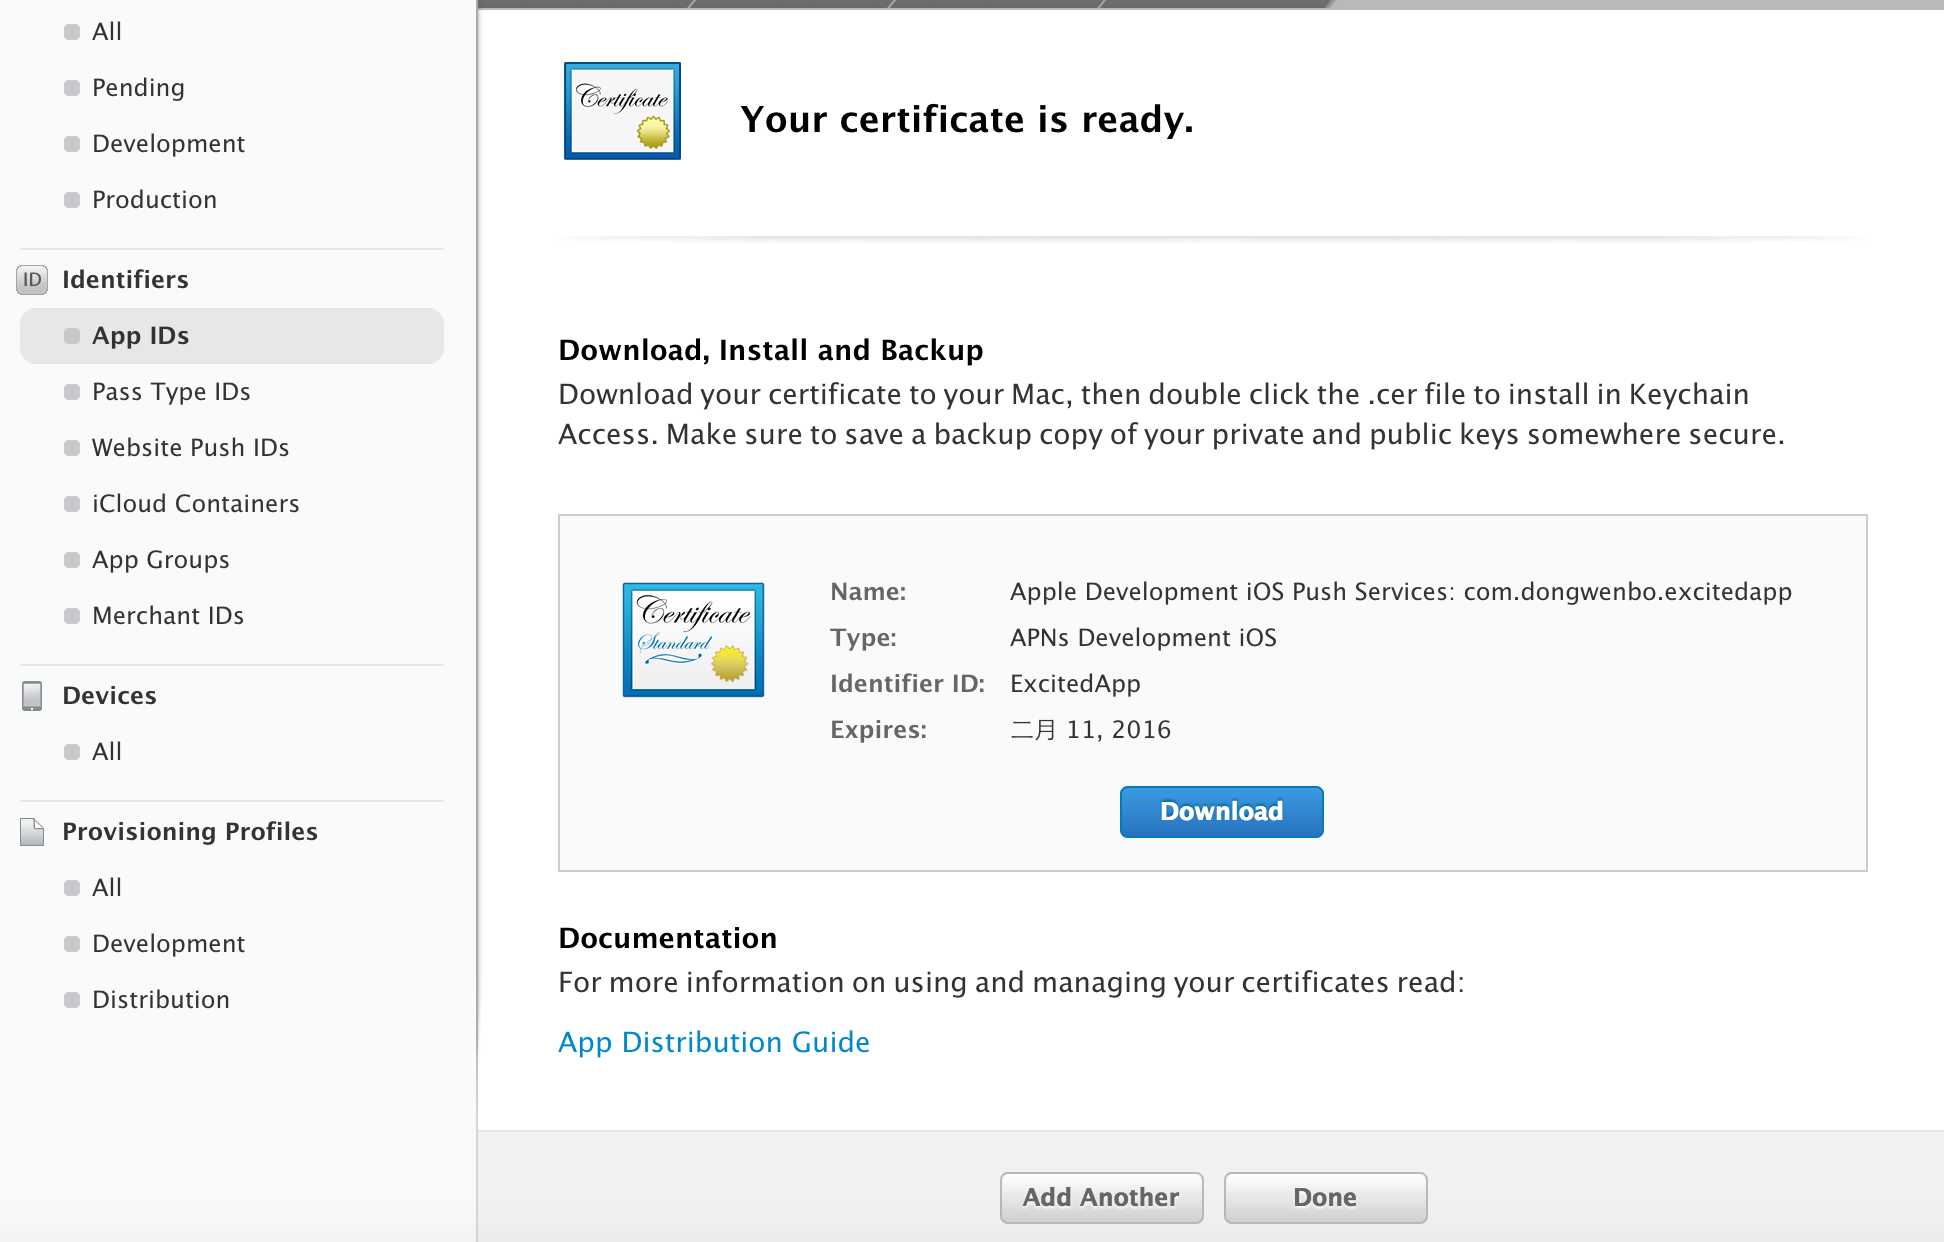
配好了!

顺带着我们把发布的证书也给配了,步骤都一样
打开我们刚刚下载的证书,添加到钥匙串中
![]()
终于能开始整我们的项目了,快哭了都
![]()
不要忘记修改bundle id 这里还要搞一个真机调试的证书才可以
真机调试的东西这里不累述,搞了这么多东西,我们终于可以拿到DeviceToken了
在AppDelegate.m中注册推送
#import "AppDelegate.h"

@implementation AppDelegate
@synthesize mainView = _mainView;

- (BOOL)application:(UIApplication *)application didFinishLaunchingWithOptions:(NSDictionary *)launchOptions
{
    if ([application respondsToSelector:@selector(isRegisteredForRemoteNotifications)])
    {
//由于ios8的推送跟ios7及以下的不一样,所以需要加判断来注册消息推送。
//IOS8
        //创建UIUserNotificationSettings,并设置消息的显示类类型
        UIUserNotificationSettings *notiSettings = [UIUserNotificationSettings settingsForTypes:(UIUserNotificationTypeBadge | UIUserNotificationTypeAlert | UIRemoteNotificationTypeSound) categories:nil];

        [application registerUserNotificationSettings:notiSettings];

    } else{ // ios7
        [application registerForRemoteNotificationTypes:(UIRemoteNotificationTypeBadge                                       |UIRemoteNotificationTypeSound                                      |UIRemoteNotificationTypeAlert)];
    }

    self.window = [[UIWindow alloc] initWithFrame:[[UIScreen mainScreen] bounds]];
    // Override point for customization after application launch.
    self.window.backgroundColor = [UIColor whiteColor];
    [self.window makeKeyAndVisible];

    self.mainView = [[MainViewController alloc] initWithNibName:@"MainViewController" bundle:nil];
    self.window.rootViewController = self.mainView;
    return YES;
}

- (void)application:(UIApplication *)application didRegisterForRemoteNotificationsWithDeviceToken:(NSData *)pToken{
    NSLog(@"---Token--%@", pToken);
}
  //会接收来自苹果服务器给你返回的deviceToken,然后你需要将它添加到你本地的推送服务器上。(很重要,决定你的设备能不能接收到推送消息)。
- (void)application:(UIApplication *)application didReceiveRemoteNotification:(NSDictionary *)userInfo{

    NSLog(@"userInfo == %@",userInfo);
    NSString *message = [[userInfo objectForKey:@"aps"]objectForKey:@"alert"];

    UIAlertView *alert = [[UIAlertView alloc] initWithTitle:@"提示" message:message delegate:self cancelButtonTitle:@"取消" otherButtonTitles:@"确定", nil nil];

    [alert show];
}
  //这个函数则是当设备接收到来自苹果推送服务器的消息时触发的,用来显示推送消息。
- (void)application:(UIApplication *)application didFailToRegisterForRemoteNotificationsWithError:(NSError *)error{

    NSLog(@"Regist fail%@",error);
}

- (void)applicationWillResignActive:(UIApplication *)application
{
    // Sent when the application is about to move from active to inactive state. This can occur for certain types of temporary interruptions (such as an incoming phone call or SMS message) or when the user quits the application and it begins the transition to the background state.
    // Use this method to pause ongoing tasks, disable timers, and throttle down OpenGL ES frame rates. Games should use this method to pause the game.
}

- (void)applicationDidEnterBackground:(UIApplication *)application
{
    // Use this method to release shared resources, save user data, invalidate timers, and store enough application state information to restore your application to its current state in case it is terminated later.
    // If your application supports background execution, this method is called instead of applicationWillTerminate: when the user quits.
}

- (void)applicationWillEnterForeground:(UIApplication *)application
{
    // Called as part of the transition from the background to the inactive state; here you can undo many of the changes made on entering the background.
}

- (void)applicationDidBecomeActive:(UIApplication *)application
{
    // Restart any tasks that were paused (or not yet started) while the application was inactive. If the application was previously in the background, optionally refresh the user interface.
}

- (void)applicationWillTerminate:(UIApplication *)application
{
    // Called when the application is about to terminate. Save data if appropriate. See also applicationDidEnterBackground:.
}

@end
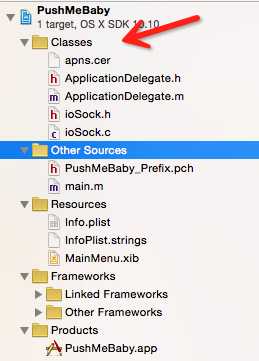
将我们的推送证书添加到项目目录
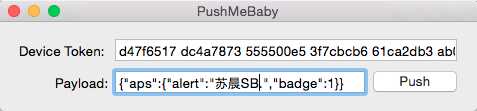
接下来我们用PushMebaby来测试一下我们的推送。PushMebaby下载地址:https://github.com/stefanhafeneger/PushMeBaby/
如果您的操作正确,那恭喜你,接下来手机上就可以收到推送了。
如果没有收到,很遗憾的通知您,请好好检查是否各个环节配置正确。
标签:
原文地址:http://www.cnblogs.com/JackieHoo/p/4987045.html

