标签:
2015-11-27
目录
1.关闭防火墙
2.配置yum仓库
3.安装基础包
4.安装apache和php
5.安装nagios(主程序)
6.安装nagiosQL(nagios的web管理工具)
7.安装nagios-plugin(nagios插件)
8.安装NRPE(nagios插件)
1.关闭防火墙
service iptables stop
service iptables status
setenforce 0
getenforce
2.配置yum仓库
#!/bin/bash
### AUTHOR: Leo
### DATE: 2015/10/25
### NAME:yum.sh
### DESC:配置yum仓库
wget http://mirrors.opencas.cn/epel/epel-release-latest-6.noarch.rpm
wget http://pkgs.repoforge.org/rpmforge-release/rpmforge-release-0.5.3-1.el6.rf.x86_64.rpm
rpm -ivh epel-release-latest-6.noarch.rpm
rpm -ivh rpmforge-release-0.5.3-1.el6.rf.x86_64.rpm
yum clean all && yum makecache
cd /etc/yum.repos.d && ls -hl
3.安装基础包
yum install -y cpp gcc-c++ gcc glibc glibc-common gd gd-devel xinetd openssl- devel fontconfig-devel libjpeg-devel libpng-devel gd-devel perl-GD mailx postfix libstdc++ glib2-devel
4.安装apache和php
yum -y install httpd php php-mysql php-gd php-devel php-ldap php-xml php-mbstring
#修改apache的主配置文件/etc/httpd/conf/httpd.conf
User nagios
Group nagios
ServerName localhost:80
DocumentRoot "/var/www/html"
DirectoryIndex index.php index.html
AddHandler php5-script .php
AddType text/html .php
AddType application/x-httpd-php .php
#重启apache服务
service httpd restart
#测试访问
vim /var/www/html/index.html
this is a test !
curl 10.10.2.89
http://10.10.2.89/


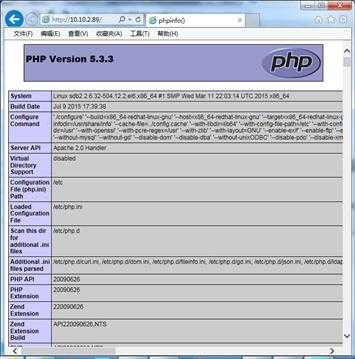
vim /var/www/html/index.php
<?php
phpinfo();
?>
curl 10.10.2.89
http://10.10.2.89/
5.安装nagios(主程序)
#创建用户nagios、apache
useradd -M -s /sbin/nologin nagios
useradd apache
#创建用户组nagcmd,用于从Web 接口执行外部命令
groupadd nagcmd
#添加nagios 和apache 用户到该组
usermod -G nagcmd apache
usermod -a -G nagcmd nagios
#创建目录
mkdir /usr/local/nagios
#修改属主
chown -R nagios.nagios /usr/local/nagios
#下载nagios源码包
wget http://nchc.dl.sourceforge.net/project/nagios/nagios-4.x/nagios-4.1.1/nagios-4.1.1.tar.gz
#解压nagios源码包
tar -zxf nagios-4.1.1.tar.gz -C /usr/local/src/ && cd /usr/local/src/nagios-4.1.1
#配置环境
./configure --with-group=nagios --with-user=nagios --with-command-group=nagcmd --with-gd-lib=/usr/lib --with-gd-inc=/usr/include

*** Configuration summary for nagios 4.1.1 08-19-2015 ***:

 General Options:
 -------------------------
        Nagios executable:  nagios
        Nagios user/group:  nagios,nagios
       Command user/group:  nagios,nagcmd
             Event Broker:  yes
        Install ${prefix}:  /usr/local/nagios
    Install ${includedir}:  /usr/local/nagios/include/nagios
                Lock file:  ${prefix}/var/nagios.lock
   Check result directory:  ${prefix}/var/spool/checkresults
           Init directory:  /etc/rc.d/init.d
  Apache conf.d directory:  /etc/httpd/conf.d
             Mail program:  /bin/mail
                  Host OS:  linux-gnu
          IOBroker Method:  epoll

 Web Interface Options:
 ------------------------
                 HTML URL:  http://localhost/nagios/
                  CGI URL:  http://localhost/nagios/cgi-bin/
 Traceroute (used by WAP):  /bin/traceroute

#编译安装
make all && make install
#生成init 启动脚本
make install-init
#设置相应的目录权限
make install-commandmode
#生成模板配置文件
make install-config
#生成apache 配置文件
make install-webconf
/etc/httpd/conf.d/nagios.conf
#设置启动级别,并启动服务
chkconfig --add nagios &&chkconfig --level 35 nagios on && service nagios start
#验证Nagios配置文件的正确性
/usr/local/nagios/bin/nagios -v /usr/local/nagios/etc/nagios.cfg
Total Warnings: 0
Total Errors:   0
#添加apache访问用户nagiosadmin,密码nagiosadmin
htpasswd -bc /usr/local/nagios/etc/htpasswd.users nagiosadmin nagiosadmin
#重启apache和nagios服务
service nagios restart
service httpd restart
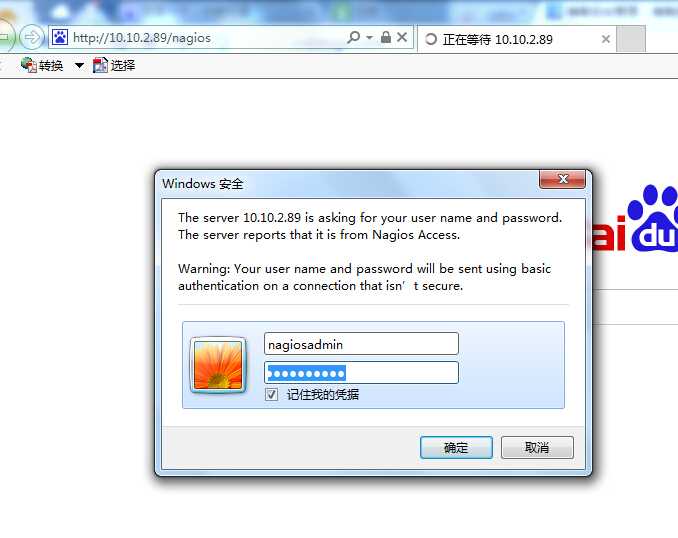
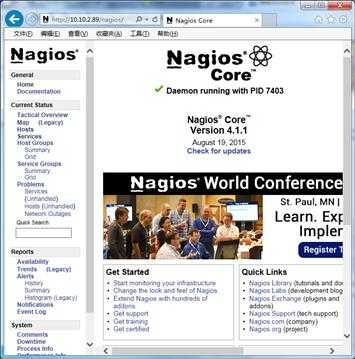
#使用物理机浏览器测试访问nagios:
http://10.10.2.89/nagios
用户nagiosadmin,密码nagiosadmin
6.安装nagiosQL(nagios的web管理工具)
#安装mysql
yum -y install mysql mysql-server mysql-devel
#下载nagiosql源码包
wget http://nchc.dl.sourceforge.net/project/nagiosql/nagiosql/NagiosQL%203.2.0/nagiosql_320.tar.gz
#解压nagiosql源码包到/usr/local/nagios目录下
tar -zxf nagiosql_320.tar.gz && cp -a nagiosql32 /usr/local/nagios/nagiosql
#建立nagiosQL导出nagios配置文件的目录,并修改权限,否则在浏览器进行网页上安装会报错
chown -R nagios:nagios /usr/local/nagios/nagiosql
chmod 777 /usr/local/nagios/nagiosql/config/
mkdir -p /usr/local/nagios/nagiosql/etc/{hosts,services,backup,import}
mkdir -p /usr/local/nagios/nagiosql/etc/backup/{hosts,services}
chown -R nagios:nagios /usr/local/nagios/nagiosql/
#修改/etc/httpd/conf.d/nagios.conf,添加如下内容:
Alias /nagiosQL "/usr/local/nagios/nagiosql"
<Directory "/usr/local/nagios/nagiosql">
Options None
AllowOverride None
Order allow,deny
Allow from all
</Directory>
#修改php.ini的timezone
date.timezone = Asia/ShangHai
#修改php会话权限
chmod 777 /var/lib/php/session/
#赋予mysql的root用户远程访问和grant权限
mysql -uroot -ppro#pateo
mysql> grant all on *.* to root@‘%‘ identified by ‘pro#pateo‘ with grant option;
mysql> flush privileges;
#重启apache服务
service httpd restart
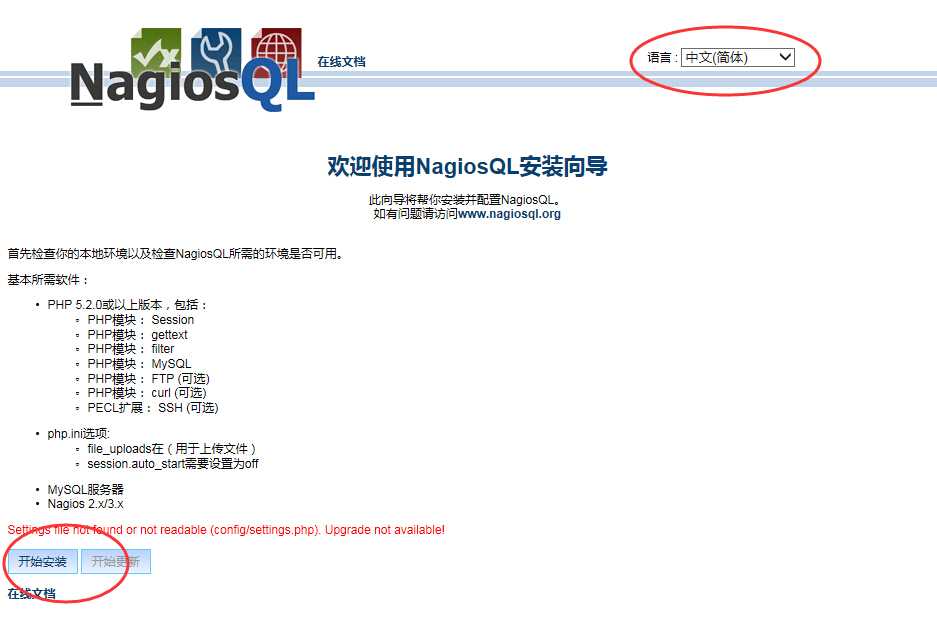
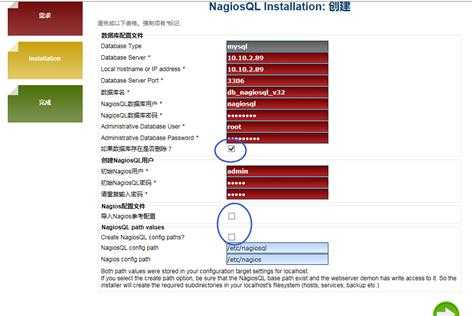
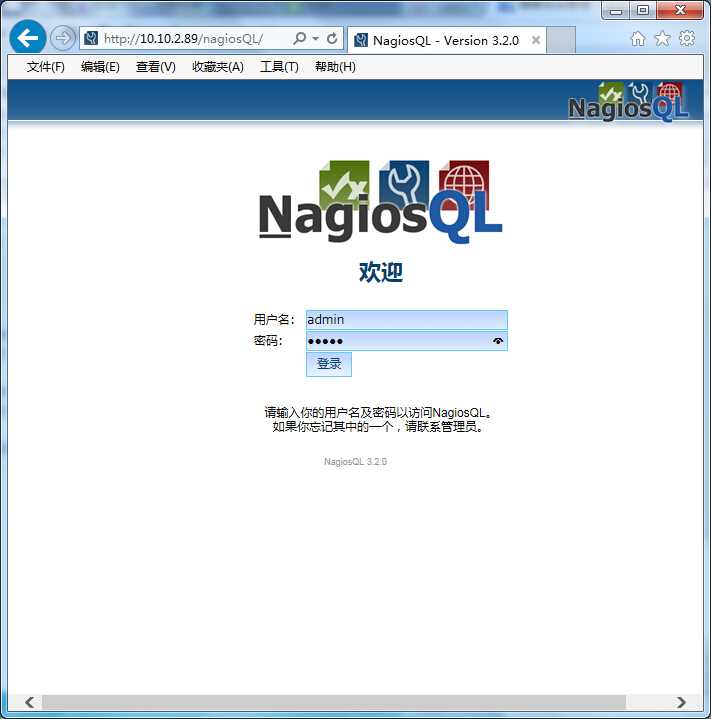
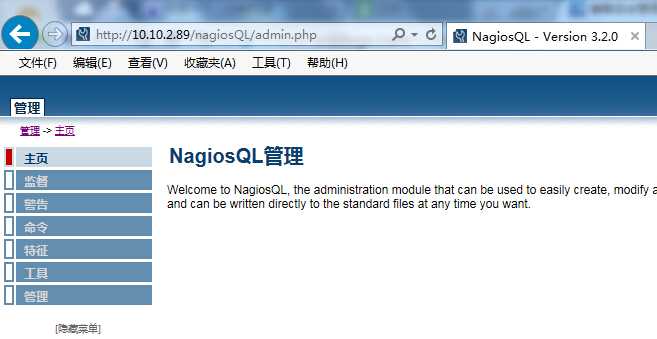
#物理机浏览器测试访问nagiosql并安装
http://10.10.2.89/nagiosQL
用户admin,密码amdin

7.安装nagios-plugin(nagios插件)
#安装基础包
yum -y install perl perl-devel nagios-plugins nagios-plugins-ntp-perl perl-CPAN perl-Nagios-Plugin perl-Regexp-Common
cpan[1]> install Nagios:Plugin
cpan[1]> install Regexp:Common
#下载nagios-plugins源码包
wget http://nagios-plugins.org/download/nagios-plugins-2.1.1.tar.gz
#解压nagios-plugins源码包
tar -zxf nagios-plugins-2.1.1.tar.gz -C /usr/local/src/ && cd /usr/local/src/nagios-plugins-2.1.1
#配置环境
./configure --help
./configure --prefix=/usr/local/nagios/ --enable-perl-modules
#编译安装
make && make install
#替换插件包libexec
cd /usr/local/nagios/ && mv libexec/ libexec.bak && tar -zxf /root/libexec.tar.gz -C ./
chown -R nagios:nagios /usr/local/nagios/libexec
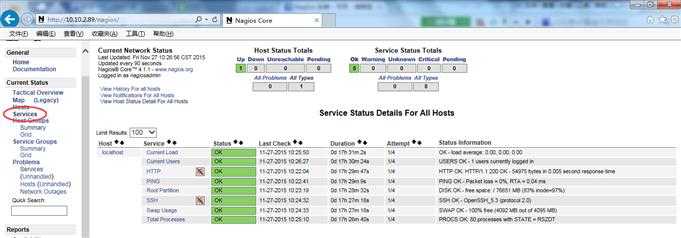
#检测iostat命令
/usr/local/nagios//libexec/check_iostat -w 15
IOSTAT OK - user 0.79 nice 0.00 sys 0.21 iowait 0.26 idle 0.00  | iowait=0.26%;; idle=0.00%;; user=0.79%;; nice=0.00%;; sys=0.21%;;
#检测cpu命令
/usr/local/nagios//libexec/check_cpu.sh -w 85 -c 95
CPU OK : user=0% system=0% iowait=0% idle=100% | cpu_user=0%;85;95; cpu_sys=0%;85;95; cpu_iowait=0%;85;95; cpu_idle=100%;
#检测memory命令
/usr/local/nagios//libexec/check_memory.sh -w 85 -c 90
MEMORY - OK used=50% idle=50% | ‘MEMORY Usage‘=50%;85;90;
#检测disk命令
/usr/local/nagios//libexec/check_disk -w 20 -c 15
DISK OK - free space: / 76692 MB (83% inode=97%); /dev/shm 1441 MB (100% inode=99%); /boot 110 MB (61% inode=99%);| /=14837MB;96414;96419;0;96434 /dev/shm=0MB;1421;1426;0;1441 /boot=69MB;169;174;0;189
8.安装NRPE(nagios插件)
#安装基础包
yum install -y gcc glibc glibc-common gd gd-devel xinetd openssl-devel
#下载NRPE源码包
wget http://nchc.dl.sourceforge.net/project/nagios/nrpe-2.x/nrpe-2.15/nrpe-2.15.tar.gz
#解压NRPE源码包
tar -zxf nrpe-2.15.tar.gz -C /usr/local/src/ && cd /usr/local/src/nrpe-2.15
#配置环境
./configure --help
./configure --prefix=/usr/local/nagios --enable-command-args
#编译
make all
#安装
make install-plugin
make install-daemon
make install-daemon-config
make install-xinetd
#配置NRPE监控IP
vim /etc/xinetd.d/nrpe
        only_from       = 127.0.0.1 10.10.2.89
#添加NRPE服务端口5666
echo ‘nrpe            5666/tcp                        #NRPE‘>>/etc/services
#重启xinetd服务
chkconfig xinetd on && service xinetd restart
#验证端口5666
netstat -an|grep 5666
tcp        0      0 0.0.0.0:5666                0.0.0.0:*                   LISTEN
#修改命令定义文件commands.cfg,添加check_nrpe命令
vim /usr/local/nagios/etc/objects/commands.cfg
define command{
        command_name check_nrpe
        command_line /usr/local/nagios/libexec/check_nrpe -H $HOSTADDRESS$ -c $ARG1$
}
#复制nrpe.cfg文件到/usr/local/nagios/etc目录
cd /usr/local/nagios/etc/ && mv nrpe.cfg nrpe.cfg.bak
cp /root/nrpe.cfg /usr/local/nagios/etc/
chown nagios:nagios nrpe.cfg
#重启nagios服务
service nagios restart
#检测NRPE命令
/usr/local/nagios/libexec/check_nrpe -H localhost
或
/usr/local/nagios/libexec/check_nrpe -H 127.0.0.1
NRPE v2.15
标签:
原文地址:http://www.cnblogs.com/cenliang/p/4999812.html