标签:
大三学生一个,喜欢编程,喜欢谷歌,喜欢Android,所以选择的方向自然是Android应用开发,开博第一篇,希望以后会有更多的进步。
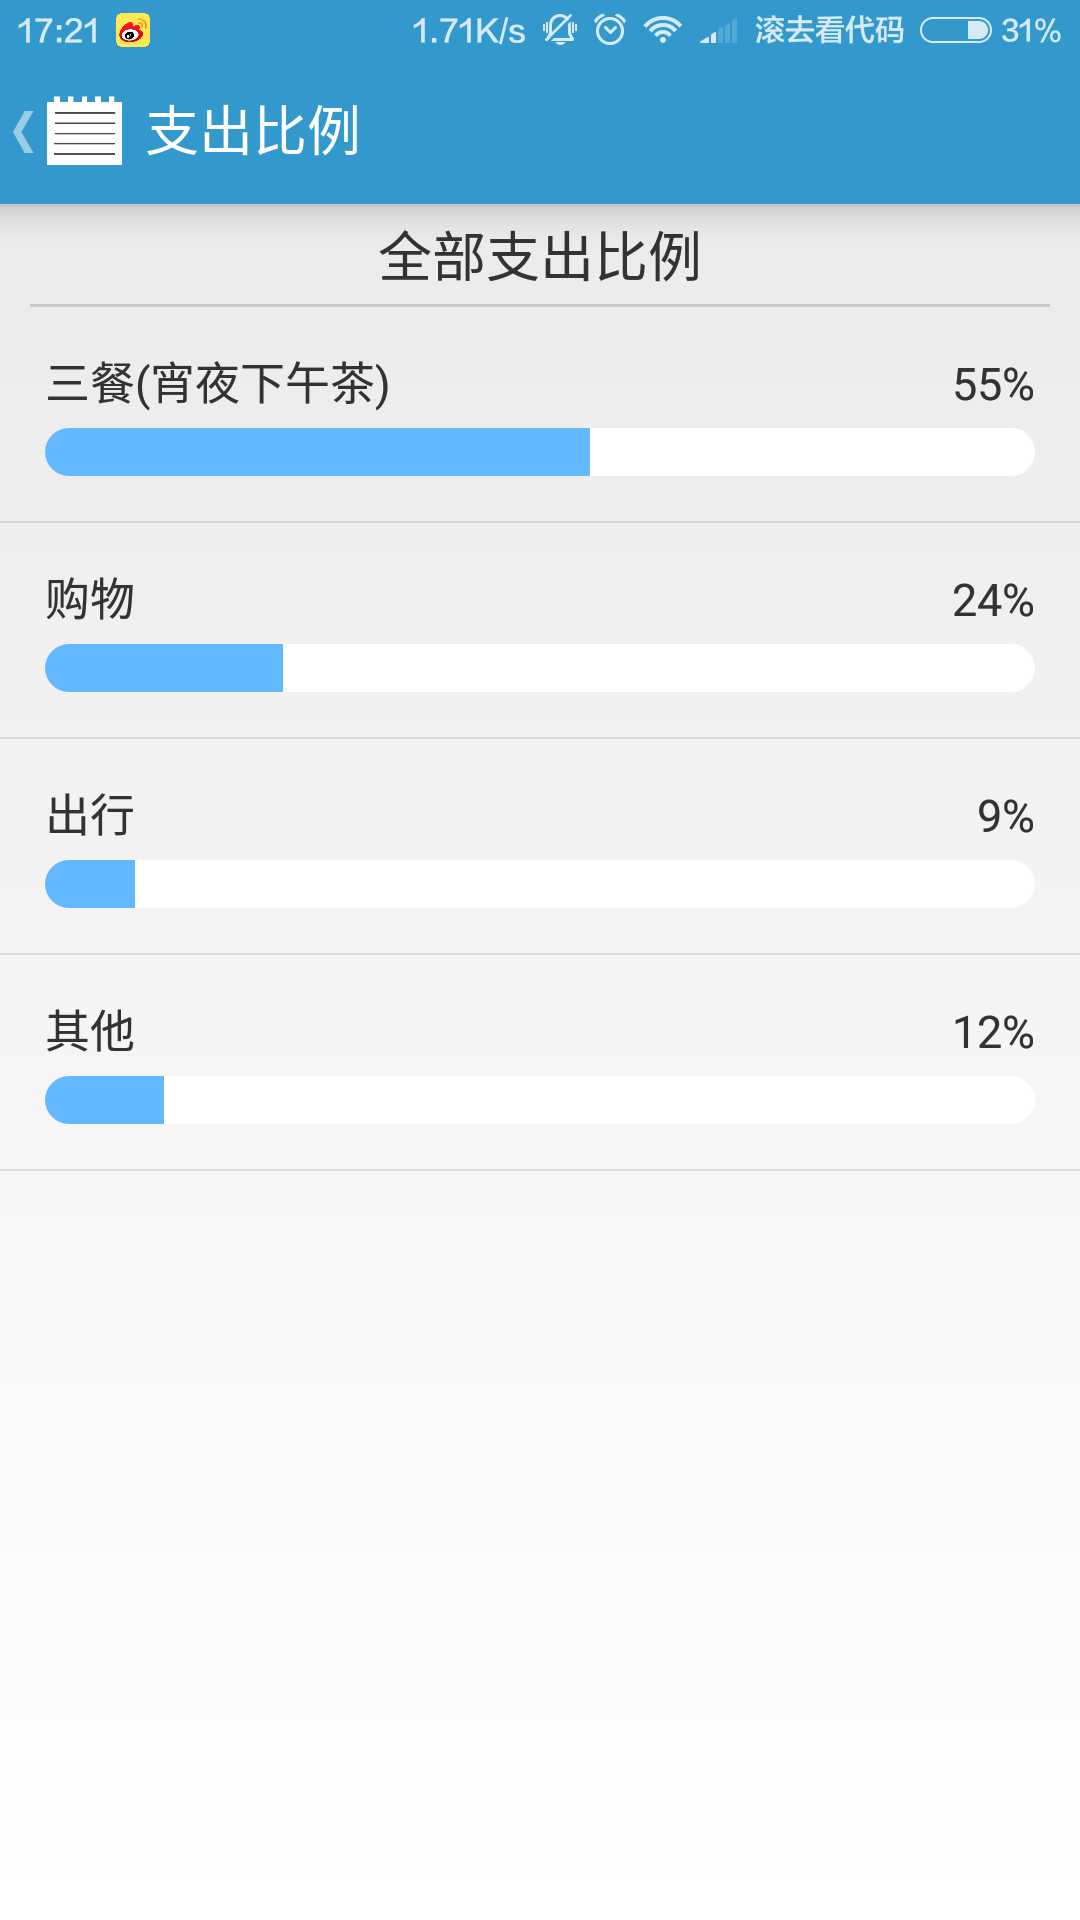
最近在做一个记账App的时候,需要一个Activity来显示每个月的消费各个项目的比例,Activity中主要用到一个ListView,ListView中包括一个TextView来显示类型的名称,一个TextView来显示所占比例,一个ProgressBar来显示进度条,让每个条目的比例更加清晰。如下图(这里只提供实现方法,界面效果暂不提供)

因为这种效果比较特别,需要我们自己来实现自定义的效果。下面来实现它:
一、定义每个Item的布局,tendency_list_item.xml
<?xml version="1.0" encoding="utf-8"?>
<FrameLayout xmlns:android="http://schemas.android.com/apk/res/android"
    android:layout_width="match_parent"
    android:layout_height="wrap_content"
    android:descendantFocusability="beforeDescendants"
    android:paddingLeft="5dp"
    android:paddingRight="5dp" >

    <RelativeLayout
        android:layout_width="fill_parent"
        android:layout_height="wrap_content"
        android:descendantFocusability="afterDescendants" >

        <TextView
            android:id="@+id/tendency_title"
            android:layout_width="wrap_content"
            android:layout_height="wrap_content"
            android:layout_marginBottom="5dp"
            android:layout_marginLeft="10dp"
            android:layout_marginTop="15dp"
            android:textSize="15sp" />

        <ProgressBar
            android:id="@+id/tendency_progressBar"
            style="?android:attr/progressBarStyleHorizontal"
            android:layout_width="fill_parent"
            android:layout_height="wrap_content"
            android:layout_below="@id/tendency_title"
            android:layout_marginBottom="15dp"
            android:layout_marginLeft="10dp"
            android:layout_marginRight="10dp"
            android:max="100"
            android:progressDrawable="@drawable/progress_style" />

        <TextView
            android:id="@+id/tendency_total"
            android:layout_width="wrap_content"
            android:layout_height="wrap_content"
            android:layout_alignParentRight="true"
            android:layout_marginRight="10dp"
            android:layout_marginTop="15dp"
            android:textSize="15sp" />
    </RelativeLayout>

</FrameLayout>
复杂冗余的可以无视,就是简单的两个TextView和一个ProgressBar而已
二、创建一个类,继承BaseAdapter,可以是一个独立的类,也可以是当前的activity中建立的一个内部类,重写一些函数即可,这里布局被硬编码了,如果是封装的一个外部类,可以通过参数传进来
public class myAdapter extends BaseAdapter {
        private Context context; // 当前的Context
        private LayoutInflater mInflater;  // 通过LayoutInflater来加载每个item的布局
        private double total; // 跟项目有关,把总的金额数传进来,这也是使用内部类的原因
        List<Map<String, Object>> map; // 存放数据源

        public myAdapter(Context context, List<Map<String, Object>> map,
                double total) {
            this.context = context;
            this.mInflater = LayoutInflater.from(context);
            this.total = total;
            this.map = map;
        }

        // 重写这个方法,获得当前ListView共有多少个Item
        @Override
        public int getCount() {
            return listmap.size();
        }

        // 重写这个方法,获得当前的position
        @Override
        public Object getItem(int position) {
            return position;
        }

        @Override
        public long getItemId(int position) {
            return position;
        }

        // 一个辅助类
        public class viewHolder {
            TextView title;
            ProgressBar progress;
            TextView sum;
        }

        // 一个最重要的方法,重写它来把数据映射到布局上
        @Override
        public View getView(int position, View view, ViewGroup parent) {
            view = mInflater.inflate(R.layout.tendency_list_item, null); // 加载Item的布局
            viewHolder vh = new viewHolder(); // 创建辅助类
            vh.title = (TextView) view.findViewById(R.id.tendency_title); // 通过Id获取对象
            vh.progress = (ProgressBar) view
                    .findViewById(R.id.tendency_progressBar);
            vh.sum = (TextView) view.findViewById(R.id.tendency_total);

            vh.title.setText((String) map.get(position).get("type")); // 调用每个对象来把数据映射进去
            double part = (Double) map.get(position).get("total");
            String part2 = String.format("%.0f", part * 100 / total);
            vh.sum.setText(part2 + "%");
            vh.progress.setProgress(Integer.parseInt(part2));
            return view;
        }
    }
三、调用即可
myAdapter adapter = new myAdapter(tendency_activity.this, listmap, sum);
show.setAdapter(adapter);
原理其实也比较简单,在实例化的时候,先调用getCount()来计算有多少个Item,然后每个position都调用getView()来进行数据的映射(这样性能不会很好,如何优化日后再补充)。
如有错误,还请指导更正,感谢!
Android开发学习之路-自定义ListView(继承BaseAdapter)
标签:
原文地址:http://www.cnblogs.com/Fndroid/p/5024204.html