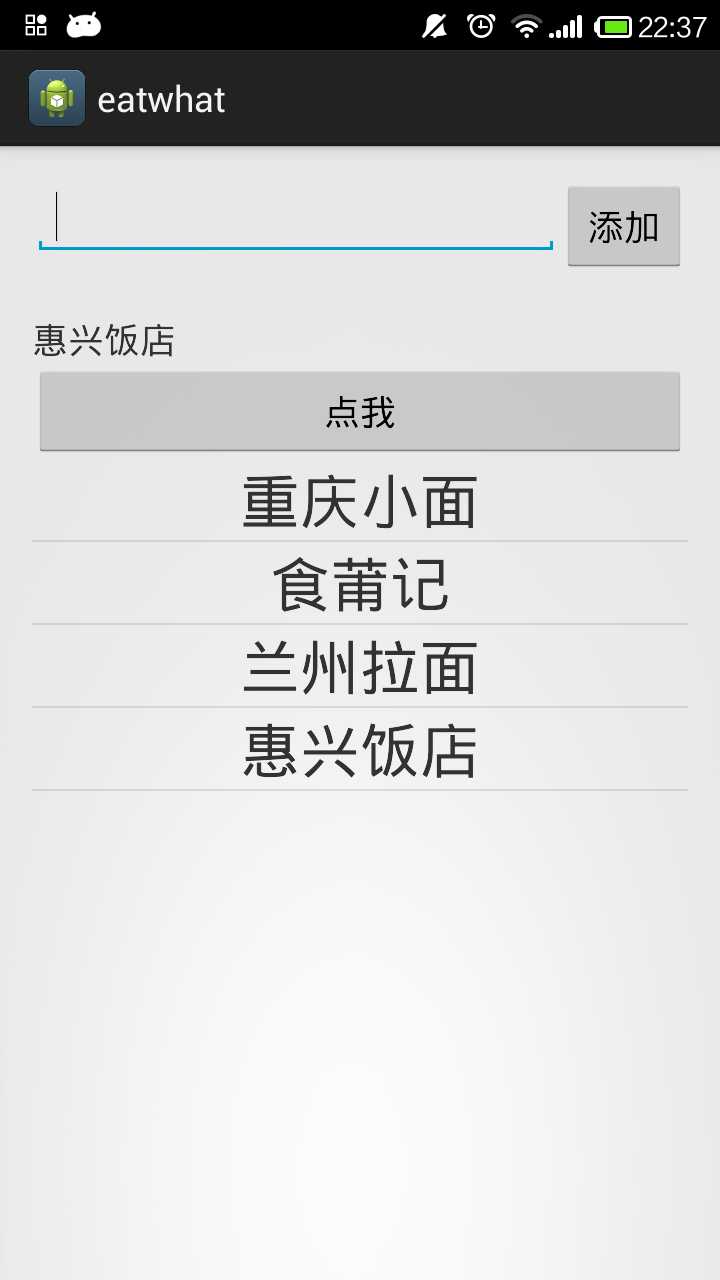
标签:

    <RelativeLayout
        android:id="@+id/et_relative"
        android:layout_width="match_parent"
        android:layout_height="wrap_content">
        <Button
            android:id="@+id/add_shop_btn"
            android:layout_width="wrap_content"
            android:layout_height="wrap_content"
            android:layout_alignParentRight="true"
            android:text="@string/add_shop_btn_text"
            android:onClick="addShop"/>
        <EditText
            android:id="@+id/addshop_et"
            android:layout_width="match_parent"
            android:layout_height="wrap_content"
            android:layout_toLeftOf="@id/add_shop_btn"
            android:textSize="18sp"/>
    </RelativeLayout>
    <TextView
        android:id="@+id/shop_name"
        android:layout_width="wrap_content"
        android:layout_height="wrap_content"
        android:text="@string/shop_name"
        android:layout_below="@id/et_relative"
        android:paddingTop="20dp"
        android:textSize="18sp" />
    <Button
        android:id="@+id/random_btn"
        android:layout_width="match_parent"
        android:layout_height="wrap_content"
        android:layout_below="@id/shop_name"
        android:text="@string/random_btn_text"/>
    <ListView
        android:id="@+id/lv_shop"
        android:layout_width="match_parent"
        android:layout_height="match_parent"
        android:layout_below="@id/random_btn"
        />
<?xml version="1.0" encoding="utf-8"?>
<RelativeLayout xmlns:android="http://schemas.android.com/apk/res/android"
    android:layout_width="match_parent"
    android:layout_height="match_parent"
    android:orientation="vertical" >

    <TextView
        android:id="@+id/item_text"
        android:layout_width="wrap_content"
        android:layout_height="wrap_content"
        android:textSize="30sp"
        android:layout_centerInParent="true"
        android:text="店名"/>
</RelativeLayout>
public class Shop {

    private String name;

    public Shop(String name) {
        this.name = name;
    }

    public String getName() {
        return name;
    }

    public void setName(String name) {
        this.name = name;
    }

}
  //内部类 适配器继承BaseAdapter
    class ShopInfoAdapter extends BaseAdapter{

        @Override
        public int getCount() {

            return shopList.size();
        }

        @SuppressLint("ViewHolder")
        @Override
        public View getView(int position, View converView, ViewGroup parent) {

            View v = View.inflate(MainActivity.this, R.layout.item_shop, null);

            TextView tv_name = (TextView)v.findViewById(R.id.item_text);

            tv_name.setText(shopList.get(position).getName());

            return v;
        }
        @Override
        public Object getItem(int arg0) {

            return null;
        }

        @Override
        public long getItemId(int arg0) {

            return 0;
        }
    }
    //Shop类型
    private List<Shop> shopList;
    //listview控件
    private ListView shop_lv;
    //适配器
    private ShopInfoAdapter shopAdapter;
//初始化控件listview
shop_lv = (ListView) findViewById(R.id.lv_shop);

//初始化适配器
shopAdapter = new ShopInfoAdapter();

//设置适配器
shop_lv.setAdapter(shopAdapter);
     if (addName != null && !"".equals(addName)){
            //List shop添加店名
            Shop shop = new Shop(addName);
            //添加新实例化的shop对象
            shopList.add(shop);
            //刷新listview
            shopAdapter.notifyDataSetChanged();
            //清空文本框内容
            addshop_et.setText("");

            String toast_text = "添加店铺:" + addName;

            Toast.makeText(MainActivity.this, toast_text, Toast.LENGTH_SHORT).show();
        } else{
            Toast.makeText(MainActivity.this, "添加内容为空", Toast.LENGTH_SHORT).show();
        }
shop_name.setText(shopList.get(num).getName());
标签:
原文地址:http://www.cnblogs.com/superdo/p/5024484.html