标签:
UIImageView是在界面上显示图片的一个控件,在UIImageView中显示图片的话应该首先把图片加载到UIImage中,然后通过其他方式使用该UIImage。
创建UIImageView有两种方法:
一种是用UIImage来加载:
UIImage *image = [UIImageimageNamed:@"picture"];
UIImageView *imageView = [[UIImageView alloc] initWithImage:image];
另一种是通过initWithFrame:来加载,然后手工修改UIImageView的属性:
UIImageView *imageView = [[UIImageView alloc] initWithImage:@"picture"];

    //这里我用了第一种方法
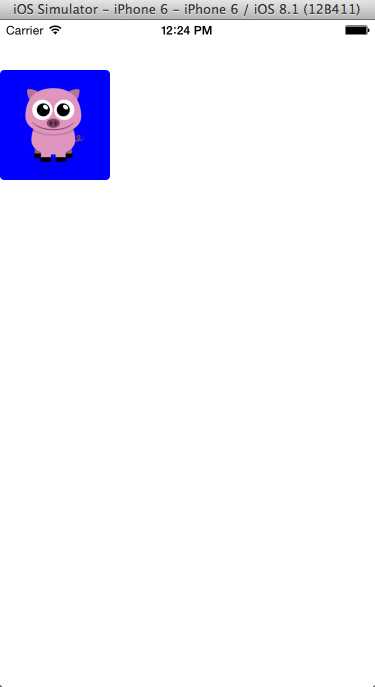
    UIImage *image = [UIImage imageNamed:@"u=2255024074,2191209375&fm=21&gp=0"];
    //初始化
    UIImageView *imageView = [[UIImageView alloc] initWithImage:image];
    [self.view addSubview:imageView];
    //背景颜色
    imageView.backgroundColor = [UIColor blueColor];
    //圆角
    imageView.layer.cornerRadius = 4;
    imageView.layer.masksToBounds = YES;
    //是否交互
    imageView.userInteractionEnabled = YES;
    //宽与高分别采用原图片的宽与高
    float width = imageView.frame.size.width;
    float height = imageView.frame.size.height;
    //设置imageView的位置与尺寸
    CGRect frame = imageView.frame;
    frame.origin.x = 0;
    frame.origin.y = 50;
    frame.size.width = width;
    frame.size.height = height;
    [imageView setFrame:frame];
UIImageView的几种常用属性:
(1)设置圆角
imageView.layer.masksToBounds = YES;
imageView.layer.cornerRadius = 10;
(2)设置边框颜色和大小
imageView.layer.borderColor = [UIColor orangeColor];
imageView.layer.borderWidth = 2;
(3)contentMode属性:当图片小于imageView的大小处理图片显示
这个属性是用来设置图片的显示方式,如居中、居右,是否缩放等,有以下几个常量可供设定:
UIViewContentModeScaleAspectFit:这个图片都会在view里面显示,并且比例不变,这就是说,如果图片和view的比例不一样就会有留白。
UIViewContentModeScaleAspectFill: 这是整个view会被图片填满,图片比例不变 ,这样图片显示就会大于view。
UIViewContentModeCenter ;UIViewContentModeTop;UIViewContentModeBottom;UIViewContentModeLeft;UIViewContentModeRight;
UIViewContentModeTopLeft;UIViewContentModeTopRight;UIViewContentModeBottomLeft;UIViewContentModeBottomRight(这几种就不一一解
释了,都是保持图片比例不变)。
(4)为图片添加单击事件:一定要先将userInteractionEnabled置为YES,这样才能响应单击事件
imageView.userInteractionEnabled = YES;
UITapGestureRecognizer *tap = [[UITapGestureRecognizer alloc] initWithTarget:self action:@selector(ImageViewAction:)];
[imageView addGestureRecognizer:tap];
- (void)ImageViewAction:(UITapGestureRecognizer *)gesture{
imageView.backgroundColor = [UIColor yellowColor];
}
(5)播放一系列图片
UIImage *image1 = [UIImage imageNamed:@"p1"];
UIImage *image2 = [UIImage imageNamed:@"p2"];
UIImage *image3 = [UIImage imageNamed:@"p3"];
NSArray *imagesArray = @[image1,image2,image3];
imageView.animationImages = imagesArray;
//设定所有的图片在多少秒内播放完毕
imageView.animationDuration = [imagesArray count];
//不重复播放多少遍,0表示无数遍
imageView.animationRepeatCount = 0;
// 开始播放
[imageView startAnimating];
标签:
原文地址:http://www.cnblogs.com/0320y/p/5032457.html