标签:
UINavigationController又被成为导航控制器,继承自UIViewController,以栈的方式管理所控制的视图控制器,下面就详细说一下UINavigationController的使用:
1、首先新建一个工程(就不多说了)创建RootViewController(继承自UIViewController)。
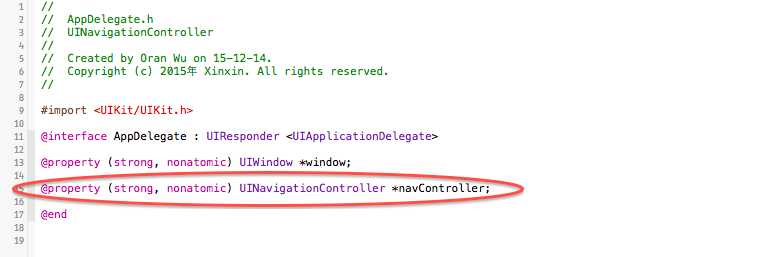
2、打开AppDelegate.h文件添加属性
3、打开AppDelegate.m文件的
- (BOOL)application:(UIApplication *)application didFinishLaunchingWithOptions:(NSDictionary *)launchOptions方法添加navController和根视图(RootViewController)。
 1 - (BOOL)application:(UIApplication *)application didFinishLaunchingWithOptions:(NSDictionary *)launchOptions {
 2     // Override point for customization after application launch.
 3
 4     self.window = [[UIWindow alloc] initWithFrame:[[UIScreen mainScreen] bounds]];
 5     RootViewController *rootVC = [[RootViewController alloc] init];
 6     rootVC.title = @"RootViewController";
 7
 8     //初始化navController
 9     self.navController = [[UINavigationController alloc] init];
10     //给rootVC添加推入动作
11     [self.navController pushViewController:rootVC animated:YES];
12     //将navController加到window上
13     [self.window addSubview:self.navController.view];
14
15     [self.window makeKeyAndVisible];
16
17     return YES;
18 }
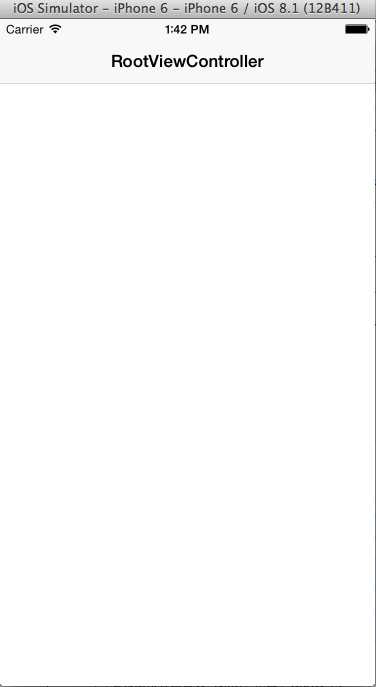
效果图:
4、添加UIBarButtonItem
注:UIBarButtonItem分为leftBarButtonItem和rightBarButtonItem;
 1 #import "RootViewController.h"
 2
 3 @interface RootViewController (){
 4
 5     UIBarButtonItem *leftButton;
 6     UIBarButtonItem *rightButton;
 7
 8 }
 9
10 @end
11
12 @implementation RootViewController
13
14 - (void)viewDidLoad {
15     [super viewDidLoad];
16     // Do any additional setup after loading the view from its nib.
17
18     leftButton = [[UIBarButtonItem alloc] initWithBarButtonSystemItem:UIBarButtonSystemItemEdit target:self action:@selector(leftButtonAction:)];
19     self.navigationItem.leftBarButtonItem = leftButton;
20
21     rightButton = [[UIBarButtonItem alloc] initWithBarButtonSystemItem:UIBarButtonSystemItemCancel target:self action:@selector(rightButtonAction:)];
22     self.navigationItem.rightBarButtonItem = rightButton;
23
24
25 }
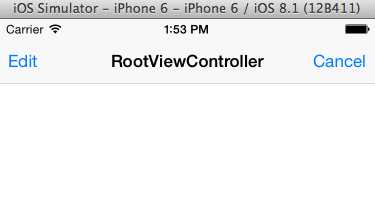
效果图:
这里还要说一下initWithBarButtonSystemItem:即系统自带按钮风格:
UIBarButtonSystemItemDone:蓝色文字按钮,标有“Done”;
UIBarButtonSystemItemCancel:文字按钮,标有“Cancel”;
UIBarButtonSystemItemEdit:文字按钮,标有“Edit”;
UIBarButtonSystemItemSave:蓝色文字按钮,标有“Save”;
UIBarButtonSystemItemAdd:图像按钮,上面有一个Å符号;
UIBarButtonSystemItemFlexibleSpace:空白,占用空间大小可变;
UIBarButtonSystemItemFixedSpace:空白占位符;
UIBarButtonSystemItemCompose:图像按钮,上有一支笔和纸张;
UIBarButtonSystemItemReply:图像按钮,上有一个回复箭头;
UIBarButtonSystemItemAction:图像按钮,上有一个动作箭头;
UIBarButtonSystemItemOrganize:图像按钮,上有一个文件夹以及向下箭头;
UIBarButtonSystemItemBookmarks:图像按钮,上有书签图标;
UIBarButtonSystemItemSearch:图像按钮,上有spotlight图标;
UIBarButtonSystemItemRefresh:图像按钮,上有一个环形的刷新箭头;
UIBarButtonSystemItemStop:图像按钮,上有一个停止记号X;
UIBarButtonSystemItemCamera:图像按钮,上有一个照相机;
UIBarButtonSystemItemTrash:图像按钮,上有一个垃圾桶;
UIBarButtonSystemItemPlay:图像按钮,上有一个播放图标;
UIBarButtonSystemItemPause:图像按钮,上有一个暂停图标;
UIBarButtonSystemItemRewind:图像按钮,上有一个倒带图标;
UIBarButtonSystemItemFastForward:图像按钮,上有一个快进图标;
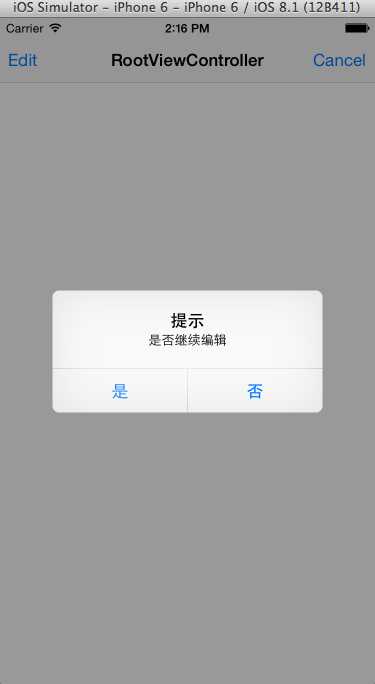
5、UIBarButtonItem的事件的实现
 1 - (void)leftButtonAction:(UIBarButtonItem*)leftAction{
 2
 3     UIAlertView *leftAlert = [[UIAlertView alloc] initWithTitle:@"提示" message:@"是否继续编辑" delegate:self cancelButtonTitle:@"是" otherButtonTitles:@"否", nil];
 4     [leftAlert show];
 5 }
 6
 7 - (void)rightButtonAction:(UIBarButtonItem*)rightAction{
 8
 9     UIAlertView *rightAlert = [[UIAlertView alloc] initWithTitle:@"提示" message:@"退出" delegate:self cancelButtonTitle:@"是" otherButtonTitles:@"否", nil];
10     [rightAlert show];
11
12 }
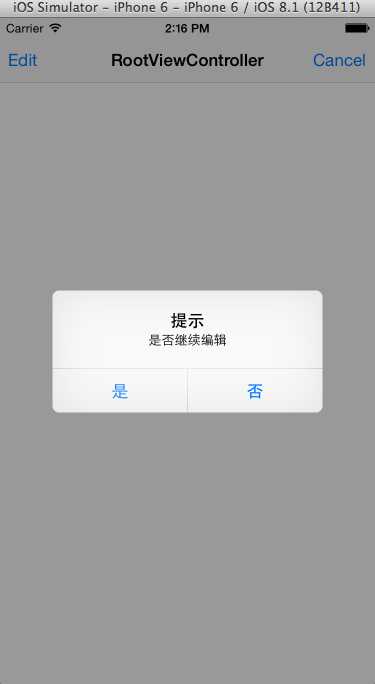
效果图:
ios基础篇(十)——UINavgationController的使用(一)UIBarButtonItem的添加
标签:
原文地址:http://www.cnblogs.com/0320y/p/5045147.html