标签:style blog http java color 使用
在上一篇文章中(详见http://www.cnblogs.com/bxljoy/p/3850263.html),我们已经介绍了tomcat+solr的索引服务器的配置,但是文中创建的服务器只能支持存储单一索引,很多情况下,我们需要对多个表或者多组不同的数据分别创建索引,如果没需要创建一个索引库,就要部署一套solr服务,那明显是不合算的,所以本文就来介绍一下solr的进阶应用,在同一台服务器中配置多核索引。
进入我们解压好的solr文件目录:
cd /home/hadoop2/solr/example/multicore

ls

core0  core1  exampledocs  README.txt  solr.xml  zoo.cfg
将此文件夹下的所有内容都复制到我们solr服务器的home目录,如下:
cp -r  *  /home/hadoop2/solrhome

ls

bin  collection1  controller  core0  core1  logs  README.txt  solrindex  solr.xml  zoo.cfg
其中solr.xml配置文件内容如下:
<solr persistent="false">

  <!--
  adminPath: RequestHandler path to manage cores.
    If ‘null‘ (or absent), cores will not be manageable via request handler
  -->
  <cores adminPath="/admin/cores" host="${host:}" hostPort="6688" hostContext="${hostContext:solr}">
    <core name="core0" instanceDir="core0" />
    <core name="core1" instanceDir="core1" />
    <core name="controller" instanceDir="controller" />
<shardHandlerFactory name="shardHandlerFactory" class="HttpShardHandlerFactory"> <str name="urlScheme">${urlScheme:}</str> </shardHandlerFactory> </cores> </solr>
其中红字部分需要注意:端口需要改成与自己配置的tomcat服务器端口一致,本文中为6688,;而下面的红字core属性为自定义的索引文件夹,在solrhome目录中分别对应core0、core1和controller索引文件夹,其中包含配置文件和索引数据文件:
ls /home/hadoop2/solrhome/controller/conf

logs  schema.xml  solrconfig.xml


ls /home/hadoop2/solrhome/core0/conf

logs  schema.xml  solrconfig.xml


ls /home/hadoop2/solrhome/core1/conf

logs  schema.xml  solrconfig.xml
其中solrconfig.xml无需修改,只要修改schema.xml即可:
<schema name="example core zero" version="1.1">

   <fieldtype name="string"  class="solr.StrField" sortMissingLast="true" omitNorms="true"/>
   <fieldType name="long" class="solr.TrieLongField" precisionStep="0" positionIncrementGap="0"/>
  <!-- general -->
  <field name="id"        type="string"   indexed="true"  stored="true"  multiValued="false" required="true"/>
  <field name="type"      type="string"   indexed="true"  stored="true"  multiValued="false" />
  <field name="name"      type="string"   indexed="true"  stored="true"  multiValued="false" />
  <field name="core0"     type="string"   indexed="true"  stored="true"  multiValued="false" />
  <field name="_version_" type="long"     indexed="true"  stored="true"/>

 <!-- field to use to determine and enforce document uniqueness. -->
 <uniqueKey>id</uniqueKey>

 <!-- field for the QueryParser to use when an explicit fieldname is absent -->
 <defaultSearchField>name</defaultSearchField>

 <!-- SolrQueryParser configuration: defaultOperator="AND|OR" -->
 <solrQueryParser defaultOperator="OR"/>
</schema>
系统默认的uniqueKey为id,如果有需要,我们可以修改uniqueKey,并添加我们需要创建的索引字段,如下:
<schema name="example core zero" version="1.1">

   <fieldtype name="string"  class="solr.StrField" sortMissingLast="true" omitNorms="true"/>
   <fieldType name="long" class="solr.TrieLongField" precisionStep="0" positionIncrementGap="0"/>
  <!-- general -->
<!--
  <field name="id"        type="string"   indexed="true"  stored="true"  multiValued="false" required="true"/>
-->
  <field name="type"      type="string"   indexed="true"  stored="true"  multiValued="false" />
  <field name="name"      type="string"   indexed="true"  stored="true"  multiValued="false" />
  <field name="core0"     type="string"   indexed="true"  stored="true"  multiValued="false" />
  <field name="_version_" type="long"     indexed="true"  stored="true"/>

 <!-- field to use to determine and enforce document uniqueness. -->
 <uniqueKey>rowkey</uniqueKey>
  <field name="rowkey"        type="string"   indexed="true"  stored="true"  multiValued="false" required="true"/>
  <field name="one"     type="string"   indexed="true"  stored="true"  multiValued="false" />
  <field name="two"     type="string"   indexed="true"  stored="true"  multiValued="false" />
  <field name="three"     type="string"   indexed="true"  stored="true"  multiValued="false" />

 <!-- field for the QueryParser to use when an explicit fieldname is absent -->
 <defaultSearchField>name</defaultSearchField>

 <!-- SolrQueryParser configuration: defaultOperator="AND|OR" -->
 <solrQueryParser defaultOperator="OR"/>
</schema>
以上的配置文件中,我们将uniqueKey修改为rowkey,并注释掉id字段的定义,或者修改id字段的required属性为fasle也可以,然后我们添加了需要创建索引的字段。
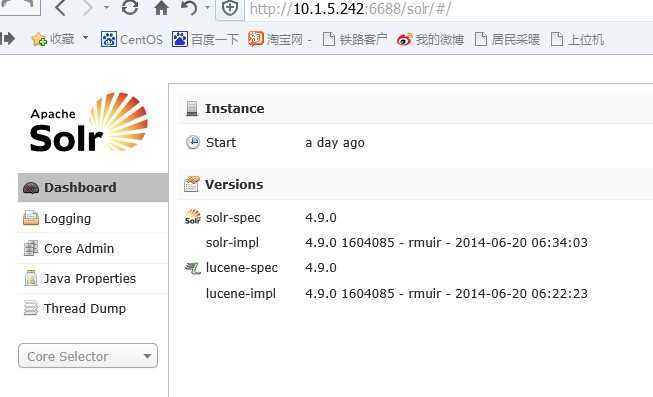
之前介绍的配置文件的修改,我们在core0、core1和controller三个文件夹中都需要做,根据建立的三个不同索引的需要,配置不同的uniqueKey和索引字段。然后重启tomcat服务器,访问对应的solr服务器的url:http://10.1.5.242:6688/solr,会看到如下图页面:

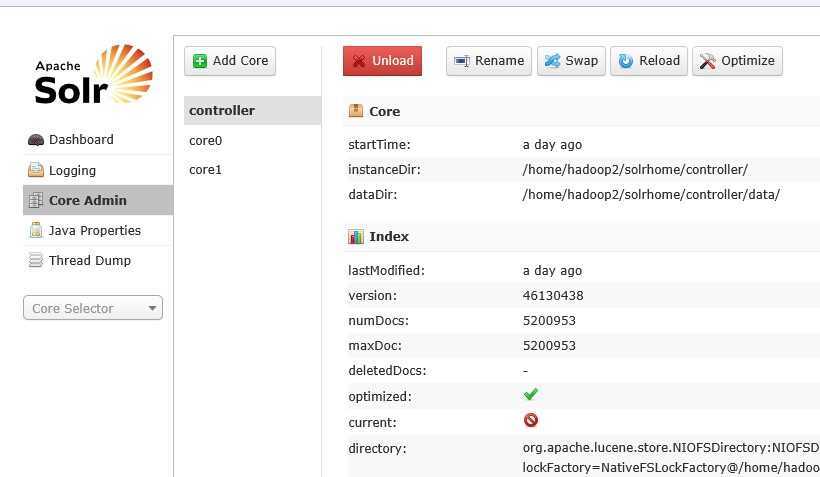
点击左侧菜单栏中的 Core Admin选项,就可以看到多个索引的状态页面了,如下图:

点击controller、core0和core1中间菜单栏,就可以切换索引状态界面,查看索引的具体信息。
solr服务器的多核索引配置步骤就是这样,后面我会介绍使用solr的java API,对索引进行创建、更新和删除等基本操作。
转载请注明出处:http://www.cnblogs.com/bxljoy/p/3861003.html
linux下配置tomcat7 + solr4.9(续)--- 多核索引的配置,布布扣,bubuko.com
linux下配置tomcat7 + solr4.9(续)--- 多核索引的配置
标签:style blog http java color 使用
原文地址:http://www.cnblogs.com/bxljoy/p/3861003.html