标签:
结合网上各个资料,再简单整理的一份。
一、APNS推送说明
1.你的IOS应用需要去注册APNS消息推送功能。
2.当苹果APNS推送服收到来自你应用的注册消息就会返回一串device token给你(很重要)
3.将应用收到的device Token传给你本地的Push服务器。
4.当你需要为应用推送消息的时候,你本地的推送服务器会将消息,以及Device Token打包发送到苹果的APNS服
5.APNS再将消息推送给目的iphone
二、推送的准备工作
推送准备的主要就是1、推送证书 2、导出的密钥文件 3、下载的描述文件
1、APP ID创建
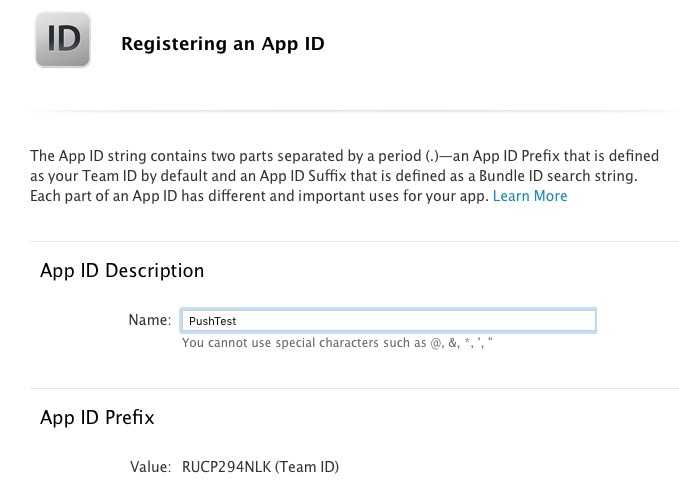
先创建APP ID,名字为PustTest, Bundle ID 为com.公司名.testpush
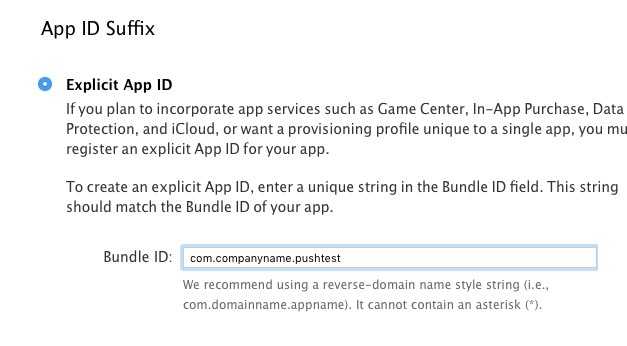
直接点击下一步,完成创建。
2、生成证书
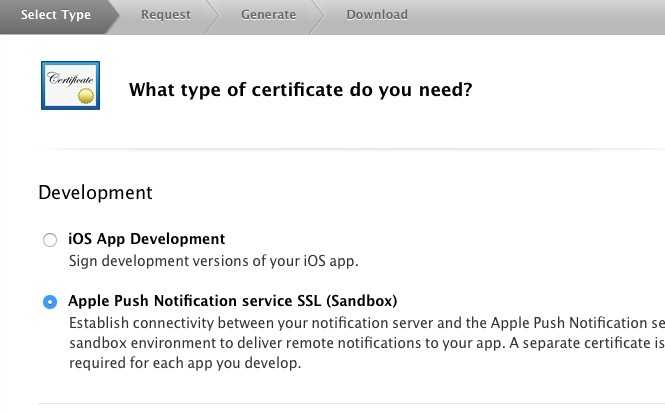
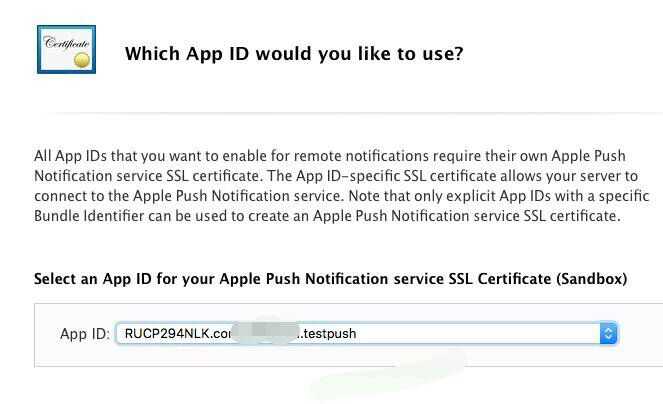
证书选择Push推送证书,下一步选择刚刚创建的APP ID
添加从钥匙串导出的请求文件

下一步->下载推送证书。
3、描述文件创建下载
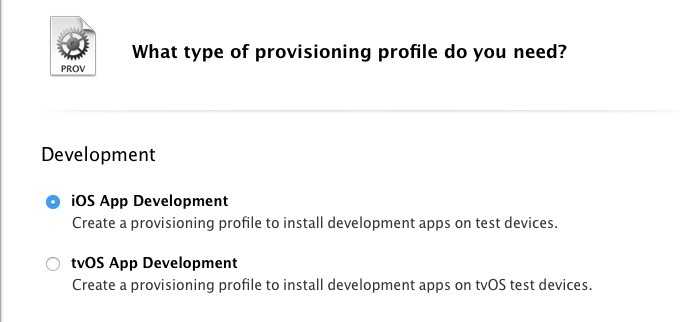
描述文件选择Development, 如果这里选择选择下面的生产,则项目可能会闪退。下一步也是选择刚刚创建的APP ID,然后选择设备一步步,最后下载描述文件。
4、密钥导出
双击下载的证书文件,会在钥匙串登陆-我的证书里生成一个新的证书,右击导出证书,名字设置为 push.p12
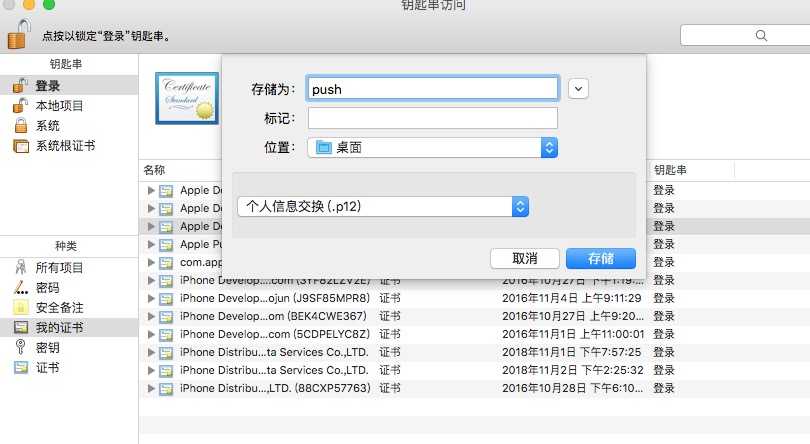
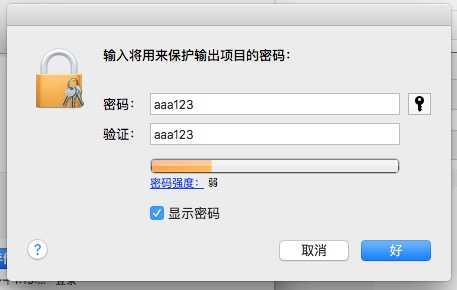
导出的密码要记得,推送要用,我设置位aaa123;
5,整理
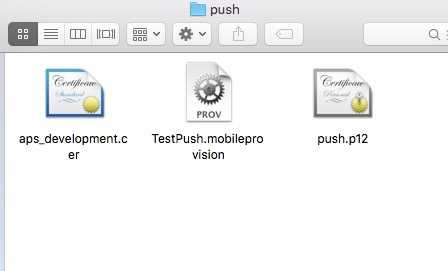
将密钥,证书,和描述文件,放到桌面的一个文件夹里,文件夹名字设置为 "push";
6,文件转换pem
推送该准备的文件都准备好了,然后开始做推送,将密钥和证书转换成pem文件。打开电脑里的终端,生成pem文件需要用到终端命令。
首先用终端命令打开桌面的push文件夹“ cd ~/desktop/push ” 回车;

把证书文件生成pem文件命令“ openssl x509 -in aps_development.cer -inform der -out PushCert.pem ”
把密钥p12文件生成pem文件命令“ openssl pkcs12 -nocerts -out PushKey.pem -in push.p12 ”,回车后需要输入三次密码,也就是导出时候的密码aaa123
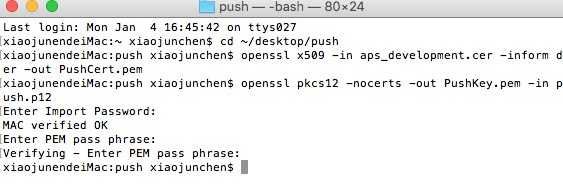
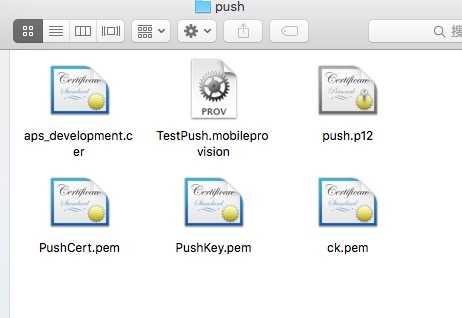
然后把两个pem文件合并成一个pem文件,命令:“ cat PushCert.pem PushKey.pem > ck.pem ”,这样桌面的push文件夹就有6个文件了
测试推送证书能否正常运行,输入终端命令“ telnet gateway.sandbox.push.apple.com 2195 ”,如果运行如下,则一切正常。

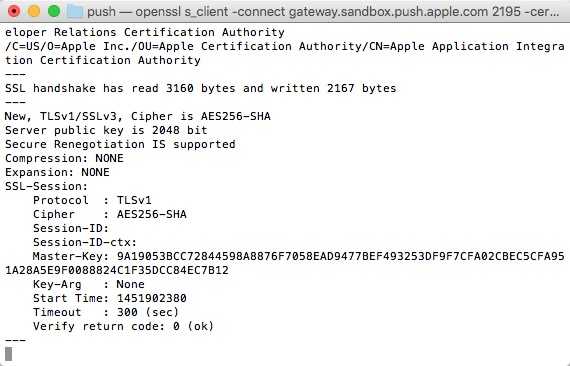
连接苹果服务器APNS,终端命令“ openssl s_client -connect gateway.sandbox.push.apple.com:2195 -cert PushCert.pem -key PushKey.pem ”
回车后输入密码 aaa123,返回一堆数据,最后截图如下。表示没问题。
7、项目配置
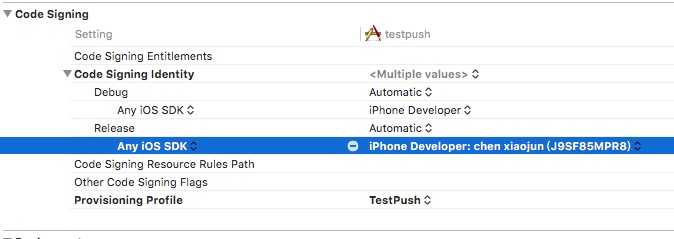
新建项目,Bundle ID 设置和APP ID里一样testpush,Code Signing选择描述文件和开发账号,
AppDelegate.m里设置注册,
- (BOOL)application:(UIApplication *)application didFinishLaunchingWithOptions:(NSDictionary *)launchOptions {

    if ([application respondsToSelector:@selector(isRegisteredForRemoteNotifications)])
    {
        //IOS8
        //创建UIUserNotificationSettings,并设置消息的显示类类型
        UIUserNotificationSettings *notiSettings = [UIUserNotificationSettings settingsForTypes:(UIUserNotificationTypeBadge | UIUserNotificationTypeAlert | UIRemoteNotificationTypeSound) categories:nil];

        [application registerUserNotificationSettings:notiSettings];
        [application registerForRemoteNotifications];

    } else{ // ios7
        [application registerForRemoteNotificationTypes:(UIRemoteNotificationTypeBadge                                       |UIRemoteNotificationTypeSound                                      |UIRemoteNotificationTypeAlert)];
    }

    self.window = [[UIWindow alloc] initWithFrame:[[UIScreen mainScreen] bounds]];
    self.window.backgroundColor = [UIColor whiteColor];
    [self.window makeKeyAndVisible];

//    self.mainView = [[ViewController alloc] initWithNibName:@"MainViewController" bundle:nil];
    self.window.rootViewController = [ViewController alloc];
    return YES;
}
其他回调方法
// 处理推送消息
- (void)application:(UIApplication *)application didReceiveRemoteNotification:(NSDictionary *)userInfo
{
    NSLog(@"userinfo:%@",userInfo);
    NSLog(@"收到推送消息:%@",[[userInfo objectForKey:@"aps"] objectForKey:@"alert"]);
}

//注册失败回调
- (void)application:(UIApplication *)application didFailToRegisterForRemoteNotificationsWithError:(NSError *) error
{
    NSLog(@"Registfail%@",error);
}

//返回设备表示device token
-(void)application:(UIApplication *)application didRegisterForRemoteNotificationsWithDeviceToken:(NSData *)deviceToken
{
    NSLog(@"设备标示%@",deviceToken);//这里的Token就是我们设备要告诉服务端的Token码
}
运行后得到标示device token “f465312ab96e2dfd35829d1c6f898a019b01141615745f5b41a4db4a312870a0”
8、PHP本地服务器
测试通知效果需要一个php文件,里面填入获取的标示,密钥导出的密码,和合并文件 ck.pem
<?php
    $deviceToken = ‘f465312ab96e2dfd35829d1c6f898a019b01141615745f5b41a4db4a312870a0‘;//获取请求参数中的deviceToken
    $passphrase = ‘aaa123‘; //mimi
    $message = ‘这是一条推送消息‘;//获取请求参数中的想要推送的信息
///打印 查看
    echo $deviceToken;
    echo $message;

// Put your alert message here:  设置你申请好并转换好的证书和密码
    $ctx = stream_context_create();
    stream_context_set_option($ctx, ‘ssl‘, ‘local_cert‘, ‘ck.pem‘);//ck.pem
    stream_context_set_option($ctx, ‘ssl‘, ‘passphrase‘, $passphrase);

// Open a connection to the APNS server

    //$fp = stream_socket_client(‘ssl://gateway.push.apple.com:2195‘, $err, $errstr, 60, STREAM_CLIENT_CONNECT, $ctx);

    $fp = stream_socket_client(‘ssl://gateway.sandbox.push.apple.com:2195‘, $err,$errstr, 60, STREAM_CLIENT_CONNECT|STREAM_CLIENT_PERSISTENT, $ctx);

    if (!$fp)

    exit("Failed to connect: $err $errstr". PHP_EOL);

    echo‘ Connected to APNS‘. PHP_EOL;

// Create the payload body

    $body[‘aps‘] = array(‘alert‘ => $message,‘sound‘ => ‘default‘);

// Encode the payload as JSON

    $payload = json_encode($body);

// Build the binary notification

    $msg = chr(0) . pack(‘n‘, 32) . pack(‘H*‘, $deviceToken) . pack(‘n‘, strlen($payload)) . $payload;

// Send it to the server

    $result = fwrite($fp, $msg, strlen($msg));

    if (!$result)

    echo‘Message not delivered‘. PHP_EOL;

    else

    echo‘Message successfully delivered‘. PHP_EOL;


// Close the connection to the server

    fclose($fp);

    ?>
php文件下载:http://pan.baidu.com/s/1bi3Lym
9、推送命令
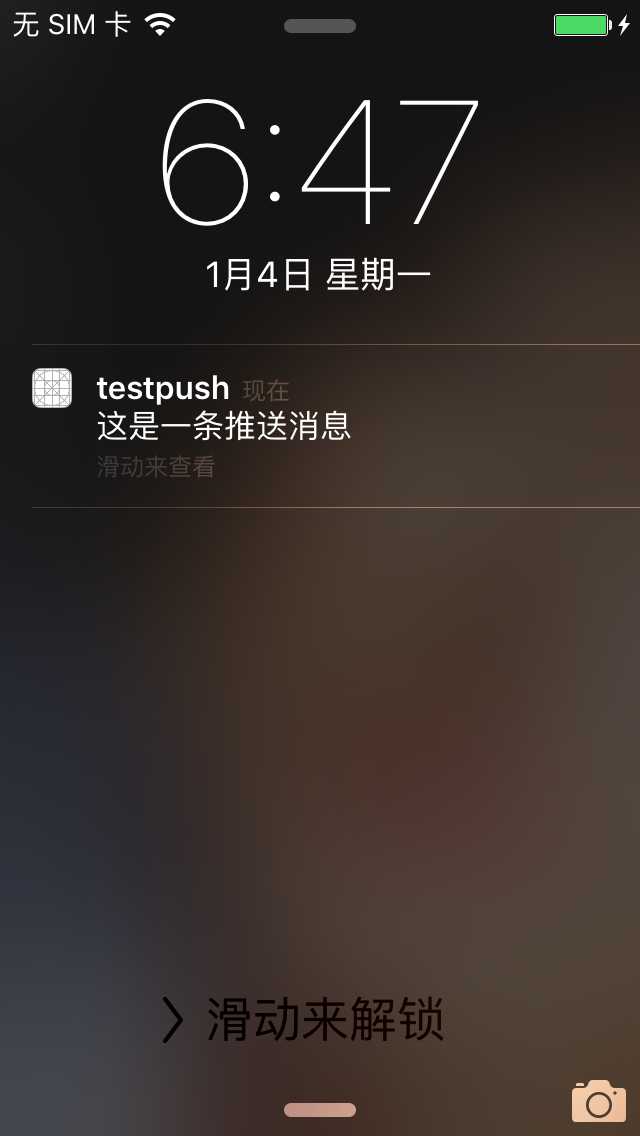
将配置好的php文件同样放到桌面的push文件夹里。运行终端命令,给标示手机推送一个通知 “这是一条推送消息”
先用终端命令ck打开push文件夹,再调用运行push.php文件,运行命令:“ php push.php “

手机端收到通知消息。
注:本文主要内容都是参考网上其他博客内容,稍微整理。
标签:
原文地址:http://www.cnblogs.com/qq95230/p/5099964.html