标签:
1.前言
上一篇已经介绍了App Delegate、View Controller的基本概念,除此之外,分别利用storyboard和纯代码创建了第一个Xcode的工程,并对不同方式搭建项目进行了比较。这一篇文章,我准备为大家介绍一下奇葩的Objective-C语言的语法和使用。这篇文章主要讲Objective-C的理论概念。
2.学习目标
2.1 Objective-C语言面向对象的特性与其他语言(C++)类比学习,声明定义一个MyObject类,并创建这个类的实例。
2.2 Objective-C语言常见语法概念概览。[协议,分类,扩展,消息机制,动态特性selector,KVC,KVO,block,ARC]
3.奇葩的Objective-C语言
对于已经有开发经验的开发者而言,初次接触Objective-C的时候觉得根本不能接受,甚至有种畏惧,oc奇葩的语法简直颠覆了自己的世界观,因为出现了莫名其妙的符号,如, + - [ ]。但是,不要怕,我们慢慢来了解这到底是毛线。
首先,从名字即可看出,Objective-C是一个面向对象的编程语言,也就是它和其他面向对象的语言一样有继承、封装、多态的语言特性,学习的时候可以类比其他语言。当然,如果没接触过其他语言也没关系,那就直接学。那么,就用C++和Objective-C两种语言去声明定义一个MyObject类。
3.1 先看一下C++中声明定义类是如何编写的
3.1.1 C++程序源码
#include <iostream>
using namespace std;
class MyObject {
public:
    MyObject();
    ~MyObject();
    void display();
    void setValue(int x);
    int getIndex();
    int getKey();
    static void classMethod();
private:
    int index;
    int key;
};

MyObject::MyObject() {
    cout<<"construct"<<endl;
}

MyObject::~MyObject() {
    cout<<"destruct"<<endl;
}

void MyObject::setValue(int x) {
    this->index = x;
    this->key = 1<<(x+2);
}

void MyObject::display() {
    cout<<"index == "<<this->index<<endl;
    cout<<"key == "<<this->key<<endl;
}

int MyObject::getKey() {
    return this->key;
}

int MyObject::getIndex() {
    return this->index;
}

void MyObject::classMethod() {
    cout<<"this is static (or class) method"<<endl;
}

int main(int argc, const char * argv[]) {
    // insert code here...
    std::cout << "Hello, World!\n";

    MyObject *object = new MyObject();
    MyObject::classMethod();
    object->setValue(3);
    object->display();
    int c = object->getIndex() + object->getKey();
    object->MyObject::~MyObject();
    printf("c = %d\n", c);

    MyObject object2;
    object2.setValue(2);
    object2.display();

    return 0;
}
3.1.2 控制台打印信息
Hello, World!
construct
this is static (or class) method
index == 3
key == 32
destruct
c = 35
construct
index == 2
key == 16
destruct
Program ended with exit code: 0
3.1.3 代码解释:
以上代码利用C++声明定义了MyObject类
1)定义了公有方法方法:
2)定义了私有成员变量:
3.1.4 特别注意
3.2 再看一下Objective-C是如何定义一个MyObject类的
3.2.1 创建新项目
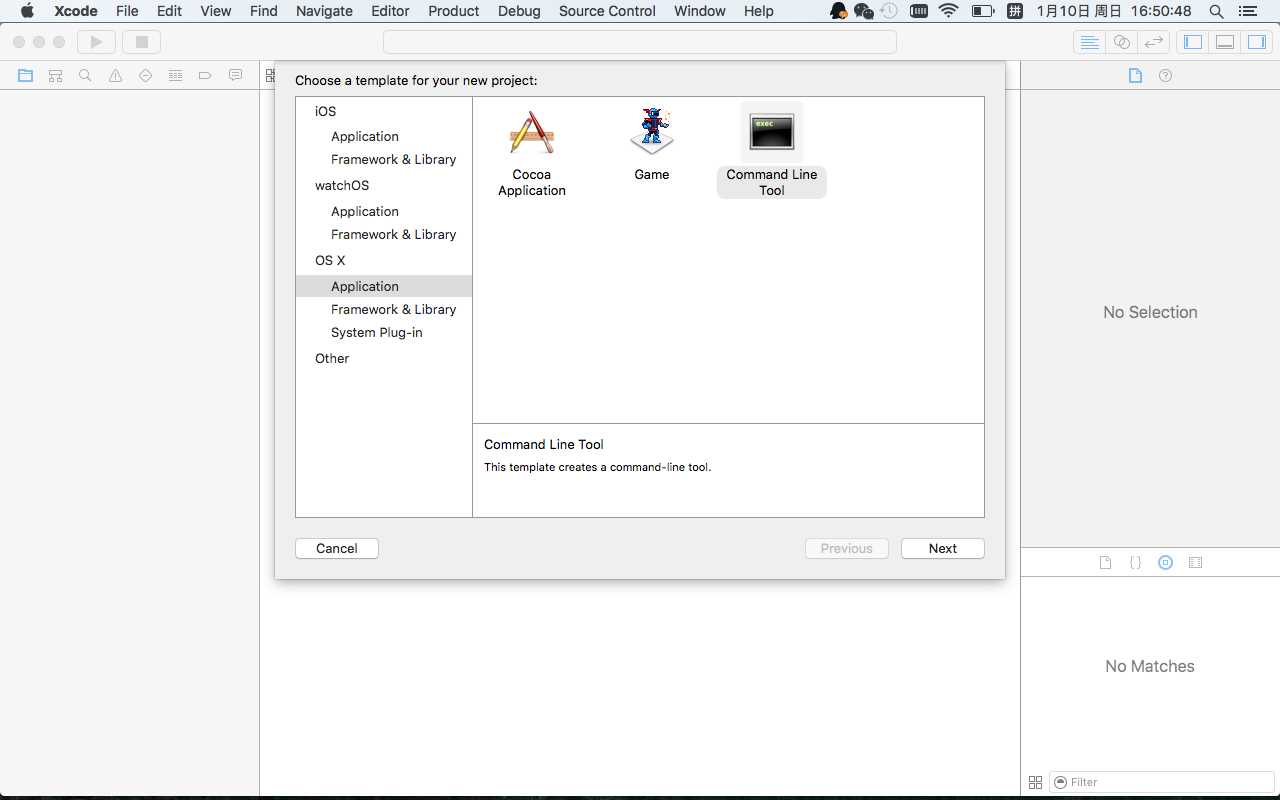
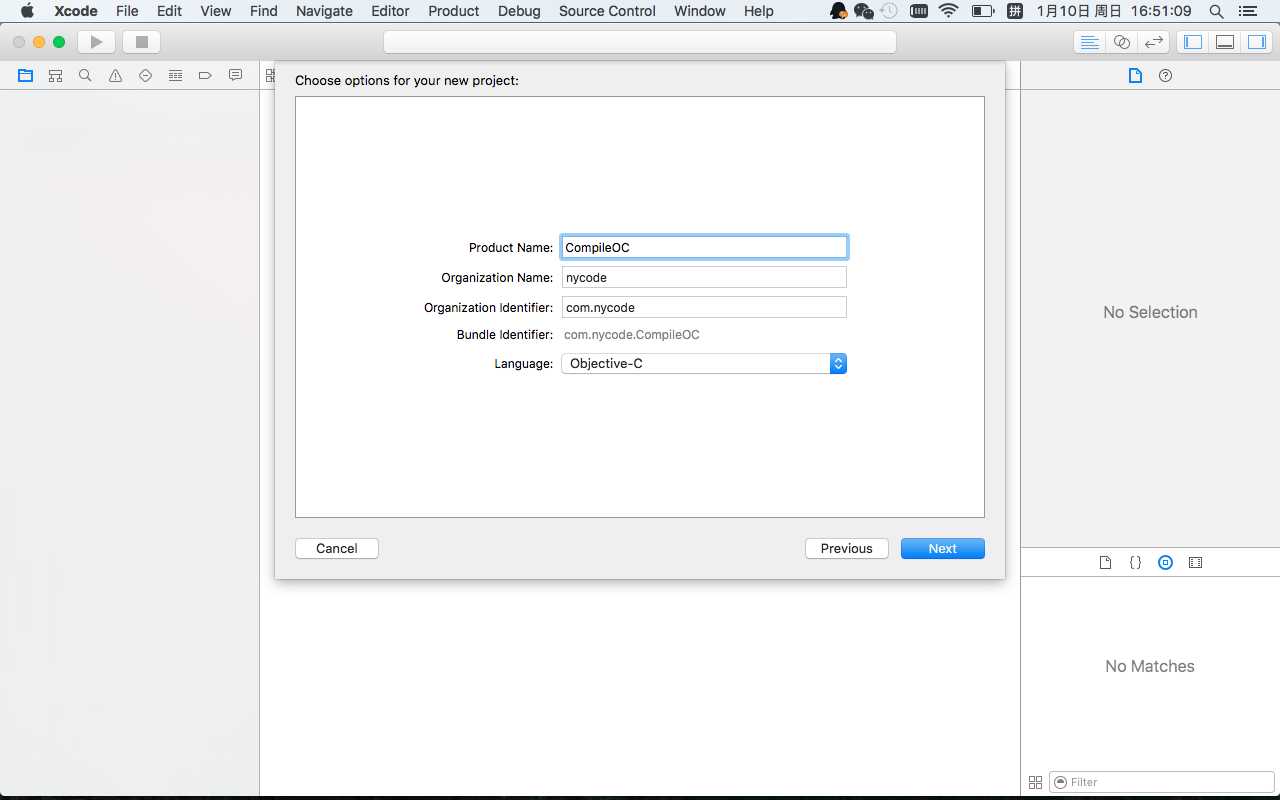
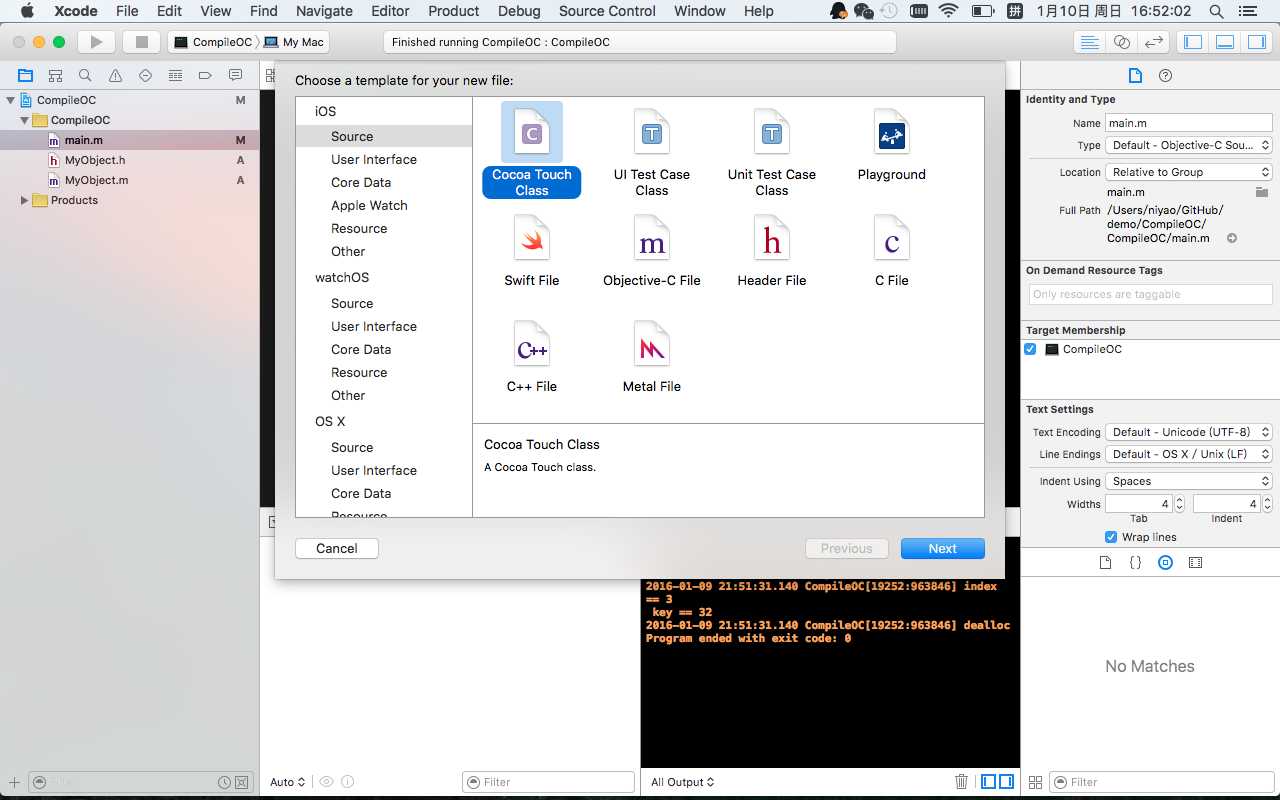
选择OS X中的Command Line Tool,创建好工程后,按住command+N键创建Cocoa Touch Class,创建一个名为MyObject的NSObject的子类。


这样就创建了OS X的命令行程序,以用于简单演示如何声明定义Objective-C的类
3.2.2 程序源码
1)main.m文件:
#import <Foundation/Foundation.h>

#import "MyObject.h"


int main(int argc, const char * argv[]) {
    @autoreleasepool {
        // insert code here...
        NSLog(@"Hello, World!");
        MyObject *object = [[MyObject alloc] initWithIndex:3];
        [object display];
//        object = nil;
    }
    return 0;
}
2) MyObject.h
#import <Foundation/Foundation.h>

@interface MyObject : NSObject
- (instancetype)initWithIndex:(NSInteger)index;
- (void)display;
+ (void)classMethod;
@end
3) .m文件
#import "MyObject.h"

@interface MyObject()
@property (assign, nonatomic) NSInteger index;
@property (assign, nonatomic) NSInteger key;

@end

@implementation MyObject
@synthesize index = _index;
@synthesize key = _key;

- (instancetype)initWithIndex:(NSInteger)index {
    self = [super init];
    if (self) {
        NSLog(@"init");
        self.index = index;
    }
    return self;
}

- (void)setIndex:(NSInteger)index {
    _index = index;
    self.key = 1<<(index+2);
}

- (NSInteger)index {
    return _index;
}

- (NSInteger)key {
    return _key;
}

- (void)display {
    NSLog(@"index == %ld \n key == %ld", (long)_index, (long)_key);
}

+ (void)classMethod {
    NSLog(@"this is static (or class) method");
}

- (void)dealloc {
    NSLog(@"dealloc");
}
@end
3.2.3 控制台打印结果
2016-01-10 17:55:50.401 CompileOC[20792:1052939] Hello, World!
2016-01-10 17:55:50.402 CompileOC[20792:1052939] init
2016-01-10 17:55:50.402 CompileOC[20792:1052939] index == 3
key == 32
2016-01-10 17:55:50.402 CompileOC[20792:1052939] dealloc
Program ended with exit code: 0
3.2.4 代码解释
1) 在main.m文件中创建了MyObject的实例并调用display方法。
2)在头文件中声明了三个公有方法,
- (instancetype)initWithIndex:(NSInteger)index;
- (void)display;
+ (void)classMethod;
3).m文件中
- (void)display
+ (void)classMethod;
4)与C++代码做对比
@interface
@end
之间就可以了,而私有方法不需要在头文件中声明。
@implementation {
@private
int index;
int key;
}
@end
注意实例变量和类的属性并不是一回事,属性和实例变量的本质区别是,属性无法直接访问对象的内部状态,但是可以利用setter和getter方法进行访问,而在setter和getter方法中还可以包含其他逻辑,比如,本文章中
- (void)setIndex:(NSInteger)index
方法,不单为实例变量_index赋值,还用setter的简洁方式
self.key = 1<<(index+2);
为实例变量_key赋值。
那_index和_key实例变量是谁声明的呢?这是Xcode编译器自己生成的:
@synthesize index = _index;
@synthesize key = _key;
上面的代码使用了 @synthesize 编译指令,让编译器分别为属性index和key自动创建实例变量_index和_key。即,自动为属性创建对应实例变量的方法是
@synthesize 属性名 = 实例变量名;
事实上,当没有实现setter方法时,@synthesize指令不写,编译器也可以为属性自动创建实例变量,编译器自动为属性创建的变量名默认为_属性名,在调试的时候可以设置变量观察。
-fno-objc-arc即可4.Objective-C语言常见语法概念
4.1 基本语法概念
4.1.1类元素
1)实例变量
声明方法:
@implementation {
//声明实例变量
}
@end
实例变量是是类封装的数据
2)属性
@property (特性) 类型 属性名;
属性是Objective-C提供的访问对象共享状态的机制,编译器可以自动生成访问实例变量的方法。Xcode自动创建的实例变量默认变量名为“_属性名”
3)类的声明(接口)
@interface MyObject : NSObject
@end
通用的如下:
@interface 类名 : 父类名
@end
说明:
4)类的实现
@implementation {
//实例变量的声明
}
//属性和方法的定义
@end
说明:
5)类的方法:分为类方法和实例方法。
//code here
return 返回值;
}
说明:
“不同的类可以拥有相同的 selector,这个没有问题,因为不同类的实例对象performSelector相同的 selector 时,会在各自的消息选标(selector)/实现地址(address) 方法链表中根据 selector 去查找具体的方法实现IMP, 然后用这个方法实现去执行具体的实现代码。这是一个动态绑定的过程,在编译的时候,我们不知道最终会执行哪一些代码,只有在执行的时候,通过selector去查询,我们才能确定具体的执行代码。”
- (void)requestDataWithIndex:(NSInteger)index forKey:(NSInteger)key completion:(void(^)(NSError *error, id response))completion {
//code here
NSError *responseError = nil;//assume it is responsed from server
NSDictionary *responseData = @{@"message": @"OK"};
if (completion != nil) {
if (responseError != nil) {
completion(responseError, nil);
} else {
completion(nil, responseData);
}
}
}
说明:6)类的扩展
其实就是写在类.m文件中的接口,只不过与类.h中接口相比,在.m文件中声明的实例变量、属性、方法外部不能访问,即实现了方法、属性的私有化。例如MyObject.m文件中
@interface MyObject()
@property (assign, nonatomic) NSInteger index;
@property (assign, nonatomic) NSInteger key;
@end
这段代码就是扩展,并且声明的index和key属性外部不能访问,只能在类的内部访问。
7)分类
分类的目的主要是为了扩展类的方法,比如MyObject类我添加一个NY的分类,创建方法如下:
#import "MyObject.h"

@interface MyObject (NY)

@end
#import "MyObject+NY.h"

@implementation MyObject (NY)

@end
说明:
/Users/niyao/GitHub/demo/CompileOC/CompileOC/MyObject+NY.m:10:1: Duplicate interface definition for class ‘MyObject‘
8)协议
@protocol NYProtocol <NSObject>
@optional
- (void)nyOptionalProtocalMethod;
@required
- (void)nyRequiredProtocalMethod;
@end
通用:
@protocol 协议名 <NSObject>
@optional
//可选择实现的方法
@required
//必须实现的方法
@end
@interface MyObject() <NYProtocol>
@property (assign, nonatomic) NSInteger index;
@property (assign, nonatomic) NSInteger key;
@end
说明:
4.2 ARC(Automatic Reference Counting)
系统根据对象被引用的次数计次,当引用计数为零时,释放该对象所占有的内存。
4.3 KVC&KVO
博文推荐
http://blog.csdn.net/kesalin/article/details/8155245
iOS完全自学手册——[三]Objective-C语言速成,利用Objective-C创建自己的对象
标签:
原文地址:http://www.cnblogs.com/nycoder/p/5120043.html