标签:
[root@nodeSource local]# yum install gc-devel gcc-c++ pcre-devel zlib-devel
[root@nodeSource local]# tar -zxvf nginx-1.8.0.tar.gz
[root@nodeSource local]# cd nginx-1.8.0
[root@nodeSource local]#  ./configure --prefix=/usr/local/nginx-1.8.0
[root@nodeSource local]# make && make install
[root@nodeSource sbin]# mkdir -p /var/lock/subsys/nginx
[root@nodeSource local]# vim /etc/init.d/nginx
#!/bin/sh
#
# nginx - this script starts and stops the nginx daemin
#
# chkconfig:   - 85 15
# description:  Nginx is an HTTP(S) server, HTTP(S) reverse \
#               proxy and IMAP/POP3 proxy server
# processname: nginx
# config:      /usr/local/nginx/conf/nginx.conf
# pidfile:     /usr/local/nginx/logs/nginx.pid

# Source function library.
. /etc/rc.d/init.d/functions

# Source networking configuration.
. /etc/sysconfig/network

# Check that networking is up.
[ "$NETWORKING" = "no" ] && exit 0

nginx="/usr/local/nginx-1.8.0/sbin/nginx"
prog=$(basename $nginx)

NGINX_CONF_FILE="/usr/local/nginx-1.8.0/conf/nginx.conf"

lockfile=/var/lock/subsys/nginx

start() {
    [ -x $nginx ] || exit 5
    [ -f $NGINX_CONF_FILE ] || exit 6
    echo -n $"Starting $prog: "
    daemon $nginx -c $NGINX_CONF_FILE
    retval=$?
    echo
    [ $retval -eq 0 ] && touch $lockfile
    return $retval
}

stop() {
    echo -n $"Stopping $prog: "
    killproc $prog -QUIT
    retval=$?
    echo
    [ $retval -eq 0 ] && rm -f $lockfile
    return $retval
}

restart() {
    configtest || return $?
    stop
    start
}

reload() {
    configtest || return $?
    echo -n $"Reloading $prog: "
    killproc $nginx -HUP
    RETVAL=$?
    echo
}

force_reload() {
    restart
}

configtest() {
  $nginx -t -c $NGINX_CONF_FILE
}

rh_status() {
    status $prog
}

rh_status_q() {
    rh_status >/dev/null 2>&1
}

case "$1" in
    start)
        rh_status_q && exit 0
        $1
        ;;
    stop)
        rh_status_q || exit 0
        $1
        ;;
    restart|configtest)
        $1
        ;;
    reload)
        rh_status_q || exit 7
        $1
        ;;
    force-reload)
        force_reload
        ;;
    status)
        rh_status
        ;;
    condrestart|try-restart)
        rh_status_q || exit 0
            ;;
    *)
        echo $"Usage: $0 {start|stop|status|restart|condrestart|try-restart|reload|force-reload|configtest}"
        exit 2
esac
[root@nodeSource local]# chmod +x /etc/init.d/nginx
[root@nodeSource local]# chkconfig --add nginx
[root@nodeSource local]# chkconfig --list
[root@nodeSource local]# chkconfig nginx on
[root@nodeSource ~]# service nginx start
[root@nodeSource ~]# service iptables stop


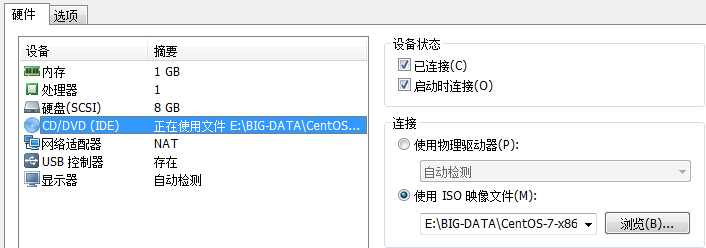
[root@nodeSource ~]# mount /dev/cdrom /mnt

[root@nodeSource /]# vim /usr/local/nginx-1.8.0/conf/nginx.conf
 location / {
            #root   html;
            #index  index.html index.htm;
            root       /mnt;
            autoindex  on;
        }
[root@nodeSource /]# service nginx restart

[root@node1 /]# mkdir -p /etc/yum.repos.d/_bak
[root@node1 /]# mv /etc/yum.repos.d/* /etc/yum.repos.d/_bak
[root@node1 yum.repos.d]# vi local.repo #(注:无论文件名是什么但是必须以.repo结尾)
[local_server]
name=Thisis a local repo
baseurl=http://IP
enabled=1
gpgcheck=1
gpgkey=http://IP/RPM-GPG-KEY-CentOS-6  #(如果是其他版本的CentOS例如CentOS 7则需要把Key改成相应的KEY)
[root@node1 yum.repos.d]# yum makecache  #更新Yum源,然就后行后啦,可以随便安装个软件试试效果
标签:
原文地址:http://www.cnblogs.com/raphael5200/p/5122342.html