标签:
本文演示用Android Studio写一个最简单的输入法。界面和交互都很简陋,只为剔肉留骨,彰显写一个Android输入法的要点。

我给该输入法命名为AndroidXXIME。
如前文《Android下创建一个输入法》中所说:输入法是一个包含IME service的安卓应用程序,首先应该在程序的manifest中声明service。我的manifest.xml文件如下:
<manifest xmlns:android="http://schemas.android.com/apk/res/android"
    package="com.binglen.androidxxime">

    <application
        android:allowBackup="true"
        android:icon="@mipmap/ic_launcher"
        android:label="@string/app_name"
        android:supportsRtl="true"
        android:theme="@style/AppTheme">

        <service android:name=".AndroidXXIME"
            android:label="@string/xxime"
            android:permission="android.permission.BIND_INPUT_METHOD"
            >
            <intent-filter>
                <action android:name="android.view.InputMethod" />
            </intent-filter>
            <meta-data android:name="android.view.im" android:resource="@xml/method"/>
        </service>

    </application>

</manifest>
在Android Studio生成application块的尾部添加IME service的声明。第一行粗体字声明需要BIND_INPUT_METHOD权限,第二行粗体字创建了一个能够匹配android.view.InputMethod的intent filter,第三行粗体字定义了输入法的metadata。
需要注意:service android:name必须与后面java文件中的类名保持一致。
接下来创建该service中声明的资源。
meta-data里用到了资源xml/method文件,该文件中包含了输入法的subtype属性,输入法通过该属性定义它所支持的输入模式和语言,一个输入法可以包含多个subtype属性。在工程中res下创建xml文件夹,把method.xml添加到该文件夹下。method.xml内容如下:
<?xml version="1.0" encoding="utf-8"?>
<input-method xmlns:android="http://schemas.android.com/apk/res/android">
    <subtype
        android:label="@string/subtype_en_US"
        android:imeSubtypeLocale="en_US"
        android:imeSubtypeMode="keyboard" />
</input-method>
关于subtype的属性,可以参见InputMethodSubtype:
label是该subtype的名字
imeSubtypeLocale是该subtype支持的语言类型
imeSubtypeMode是它所支持的模式,可以是keyboard或者voice,当输入法被调起是,系统会把用户选择的mode值传给输入法。
在这里补上前文引用到的字符串定义:
<string name="xxime">XXIME</string>
<string name="subtype_en_US">English (US)</string>
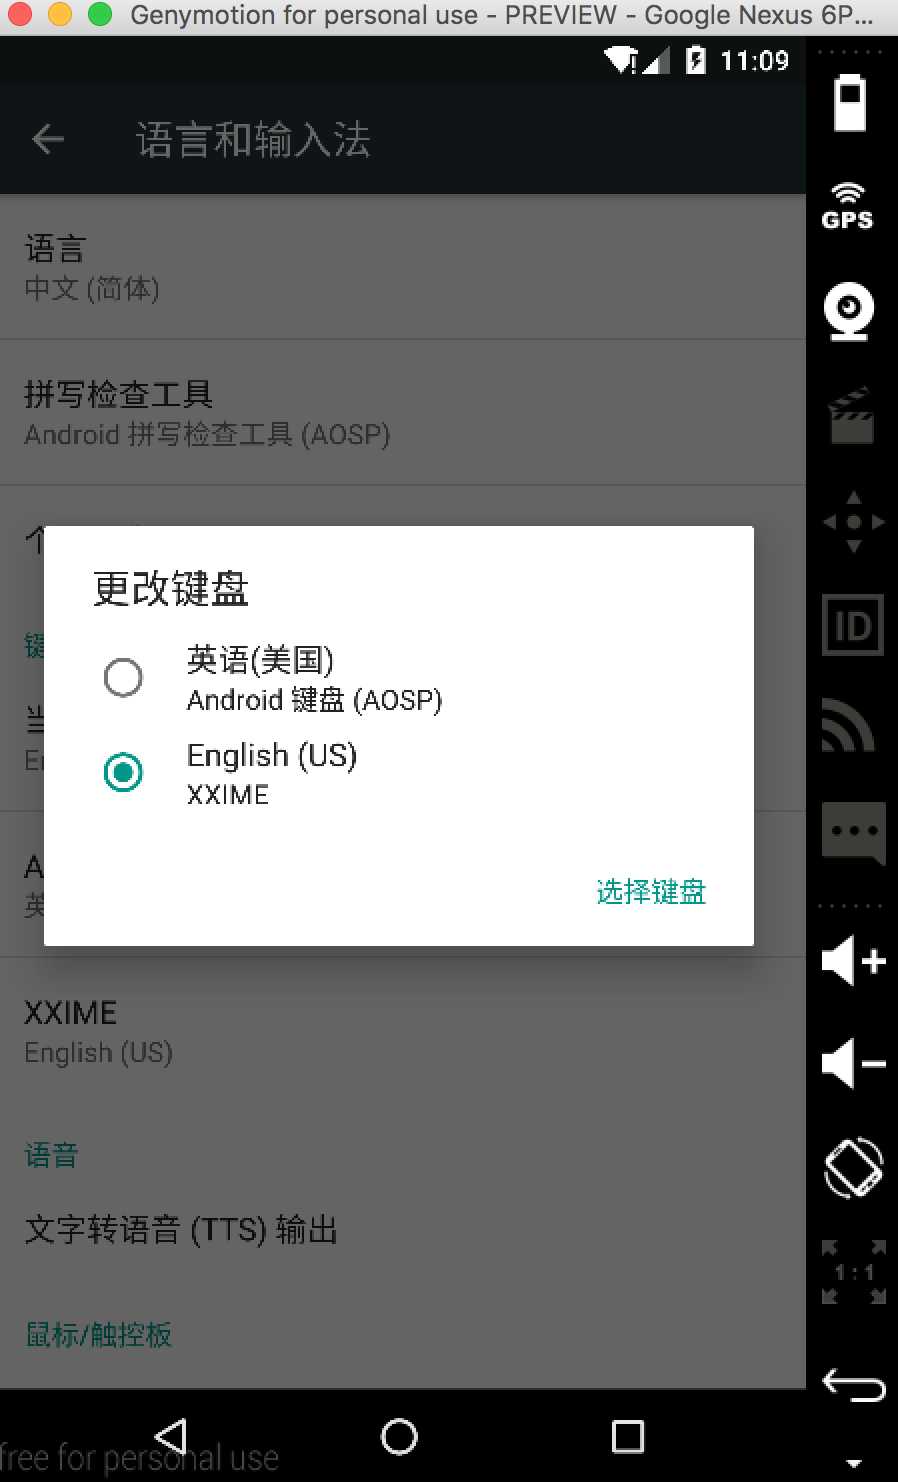
xxime在manifest中定义service的android:label时被引用到,该字串用来显示系统“语言和输入法”中本输入法的名字:

在res/layout/中添加文件keyboard.xml,定义键盘布局,内容如下:
<?xml version="1.0" encoding="UTF-8"?>
<android.inputmethodservice.KeyboardView
    xmlns:android="http://schemas.android.com/apk/res/android"
    android:id="@+id/keyboard"
    android:layout_width="match_parent"
    android:layout_height="wrap_content"
    android:layout_alignParentBottom="true"
    android:keyPreviewLayout ="@layout/preview"
/>
点击android.inputmethodservice.KeyboardView查看关于它的XML属性,其中keyPreviewLayout表示键盘被按下时的布局资源。在res/layout中添加preview.xml如下:
<?xml version="1.0" encoding="utf-8"?>
<TextView xmlns:android="http://schemas.android.com/apk/res/android"
    android:layout_width="match_parent"
    android:layout_height="match_parent"
    android:gravity="center"
    android:background="#ffff00"
    android:textStyle="bold"
    android:textSize="30sp"
    >
</TextView>
里面仅有一个TextView。
前面资源引用的源头都来自manifest文件,却不见哪里引用keyboard.xml。答案在后面,AndroidXXIME.java文件中onCreateInputView()函数中创建键盘视图和键盘布局时会用到,包括下面的qwerty.xml。
按键信息定义在Keyboard中,其格式形式如下:
 <Keyboard
         android:keyWidth="%10p"
         android:keyHeight="50px"
         android:horizontalGap="2px"
         android:verticalGap="2px" >
     <Row android:keyWidth="32px" >
         <Key android:keyLabel="A" />
         ...
     </Row>
     ...
 </Keyboard>
这是一个嵌套结构,其下包含了Row表示一行,内部又包含Key表示一个按键,每个按键有两个必填属性:
· keyLabel:按键上显示的文字
· codes:该按键代表的Unicode码
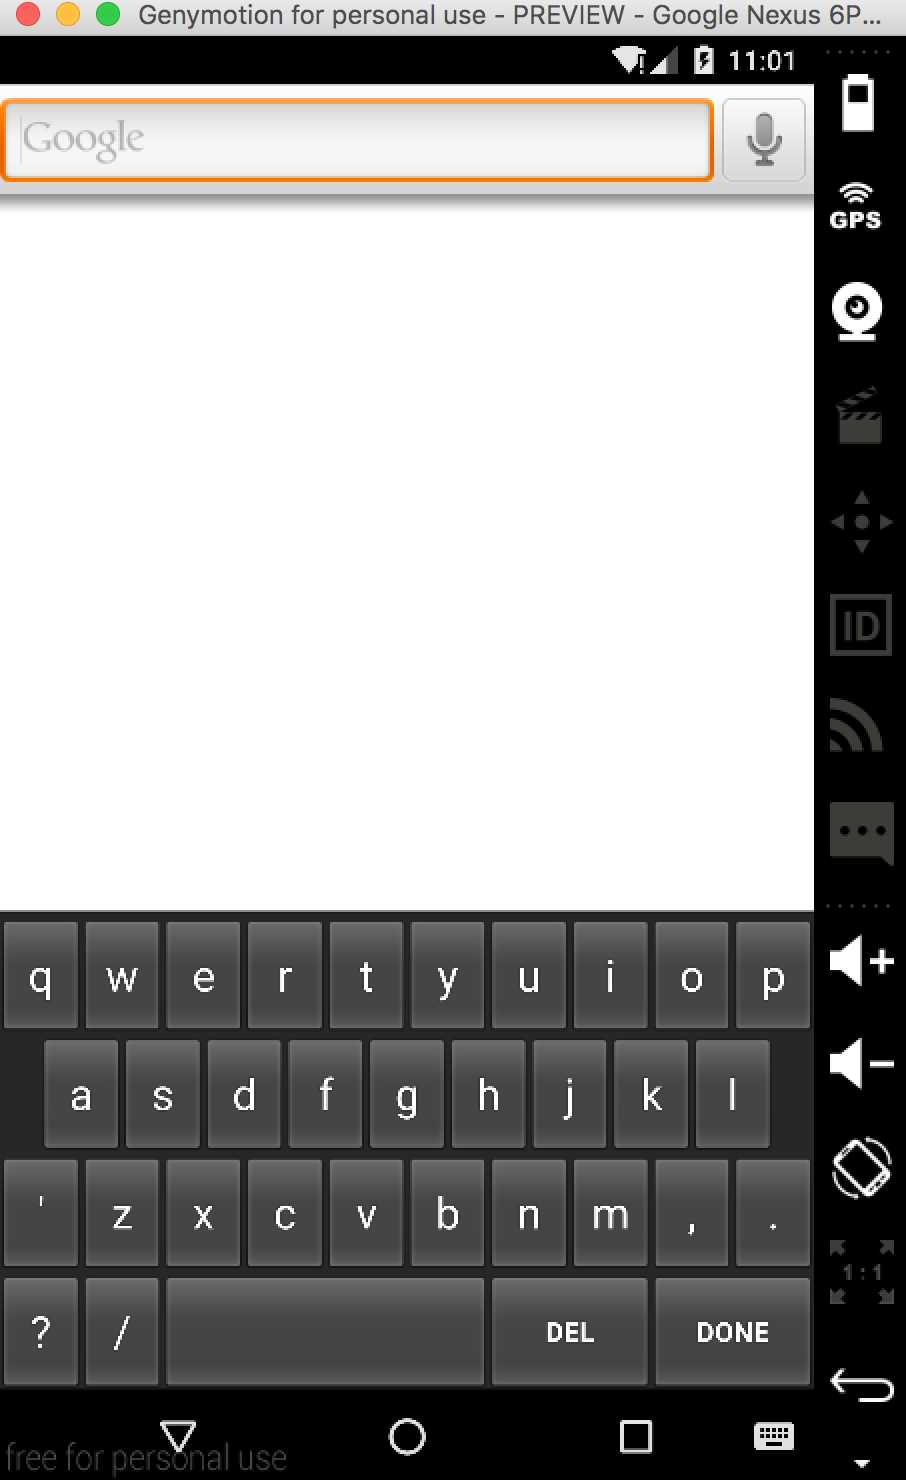
我们的按键信息文件在res/xml/qwerty.xml中,定义如下:
<Keyboard xmlns:android="http://schemas.android.com/apk/res/android"
    android:keyWidth="10%p"
    android:horizontalGap="0px"
    android:verticalGap="0px"
    android:keyHeight="60dp"
    >
    <Row>
        <Key android:codes="113" android:keyLabel="q" android:keyEdgeFlags="left"/>
        <Key android:codes="119" android:keyLabel="w"/>
        <Key android:codes="101" android:keyLabel="e"/>
        <Key android:codes="114" android:keyLabel="r"/>
        <Key android:codes="116" android:keyLabel="t"/>
        <Key android:codes="121" android:keyLabel="y"/>
        <Key android:codes="117" android:keyLabel="u"/>
        <Key android:codes="105" android:keyLabel="i"/>
        <Key android:codes="111" android:keyLabel="o"/>
        <Key android:codes="112" android:keyLabel="p" android:keyEdgeFlags="right"/>
    </Row>
    <Row android:layout_centerHorizontal="true">
        <Key android:codes="97" android:keyLabel="a" android:horizontalGap="5%p" android:keyEdgeFlags="left"/>
        <Key android:codes="115" android:keyLabel="s"/>
        <Key android:codes="100" android:keyLabel="d"/>
        <Key android:codes="102" android:keyLabel="f"/>
        <Key android:codes="103" android:keyLabel="g"/>
        <Key android:codes="104" android:keyLabel="h"/>
        <Key android:codes="106" android:keyLabel="j"/>
        <Key android:codes="107" android:keyLabel="k"/>
        <Key android:codes="108" android:keyLabel="l" android:keyEdgeFlags="right"/>
    </Row>
    <Row>
        <Key android:codes="39" android:keyLabel="‘" android:keyEdgeFlags="left"/>
        <Key android:codes="122" android:keyLabel="z"/>
        <Key android:codes="120" android:keyLabel="x"/>
        <Key android:codes="99" android:keyLabel="c"/>
        <Key android:codes="118" android:keyLabel="v"/>
        <Key android:codes="98" android:keyLabel="b"/>
        <Key android:codes="110" android:keyLabel="n"/>
        <Key android:codes="109" android:keyLabel="m"/>
        <Key android:codes="44" android:keyLabel=","/>
        <Key android:codes="46" android:keyLabel="." android:keyEdgeFlags="right"/>
    </Row>
    <Row android:rowEdgeFlags="bottom">
        <Key android:codes="63" android:keyLabel="\?" android:keyWidth="10%p"  android:keyEdgeFlags="left"/>
        <Key android:codes="47" android:keyLabel="/" android:keyWidth="10%p" />
        <Key android:codes="32" android:keyLabel=" " android:keyWidth="40%p" android:isRepeatable="true"/>
        <Key android:codes="-5" android:keyLabel="DEL" android:keyWidth="20%p" android:isRepeatable="true"/>
        <Key android:codes="-4" android:keyLabel="DONE" android:keyWidth="20%p" android:keyEdgeFlags="right"/>
    </Row>
</Keyboard>
其中有一些负值是定义在Keyboard类中的常量。
在字母a键的定义中有:android:horizontalGap="5%p",官方文档解释android:horizontalGap用来定义按键之间的间距,其实是与上一个按键之间的距离,如果是左边打头的的按键,则是与左边缘之间的距离。%p表示在父组件中的尺寸占比。
接下来就需要为输入法创建service和listener了。可以在一个类里完成这两个角色,AndroidXXIME类扩展了InputMethodService,并实现了KeyboardView.OnKeyboardActionListener接口。该类的定义如下:
public class AndroidXXIME extends InputMethodService
        implements KeyboardView.OnKeyboardActionListener {

    private KeyboardView keyboardView; // 对应keyboard.xml中定义的KeyboardView
    private Keyboard keyboard;         // 对应qwerty.xml中定义的Keyboard

    @Override
    public void onPress(int primaryCode) {
    }

    @Override
    public void onRelease(int primaryCode) {
    }

    @Override
    public void onText(CharSequence text) {
    }

    @Override
    public void swipeDown() {
    }

    @Override
    public void swipeLeft() {
    }

    @Override
    public void swipeRight() {
    }

    @Override
    public void swipeUp() {
    }

    @Override
    public View onCreateInputView() {
        // keyboard被创建后,将调用onCreateInputView函数
        keyboardView = (KeyboardView)getLayoutInflater().inflate(R.layout.keyboard, null);  // 此处使用了keyboard.xml
        keyboard = new Keyboard(this, R.xml.qwerty);  // 此处使用了qwerty.xml
        keyboardView.setKeyboard(keyboard);
        keyboardView.setOnKeyboardActionListener(this);
        return keyboardView;
    }

    private void playClick(int keyCode){
        // 点击按键时播放声音,在onKey函数中被调用
        AudioManager am = (AudioManager)getSystemService(AUDIO_SERVICE);
        switch(keyCode){
            case 32:
                am.playSoundEffect(AudioManager.FX_KEYPRESS_SPACEBAR);
                break;
            case Keyboard.KEYCODE_DONE:
            case 10:
                am.playSoundEffect(AudioManager.FX_KEYPRESS_RETURN);
                break;
            case Keyboard.KEYCODE_DELETE:
                am.playSoundEffect(AudioManager.FX_KEYPRESS_DELETE);
                break;
            default: am.playSoundEffect(AudioManager.FX_KEYPRESS_STANDARD);
        }
    }

    @Override
    public void onKey(int primaryCode, int[] keyCodes) {
        InputConnection ic = getCurrentInputConnection();
        playClick(primaryCode);
        switch(primaryCode){
            case Keyboard.KEYCODE_DELETE :
                ic.deleteSurroundingText(1, 0);
                break;
            case Keyboard.KEYCODE_DONE:
                ic.sendKeyEvent(new KeyEvent(KeyEvent.ACTION_DOWN, KeyEvent.KEYCODE_ENTER));
                break;
            default:
                char code = (char)primaryCode;
                ic.commitText(String.valueOf(code), 1);
        }
    }
}

该例程代码可参见https://github.com/palanceli/AndroidXXIME/tree/v1
标签:
原文地址:http://www.cnblogs.com/palance/p/5120048.html