标签:
第二组UI组件:TextView及其子类
1.
TextView(不允许用户编辑文本内容)直接继承了View,同时是EditText(允许用户编辑文本内容)/Button两个UI组件类的父类。TextView的作用就是在界面上显示文本(类似JLabel)
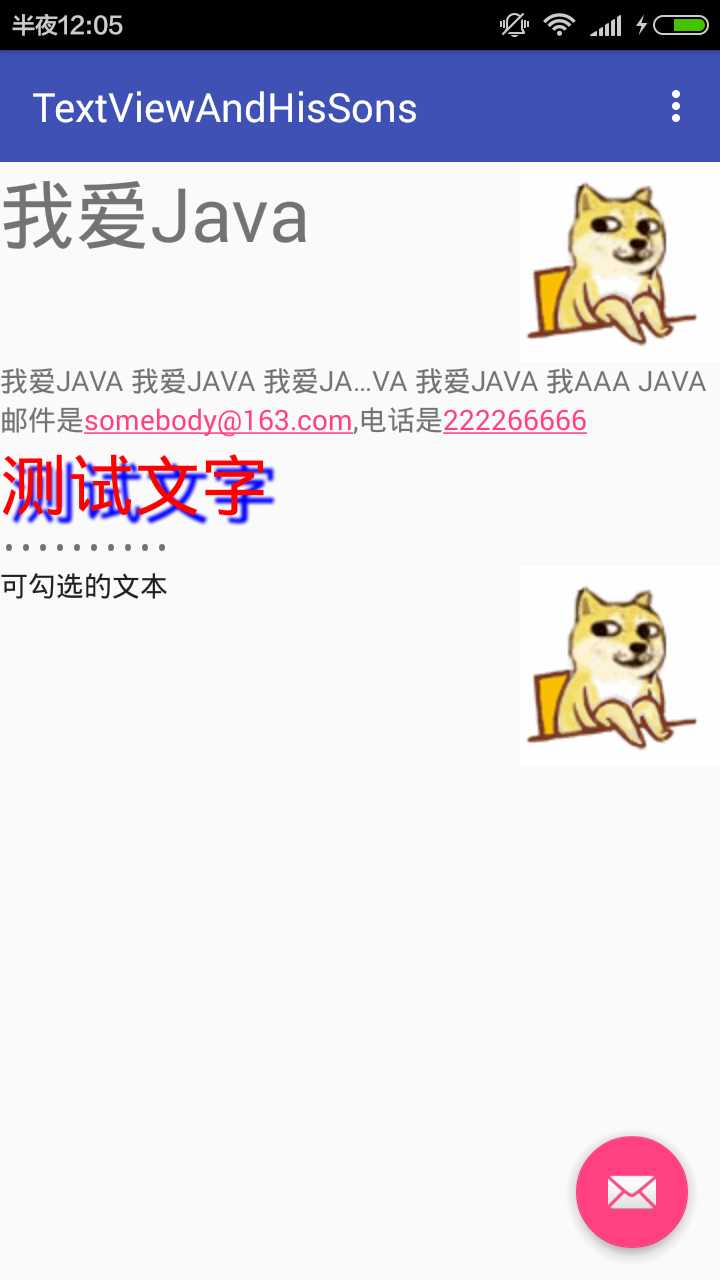
下面是TextView的几个使用例子

 1 <LinearLayout xmlns:android="http://schemas.android.com/apk/res/android"
 2         android:orientation="vertical"
 3         android:layout_width="match_parent"
 4         android:layout_height="match_parent">
 5         <!-- 设置字号为20pt,在文本框结尾处绘制图片 -->
 6         <TextView
 7             android:layout_width="match_parent"
 8             android:layout_height="wrap_content"
 9             android:layout_marginTop="30pt"
10             android:text="我爱Java"
11             android:textSize="20pt"
12             android:drawableEnd="@drawable/doge"
13             android:drawableRight="@drawable/doge"/>
14         <!-- 设置中间省略,所以字母大写 -->
15         <TextView
16             android:layout_width="match_parent"
17             android:layout_height="wrap_content"
18             android:singleLine="true"
19             android:text="我爱Java 我爱Java 我爱Java 我爱Java 我爱Java 我aaa Java"
20             android:ellipsize="middle"
21             android:textAllCaps="true"/>
22         <!-- 对邮件/电话增加链接 -->
23         <TextView
24             android:layout_width="match_parent"
25             android:layout_height="wrap_content"
26             android:singleLine="true"
27             android:text="邮件是somebody@163.com,电话是222266666"
28             android:autoLink="email|phone"/>
29         <!-- 设置文字颜色/大小,并使用阴影 -->
30         <TextView
31             android:layout_width="match_parent"
32             android:layout_height="wrap_content"
33             android:text="测试文字"
34             android:shadowColor="#00f"
35             android:shadowDx="10.0"
36             android:shadowDy="8.0"
37             android:shadowRadius="3.0"
38             android:textColor="#f00"
39             android:textSize="18pt"/>
40         <!-- 测试密码框 -->
41         <TextView
42             android:id="@+id/passwd"
43             android:layout_width="match_parent"
44             android:layout_height="wrap_content"
45             android:text="@string/hello"
46             android:password="true"/>
47         <CheckedTextView
48             android:layout_width="match_parent"
49             android:layout_height="wrap_content"
50             android:text="可勾选的文本"
51             android:checkMark="@drawable/doge"/>
52     </LinearLayout>
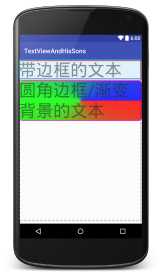
然后是一个圆角边框/渐变背景的TextView的实例
先在两个XML文件中定义两个背景文件
bg_border.xml
1 <?xml version="1.0" encoding="utf-8"?>
2 <shape xmlns:android="http://schemas.android.com/apk/res/android">
3     <!-- 设置背景色为透明色 -->
4     <solid android:color="#0000" />
5     <!-- 设置红色边框 -->
6     <stroke android:width="4px" android:color="#f00" />
7 </shape>
bg_border1.xml
 1 <?xml version="1.0" encoding="utf-8"?>
 2 <shape xmlns:android="http://schemas.android.com/apk/res/android" android:shape="rectangle">
 3     <!-- 指定圆角矩形的4个圆角的半径 -->
 4     <corners android:topLeftRadius="20px"
 5         android:topRightRadius="5px"
 6         android:bottomRightRadius="20px"
 7         android:bottomLeftRadius="5px"/>
 8     <!-- 指定边框线条的宽度和颜色 -->
 9     <stroke android:width="4px" android:color="#f0f" />
10     <!-- 指定使用渐变背景色,使用sweep类型的渐变,颜色从红色到绿色到蓝色 -->
11     <gradient android:startColor="#f00"
12         android:centerColor="#0f0"
13         android:endColor="#00f"
14         android:type="sweep"/>
15 </shape>
新增xml文件时,它是跑到layout目录下的而且还无法移动。。我就把文件写好剪切到了drawable文件夹里面。
然后添加一个布局文件border到layout目录下
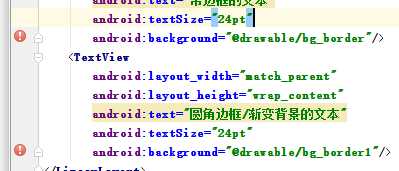
 1 <?xml version="1.0" encoding="utf-8"?>
 2 <LinearLayout xmlns:android="http://schemas.android.com/apk/res/android"
 3     android:orientation="vertical"
 4     android:layout_width="match_parent"
 5     android:layout_height="match_parent">
 6     <!-- 通过android:background指定背景 -->
 7     <TextView
 8         android:layout_width="match_parent"
 9         android:layout_height="wrap_content"
10         android:text="带边框的文本"
11         android:textSize="24pt"
12         android:background="@drawable/bg_border"/>
13     <TextView
14         android:layout_width="match_parent"
15         android:layout_height="wrap_content"
16         android:text="圆角边框/渐变背景的文本"
17         android:textSize="24pt"
18         android:background="@drawable/bg_border1"/>
19 </LinearLayout>
在引用背景的两行有感叹号提示错误。但是找不到错误,程序运行的错误是空指针异常,不知道怎么修改。但是可以看到右方的实例效果图。
错误的地方,求大神讲解
2.EditText的功能与用法
与TextView最大的区别是可以接受用户输入。最重要的属性是inputType,该属性相当于HTML的<input.../>元素的type属性,用于将EditView设置为指定类型的输入组件。
下面是一个用户相对友好的输入界面
 1 <?xml version="1.0" encoding="utf-8"?>
 2 <TableLayout xmlns:android="http://schemas.android.com/apk/res/android"
 3     android:layout_width="match_parent"
 4     android:layout_height="match_parent"
 5     android:stretchColumns="1">
 6     <TextView
 7         android:layout_width="match_parent"
 8         android:layout_height="32sp" />
 9     <TableRow>
10         <TextView
11             android:layout_width="match_parent"
12             android:layout_height="wrap_content"
13             android:text="用户名:"
14             android:textSize="16sp"/>
15         <EditText
16             android:layout_width="match_parent"
17             android:layout_height="wrap_content"
18             android:hint="请填写登陆账号"
19             android:selectAllOnFocus="true"/>
20     </TableRow>
21     <TableRow>
22         <TextView
23             android:layout_width="match_parent"
24             android:layout_height="wrap_content"
25             android:text="密码:"
26             android:textSize="16sp"/>
27         <!-- android:inputType="numberPassword"表明只能接受数字密码 -->
28         <EditText
29             android:layout_width="match_parent"
30             android:layout_height="wrap_content"
31             android:inputType="numberPassword"/>
32     </TableRow>
33     <TableRow>
34         <TextView
35             android:layout_width="match_parent"
36             android:layout_height="wrap_content"
37             android:text="年龄:"
38             android:textSize="16sp"/>
39         <!-- inputType="number"表明是数值输入框 -->
40         <EditText
41             android:layout_width="match_parent"
42             android:layout_height="wrap_content"
43             android:inputType="number"/>
44     </TableRow>
45     <TableRow>
46         <TextView
47             android:layout_width="match_parent"
48             android:layout_height="wrap_content"
49             android:text="生日:"
50             android:textSize="16sp"/>
51         <!-- inputType="date"表明是日期输入框 -->
52         <EditText
53             android:layout_width="match_parent"
54             android:layout_height="wrap_content"
55             android:inputType="date"/>
56     </TableRow>
57     <TableRow>
58         <TextView
59             android:layout_width="match_parent"
60             android:layout_height="wrap_content"
61             android:text="电话号码:"
62             android:textSize="16sp"/>
63         <!-- inputType="phone"表明是输入电话号码的输入框 -->
64         <EditText
65             android:layout_width="match_parent"
66             android:layout_height="wrap_content"
67             android:hint="请填写您的电话号码"
68             android:selectAllOnFocus="true"
69             android:inputType="phone"/>
70     </TableRow>
71     <Button
72         android:layout_width="wrap_content"
73         android:layout_height="wrap_content"
74         android:text="注册"/>
75 </TableLayout>
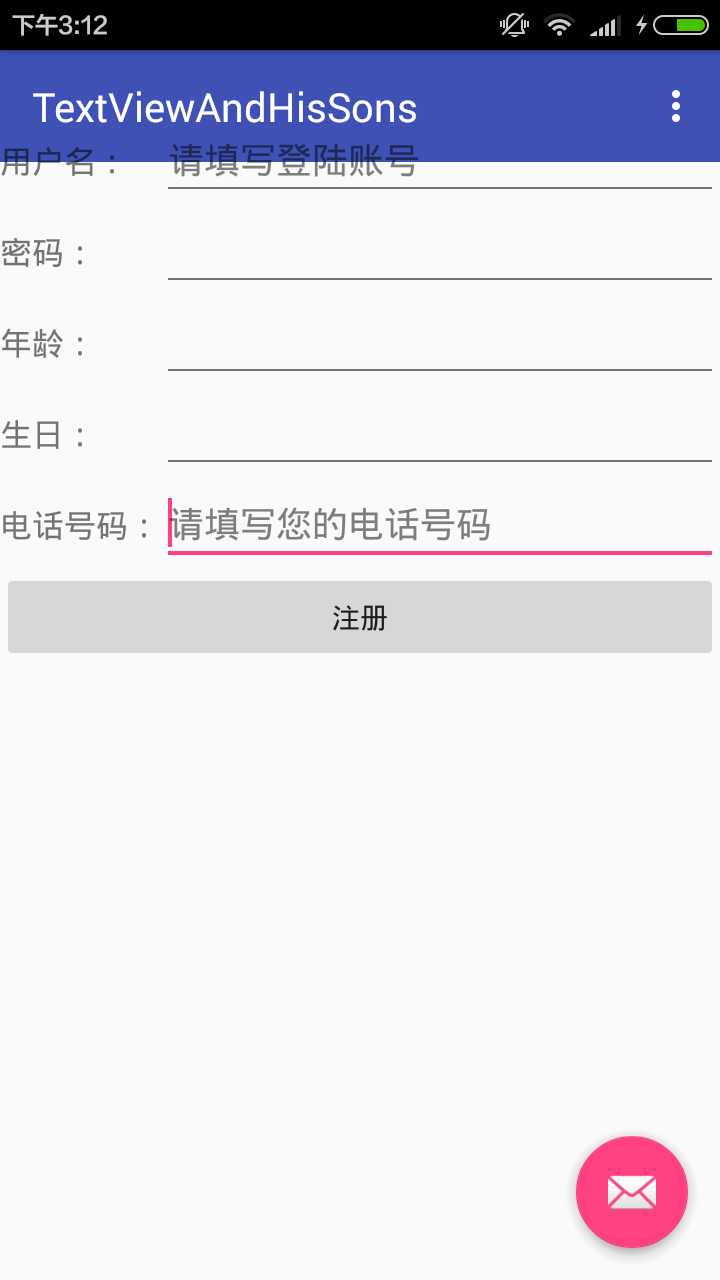
切换不同的文本框时会启用不同的键盘
3.Button
可以指定按钮按下/松开时的图片
还可以使用9Patch图片作为背景(sdk/tools里面的draw9patch.bat)可以设定缩放的图片区域,防止图片变形(暂时没有实际操作)
下面是一个简单的使用说明
首先是一个界面布局文件
 1 <LinearLayout
 2         xmlns:android="http://schemas.android.com/apk/res/android"
 3         android:orientation="vertical"
 4         android:layout_width="match_parent"
 5         android:layout_height="match_parent">
 6         <TextView
 7             android:layout_marginTop="80px"
 8             android:layout_width="wrap_content"
 9             android:layout_height="wrap_content" />
10         <!-- 文字带阴影的按钮 -->
11         <Button
12             android:layout_width="wrap_content"
13             android:layout_height="wrap_content"
14             android:text="文字带阴影的按钮"
15             android:textSize="12pt"
16             android:shadowColor="#aa5"
17             android:shadowRadius="1"
18             android:shadowDx="5"
19             android:shadowDy="5"/>
20         <!-- 普通文字按钮 -->
21         <Button
22             android:layout_width="wrap_content"
23             android:layout_height="wrap_content"
24             android:background="@drawable/doge"
25             android:text="普通按钮"
26             android:textSize="10pt" />
27         <!-- 带文字的图片按钮 -->
28         <Button
29             android:layout_width="wrap_content"
30             android:layout_height="wrap_content"
31             android:background="@drawable/button_selector"
32             android:textSize="11px"
33             android:text="带文字的图片按钮"/>
34     </LinearLayout>
里面引用了一个xml文件,文件指定了第三个按钮按下和松开时的图片
1 <?xml version="1.0" encoding="utf-8"?>
2 <selector xmlns:android="http://schemas.android.com/apk/res/android">
3     <!-- 指定按钮按下时的图片 -->
4     <item android:state_pressed="true"
5         android:drawable="@drawable/three"/>
6     <!-- 指定按钮松开时的图片 -->
7     <item android:state_pressed="false"
8         android:drawable="@drawable/four"/>
9 </selector>

4.单选钮(RadioButton)和复选框(CheckBox)的功能与用法
比普通按钮多了一个可选中的功能,可额外指定一个android:checked属性(初始时是否被选中)
注意:如果在XML布局文件中定义了一组单选钮,并默认勾选了第一个单选钮,则必须为该组单选钮的每个按钮指定android:id属性值;否组这组单选钮不能正常工作
XML布局文件如下
 1 <TableLayout
 2         xmlns:android="http://schemas.android.com/apk/res/android"
 3         android:layout_width="match_parent"
 4         android:layout_height="match_parent">
 5         <TextView
 6             android:layout_width="match_parent"
 7             android:layout_height="wrap_content"
 8             android:layout_marginTop="100px"/>
 9         <TableRow>
10             <TextView
11                 android:layout_width="wrap_content"
12                 android:layout_height="wrap_content"
13                 android:text="性别"/>
14             <!-- 定义一组单选钮 -->
15             <RadioGroup android:id="@+id/rg"
16                 android:orientation="horizontal"
17                 android:layout_gravity="center_horizontal">
18                 <!-- 定义两个单选钮 -->
19                 <RadioButton
20                     android:layout_width="wrap_content"
21                     android:layout_height="wrap_content"
22                     android:id="@+id/male"
23                     android:text="男"
24                     android:checked="true"/>
25                 <RadioButton
26                     android:layout_width="wrap_content"
27                     android:layout_height="wrap_content"
28                     android:id="@+id/female"
29                     android:text="女"/>
30             </RadioGroup>
31         </TableRow>
32         <TableRow>
33             <TextView
34                 android:layout_width="wrap_content"
35                 android:layout_height="wrap_content"
36                 android:text="喜欢的颜色:"/>
37             <!-- 定义一个垂直的线性布局 -->
38             <LinearLayout
39                 android:layout_gravity="center_horizontal"
40                 android:orientation="vertical"
41                 android:layout_width="wrap_content"
42                 android:layout_height="wrap_content">
43                 <!-- 定义三个复选框 -->
44                 <CheckBox
45                     android:layout_width="wrap_content"
46                     android:layout_height="wrap_content"
47                     android:text="红色"
48                     android:checked="true"/>
49                 <CheckBox
50                     android:layout_width="wrap_content"
51                     android:layout_height="wrap_content"
52                     android:text="蓝色"/>
53                 <CheckBox
54                     android:layout_width="wrap_content"
55                     android:layout_height="wrap_content"
56                     android:text="绿色"/>
57             </LinearLayout>
58         </TableRow>
59         <TextView
60             android:id="@+id/show"
61             android:layout_width="wrap_content"
62             android:layout_height="wrap_content"/>
63     </TableLayout>
为了监听单选钮/复选框勾选状态的改变,为他们添加事件监听器,如下的代码为RadioGroup添加了事件监听器
 1 public class RadioButtonAndCheckBox extends AppCompatActivity {
 2
 3     RadioGroup rg;
 4     TextView show;
 5     @Override
 6     protected void onCreate(Bundle savedInstanceState) {
 7         super.onCreate(savedInstanceState);
 8         setContentView(R.layout.activity_radio_button_and_check_box);
 9         //获取界面上rg/show两个组件
10         rg=(RadioGroup)findViewById(R.id.rg);
11         show=(TextView)findViewById(R.id.show);
12         //为RadioGroup组件的onCheckedChanged事件绑定事件监听器
13         rg.setOnCheckedChangeListener(new RadioGroup.OnCheckedChangeListener()
14         {
15             @Override
16             public void onCheckedChanged(RadioGroup group,int checkedId)
17             {
18                 //根据用户勾选的单选按钮来动态改变tip字符串的值
19                 String tip=checkedId==R.id.male?"您的性别是男":"您的性别是女";
20                 //修改show组件中的文本
21                 show.setText(tip);
22             }
23         });
24     }
25 }
运行效果如下

5.状态开关按钮(ToggleButton)和开关(Switch)的功能与用法
通常用于切换程序中的某种状态,下面是一个动态控制布局的实例
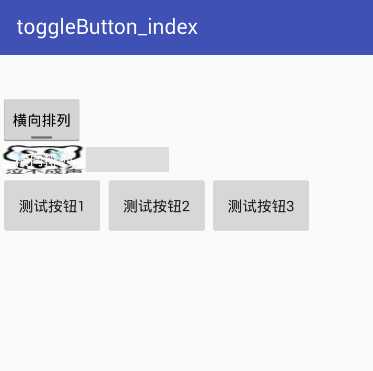
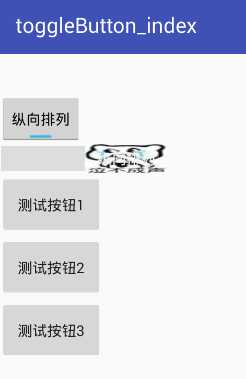
在页面中增加一个ToggleButton,随着该按钮状态的改变,界面布局中的LinearLayout布局的方向在水平布局/垂直布局之间切换。如下是界面布局文件
 1 <LinearLayout xmlns:android="http://schemas.android.com/apk/res/android"
 2         android:orientation="vertical"
 3         android:layout_width="match_parent"
 4         android:layout_height="match_parent">
 5         <TextView
 6             android:layout_width="match_parent"
 7             android:layout_height="wrap_content"
 8             android:layout_marginTop="150px"/>
 9         <!-- 定义一个ToggleButton按钮 -->
10         <ToggleButton
11             android:id="@+id/toggle"
12             android:layout_width="wrap_content"
13             android:layout_height="wrap_content"
14             android:textOff="横向排列"
15             android:textOn="纵向排列"
16             android:checked="true"/>
17         <Switch
18             android:id="@+id/switcher"
19             android:layout_width="wrap_content"
20             android:layout_height="wrap_content"
21             android:textOff="横向排列"
22             android:textOn="纵向排列"
23             android:thumb="@drawable/three"
24             android:checked="true"/>
25         <!-- 定义一个可以动态改变方向的线性布局 -->
26         <LinearLayout
27             android:id="@+id/test"
28             android:orientation="vertical"
29             android:layout_width="match_parent"
30             android:layout_height="match_parent">
31             <Button
32                 android:layout_width="200px"
33                 android:layout_height="120px"
34                 android:text="测试按钮1"/>
35             <Button
36                 android:layout_width="200px"
37                 android:layout_height="120px"
38                 android:text="测试按钮2"/>
39             <Button
40                 android:layout_width="200px"
41                 android:layout_height="120px"
42                 android:text="测试按钮3"/>
43         </LinearLayout>
44     </LinearLayout>
然后再java代码中为ToggleButton按钮/Switch按钮绑定监听器,当选中状态改变时,程序通过代码来改变LinearLayout的布局方向
 1 public class toggleButton_index extends AppCompatActivity {
 2     ToggleButton toggle;
 3     Switch switcher;
 4     @Override
 5     protected void onCreate(Bundle savedInstanceState) {
 6         super.onCreate(savedInstanceState);
 7         setContentView(R.layout.activity_toggle_button_index);
 8         toggle=(ToggleButton)findViewById(R.id.toggle);
 9         switcher=(Switch)findViewById(R.id.switcher);
10         final LinearLayout test=(LinearLayout)findViewById(R.id.test);
11
12         CompoundButton.OnCheckedChangeListener listener=new CompoundButton.OnCheckedChangeListener()
13         {
14             @Override
15             public void onCheckedChanged(CompoundButton button,boolean isChecked)
16             {
17                 if(isChecked)
18                 {
19                     //设置LinearLayout垂直布局
20                     test.setOrientation(LinearLayout.VERTICAL);
21                     toggle.setChecked(true);
22                     switcher.setChecked(true);
23                 }
24                 else
25                 {
26                     //设置LinearLayout水平布局
27                     test.setOrientation(LinearLayout.HORIZONTAL);
28                     toggle.setChecked(false);
29                     toggle.setChecked(false);
30                 }
31             }
32         };
33         toggle.setOnCheckedChangeListener(listener);
34         switcher.setOnCheckedChangeListener(listener);
35     }
36 }
运行效果如下 上方的是ToggleButton 下方的是Switch
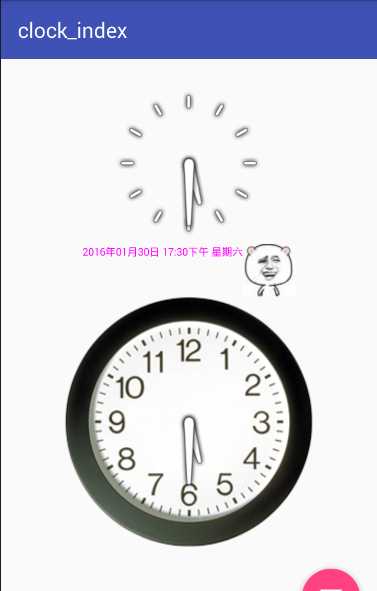
6.时钟(AnalogClock和TextClock(需要api17))
AnalogClock显示模拟时钟,TextClock显示数字时钟,可以显示当前秒数
下面是使用的样例
 1 <LinearLayout
 2         xmlns:android="http://schemas.android.com/apk/res/android"
 3         android:orientation="vertical"
 4         android:layout_width="match_parent"
 5         android:layout_height="match_parent"
 6         android:gravity="center_horizontal">
 7         <TextView
 8             android:layout_width="wrap_content"
 9             android:layout_height="wrap_content"
10             android:layout_marginTop="120px"/>
11         <!-- 定义模拟时钟 -->
12         <AnalogClock
13             android:layout_width="wrap_content"
14             android:layout_height="wrap_content" />
15         <!-- 定义数字时钟 -->
16         <TextClock
17             android:layout_width="wrap_content"
18             android:layout_height="wrap_content"
19             android:textSize="20pt"
20             android:textColor="#f0f"
21             android:format12Hour="yyyy年MM月dd日 H:mma EEEE"
22             android:drawableEnd="@drawable/four"
23             android:drawableRight="@drawable/four"/>
24         <!-- 定义模拟时钟,并使用自定义表盘/时针图片 -->
25         <AnalogClock
26             android:layout_width="wrap_content"
27             android:layout_height="wrap_content"
28             android:dial="@drawable/clock"/>
29     </LinearLayout>
图示,没有再去找时针分针的图片
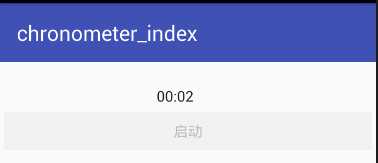
7.计时器(Chronometer)
下面的程序:用户单击button系统开始计时,超过20s停止计时,xml布局文件比较简单就不加了
 1 public class chronometer_index extends AppCompatActivity {
 2     Chronometer ch;
 3     Button start;
 4     @Override
 5     protected void onCreate(Bundle savedInstanceState) {
 6         super.onCreate(savedInstanceState);
 7         setContentView(R.layout.activity_chronometer_index);
 8         //获取计时器组件
 9         ch=(Chronometer)findViewById(R.id.chr);
10         start=(Button)findViewById(R.id.begin);
11         start.setOnClickListener(new View.OnClickListener() {
12             @Override
13             public void onClick(View v) {
14                 //设置开始计时时间
15                 ch.setBase(SystemClock.elapsedRealtime());
16                 //启动计时器
17                 ch.start();
18                 start.setEnabled(false);
19             }
20         });
21         //为Chronometer绑定事件监听器
22         ch.setOnChronometerTickListener(new Chronometer.OnChronometerTickListener() {
23             @Override
24             public void onChronometerTick(Chronometer chronometer) {
25                 //如果从开始计时到现在超过了20s
26                 if(SystemClock.elapsedRealtime()-ch.getBase()>20*1000)
27                 {
28                     ch.stop();
29                     start.setEnabled(true);
30                 }
31             }
32         });
33     }
34 }
下一篇 第三组UI组件:ImageView及其子类
标签:
原文地址:http://www.cnblogs.com/wangkaipeng/p/5170413.html
