标签:
本项目是SpringMVC的入门项目,用于演示SpringMVC的项目配置、各层结构,功能较简单二、pom.xml添加依赖
1 2 3 4 5 6 7 8 9 10 11 12 13 14 15 16 17 18 19 20 21 22 23 24 25 26 27 28 29 30 31 32 | <dependency> <groupId>javax.servlet</groupId> <artifactId>javax.servlet-api</artifactId> <version>3.1.0</version></dependency><dependency> <groupId>javax.servlet.jsp</groupId> <artifactId>jsp-api</artifactId> <version>2.2</version></dependency><!--① 依赖的Spring模块类库 --><dependency> <groupId>org.springframework</groupId> <artifactId>spring-context</artifactId> <version>3.1.1.RELEASE</version></dependency><dependency> <groupId>org.springframework</groupId> <artifactId>spring-beans</artifactId> <version>3.1.1.RELEASE</version></dependency><dependency> <groupId>org.springframework</groupId> <artifactId>spring-web</artifactId> <version>3.2.3.RELEASE</version></dependency><dependency> <groupId>org.springframework</groupId> <artifactId>spring-webmvc</artifactId> <version>3.2.3.RELEASE</version></dependency> |
三、web.config配置文件
1 2 3 4 5 6 7 8 9 10 11 12 13 14 15 16 17 18 19 20 21 22 23 24 25 26 27 28 29 30 31 32 33 34 | <?xml version="1.0" encoding="UTF-8"?> xsi:schemaLocation="http://java.sun.com/xml/ns/j2ee <display-name>SpringMVC</display-name> <!-- Spring应用上下文, 理解层次化的ApplicationContext --> <context-param> <param-name>contextConfigLocation</param-name> <param-value>/WEB-INF/applicationContext.xml</param-value> </context-param> <listener> <listener-class>org.springframework.web.context.ContextLoaderListener</listener-class> </listener> <!-- DispatcherServlet, Spring MVC的核心 --> <servlet> <servlet-name>mvc-dispatcher</servlet-name> <servlet-class>org.springframework.web.servlet.DispatcherServlet</servlet-class> <!-- DispatcherServlet对应的上下文配置, 默认为/WEB-INF/$servlet-name$-servlet.xml --> <init-param> <param-name>contextConfigLocation</param-name> <param-value>/WEB-INF/mvc-dispatcher-servlet.xml</param-value> </init-param> <load-on-startup>1</load-on-startup> </servlet> <servlet-mapping> <servlet-name>mvc-dispatcher</servlet-name> <!-- mvc-dispatcher拦截所有的请求 --> <url-pattern>/</url-pattern> </servlet-mapping></web-app> |
四、添加applicationContext.xml配置文件
文件路径对应web.xml中<context-param><param-value>节点值
1 2 3 4 5 6 7 8 9 10 11 12 13 14 15 16 17 | <?xml version="1.0" encoding="UTF-8"?> xmlns:xsi="http://www.w3.org/2001/XMLSchema-instance" xmlns:p="http://www.springframework.org/schema/p" xmlns:aop="http://www.springframework.org/schema/aop" xmlns:tx="http://www.springframework.org/schema/tx" xsi:schemaLocation="http://www.springframework.org/schema/beans <!-- 扫描类包,将标注Spring注解的类自动转化Bean,同时完成Bean的注入 --> <context:component-scan base-package="com.james"/></beans> |
五、添加mvc-dispatcher-servlet.xml配置文件
文件路径对应web.xml中<servlet><init-param><param-value>节点值
1 2 3 4 5 6 7 8 9 10 11 12 13 14 15 16 17 18 19 20 21 22 23 24 25 26 27 28 29 30 31 32 | <?xml version="1.0" encoding="UTF-8"?> xmlns:xsi="http://www.w3.org/2001/XMLSchema-instance" xmlns:context="http://www.springframework.org/schema/context" xsi:schemaLocation=" <context:component-scan base-package="com.james"> <context:include-filter type="annotation" expression="org.springframework.stereotype.Controller" /> </context:component-scan> <!-- 扩充了注解驱动,可以将请求参数绑定到控制器参数 --> <mvc:annotation-driven /> <!-- 静态资源处理, css, js, imgs --> <mvc:resources mapping="/resources/**" location="/resources/" /> <!-- /WEB-INF/views/ 对应jsp文件路径 --> <bean class="org.springframework.web.servlet.view.InternalResourceViewResolver"> <property name="viewClass" value="org.springframework.web.servlet.view.JstlView" /> <property name="prefix" value="/WEB-INF/views/" /> <property name="suffix" value=".jsp" /> </bean></beans> |
六、添加web、service、dao层及类
1、HelloController.java 包自定义
1 2 3 4 5 6 7 8 9 10 11 12 13 14 15 16 17 18 19 20 21 22 23 24 25 | package com.web.controller;import javax.servlet.http.HttpSession;import org.springframework.beans.factory.annotation.Autowired;import org.springframework.stereotype.Controller;import org.springframework.web.bind.annotation.RequestMapping;import com.james.service.HelloService;@Controller@RequestMapping("/hello")public class HelloController { @Autowired private HelloService service; @RequestMapping("/mvc") public String helloMvc(HttpSession httpSession) { System.out.println("进入:HelloController-->helloMvc"); this.service.helloMvc(); // 视图渲染,/WEB-INF/views/home.jsp return "home"; }} |
2、HelloService.java
1 2 3 4 5 6 7 8 9 10 11 12 13 14 15 16 17 18 19 | package com.service;import org.springframework.beans.factory.annotation.Autowired;import org.springframework.stereotype.Service;import com.dao.HelloDao;@Servicepublic class HelloService { @Autowired private HelloDao dao; public void helloMvc() { System.out.println("进入:HelloService-->helloMvc"); this.dao.helloMvc(); }} |
3、HelloDao.java
1 2 3 4 5 6 7 8 9 10 11 12 | package com.dao;import org.springframework.stereotype.Repository;@Repositorypublic class HelloDao { public void helloMvc() { System.out.println("进入:HelloDao-->helloMvc"); System.out.println("进入:HelloDao-->helloMvc2"); }} |
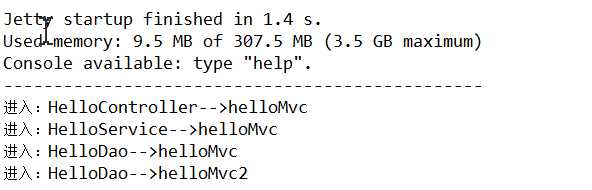
七、利用jetty启动mvc并查看输出
标签:
原文地址:http://www.cnblogs.com/gossip/p/5201938.html