标签:
作者:夏至 欢迎转载,也请保留这段申明,谢谢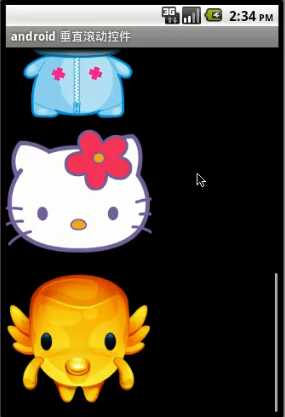
<?xml version="1.0" encoding="utf-8"?><ScrollView xmlns:android="http://schemas.android.com/apk/res/android"android:layout_width="match_parent"android:layout_height="match_parent"android:id="@+id/scrollView"><LinearLayoutandroid:layout_width="match_parent"android:layout_height="match_parent"android:orientation="vertical" ><Buttonandroid:id="@+id/bottom"android:layout_width="match_parent"android:layout_height="wrap_content"android:textSize="24sp"android:text="跳到底部"/><TextViewandroid:layout_width="match_parent"android:layout_height="wrap_content"android:text="实现翻滚效果"android:textSize="24sp"/><ImageViewandroid:layout_width="wrap_content"android:layout_height="wrap_content"android:src="@drawable/image1"/><ImageViewandroid:layout_width="wrap_content"android:layout_height="wrap_content"android:scaleType="fitCenter"android:src="@drawable/image2"/><ImageViewandroid:layout_width="wrap_content"android:layout_height="wrap_content"android:scaleType="fitCenter"android:src="@drawable/shaorui"/><ImageViewandroid:layout_width="wrap_content"android:layout_height="wrap_content"android:scaleType="fitCenter"android:src="@drawable/start"/><ImageViewandroid:layout_width="wrap_content"android:layout_height="wrap_content"android:scaleType="fitCenter"android:src="@drawable/stop"/><Buttonandroid:id="@+id/top"android:layout_width="match_parent"android:layout_height="wrap_content"android:textSize="24sp"android:text="回到顶部"/></LinearLayout></ScrollView>
public class MainActivity extends AppCompatActivity implements View.OnClickListener {private ScrollView scrollView;@Overrideprotected void onCreate(Bundle savedInstanceState) {super.onCreate(savedInstanceState);setContentView(R.layout.linearlayout);Button top = (Button) findViewById(R.id.top);Button bottom = (Button) findViewById(R.id.bottom);scrollView = (ScrollView) findViewById(R.id.scrollView);top.setOnClickListener(this);bottom.setOnClickListener(this);}@Overridepublic void onClick(View v) {switch (v.getId()) {case R.id.top:scrollView.fullScroll(ScrollView.FOCUS_UP);break;case R.id.bottom:scrollView.fullScroll(ScrollView.FOCUS_DOWN);break;}}


<HorizontalScrollViewxmlns:android="http://schemas.android.com/apk/res/android"android:layout_width="match_parent"android:layout_height="wrap_content"android:id="@+id/scrollView"><LinearLayout- android:layout_width="match_parent"
android:layout_height="match_parent"android:orientation="horizontal" >.....
public class MainActivity extends AppCompatActivity implements View.OnClickListener {private HorizontalScrollView horizontalScrollView;@Overrideprotected void onCreate(Bundle savedInstanceState) {super.onCreate(savedInstanceState);setContentView(R.layout.linearlayout);Button top = (Button) findViewById(R.id.top);Button bottom = (Button) findViewById(R.id.bottom);horizontalScrollView = (HorizontalScrollView) findViewById(R.id.scrollView);top.setOnClickListener(this);bottom.setOnClickListener(this);}@Overridepublic void onClick(View v) {switch (v.getId()) {case R.id.top:horizontalScrollView.fullScroll(HorizontalScrollView.FOCUS_UP);break;case R.id.bottom:horizontalScrollView.fullScroll(HorizontalScrollView.FOCUS_DOWN);break;}}


Android 学习笔记(7)——ScrollView(竖直滚动条)/HorizontalScrollView(水平滚动条)
标签:
原文地址:http://www.cnblogs.com/shaorui/p/5206597.html