标签:

smarty.class.php 主要的东西放在类里面
templates 放模板
templates_c 放缓存
类里面 $smarty->assign("author","feng and meizi")
$smarty->display("test.tpl")
请求的是test.php 找的是test.tpl文件 test.tpl:<{$author}>
test.tpl文件将所有内容替换完成之后
<div><?php echo $this->tpl_vars["author"];?></div>
存在templates_c文件里的com_test.tpl.php
test.php 里面有个include()函数将页面com_test.tpl.php包含进来
最后显示的是feng and meizi
配置smarty模板
输出配置文件的文件目录
主文件为test.php
配置文件:init.inc.php
定义模板文件夹 templates test.html
定义临时模板存放的文件夹 templates_c
添加模板扩充插件存放目录 plugins
定义缓存文件存放目录 cache
定义模板配置文件存放目录 configs
自定义配置文件 configns文件夹里面的test.conf
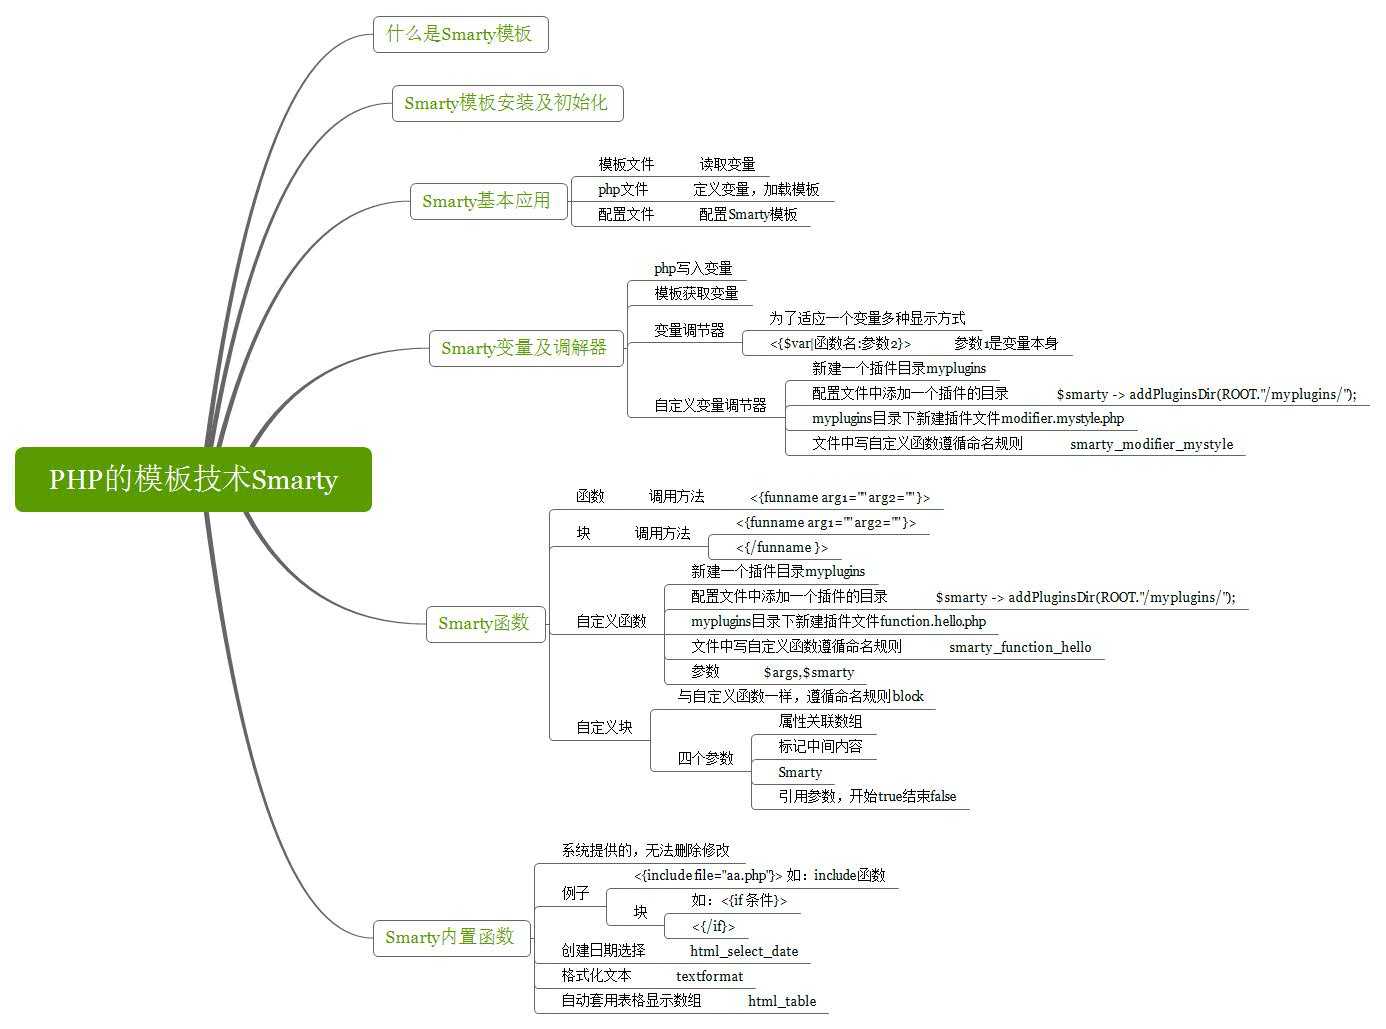
系统自带调节器 |truncate:5:"..." 需要三个参数:第一个参数为自身,不用写
配置文件里用:$smarty->addPluginsDir(ROOT.‘plugins/‘);
调节器是以modifier开头的
命名规则:
function smarty_modifiercompiler_lower($params)
{
if (Smarty::$_MBSTRING) {
return ‘mb_strtolower(‘ . $params[0] . ‘, \‘‘ . addslashes(Smarty::$_CHARSET) . ‘\‘)‘;
}
// no MBString fallback
return ‘strtolower(‘ . $params[0] . ‘)‘;
}
自定义插件 1.新建插件目录
2.配置文件中添加插件目录 $smarty->addPluginsDir(ROOT.‘plugins/‘);
3.目录下新建插件文件modifier.mystyle.php
4.写函数
<?php
function smarty_modifier_mystyle($str,$color="yellow",$size="20")
{
$str = "<span style=‘color:".$color."; font-size:".$size."px‘>".$str."</span>";
return $str;
}
?>
Test.php
<?php
//加载初始化文件
require "init.inc.php";

//用assign()方法将变量植入到模板内

$smarty->assign("title","测试网页");

$smarty->assign("content","内容");
$smarty->assign("neirong","this is a test demo");

$smarty->assign("shuzu",array("one"=>1,"two"=>2,3,4,5));

$smarty->assign("shijian",time());

@$smarty->assign("get",$_GET);

class Ren
{
    public $name ="张三";
}
$ren = new Ren();

$smarty->assign("ren",$ren);


//用smarty对象中的display()方法将网页输出
$smarty->display("Test.html");


?>
Test.html
<!DOCTYPE html PUBLIC "-//W3C//DTD XHTML 1.0 Transitional//EN" "http://www.w3.org/TR/xhtml1/DTD/xhtml1-transitional.dtd">
<html xmlns="http://www.w3.org/1999/xhtml">
<head>
<meta http-equiv="Content-Type" content="text/html; charset=utf-8" />
<title><{$title}></title>
</head>

<body>

<{$content}><br  />
<{$neirong}><br  />
<{print_r($shuzu)}><br  />
<{$shuzu.one}><br  />
<{$shuzu.two}>
<{$ren->name}>
<{$smarty.get.name}>

<!--引用自定义的配置文件-->
<{config_load file="test.conf" section="two"}>


    <div style="background-color:<{ #bg# }>; width:100px; height:100px; font-size:<{#size#}>px">好厉害</div>
</body>

<!--cat连接字符串-->
<div><{$neirong|cat:"中国"|cat:"china"}></div>

<!--截取英文的时候按单词来截,中文不存在这种情况-->
<div><{$neirong|truncate:6:""}></div>

<!--这样就可以分开截英文-->
<div><{$neirong|truncate:6:true}></div>

<!--处理时间函数--><!--default设置默认值--><!--调用自定义的调节器-->
<div><{$shijian|date_format:"%Y-%m-%d %H:%M:%S "}></div>

<div><{$aa|default:"hello"}></div>


<div><{$neirong|mystyle:green:50}></div>

</html>
init.inc.php
<?php

define("ROOT",str_replace("\\","/",dirname(__FILE__)).‘/‘); //常量ROOT中指定项目根目录

require ROOT.‘libs/Smarty.class.php‘; //加载Smarty类文件

$smarty = new Smarty(); //实例化Smarty对象<br>


$smarty -> auto_literal = false; //就可以让定界符号使用空格
$smarty->setTemplateDir(ROOT.‘templates/‘); //设置所有模板文件存放位置
//$smarty->addTemplateDir(ROOT.‘templates2/‘); //添加一个模板文件夹
$smarty->setCompileDir(ROOT.‘templates_c/‘); //设置编译过的模板存放的目录
$smarty->addPluginsDir(ROOT.‘plugins/‘); //设置为模板扩充插件存放目录
$smarty->setCacheDir(ROOT.‘cache/‘); //设置缓存文件存放目录
$smarty->setConfigDir(ROOT.‘configs‘); //设置模板配置文件存放目录

$smarty->caching = false; //设置Smarty缓存开关功能
$smarty->cache_lifetime = 60*60*24; //设置缓存模板有效时间一天
$smarty->left_delimiter = ‘<{‘; //设置模板语言中的左结束符
$smarty->right_delimiter = ‘}>‘; //设置模板语言中的右结束符


?>
modifier.mystyle.php
<?php

function smarty_modifier_mystyle($str,$color="yellow",$size="20")
{
    $str = "<span style=‘color:".$color."; font-size:".$size."px‘>".$str."</span>";

    return $str;
}

?>
test.conf
[one]
bg=red
size=50

[two]
bg=yellow
size=24
标签:
原文地址:http://www.cnblogs.com/Chenshuai7/p/5262236.html