标签:
iOS开发过程中有时候难免会使用iOS内置的一些应用软件和服务,例如QQ通讯录、微信电话本会使用iOS的通讯录,一些第三方软件会在应用内发送短信等。今天将和大家一起学习如何使用系统应用、使用系统服务:
在开发某些应用时可能希望能够调用iOS系统内置的电话、短信、邮件、浏览器应用,此时你可以直接使用UIApplication的OpenURL:方法指定特定的协议来打开不同的系统应用。常用的协议如下:
打电话:tel:或者tel://、telprompt:或telprompt://(拨打电话前有提示)
发短信:sms:或者sms://
发送邮件:mailto:或者mailto://
启动浏览器:http:或者http://
下面以一个简单的demo演示如何调用上面几种系统应用:
#import "ViewController.h"

@interface ViewController ()

@end

@implementation ViewController

- (void)viewDidLoad {
    [super viewDidLoad];

}

#pragma mark - UI事件
//打电话
- (IBAction)callClicK:(UIButton *)sender {
    NSString *phoneNumber=@"18500138888";
//    NSString *url=[NSString stringWithFormat:@"tel://%@",phoneNumber];//这种方式会直接拨打电话
    NSString *url=[NSString stringWithFormat:@"telprompt://%@",phoneNumber];//这种方式会提示用户确认是否拨打电话
    [self openUrl:url];
}

//发送短信
- (IBAction)sendMessageClick:(UIButton *)sender {
    NSString *phoneNumber=@"18500138888";
    NSString *url=[NSString stringWithFormat:@"sms://%@",phoneNumber];
    [self openUrl:url];
}

//发送邮件
- (IBAction)sendEmailClick:(UIButton *)sender {
    NSString *mailAddress=@"kenshin@hotmail.com";
    NSString *url=[NSString stringWithFormat:@"mailto://%@",mailAddress];
    [self openUrl:url];
}

//浏览网页
- (IBAction)browserClick:(UIButton *)sender {
    NSString *url=@"http://www.cnblogs.com/kenshincui";
    [self openUrl:url];
}

#pragma mark - 私有方法
-(void)openUrl:(NSString *)urlStr{
    //注意url中包含协议名称,iOS根据协议确定调用哪个应用,例如发送邮件是“sms://”其中“//”可以省略写成“sms:”(其他协议也是如此)
    NSURL *url=[NSURL URLWithString:urlStr];
    UIApplication *application=[UIApplication sharedApplication];
    if(![application canOpenURL:url]){
        NSLog(@"无法打开\"%@\",请确保此应用已经正确安装.",url);
        return;
    }
    [[UIApplication sharedApplication] openURL:url];
}

@end
不难发现当openURL:方法只要指定一个URL Schame并且已经安装了对应的应用程序就可以打开此应用。当然,如果是自己开发的应用也可以调用openURL方法来打开。假设你现在开发了一个应用A,如果用户机器上已经安装了此应用,并且在应用B中希望能够直接打开A。那么首先需要确保应用A已经配置了Url Types,具体方法就是在plist文件中添加URL types节点并配置URL Schemas作为具体协议,配置URL identifier作为这个URL的唯一标识,如下图

然后就可以调用openURL方法像打开系统应用一样打开第三方应用程序了:
//打开第三方应用
- (IBAction)thirdPartyApplicationClick:(UIButton *)sender {
    NSString *url=@"cmj://myparams";
    [self openUrl:url];
}
就像调用系统应用一样,协议后面可以传递一些参数(例如上面传递的myparams),这样一来在应用中可以在AppDelegate的-(BOOL)application:(UIApplication *)application openURL:(NSURL *)url sourceApplication:(NSString *)sourceApplication annotation:(id)annotation代理方法中接收参数并解析。-(BOOL)application:(UIApplication *)application openURL:(NSURL *)url sourceApplication:(NSString *)sourceApplication annotation:(id)annotation{
NSString *str=[NSString stringWithFormat:@"url:%@,source application:%@,params:%@",url,sourceApplication,[url host]];
NSLog(@"%@",str);
return YES;//是否打开
}调用系统内置的应用来发送短信、邮件相当简单,但是这么操作也存在着一些弊端:当你点击了发送短信(或邮件)操作之后直接启动了系统的短信(或邮件)应用程序,我们的应用其实此时已经处于一种挂起状态,发送完(短信或邮件)之后无法自动回到应用界面。如果想要在应用程序内部完成这些操作则可以利用iOS中的MessageUI.framework,它提供了关于短信和邮件的UI接口供开发者在应用程序内部调用。从框架名称不难看出这是一套UI接口,提供有现成的短信和邮件的编辑界面,开发人员只需要通过编程的方式给短信和邮件控制器设置对应的参数即可。
在MessageUI.framework中主要有两个控制器类分别用于发送短信(MFMessageComposeViewController)和邮件(MFMailComposeViewController),它们均继承于UINavigationController。由于两个类使用方法十分类似,这里主要介绍一下MFMessageComposeViewController使用步骤:
创建MFMessageComposeViewController对象。
设置收件人recipients、信息正文body,如果运行商支持主题和附件的话可以设置主题subject、附件attachments(可以通过canSendSubject、canSendAttachments方法判断是否支持)
设置代理messageComposeDelegate(注意这里不是delegate属性,因为delegate属性已经留给UINavigationController,MFMessageComposeViewController没有覆盖此属性而是重新定义了一个代理),实现代理方法获得发送状态。
下面自定义一个发送短信的界面演示MFMessageComposeViewController的使用:
用户通过在此界面输入短信信息点击“发送信息”调用MFMessageComposeViewController界面来展示或进一步编辑信息,点击MFMessageComposeViewController中的“发送”来完成短信发送工作,当然用户也可能点击“取消”按钮回到前一个短信编辑页面。

实现代码:
//
//  KCSendMessageViewController.m
//  iOSSystemApplication
//
//  Created by Kenshin Cui on 14/04/05.
//  Copyright (c) 2014年 cmjstudio. All rights reserved.
//

#import "KCSendMessageViewController.h"
#import <MessageUI/MessageUI.h>

@interface KCSendMessageViewController ()<MFMessageComposeViewControllerDelegate>

@property (weak, nonatomic) IBOutlet UITextField *receivers;
@property (weak, nonatomic) IBOutlet UITextField *body;
@property (weak, nonatomic) IBOutlet UITextField *subject;
@property (weak, nonatomic) IBOutlet UITextField *attachments;

@end

@implementation KCSendMessageViewController
#pragma mark - 控制器视图方法
- (void)viewDidLoad {
    [super viewDidLoad];

}


#pragma mark - UI事件
- (IBAction)sendMessageClick:(UIButton *)sender {
    //如果能发送文本信息
    if([MFMessageComposeViewController canSendText]){
        MFMessageComposeViewController *messageController=[[MFMessageComposeViewController alloc]init];
        //收件人
        messageController.recipients=[self.receivers.text componentsSeparatedByString:@","];
        //信息正文
        messageController.body=self.body.text;
        //设置代理,注意这里不是delegate而是messageComposeDelegate
        messageController.messageComposeDelegate=self;
        //如果运行商支持主题
        if([MFMessageComposeViewController canSendSubject]){
            messageController.subject=self.subject.text;
        }
        //如果运行商支持附件
        if ([MFMessageComposeViewController canSendAttachments]) {
            /*第一种方法*/
            //messageController.attachments=...;

            /*第二种方法*/
            NSArray *attachments= [self.attachments.text componentsSeparatedByString:@","];
            if (attachments.count>0) {
                [attachments enumerateObjectsUsingBlock:^(id obj, NSUInteger idx, BOOL *stop) {
                    NSString *path=[[NSBundle mainBundle]pathForResource:obj ofType:nil];
                    NSURL *url=[NSURL fileURLWithPath:path];
                    [messageController addAttachmentURL:url withAlternateFilename:obj];
                }];
            }

            /*第三种方法*/
//            NSString *path=[[NSBundle mainBundle]pathForResource:@"photo.jpg" ofType:nil];
//            NSURL *url=[NSURL fileURLWithPath:path];
//            NSData *data=[NSData dataWithContentsOfURL:url];
            /**
             *  attatchData:文件数据
             *  uti:统一类型标识,标识具体文件类型,详情查看:帮助文档中System-Declared Uniform Type Identifiers
             *  fileName:展现给用户看的文件名称
             */
//            [messageController addAttachmentData:data typeIdentifier:@"public.image"  filename:@"photo.jpg"];
        }
        [self presentViewController:messageController animated:YES completion:nil];
    }
}

#pragma mark - MFMessageComposeViewController代理方法
//发送完成,不管成功与否
-(void)messageComposeViewController:(MFMessageComposeViewController *)controller didFinishWithResult:(MessageComposeResult)result{
    switch (result) {
        case MessageComposeResultSent:
            NSLog(@"发送成功.");
            break;
        case MessageComposeResultCancelled:
            NSLog(@"取消发送.");
            break;
        default:
            NSLog(@"发送失败.");
            break;
    }
    [self dismissViewControllerAnimated:YES completion:nil];
}

@end
这里需要强调一下:
.1) MFMessageComposeViewController的代理不是通过delegate属性指定的而是通过messageComposeDelegate指定的。
.2) 可以通过几种方式来指定发送的附件,在这个过程中请务必指定文件的后缀,否则在发送后无法正确识别文件类别(例如如果发送的是一张jpg图片,在发送后无法正确查看图片)。
.3) 无论发送成功与否代理方法-(void)messageComposeViewController:(MFMessageComposeViewController *)controller didFinishWithResult:(MessageComposeResult)result都会执行,通过代理参数中的result来获得发送状态。
其实只要熟悉了MFMessageComposeViewController之后,那么用于发送邮件的MFMailComposeViewController用法和步骤完全一致,只是功能不同。下面看一下MFMailComposeViewController的使用:
#import "KCSendEmailViewController.h"
#import <MessageUI/MessageUI.h>

@interface KCSendEmailViewController ()<MFMailComposeViewControllerDelegate>
@property (weak, nonatomic) IBOutlet UITextField *toTecipients;//收件人
@property (weak, nonatomic) IBOutlet UITextField *ccRecipients;//抄送人
@property (weak, nonatomic) IBOutlet UITextField *bccRecipients;//密送人
@property (weak, nonatomic) IBOutlet UITextField *subject; //主题
@property (weak, nonatomic) IBOutlet UITextField *body;//正文
@property (weak, nonatomic) IBOutlet UITextField *attachments;//附件

@end

@implementation KCSendEmailViewController

- (void)viewDidLoad {
    [super viewDidLoad];
}

#pragma mark - UI事件

- (IBAction)sendEmailClick:(UIButton *)sender {
    //判断当前是否能够发送邮件
    if ([MFMailComposeViewController canSendMail]) {
        MFMailComposeViewController *mailController=[[MFMailComposeViewController alloc]init];
        //设置代理,注意这里不是delegate,而是mailComposeDelegate
        mailController.mailComposeDelegate=self;
        //设置收件人
        [mailController setToRecipients:[self.toTecipients.text componentsSeparatedByString:@","]];
        //设置抄送人
        if (self.ccRecipients.text.length>0) {
            [mailController setCcRecipients:[self.ccRecipients.text componentsSeparatedByString:@","]];
        }
        //设置密送人
        if (self.bccRecipients.text.length>0) {
            [mailController setBccRecipients:[self.bccRecipients.text componentsSeparatedByString:@","]];
        }
        //设置主题
        [mailController setSubject:self.subject.text];
        //设置内容
        [mailController setMessageBody:self.body.text isHTML:YES];
        //添加附件
        if (self.attachments.text.length>0) {
            NSArray *attachments=[self.attachments.text componentsSeparatedByString:@","] ;
            [attachments enumerateObjectsUsingBlock:^(id obj, NSUInteger idx, BOOL *stop) {
                NSString *file=[[NSBundle mainBundle] pathForResource:obj ofType:nil];
                NSData *data=[NSData dataWithContentsOfFile:file];
                [mailController addAttachmentData:data mimeType:@"image/jpeg" fileName:obj];//第二个参数是mimeType类型,jpg图片对应image/jpeg
            }];
        }
        [self presentViewController:mailController animated:YES completion:nil];

    }
}

#pragma mark - MFMailComposeViewController代理方法
-(void)mailComposeController:(MFMailComposeViewController *)controller didFinishWithResult:(MFMailComposeResult)result error:(NSError *)error{
    switch (result) {
        case MFMailComposeResultSent:
            NSLog(@"发送成功.");
            break;
        case MFMailComposeResultSaved://如果存储为草稿(点取消会提示是否存储为草稿,存储后可以到系统邮件应用的对应草稿箱找到)
            NSLog(@"邮件已保存.");
            break;
        case MFMailComposeResultCancelled:
            NSLog(@"取消发送.");
            break;

        default:
            NSLog(@"发送失败.");
            break;
    }
    if (error) {
        NSLog(@"发送邮件过程中发生错误,错误信息:%@",error.localizedDescription);
    }
    [self dismissViewControllerAnimated:YES completion:nil];
}

@end
运行效果:
iOS中带有一个Contacts应用程序来管理联系人,但是有些时候我们希望自己的应用能够访问或者修改这些信息,这个时候就要用到AddressBook.framework框架。iOS中的通讯录是存储在数据库中的,由于iOS的权限设计,开发人员是不允许直接访问通讯录数据库的,必须依靠AddressBook提供的标准API来实现通讯录操作。通过AddressBook.framework开发者可以从底层去操作AddressBook.framework的所有信息,但是需要注意的是这个框架是基于C语言编写的,无法使用ARC来管理内存,开发者需要自己管理内存。下面大致介绍一下通讯录操作中常用的类型:
.1) ABAddressBookRef:代表通讯录对象,通过该对象开发人员不用过多的关注通讯录的存储方式,可以直接以透明的方式去访问、保存(在使用AddressBook.framework操作联系人时,所有的增加、删除、修改后都必须执行保存操作,类似于Core Data)等。
.2) ABRecordRef:代表一个通用的记录对象,可以是一条联系人信息,也可以是一个群组,可以通过ABRecordGetRecordType()函数获得具体类型。如果作为联系人(事实上也经常使用它作为联系人),那么这个记录记录了一个完整的联系人信息(姓名、性别、电话、邮件等),每条记录都有一个唯一的ID标示这条记录(可以通过ABRecordGetRecordID()函数获得)。
.3) ABPersonRef:代表联系人信息,很少直接使用,实际开发过程中通常会使用类型为“kABPersonType”的ABRecordRef来表示联系人(由此可见ABPersonRef其实是一种类型为“kABPersonType”的ABRecordRef)
.4)ABGroupRef:代表群组,与ABPersonRef类似,很少直接使用ABGroupRef,而是使用类型为“kABGroupType”的ABRecordRef来表示群组,一个群组可以包含多个联系人,一个联系人也同样可以多个群组。
由于通讯录操作的关键是对ABRecordRef的操作,首先看一下常用的操作通讯录记录的方法:
ABPersonCreate():创建一个类型为“kABPersonType”的ABRecordRef。

ABRecordCopyValue():取得指定属性的值。
ABRecordCopyCompositeName():取得联系人(或群组)的复合信息(对于联系人则包括:姓、名、公司等信息,对于群组则返回组名称)。
ABRecordSetValue():设置ABRecordRef的属性值。注意在设置ABRecordRef的值时又分为单值属性和多值属性:单值属性设置只要通过ABRecordSetValue()方法指定属性名和值即可;多值属性则要先通过创建一个ABMutableMultiValueRef类型的变量,然后通过ABMultiValueAddValueAndLabel()方法依次添加属性值,最后通过ABRecordSetValue()方法将ABMutableMultiValueRef类型的变量设置为记录值。
ABRecordRemoveValue():删除指定的属性值。
注意:

由于联系人访问时(读取、设置、删除时)牵扯到大量联系人属性,可以到ABPerson.h中查询或者直接到帮助文档“Personal Information Properties”
通讯录的访问步骤一般如下:
下面就通过一个示例演示一下如何通过ABAddressBook.framework访问通讯录,这个例子中通过一个UITableViewController模拟一下通讯录的查看、删除、添加操作。
主控制器视图,用于显示联系人,修改删除联系人:
KCContactViewController.h
#import <UIKit/UIKit.h>

/**
 *  定义一个协议作为代理
 */
@protocol KCContactDelegate
//新增或修改联系人
-(void)editPersonWithFirstName:(NSString *)firstName lastName:(NSString *)lastName workNumber:(NSString *)workNumber;
//取消修改或新增
-(void)cancelEdit;
@end

@interface KCContactTableViewController : UITableViewController

@end
KCContactViewController.m
#import "KCContactTableViewController.h"
#import <AddressBook/AddressBook.h>
#import "KCAddPersonViewController.h"

@interface KCContactTableViewController ()<KCContactDelegate>

@property (assign,nonatomic) ABAddressBookRef addressBook;//通讯录
@property (strong,nonatomic) NSMutableArray *allPerson;//通讯录所有人员

@property (assign,nonatomic) int isModify;//标识是修改还是新增,通过选择cell进行导航则认为是修改,否则视为新增
@property (assign,nonatomic) UITableViewCell *selectedCell;//当前选中的单元格

@end

@implementation KCContactTableViewController

#pragma mark - 控制器视图
- (void)viewDidLoad {
    [super viewDidLoad];

    //请求访问通讯录并初始化数据
    [self requestAddressBook];
}

//由于在整个视图控制器周期内addressBook都驻留在内存中,所有当控制器视图销毁时销毁该对象
-(void)dealloc{
    if (self.addressBook!=NULL) {
        CFRelease(self.addressBook);
    }
}

#pragma mark - UI事件
//点击删除按钮
- (IBAction)trashClick:(UIBarButtonItem *)sender {
    self.tableView.editing=!self.tableView.editing;
}


#pragma mark - UITableView数据源方法

- (NSInteger)numberOfSectionsInTableView:(UITableView *)tableView {
    return 1;
}

- (NSInteger)tableView:(UITableView *)tableView numberOfRowsInSection:(NSInteger)section {
    return self.allPerson.count;
}


- (UITableViewCell *)tableView:(UITableView *)tableView cellForRowAtIndexPath:(NSIndexPath *)indexPath {
    static NSString *identtityKey=@"myTableViewCellIdentityKey1";
    UITableViewCell *cell=[tableView dequeueReusableCellWithIdentifier:identtityKey];
    if(cell==nil){
        cell=[[UITableViewCell alloc]initWithStyle:UITableViewCellStyleValue1 reuseIdentifier:identtityKey];
    }
    //取得一条人员记录
    ABRecordRef recordRef=(__bridge ABRecordRef)self.allPerson[indexPath.row];
    //取得记录中得信息
    NSString *firstName=(__bridge NSString *) ABRecordCopyValue(recordRef, kABPersonFirstNameProperty);//注意这里进行了强转,不用自己释放资源
    NSString *lastName=(__bridge NSString *)ABRecordCopyValue(recordRef, kABPersonLastNameProperty);

    ABMultiValueRef phoneNumbersRef= ABRecordCopyValue(recordRef, kABPersonPhoneProperty);//获取手机号,注意手机号是ABMultiValueRef类,有可能有多条
//    NSArray *phoneNumbers=(__bridge NSArray *)ABMultiValueCopyArrayOfAllValues(phoneNumbersRef);//取得CFArraryRef类型的手机记录并转化为NSArrary
    long count= ABMultiValueGetCount(phoneNumbersRef);
//    for(int i=0;i<count;++i){
//        NSString *phoneLabel= (__bridge NSString *)(ABMultiValueCopyLabelAtIndex(phoneNumbersRef, i));
//        NSString *phoneNumber=(__bridge NSString *)(ABMultiValueCopyValueAtIndex(phoneNumbersRef, i));
//        NSLog(@"%@:%@",phoneLabel,phoneNumber);
//    }

    cell.textLabel.text=[NSString stringWithFormat:@"%@ %@",firstName,lastName];
    if (count>0) {
        cell.detailTextLabel.text=(__bridge NSString *)(ABMultiValueCopyValueAtIndex(phoneNumbersRef, 0));
    }
    if(ABPersonHasImageData(recordRef)){//如果有照片数据
        NSData *imageData= (__bridge NSData *)(ABPersonCopyImageData(recordRef));
        cell.imageView.image=[UIImage imageWithData:imageData];
    }else{
        cell.imageView.image=[UIImage imageNamed:@"avatar"];//没有图片使用默认头像
    }
    //使用cell的tag存储记录id
    cell.tag=ABRecordGetRecordID(recordRef);

    return cell;
}


- (void)tableView:(UITableView *)tableView commitEditingStyle:(UITableViewCellEditingStyle)editingStyle forRowAtIndexPath:(NSIndexPath *)indexPath {
    if (editingStyle == UITableViewCellEditingStyleDelete) {
        ABRecordRef recordRef=(__bridge ABRecordRef )self.allPerson[indexPath.row];
        [self removePersonWithRecord:recordRef];//从通讯录删除
        [self.allPerson removeObjectAtIndex:indexPath.row];//从数组移除
        [tableView deleteRowsAtIndexPaths:@[indexPath] withRowAnimation:UITableViewRowAnimationFade];//从列表删除
    } else if (editingStyle == UITableViewCellEditingStyleInsert) {
        // Create a new instance of the appropriate class, insert it into the array, and add a new row to the table view
    }
}

#pragma mark - UITableView代理方法
-(void)tableView:(UITableView *)tableView didSelectRowAtIndexPath:(NSIndexPath *)indexPath{
    self.isModify=1;
    self.selectedCell=[tableView cellForRowAtIndexPath:indexPath];
    [self performSegueWithIdentifier:@"AddPerson" sender:self];
}

#pragma mark - Navigation
- (void)prepareForSegue:(UIStoryboardSegue *)segue sender:(id)sender {
    if([segue.identifier isEqualToString:@"AddPerson"]){
        UINavigationController *navigationController=(UINavigationController *)segue.destinationViewController;
        //根据导航控制器取得添加/修改人员的控制器视图
        KCAddPersonViewController *addPersonController=(KCAddPersonViewController *)navigationController.topViewController;
        addPersonController.delegate=self;
        //如果是通过选择cell进行的导航操作说明是修改,否则为添加
        if (self.isModify) {
            UITableViewCell *cell=self.selectedCell;
            addPersonController.recordID=(ABRecordID)cell.tag;//设置
            NSArray *array=[cell.textLabel.text componentsSeparatedByString:@" "];
            if (array.count>0) {
                addPersonController.firstNameText=[array firstObject];
            }
            if (array.count>1) {
                addPersonController.lastNameText=[array lastObject];
            }
            addPersonController.workPhoneText=cell.detailTextLabel.text;

        }
    }
}


#pragma mark - KCContact代理方法
-(void)editPersonWithFirstName:(NSString *)firstName lastName:(NSString *)lastName workNumber:(NSString *)workNumber{
    if (self.isModify) {
        UITableViewCell *cell=self.selectedCell;
        NSIndexPath *indexPath= [self.tableView indexPathForCell:cell];
        [self modifyPersonWithRecordID:(ABRecordID)cell.tag firstName:firstName lastName:lastName workNumber:workNumber];
        [self.tableView reloadRowsAtIndexPaths:@[indexPath] withRowAnimation:UITableViewRowAnimationRight];
    }else{
        [self addPersonWithFirstName:firstName lastName:lastName workNumber:workNumber];//通讯簿中添加信息
        [self initAllPerson];//重新初始化数据
        [self.tableView reloadData];
    }
    self.isModify=0;
}
-(void)cancelEdit{
    self.isModify=0;
}

#pragma mark - 私有方法
/**
 *  请求访问通讯录
 */
-(void)requestAddressBook{
    //创建通讯录对象
    self.addressBook=ABAddressBookCreateWithOptions(NULL, NULL);

    //请求访问用户通讯录,注意无论成功与否block都会调用
    ABAddressBookRequestAccessWithCompletion(self.addressBook, ^(bool granted, CFErrorRef error) {
        if (!granted) {
            NSLog(@"未获得通讯录访问权限!");
        }
        [self initAllPerson];

    });
}
/**
 *  取得所有通讯录记录
 */
-(void)initAllPerson{
    //取得通讯录访问授权
    ABAuthorizationStatus authorization= ABAddressBookGetAuthorizationStatus();
    //如果未获得授权
    if (authorization!=kABAuthorizationStatusAuthorized) {
        NSLog(@"尚未获得通讯录访问授权!");
        return ;
    }
    //取得通讯录中所有人员记录
    CFArrayRef allPeople= ABAddressBookCopyArrayOfAllPeople(self.addressBook);
    self.allPerson=(__bridge NSMutableArray *)allPeople;

    //释放资源
    CFRelease(allPeople);

}

/**
 *  删除指定的记录
 *
 *  @param recordRef 要删除的记录
 */
-(void)removePersonWithRecord:(ABRecordRef)recordRef{
    ABAddressBookRemoveRecord(self.addressBook, recordRef, NULL);//删除
    ABAddressBookSave(self.addressBook, NULL);//删除之后提交更改
}
/**
 *  根据姓名删除记录
 */
-(void)removePersonWithName:(NSString *)personName{
    CFStringRef personNameRef=(__bridge CFStringRef)(personName);
    CFArrayRef recordsRef= ABAddressBookCopyPeopleWithName(self.addressBook, personNameRef);//根据人员姓名查找
    CFIndex count= CFArrayGetCount(recordsRef);//取得记录数
    for (CFIndex i=0; i<count; ++i) {
        ABRecordRef recordRef=CFArrayGetValueAtIndex(recordsRef, i);//取得指定的记录
        ABAddressBookRemoveRecord(self.addressBook, recordRef, NULL);//删除
    }
    ABAddressBookSave(self.addressBook, NULL);//删除之后提交更改
    CFRelease(recordsRef);
}

/**
 *  添加一条记录
 *
 *  @param firstName  名
 *  @param lastName   姓
 *  @param iPhoneName iPhone手机号
 */
-(void)addPersonWithFirstName:(NSString *)firstName lastName:(NSString *)lastName workNumber:(NSString *)workNumber{
    //创建一条记录
    ABRecordRef recordRef= ABPersonCreate();
    ABRecordSetValue(recordRef, kABPersonFirstNameProperty, (__bridge CFTypeRef)(firstName), NULL);//添加名
    ABRecordSetValue(recordRef, kABPersonLastNameProperty, (__bridge CFTypeRef)(lastName), NULL);//添加姓

    ABMutableMultiValueRef multiValueRef =ABMultiValueCreateMutable(kABStringPropertyType);//添加设置多值属性
    ABMultiValueAddValueAndLabel(multiValueRef, (__bridge CFStringRef)(workNumber), kABWorkLabel, NULL);//添加工作电话
    ABRecordSetValue(recordRef, kABPersonPhoneProperty, multiValueRef, NULL);

    //添加记录
    ABAddressBookAddRecord(self.addressBook, recordRef, NULL);

    //保存通讯录,提交更改
    ABAddressBookSave(self.addressBook, NULL);
    //释放资源
    CFRelease(recordRef);
    CFRelease(multiValueRef);
}

/**
 *  根据RecordID修改联系人信息
 *
 *  @param recordID   记录唯一ID
 *  @param firstName  姓
 *  @param lastName   名
 *  @param homeNumber 工作电话
 */
-(void)modifyPersonWithRecordID:(ABRecordID)recordID firstName:(NSString *)firstName lastName:(NSString *)lastName workNumber:(NSString *)workNumber{
    ABRecordRef recordRef=ABAddressBookGetPersonWithRecordID(self.addressBook,recordID);
    ABRecordSetValue(recordRef, kABPersonFirstNameProperty, (__bridge CFTypeRef)(firstName), NULL);//添加名
    ABRecordSetValue(recordRef, kABPersonLastNameProperty, (__bridge CFTypeRef)(lastName), NULL);//添加姓

    ABMutableMultiValueRef multiValueRef =ABMultiValueCreateMutable(kABStringPropertyType);
    ABMultiValueAddValueAndLabel(multiValueRef, (__bridge CFStringRef)(workNumber), kABWorkLabel, NULL);
    ABRecordSetValue(recordRef, kABPersonPhoneProperty, multiValueRef, NULL);
    //保存记录,提交更改
    ABAddressBookSave(self.addressBook, NULL);
    //释放资源
    CFRelease(multiValueRef);
}
@end
新增或修改控制器视图,用于显示一个联系人的信息或者新增一个联系人:
KCAddPersonViewController.h
#import <UIKit/UIKit.h>
@protocol KCContactDelegate;

@interface KCAddPersonViewController : UIViewController

@property (assign,nonatomic) int recordID;//通讯录记录id,如果ID不为0则代表修改否则认为是新增
@property (strong,nonatomic) NSString *firstNameText;
@property (strong,nonatomic) NSString *lastNameText;
@property (strong,nonatomic) NSString *workPhoneText;

@property (strong,nonatomic) id<KCContactDelegate> delegate;

@end
KCAddPersonViewController.m
#import "KCAddPersonViewController.h"
#import "KCContactTableViewController.h"

@interface KCAddPersonViewController ()

@property (weak, nonatomic) IBOutlet UITextField *firstName;
@property (weak, nonatomic) IBOutlet UITextField *lastName;
@property (weak, nonatomic) IBOutlet UITextField *workPhone;
@end

@implementation KCAddPersonViewController

- (void)viewDidLoad {
    [super viewDidLoad];
    [self setupUI];
}

#pragma mark - UI事件
- (IBAction)cancelClick:(UIBarButtonItem *)sender {
    [self.delegate cancelEdit];
    [self dismissViewControllerAnimated:YES completion:nil];
}

- (IBAction)doneClick:(UIBarButtonItem *)sender {
    //调用代理方法
    [self.delegate editPersonWithFirstName:self.firstName.text lastName:self.lastName.text workNumber:self.workPhone.text];

    [self dismissViewControllerAnimated:YES completion:nil];
}

#pragma mark - 私有方法
-(void)setupUI{
    if (self.recordID) {//如果ID不为0则认为是修改,此时需要初始化界面
        self.firstName.text=self.firstNameText;
        self.lastName.text=self.lastNameText;
        self.workPhone.text=self.workPhoneText;
    }
}
@end
运行效果:
备注:

1.上文中所指的以Ref结尾的对象事实上是该对象的指针(或引用),在C语言的框架中多数类型会以Ref结尾,这个类型本身就是一个指针,定义时不需要加“*”。

2.通常方法中包含copy、create、new、retain等关键字的方法创建的变量使用之后需要调用对应的release方法释放。例如:使用ABPersonCreate();创建完ABRecordRef变量后使用CFRelease()方法释放。

3.在与很多C语言框架交互时可以都存在Obj-C和C语言类型之间的转化(特别是Obj-C和Core Foundation框架中的一些转化),此时可能会用到桥接,只要在强转之后前面加上”__bridge”即可,经过桥接转化后的类型不需要再去手动维护内存,也就不需要使用对应的release方法释放内存。

4.AddressBook框架中很多类型的创建、属性设置等都是以这个类型名开发头的方法来创建的,事实上如果大家熟悉了其他框架会发现也都是类似的,这是Apple开发中约定俗成的命名规则(特别是C语言框架)。例如:要给ABRecordRef类型的变量设置属性则可以通过ABRecordSetValue()方法完成。使用AddressBook.framework来操作通讯录特点就是可以对通讯录有更加精确的控制,但是缺点就是面对大量C语言API稍嫌麻烦,于是Apple官方提供了另一套框架供开发者使用,那就是AddressBookUI.framework。例如前面查看、新增、修改人员的界面这个框架就提供了现成的控制器视图供开发者使用。下面是这个框架中提供的控制器视图:
1. ABPersonViewController:用于查看联系人信息(可设置编辑)。需要设置displayedPerson属性来设置要显示或编辑的联系人。
2. ABNewPersonViewController:用于新增联系人信息。
3. ABUnknownPersonViewController:用于显示一个未知联系人(尚未保存的联系人)信息。需要设置displayedPerson属性来设置要显示的未知联系人。
以上三个控制器视图均继承于UIViewController,在使用过程中必须使用一个UINavigationController进行包装,否则只能看到视图内容无法进行操作(例如对于ABNewPersonViewController如果不使用UINavigationController进行包装则没有新增和取消按钮),同时注意包装后的控制器视图不需要处理具体新增、修改逻辑(增加和修改的处理逻辑对应的控制器视图内部已经完成),但是必须处理控制器的关闭操作(调用dismissViewControllerAnimated::方法),并且可以通过代理方法获得新增、修改的联系人。下面看一下三个控制器视图的代理方法:
-(BOOL)personViewController:(ABPersonViewController *)personViewController shouldPerformDefaultActionForPerson:(ABRecordRef)person property:(ABPropertyID)property identifier:
``
(ABMultiValueIdentifier)identifier:此方法会在选择了一个联系人属性后触发,四个参数分别代表:使用的控制器视图、所查看的联系人、所选则的联系人属性、该属性是否是多值属性。
2. ABNewPersonViewController的newPersonViewDelegate代理方法:

-(void)newPersonViewController:(ABNewPersonViewController *)newPersonView didCompleteWithNewPerson:(ABRecordRef)person:点击取消或完成后触发,如果参数中的person为NULL说明点击了取消,否则说明点击了完成。无论是取消还是完成操作,此方法调用时保存操作已经进行完毕,不需要在此方法中自己保存联系人信息。
3. ABUnkownPersonViewcontroller的unkownPersonViewDelegate代理方法:

-(void)unknownPersonViewController:(ABUnknownPersonViewController *)unknownCardViewController didResolveToPerson:(ABRecordRef)person:保存此联系人时调用,调用后将此联系人返回。
-(BOOL)unknownPersonViewController:(ABUnknownPersonViewController *)personViewController shouldPerformDefaultActionForPerson:(ABRecordRef)person property:(ABPropertyID)property identifier:(ABMultiValueIdentifier)identifier:选择一个位置联系人属性之后执行,返回值代表是否执行默认的选择操作(例如如果是手机号,默认操作会拨打此电话)
除了上面三类控制器视图在AddressBookUI中还提供了另外一个控制器视图ABPeoplePickerNavigationController,它与之前介绍的UIImagePickerController、MPMediaPickerController类似,只是他是用来选择一个联系人的。这个控制器视图本身继承于UINavigationController,视图自身的“组”、“取消”按钮操作不需要开发者来完成(例如开发者不用在点击取消是关闭当前控制器视图,它自身已经实现了关闭方法),当然这里主要说一下这个控制器视图的peoplePickerDelegate代理方法:-(void)peoplePickerNavigationController:(ABPeoplePickerNavigationController *)peoplePicker didSelectPerson:(ABRecordRef)person:选择一个联系人后执行。此代理方法实现后代理方法“-(void)peoplePickerNavigationController:(ABPeoplePickerNavigationController *)peoplePicker didSelectPerson:(ABRecordRef)person property:(ABPropertyID)property identifier:(ABMultiValueIdentifier)identifier”不会再执行。并且一旦实现了这个代理方法用户只能选择到联系人视图,无法查看具体联系人的信息。
-(void)peoplePickerNavigationControllerDidCancel:(ABPeoplePickerNavigationController *)peoplePicker:用户点击取消后执行。
-(void)peoplePickerNavigationController:(ABPeoplePickerNavigationController *)peoplePicker didSelectPerson:(ABRecordRef)person property:(ABPropertyID)property identifier:(ABMultiValueIdentifier)identifier:选择联系人具体的属性后执行,注意如果要执行此方法则不能实现-(void)peoplePickerNavigationController:(ABPeoplePickerNavigationController *)peoplePicker didSelectPerson:(ABRecordRef)person代理方法,此时如果点击一个具体联系人会导航到联系人详细信息界面,用户点击具体的属性后触发此方法。下面就看一下上面四个控制器视图的使用方法,在下面的程序中定义了四个按钮,点击不同的按钮调用不同的控制器视图用于演示:
#import "ViewController.h"
#import <AddressBookUI/AddressBookUI.h>

@interface ViewController ()<ABNewPersonViewControllerDelegate,ABUnknownPersonViewControllerDelegate,ABPeoplePickerNavigationControllerDelegate,ABPersonViewControllerDelegate>

@end

@implementation ViewController

- (void)viewDidLoad {
    [super viewDidLoad];
}

#pragma mark - UI事件
//添加联系人
- (IBAction)addPersonClick:(UIButton *)sender {
    ABNewPersonViewController *newPersonController=[[ABNewPersonViewController alloc]init];
    //设置代理
    newPersonController.newPersonViewDelegate=self;
    //注意ABNewPersonViewController必须包装一层UINavigationController才能使用,否则不会出现取消和完成按钮,无法进行保存等操作
    UINavigationController *navigationController=[[UINavigationController alloc]initWithRootViewController:newPersonController];
    [self presentViewController:navigationController animated:YES completion:nil];
}
//
- (IBAction)unknownPersonClick:(UIButton *)sender {
    ABUnknownPersonViewController *unknownPersonController=[[ABUnknownPersonViewController alloc]init];
    //设置未知人员
    ABRecordRef recordRef=ABPersonCreate();
    ABRecordSetValue(recordRef, kABPersonFirstNameProperty, @"Kenshin", NULL);
    ABRecordSetValue(recordRef, kABPersonLastNameProperty, @"Cui", NULL);
    ABMultiValueRef multiValueRef=ABMultiValueCreateMutable(kABStringPropertyType);
    ABMultiValueAddValueAndLabel(multiValueRef, @"18500138888", kABHomeLabel, NULL);
    ABRecordSetValue(recordRef, kABPersonPhoneProperty, multiValueRef, NULL);
    unknownPersonController.displayedPerson=recordRef;
    //设置代理
    unknownPersonController.unknownPersonViewDelegate=self;
    //设置其他属性
    unknownPersonController.allowsActions=YES;//显示标准操作按钮
    unknownPersonController.allowsAddingToAddressBook=YES;//是否允许将联系人添加到地址簿

    CFRelease(multiValueRef);
    CFRelease(recordRef);
    //使用导航控制器包装
    UINavigationController *navigationController=[[UINavigationController alloc]initWithRootViewController:unknownPersonController];
    [self presentViewController:navigationController animated:YES completion:nil];
}
- (IBAction)showPersonClick:(UIButton *)sender {
    ABPersonViewController *personController=[[ABPersonViewController alloc]init];
    //设置联系人
    ABAddressBookRef addressBook=ABAddressBookCreateWithOptions(NULL, NULL);
    ABRecordRef recordRef= ABAddressBookGetPersonWithRecordID(addressBook, 1);//取得id为1的联系人记录
    personController.displayedPerson=recordRef;
    //设置代理
    personController.personViewDelegate=self;
    //设置其他属性
    personController.allowsActions=YES;//是否显示发送信息、共享联系人等按钮
    personController.allowsEditing=YES;//允许编辑
//    personController.displayedProperties=@[@(kABPersonFirstNameProperty),@(kABPersonLastNameProperty)];//显示的联系人属性信息,默认显示所有信息

    //使用导航控制器包装
    UINavigationController *navigationController=[[UINavigationController alloc]initWithRootViewController:personController];
    [self presentViewController:navigationController animated:YES completion:nil];
}

- (IBAction)selectPersonClick:(UIButton *)sender {
    ABPeoplePickerNavigationController *peoplePickerController=[[ABPeoplePickerNavigationController alloc]init];
    //设置代理
    peoplePickerController.peoplePickerDelegate=self;
    [self presentViewController:peoplePickerController animated:YES completion:nil];
}


#pragma mark - ABNewPersonViewController代理方法
//完成新增(点击取消和完成按钮时调用),注意这里不用做实际的通讯录增加工作,此代理方法调用时已经完成新增,当保存成功的时候参数中得person会返回保存的记录,如果点击取消person为NULL
-(void)newPersonViewController:(ABNewPersonViewController *)newPersonView didCompleteWithNewPerson:(ABRecordRef)person{
    //如果有联系人信息
    if (person) {
        NSLog(@"%@ 信息保存成功.",(__bridge NSString *)(ABRecordCopyCompositeName(person)));
    }else{
        NSLog(@"点击了取消.");
    }
    //关闭模态视图窗口
    [self dismissViewControllerAnimated:YES completion:nil];

}
#pragma mark - ABUnknownPersonViewController代理方法
//保存未知联系人时触发
-(void)unknownPersonViewController:(ABUnknownPersonViewController *)unknownCardViewController didResolveToPerson:(ABRecordRef)person{
    if (person) {
        NSLog(@"%@ 信息保存成功!",(__bridge NSString *)(ABRecordCopyCompositeName(person)));
    }
    [self dismissViewControllerAnimated:YES completion:nil];
}
//选择一个人员属性后触发,返回值YES表示触发默认行为操作,否则执行代理中自定义的操作
-(BOOL)unknownPersonViewController:(ABUnknownPersonViewController *)personViewController shouldPerformDefaultActionForPerson:(ABRecordRef)person property:(ABPropertyID)property identifier:(ABMultiValueIdentifier)identifier{
    if (person) {
        NSLog(@"选择了属性:%i,值:%@.",property,(__bridge NSString *)ABRecordCopyValue(person, property));
    }
    return NO;
}
#pragma mark - ABPersonViewController代理方法
//选择一个人员属性后触发,返回值YES表示触发默认行为操作,否则执行代理中自定义的操作
-(BOOL)personViewController:(ABPersonViewController *)personViewController shouldPerformDefaultActionForPerson:(ABRecordRef)person property:(ABPropertyID)property identifier:(ABMultiValueIdentifier)identifier{
    if (person) {
         NSLog(@"选择了属性:%i,值:%@.",property,(__bridge NSString *)ABRecordCopyValue(person, property));
    }
    return NO;
}
#pragma mark - ABPeoplePickerNavigationController代理方法
//选择一个联系人后,注意这个代理方法实现后属性选择的方法将不会再调用
-(void)peoplePickerNavigationController:(ABPeoplePickerNavigationController *)peoplePicker didSelectPerson:(ABRecordRef)person{
    if (person) {
        NSLog(@"选择了%@.",(__bridge NSString *)(ABRecordCopyCompositeName(person)));
    }
}
//选择属性之后,注意如果上面的代理方法实现后此方法不会被调用
//-(void)peoplePickerNavigationController:(ABPeoplePickerNavigationController *)peoplePicker didSelectPerson:(ABRecordRef)person property:(ABPropertyID)property identifier:(ABMultiValueIdentifier)identifier{
//    if (person && property) {
//        NSLog(@"选择了属性:%i,值:%@.",property,(__bridge NSString *)ABRecordCopyValue(person, property));
//    }
//}
//点击取消按钮
-(void)peoplePickerNavigationControllerDidCancel:(ABPeoplePickerNavigationController *)peoplePicker{
    NSLog(@"取消选择.");
}
@end
注意:
为了让大家可以更加清楚的看到几个控制器视图的使用,这里并没有结合前面的UITableViewController来使用,事实上大家结合前面UITableViewController可以做一个完善的通讯录应用。随着蓝牙低功耗技术BLE(Bluetooth Low Energy)的发展,蓝牙技术正在一步步成熟,如今的大部分移动设备都配备有蓝牙4.0,相比之前的蓝牙技术耗电量大大降低。从iOS的发展史也不难看出苹果目前对蓝牙技术也是越来越关注,例如苹果于2013年9月发布的iOS7就配备了iBeacon技术,这项技术完全基于蓝牙传输。但是众所周知苹果的设备对于权限要求也是比较高的,因此在iOS中并不能像Android一样随意使用蓝牙进行文件传输(除非你已经越狱)。在iOS中进行蓝牙传输应用开发常用的框架有如下几种:
GameKit.framework:iOS7之前的蓝牙通讯框架,从iOS7开始过期,但是目前多数应用还是基于此框架。
MultipeerConnectivity.framework:iOS7开始引入的新的蓝牙通讯开发框架,用于取代GameKit。
CoreBluetooth.framework:功能强大的蓝牙开发框架,要求设备必须支持蓝牙4.0。
前两个框架使用起来比较简单,但是缺点也比较明显:仅仅支持iOS设备,传输内容仅限于沙盒或者照片库中用户选择的文件,并且第一个框架只能在同一个应用之间进行传输(一个iOS设备安装应用A,另一个iOS设备上安装应用B是无法传输的)。当然CoreBluetooth就摆脱了这些束缚,它不再局限于iOS设备之间进行传输,你可以通过iOS设备向Android、Windows Phone以及其他安装有蓝牙4.0芯片的智能设备传输,因此也是目前智能家居、无线支付等热门智能设备所推崇的技术。
其实从名称来看这个框架并不是专门为了支持蓝牙传输而设计的,它是为游戏设计的。而很多游戏中会用到基于蓝牙的点对点信息传输,因此这个框架中集成了蓝牙传输模块。前面也说了这个框架本身有很多限制,但是在iOS7之前的很多蓝牙传输都是基于此框架的,所以有必要对它进行了解。GameKit中的蓝牙使用设计很简单,并没有给开发者留有太多的复杂接口,而多数连接细节开发者是不需要关注的。GameKit中提供了两个关键类来操作蓝牙连接:
GKPeerPickerController:蓝牙查找、连接用的视图控制器,通常情况下应用程序A打开后会调用此控制器的show方法来展示一个蓝牙查找的视图,一旦发现了另一个同样在查找蓝牙连接的客户客户端B就会出现在视图列表中,此时如果用户点击连接B,B客户端就会询问用户是否允许A连接B,如果允许后A和B之间建立一个蓝牙连接。
GKSession:连接会话,主要用于发送和接受传输数据。一旦A和B建立连接GKPeerPickerController的代理方法会将A、B两者建立的会话(GKSession)对象传递给开发人员,开发人员拿到此对象可以发送和接收数据。
其实理解了上面两个类之后,使用起来就比较简单了,下面就以一个图片发送程序来演示GameKit中蓝牙的使用。此程序一个客户端运行在模拟器上作为客户端A,另一个运行在iPhone真机上作为客户端B(注意A、B必须运行同一个程序,GameKit蓝牙开发是不支持两个不同的应用传输数据的)。两个程序运行之后均调用GKPeerPickerController来发现周围蓝牙设备,一旦A发现了B之后就开始连接B,然后iOS会询问用户是否接受连接,一旦接受之后就会调用GKPeerPickerController的-(void)peerPickerController:(GKPeerPickerController )picker didConnectPeer:(NSString )peerID toSession:(GKSession )session代理方法,在此方法中可以获得连接的设备id(peerID)和连接会话(session);此时可以设置会话的数据接收句柄(相当于一个代理)并保存会话以便发送数据时使用;一旦一端(假设是A)调用会话的sendDataToAllPeers: withDataMode: error:方法发送数据,此时另一端(假设是B)就会调用句柄的- (void) receiveData:(NSData )data fromPeer:(NSString )peer inSession: (GKSession )session context:(void *)context方法,在此方法可以获得发送数据并处理。下面是程序代码:
#import "ViewController.h"
#import <GameKit/GameKit.h>
@interface ViewController ()<GKPeerPickerControllerDelegate,UIImagePickerControllerDelegate,UINavigationBarDelegate>
@property (weak, nonatomic) IBOutlet UIImageView *imageView;//照片显示视图
@property (strong,nonatomic) GKSession *session;//蓝牙连接会话
@end
@implementation ViewController
#pragma mark - 控制器视图方法
- (void)viewDidLoad {
[super viewDidLoad];
GKPeerPickerController *pearPickerController=[[GKPeerPickerController alloc]init];
pearPickerController.delegate=self;
[pearPickerController show];
}
#pragma mark - UI事件
- (IBAction)selectClick:(UIBarButtonItem *)sender {
UIImagePickerController *imagePickerController=[[UIImagePickerController alloc]init];
imagePickerController.delegate=self;
[self presentViewController:imagePickerController animated:YES completion:nil];
}
- (IBAction)sendClick:(UIBarButtonItem *)sender {
NSData *data=UIImagePNGRepresentation(self.imageView.image);
NSError *error=nil;
[self.session sendDataToAllPeers:data withDataMode:GKSendDataReliable error:&error];
if (error) {
NSLog(@"发送图片过程中发生错误,错误信息:%@",error.localizedDescription);
}
}
#pragma mark - GKPeerPickerController代理方法
/**
* 连接到某个设备
*
* @param picker 蓝牙点对点连接控制器
* @param peerID 连接设备蓝牙传输ID
* @param session 连接会话
*/
-(void)peerPickerController:(GKPeerPickerController *)picker didConnectPeer:(NSString *)peerID toSession:(GKSession *)session{
self.session=session;
NSLog(@"已连接客户端设备:%@.",peerID);
//设置数据接收处理句柄,相当于代理,一旦数据接收完成调用它的-receiveData:fromPeer:inSession:context:方法处理数据
[self.session setDataReceiveHandler:self withContext:nil];
[picker dismiss];//一旦连接成功关闭窗口
}
#pragma mark - 蓝牙数据接收方法
- (void) receiveData:(NSData *)data fromPeer:(NSString *)peer inSession: (GKSession *)session context:(void *)context{
UIImage *image=[UIImage imageWithData:data];
self.imageView.image=image;
UIImageWriteToSavedPhotosAlbum(image, nil, nil, nil);
NSLog(@"数据发送成功!");
}
#pragma mark - UIImagePickerController代理方法
-(void)imagePickerController:(UIImagePickerController *)picker didFinishPickingMediaWithInfo:(NSDictionary *)info{
self.imageView.image=[info objectForKey:UIImagePickerControllerOriginalImage];
[self dismissViewControllerAnimated:YES completion:nil];
}
-(void)imagePickerControllerDidCancel:(UIImagePickerController *)picker{
[self dismissViewControllerAnimated:YES completion:nil];
}
@end运行效果(左侧是真机,右侧是模拟器,程序演示了两个客户端互发图片的场景:首先是模拟器发送图片给真机,然后真机发送图片给模拟器):


前面已经说了GameKit相关的蓝牙操作类从iOS7已经全部过期,苹果官方推荐使用MultipeerConnectivity代替。但是应该了解,MultipeerConnectivity.framework并不仅仅支持蓝牙连接,准确的说它是一种支持Wi-Fi网络、P2P Wi-Fi已经蓝牙个人局域网的通信框架,它屏蔽了具体的连接技术,让开发人员有统一的接口编程方法。通过MultipeerConnectivity连接的节点之间可以安全的传递信息、流或者其他文件资源而不必通过网络服务。此外使用MultipeerConnectivity进行近场通信也不再局限于同一个应用之间传输,而是可以在不同的应用之间进行数据传输(当然如果有必要的话你仍然可以选择在一个应用程序之间传输)。
要了解MultipeerConnectivity的使用必须要清楚一个概念:广播(Advertisting)和发现(Disconvering),这很类似于一种Client-Server模式。假设有两台设备A、B,B作为广播去发送自身服务,A作为发现的客户端。一旦A发现了B就试图建立连接,经过B同意二者建立连接就可以相互发送数据。在使用GameKit框架时,A和B既作为广播又作为发现,当然这种情况在MultipeerConnectivity中也很常见。
A.广播
无论是作为服务器端去广播还是作为客户端去发现广播服务,那么两个(或更多)不同的设备之间必须要有区分,通常情况下使用MCPeerID对象来区分一台设备,在这个设备中可以指定显示给对方查看的名称(display name)。另外不管是哪一方,还必须建立一个会话MCSession用于发送和接受数据。通常情况下会在会话的-(void)session:(MCSession )session peer:(MCPeerID )peerID didChangeState:(MCSessionState)state代理方法中跟踪会话状态(已连接、正在连接、未连接);在会话的-(void)session:(MCSession )session didReceiveData:(NSData )data fromPeer:(MCPeerID *)peerID代理方法中接收数据;同时还会调用会话的-(void)sendData: toPeers:withMode: error:方法去发送数据。
广播作为一个服务器去发布自身服务,供周边设备发现连接。在MultipeerConnectivity中使用MCAdvertiserAssistant来表示一个广播,通常创建广播时指定一个会话MCSession对象将广播服务和会话关联起来。一旦调用广播的start方法周边的设备就可以发现该广播并可以连接到此服务。在MCSession的代理方法中可以随时更新连接状态,一旦建立了连接之后就可以通过MCSession的connectedPeers获得已经连接的设备。
B.发现
前面已经说过作为发现的客户端同样需要一个MCPeerID来标志一个客户端,同时会拥有一个MCSession来监听连接状态并发送、接受数据。除此之外,要发现广播服务,客户端就必须要随时查找服务来连接,在MultipeerConnectivity中提供了一个控制器MCBrowserViewController来展示可连接和已连接的设备(这类似于GameKit中的GKPeerPickerController),当然如果想要自己定制一个界面来展示设备连接的情况你可以选择自己开发一套UI界面。一旦通过MCBroserViewController选择一个节点去连接,那么作为广播的节点就会收到通知,询问用户是否允许连接。由于初始化MCBrowserViewController的过程已经指定了会话MCSession,所以连接过程中会随时更新会话状态,一旦建立了连接,就可以通过会话的connected属性获得已连接设备并且可以使用会话发送、接受数据。
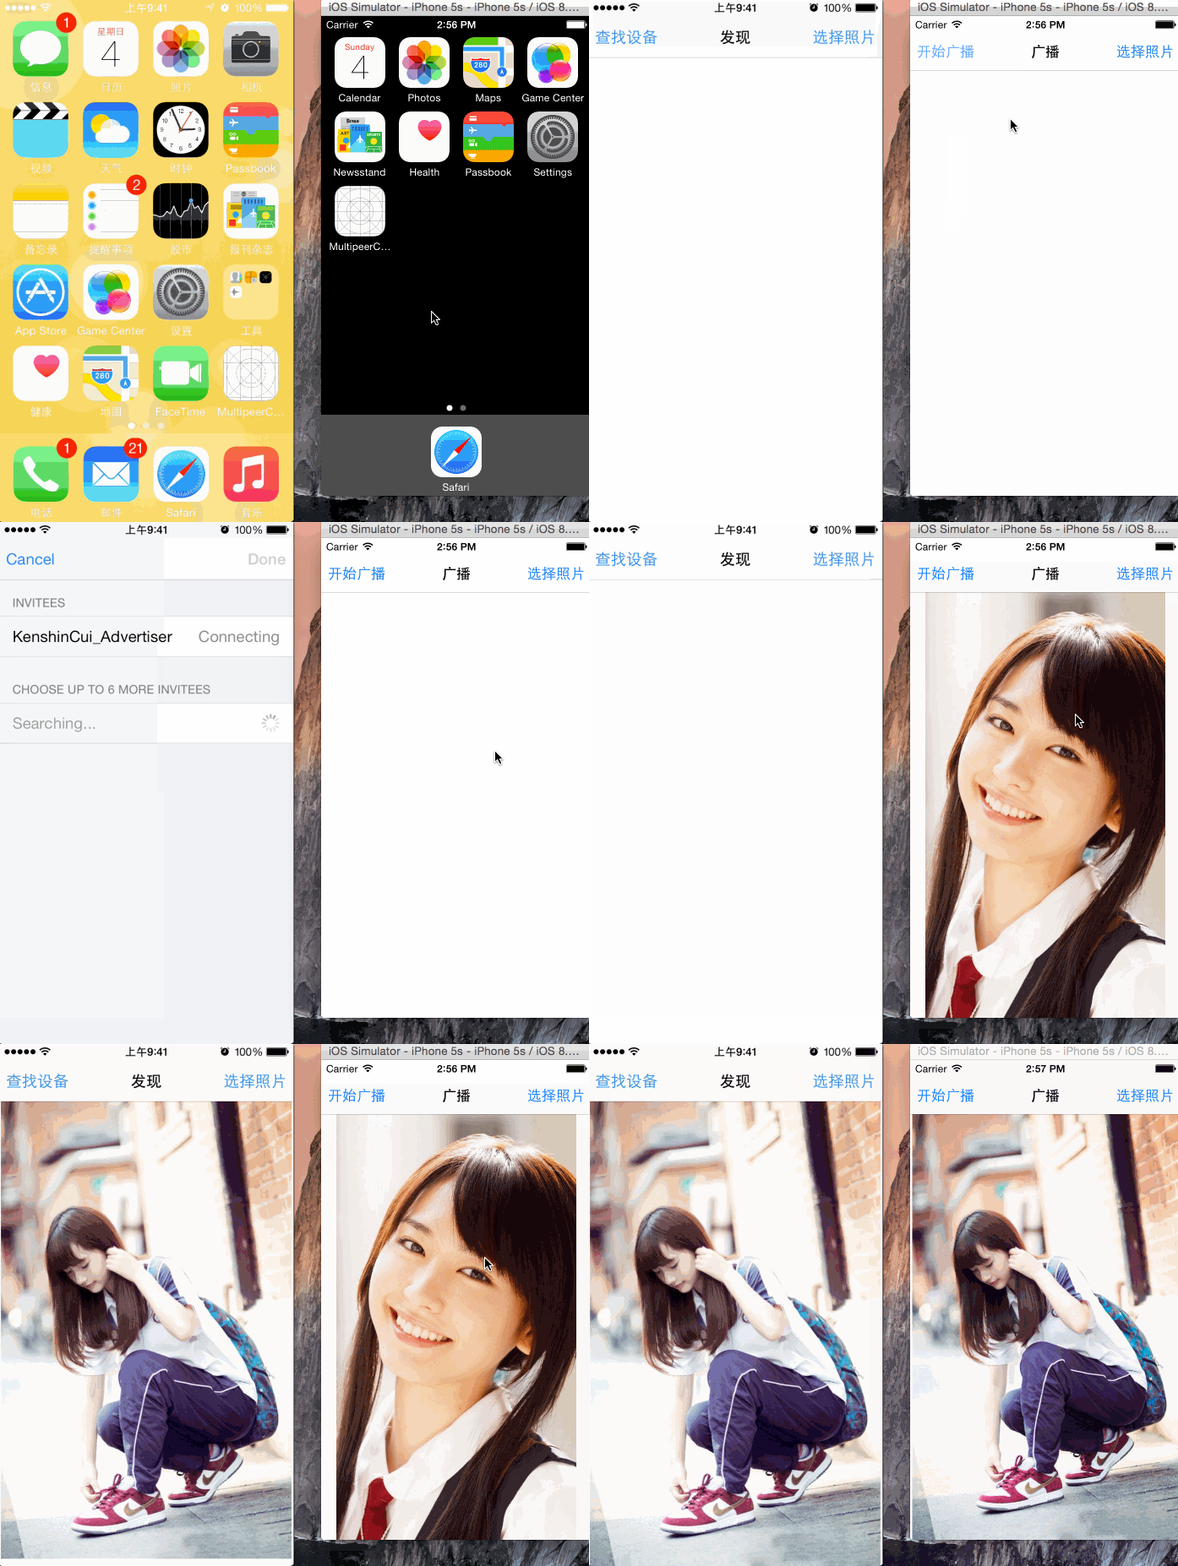
下面用两个不同的应用程序来演示使用MultipeerConnectivity的使用过程,其中一个应用运行在模拟器中作为广播节点,另一个运行在iPhone真机上作为发现节点,并且实现两个节点的图片互传。
首先看一下作为广播节点的程序:
界面:
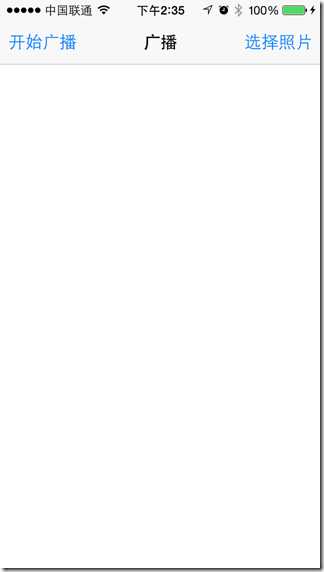
点击“开始广播”来发布服务,一旦有节点连接此服务就可以使用“选择照片”来从照片库中选取一张图片并发送到所有已连接节点。
程序
#import "ViewController.h"
#import <MultipeerConnectivity/MultipeerConnectivity.h>
@interface ViewController ()<MCSessionDelegate,MCAdvertiserAssistantDelegate, UIImagePickerControllerDelegate,UINavigationControllerDelegate>
@property (strong,nonatomic) MCSession *session;
@property (strong,nonatomic) MCAdvertiserAssistant *advertiserAssistant;
@property (strong,nonatomic) UIImagePickerController *imagePickerController;
@property (weak, nonatomic) IBOutlet UIImageView *photo;
@end
@implementation ViewController
#pragma mark - 控制器视图事件
- (void)viewDidLoad {
[super viewDidLoad];
//创建节点,displayName是用于提供给周边设备查看和区分此服务的
MCPeerID *peerID=[[MCPeerID alloc]initWithDisplayName:@"KenshinCui_Advertiser"];
_session=[[MCSession alloc]initWithPeer:peerID];
_session.delegate=self;
//创建广播
_advertiserAssistant=[[MCAdvertiserAssistant alloc]initWithServiceType:@"cmj-stream" discoveryInfo:nil session:_session];
_advertiserAssistant.delegate=self;
}
#pragma mark - UI事件
- (IBAction)advertiserClick:(UIBarButtonItem *)sender {
//开始广播
[self.advertiserAssistant start];
}
- (IBAction)selectClick:(UIBarButtonItem *)sender {
_imagePickerController=[[UIImagePickerController alloc]init];
_imagePickerController.delegate=self;
[self presentViewController:_imagePickerController animated:YES completion:nil];
}
#pragma mark - MCSession代理方法
-(void)session:(MCSession *)session peer:(MCPeerID *)peerID didChangeState:(MCSessionState)state{
NSLog(@"didChangeState");
switch (state) {
case MCSessionStateConnected:
NSLog(@"连接成功.");
break;
case MCSessionStateConnecting:
NSLog(@"正在连接...");
break;
default:
NSLog(@"连接失败.");
break;
}
}
//接收数据
-(void)session:(MCSession *)session didReceiveData:(NSData *)data fromPeer:(MCPeerID *)peerID{
NSLog(@"开始接收数据...");
UIImage *image=[UIImage imageWithData:data];
[self.photo setImage:image];
//保存到相册
UIImageWriteToSavedPhotosAlbum(image, nil, nil, nil);
}
#pragma mark - MCAdvertiserAssistant代理方法
#pragma mark - UIImagePickerController代理方法
-(void)imagePickerController:(UIImagePickerController *)picker didFinishPickingMediaWithInfo:(NSDictionary *)info{
UIImage *image=[info objectForKey:UIImagePickerControllerOriginalImage];
[self.photo setImage:image];
//发送数据给所有已连接设备
NSError *error=nil;
[self.session sendData:UIImagePNGRepresentation(image) toPeers:[self.session connectedPeers] withMode:MCSessionSendDataUnreliable error:&error];
NSLog(@"开始发送数据...");
if (error) {
NSLog(@"发送数据过程中发生错误,错误信息:%@",error.localizedDescription);
}
[self.imagePickerController dismissViewControllerAnimated:YES completion:nil];
}
-(void)imagePickerControllerDidCancel:(UIImagePickerController *)picker{
[self.imagePickerController dismissViewControllerAnimated:YES completion:nil];
}
@end再看一下作为发现节点的程序:
界面:
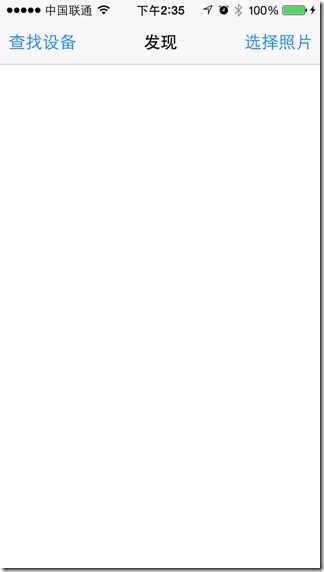
点击“查找设备”浏览可用服务,点击服务建立连接;一旦建立了连接之后就可以点击“选择照片”会从照片库中选择一张图片并发送给已连接的节点。
程序:
#import "ViewController.h"
#import <MultipeerConnectivity/MultipeerConnectivity.h>
@interface ViewController ()<MCSessionDelegate,MCBrowserViewControllerDelegate,UIImagePickerControllerDelegate,UINavigationControllerDelegate>
@property (strong,nonatomic) MCSession *session;
@property (strong,nonatomic) MCBrowserViewController *browserController;
@property (strong,nonatomic) UIImagePickerController *imagePickerController;
@property (weak, nonatomic) IBOutlet UIImageView *photo;
@end
@implementation ViewController
#pragma mark - 控制器视图事件
- (void)viewDidLoad {
[super viewDidLoad];
//创建节点
MCPeerID *peerID=[[MCPeerID alloc]initWithDisplayName:@"KenshinCui"];
//创建会话
_session=[[MCSession alloc]initWithPeer:peerID];
_session.delegate=self;
}
#pragma mark- UI事件
- (IBAction)browserClick:(UIBarButtonItem *)sender {
_browserController=[[MCBrowserViewController alloc]initWithServiceType:@"cmj-stream" session:self.session];
_browserController.delegate=self;
[self presentViewController:_browserController animated:YES completion:nil];
}
- (IBAction)selectClick:(UIBarButtonItem *)sender {
_imagePickerController=[[UIImagePickerController alloc]init];
_imagePickerController.delegate=self;
[self presentViewController:_imagePickerController animated:YES completion:nil];
}
#pragma mark - MCBrowserViewController代理方法
-(void)browserViewControllerDidFinish:(MCBrowserViewController *)browserViewController{
NSLog(@"已选择");
[self.browserController dismissViewControllerAnimated:YES completion:nil];
}
-(void)browserViewControllerWasCancelled:(MCBrowserViewController *)browserViewController{
NSLog(@"取消浏览.");
[self.browserController dismissViewControllerAnimated:YES completion:nil];
}
#pragma mark - MCSession代理方法
-(void)session:(MCSession *)session peer:(MCPeerID *)peerID didChangeState:(MCSessionState)state{
NSLog(@"didChangeState");
switch (state) {
case MCSessionStateConnected:
NSLog(@"连接成功.");
[self.browserController dismissViewControllerAnimated:YES completion:nil];
break;
case MCSessionStateConnecting:
NSLog(@"正在连接...");
break;
default:
NSLog(@"连接失败.");
break;
}
}
//接收数据
-(void)session:(MCSession *)session didReceiveData:(NSData *)data fromPeer:(MCPeerID *)peerID{
NSLog(@"开始接收数据...");
UIImage *image=[UIImage imageWithData:data];
[self.photo setImage:image];
//保存到相册
UIImageWriteToSavedPhotosAlbum(image, nil, nil, nil);
}
#pragma mark - UIImagePickerController代理方法
-(void)imagePickerController:(UIImagePickerController *)picker didFinishPickingMediaWithInfo:(NSDictionary *)info{
UIImage *image=[info objectForKey:UIImagePickerControllerOriginalImage];
[self.photo setImage:image];
//发送数据给所有已连接设备
NSError *error=nil;
[self.session sendData:UIImagePNGRepresentation(image) toPeers:[self.session connectedPeers] withMode:MCSessionSendDataUnreliable error:&error];
NSLog(@"开始发送数据...");
if (error) {
NSLog(@"发送数据过程中发生错误,错误信息:%@",error.localizedDescription);
}
[self.imagePickerController dismissViewControllerAnimated:YES completion:nil];
}
-(void)imagePickerControllerDidCancel:(UIImagePickerController *)picker{
[self.imagePickerController dismissViewControllerAnimated:YES completion:nil];
}
@end在两个程序中无论是MCBrowserViewController还是MCAdvertiserAssistant在初始化的时候都指定了一个服务类型“cmj-photo”,这是唯一标识一个服务类型的标记,可以按照官方的要求命名,应该尽可能表达服务的作用。需要特别指出的是,如果广播命名为“cmj-photo”那么发现节点只有在MCBrowserViewController中指定为“cmj-photo”才能发现此服务。
运行效果:
无论是GameKit还是MultipeerConnectivity,都只能在iOS设备之间进行数据传输,这就大大降低了蓝牙的使用范围,于是从iOS6开始苹果推出了CoreBluetooth.framework,这个框架最大的特点就是完全基于BLE4.0标准并且支持非iOS设备。当前BLE应用相当广泛,不再仅仅是两个设备之间的数据传输,它还有很多其他应用市场,例如室内定位、无线支付、智能家居等等,这也使得CoreBluetooth成为当前最热门的蓝牙技术。
CoreBluetooth设计同样也是类似于客户端-服务器端的设计,作为服务器端的设备称为外围设备(Peripheral),作为客户端的设备叫做中央设备(Central),CoreBlueTooth整个框架就是基于这两个概念来设计的。
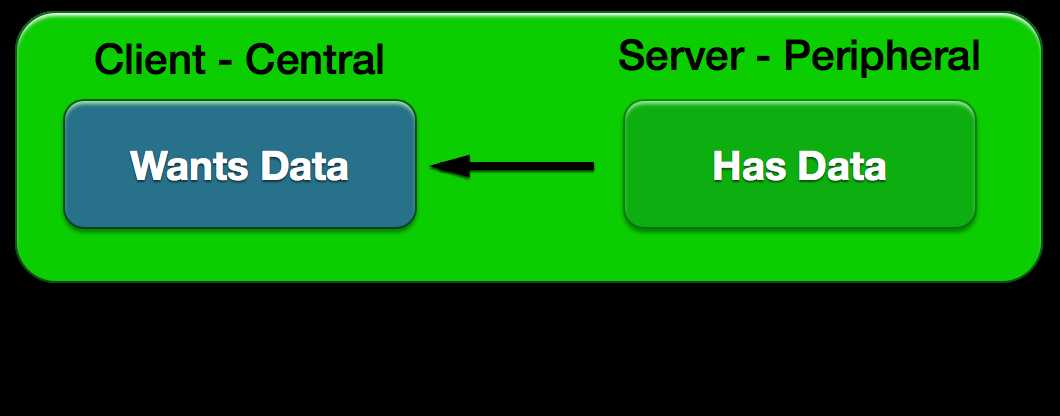
外围设备和中央设备在CoreBluetooth中使用CBPeripheralManager和CBCentralManager表示。
CBPeripheralManager:外围设备通常用于发布服务、生成数据、保存数据。外围设备发布并广播服务,告诉周围的中央设备它的可用服务和特征。
CBCentralManager:中央设备使用外围设备的数据。中央设备扫描到外围设备后会就会试图建立连接,一旦连接成功就可以使用这些服务和特征。
外围设备和中央设备之间交互的桥梁是服务(CBService)和特征(CBCharacteristic),二者都有一个唯一的标识UUID(CBUUID类型)来唯一确定一个服务或者特征,每个服务可以拥有多个特征,下面是他们之间的关系:
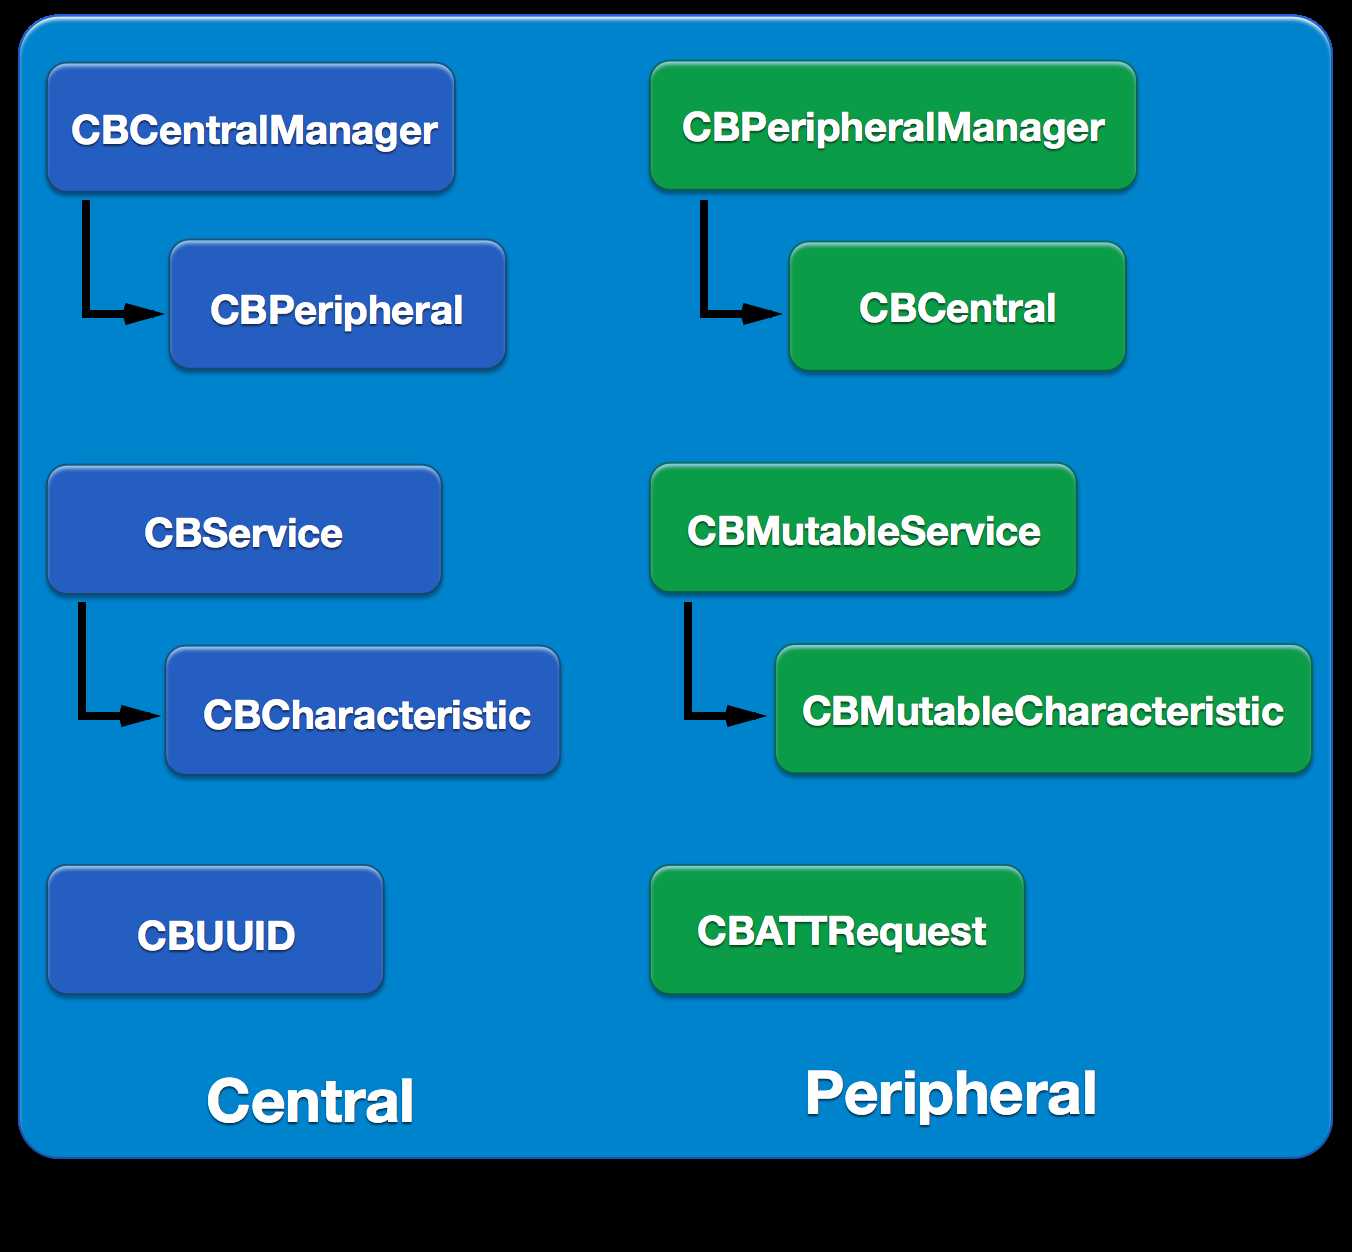
一台iOS设备(注意iPhone4以下设备不支持BLE,另外iOS7.0、8.0模拟器也无法模拟BLE)既可以作为外围设备又可以作为中央设备,但是不能同时即是外围设备又是中央设备,同时注意建立连接的过程不需要用户手动选择允许,这一点和前面两个框架是不同的,这主要是因为BLE应用场景不再局限于两台设备之间资源共享了。
A.外围设备
创建一个外围设备通常分为以下几个步骤:
1. 创建外围设备CBPeripheralManager对象并指定代理。
2. 创建特征CBCharacteristic、服务CBSerivce并添加到外围设备
3. 外围设备开始广播服务(startAdvertisting:)。
4. 和中央设备CBCentral进行交互。
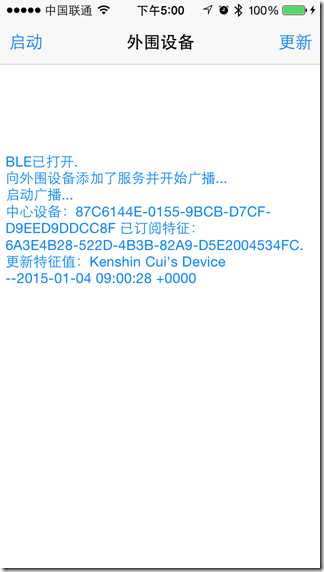
下面是简单的程序示例,程序有两个按钮“启动”和“更新”,点击启动按钮则创建外围设备、添加服务和特征并开始广播,一旦发现有中央设备连接并订阅了此服务的特征则通过更新按钮更新特征数据,此时已订阅的中央设备就会收到更新数据。
界面设计:
程序设计:
#import "ViewController.h"
#import <CoreBluetooth/CoreBluetooth.h>
#define kPeripheralName @"Kenshin Cui‘s Device" //外围设备名称
#define kServiceUUID @"C4FB2349-72FE-4CA2-94D6-1F3CB16331EE" //服务的UUID
#define kCharacteristicUUID @"6A3E4B28-522D-4B3B-82A9-D5E2004534FC" //特征的UUID
@interface ViewController ()<CBPeripheralManagerDelegate>
@property (strong,nonatomic) CBPeripheralManager *peripheralManager;//外围设备管理器
@property (strong,nonatomic) NSMutableArray *centralM;//订阅此外围设备特征的中心设备
@property (strong,nonatomic) CBMutableCharacteristic *characteristicM;//特征
@property (weak, nonatomic) IBOutlet UITextView *log; //日志记录
@end
@implementation ViewController
#pragma mark - 视图控制器方法
- (void)viewDidLoad {
[super viewDidLoad];
}
#pragma mark - UI事件
//创建外围设备
- (IBAction)startClick:(UIBarButtonItem *)sender {
_peripheralManager=[[CBPeripheralManager alloc]initWithDelegate:self queue:nil];
}
//更新数据
- (IBAction)transferClick:(UIBarButtonItem *)sender {
[self updateCharacteristicValue];
}
#pragma mark - CBPeripheralManager代理方法
//外围设备状态发生变化后调用
-(void)peripheralManagerDidUpdateState:(CBPeripheralManager *)peripheral{
switch (peripheral.state) {
case CBPeripheralManagerStatePoweredOn:
NSLog(@"BLE已打开.");
[self writeToLog:@"BLE已打开."];
//添加服务
[self setupService];
break;
default:
NSLog(@"此设备不支持BLE或未打开蓝牙功能,无法作为外围设备.");
[self writeToLog:@"此设备不支持BLE或未打开蓝牙功能,无法作为外围设备."];
break;
}
}
//外围设备添加服务后调用
-(void)peripheralManager:(CBPeripheralManager *)peripheral didAddService:(CBService *)service error:(NSError *)error{
if (error) {
NSLog(@"向外围设备添加服务失败,错误详情:%@",error.localizedDescription);
[self writeToLog:[NSString stringWithFormat:@"向外围设备添加服务失败,错误详情:%@",error.localizedDescription]];
return;
}
//添加服务后开始广播
NSDictionary *dic=@{CBAdvertisementDataLocalNameKey:kPeripheralName};//广播设置
[self.peripheralManager startAdvertising:dic];//开始广播
NSLog(@"向外围设备添加了服务并开始广播...");
[self writeToLog:@"向外围设备添加了服务并开始广播..."];
}
-(void)peripheralManagerDidStartAdvertising:(CBPeripheralManager *)peripheral error:(NSError *)error{
if (error) {
NSLog(@"启动广播过程中发生错误,错误信息:%@",error.localizedDescription);
[self writeToLog:[NSString stringWithFormat:@"启动广播过程中发生错误,错误信息:%@",error.localizedDescription]];
return;
}
NSLog(@"启动广播...");
[self writeToLog:@"启动广播..."];
}
//订阅特征
-(void)peripheralManager:(CBPeripheralManager *)peripheral central:(CBCentral *)central didSubscribeToCharacteristic:(CBCharacteristic *)characteristic{
NSLog(@"中心设备:%@ 已订阅特征:%@.",central,characteristic);
[self writeToLog:[NSString stringWithFormat:@"中心设备:%@ 已订阅特征:%@.",central.identifier.UUIDString,characteristic.UUID]];
//发现中心设备并存储
if (![self.centralM containsObject:central]) {
[self.centralM addObject:central];
}
/*中心设备订阅成功后外围设备可以更新特征值发送到中心设备,一旦更新特征值将会触发中心设备的代理方法:
-(void)peripheral:(CBPeripheral *)peripheral didUpdateValueForCharacteristic:(CBCharacteristic *)characteristic error:(NSError *)error
*/
// [self updateCharacteristicValue];
}
//取消订阅特征
-(void)peripheralManager:(CBPeripheralManager *)peripheral central:(CBCentral *)central didUnsubscribeFromCharacteristic:(CBCharacteristic *)characteristic{
NSLog(@"didUnsubscribeFromCharacteristic");
}
-(void)peripheralManager:(CBPeripheralManager *)peripheral didReceiveWriteRequests:(CBATTRequest *)request{
NSLog(@"didReceiveWriteRequests");
}
-(void)peripheralManager:(CBPeripheralManager *)peripheral willRestoreState:(NSDictionary *)dict{
NSLog(@"willRestoreState");
}
#pragma mark -属性
-(NSMutableArray *)centralM{
if (!_centralM) {
_centralM=[NSMutableArray array];
}
return _centralM;
}
#pragma mark - 私有方法
//创建特征、服务并添加服务到外围设备
-(void)setupService{
/*1.创建特征*/
//创建特征的UUID对象
CBUUID *characteristicUUID=[CBUUID UUIDWithString:kCharacteristicUUID];
//特征值
// NSString *valueStr=kPeripheralName;
// NSData *value=[valueStr dataUsingEncoding:NSUTF8StringEncoding];
//创建特征
/** 参数
* uuid:特征标识
* properties:特征的属性,例如:可通知、可写、可读等
* value:特征值
* permissions:特征的权限
*/
CBMutableCharacteristic *characteristicM=[[CBMutableCharacteristic alloc]initWithType:characteristicUUID properties:CBCharacteristicPropertyNotify value:nil permissions:CBAttributePermissionsReadable];
self.characteristicM=characteristicM;
// CBMutableCharacteristic *characteristicM=[[CBMutableCharacteristic alloc]initWithType:characteristicUUID properties:CBCharacteristicPropertyRead value:nil permissions:CBAttributePermissionsReadable];
// characteristicM.value=value;
/*创建服务并且设置特征*/
//创建服务UUID对象
CBUUID *serviceUUID=[CBUUID UUIDWithString:kServiceUUID];
//创建服务
CBMutableService *serviceM=[[CBMutableService alloc]initWithType:serviceUUID primary:YES];
//设置服务的特征
[serviceM setCharacteristics:@[characteristicM]];
/*将服务添加到外围设备*/
[self.peripheralManager addService:serviceM];
}
//更新特征值
-(void)updateCharacteristicValue{
//特征值
NSString *valueStr=[NSString stringWithFormat:@"%@ --%@",kPeripheralName,[NSDate date]];
NSData *value=[valueStr dataUsingEncoding:NSUTF8StringEncoding];
//更新特征值
[self.peripheralManager updateValue:value forCharacteristic:self.characteristicM onSubscribedCentrals:nil];
[self writeToLog:[NSString stringWithFormat:@"更新特征值:%@",valueStr]];
}
/**
* 记录日志
*
* @param info 日志信息
*/
-(void)writeToLog:(NSString *)info{
self.log.text=[NSString stringWithFormat:@"%@\r\n%@",self.log.text,info];
}
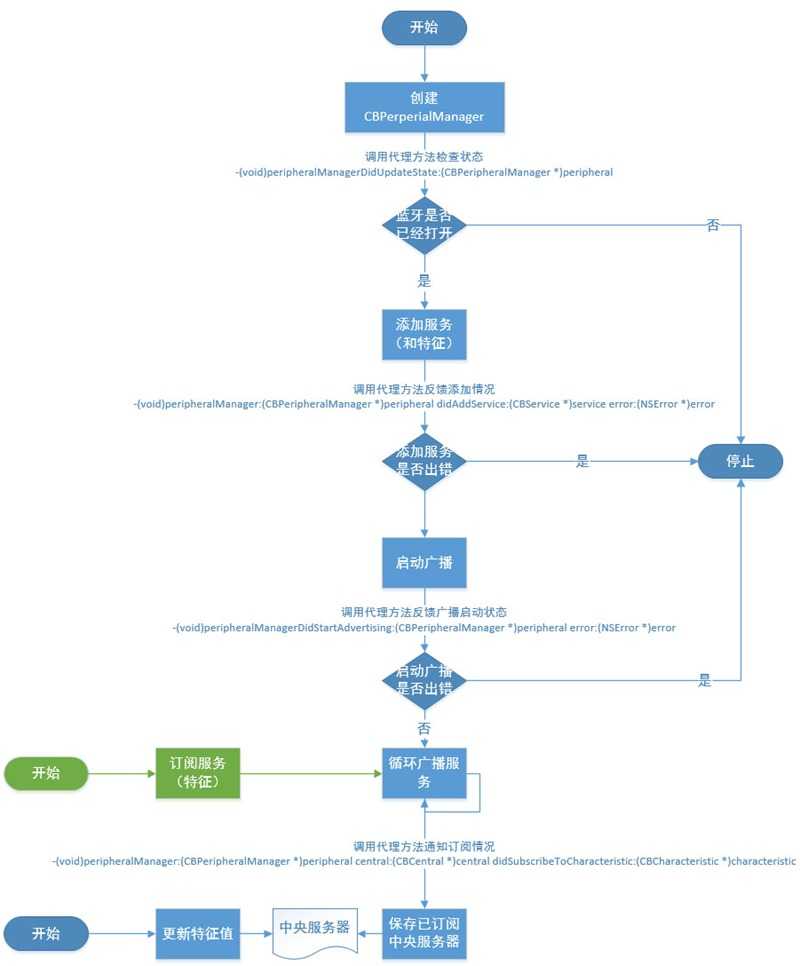
@end上面程序运行的流程如下(图中蓝色代表外围设备操作,绿色部分表示中央设备操作):
B.中央设备
中央设备的创建一般可以分为如下几个步骤:
1. 创建中央设备管理对象CBCentralManager并指定代理。
2. 扫描外围设备,一般发现可用外围设备则连接并保存外围设备。
3. 查找外围设备服务和特征,查找到可用特征则读取特征数据。
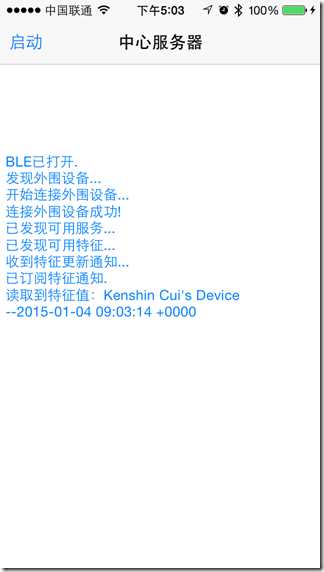
下面是一个简单的中央服务器端实现,点击“启动”按钮则开始扫描周围的外围设备,一旦发现了可用的外围设备则建立连接并设置外围设备的代理,之后开始查找其服务和特征。一旦外围设备的特征值做了更新,则可以在代理方法中读取更新后的特征值。
界面设计:
程序设计:
#import "ViewController.h"
#import <CoreBluetooth/CoreBluetooth.h>
#define kServiceUUID @"C4FB2349-72FE-4CA2-94D6-1F3CB16331EE" //服务的UUID
#define kCharacteristicUUID @"6A3E4B28-522D-4B3B-82A9-D5E2004534FC" //特征的UUID
@interface ViewController ()<CBCentralManagerDelegate,CBPeripheralDelegate>
@property (strong,nonatomic) CBCentralManager *centralManager;//中心设备管理器
@property (strong,nonatomic) NSMutableArray *peripherals;//连接的外围设备
@property (weak, nonatomic) IBOutlet UITextView *log;//日志记录
@end
@implementation ViewController
#pragma mark - 控制器视图事件
- (void)viewDidLoad {
[super viewDidLoad];
}
#pragma mark - UI事件
- (IBAction)startClick:(UIBarButtonItem *)sender {
//创建中心设备管理器并设置当前控制器视图为代理
_centralManager=[[CBCentralManager alloc]initWithDelegate:self queue:nil];
}
#pragma mark - CBCentralManager代理方法
//中心服务器状态更新后
-(void)centralManagerDidUpdateState:(CBCentralManager *)central{
switch (central.state) {
case CBPeripheralManagerStatePoweredOn:
NSLog(@"BLE已打开.");
[self writeToLog:@"BLE已打开."];
//扫描外围设备
// [central scanForPeripheralsWithServices:@[[CBUUID UUIDWithString:kServiceUUID]] options:@{CBCentralManagerScanOptionAllowDuplicatesKey:@YES}];
[central scanForPeripheralsWithServices:nil options:@{CBCentralManagerScanOptionAllowDuplicatesKey:@YES}];
break;
default:
NSLog(@"此设备不支持BLE或未打开蓝牙功能,无法作为外围设备.");
[self writeToLog:@"此设备不支持BLE或未打开蓝牙功能,无法作为外围设备."];
break;
}
}
/**
* 发现外围设备
*
* @param central 中心设备
* @param peripheral 外围设备
* @param advertisementData 特征数据
* @param RSSI 信号质量(信号强度)
*/
-(void)centralManager:(CBCentralManager *)central didDiscoverPeripheral:(CBPeripheral *)peripheral advertisementData:(NSDictionary *)advertisementData RSSI:(NSNumber *)RSSI{
NSLog(@"发现外围设备...");
[self writeToLog:@"发现外围设备..."];
//停止扫描
[self.centralManager stopScan];
//连接外围设备
if (peripheral) {
//添加保存外围设备,注意如果这里不保存外围设备(或者说peripheral没有一个强引用,无法到达连接成功(或失败)的代理方法,因为在此方法调用完就会被销毁
if(![self.peripherals containsObject:peripheral]){
[self.peripherals addObject:peripheral];
}
NSLog(@"开始连接外围设备...");
[self writeToLog:@"开始连接外围设备..."];
[self.centralManager connectPeripheral:peripheral options:nil];
}
}
//连接到外围设备
-(void)centralManager:(CBCentralManager *)central didConnectPeripheral:(CBPeripheral *)peripheral{
NSLog(@"连接外围设备成功!");
[self writeToLog:@"连接外围设备成功!"];
//设置外围设备的代理为当前视图控制器
peripheral.delegate=self;
//外围设备开始寻找服务
[peripheral discoverServices:@[[CBUUID UUIDWithString:kServiceUUID]]];
}
//连接外围设备失败
-(void)centralManager:(CBCentralManager *)central didFailToConnectPeripheral:(CBPeripheral *)peripheral error:(NSError *)error{
NSLog(@"连接外围设备失败!");
[self writeToLog:@"连接外围设备失败!"];
}
#pragma mark - CBPeripheral 代理方法
//外围设备寻找到服务后
-(void)peripheral:(CBPeripheral *)peripheral didDiscoverServices:(NSError *)error{
NSLog(@"已发现可用服务...");
[self writeToLog:@"已发现可用服务..."];
if(error){
NSLog(@"外围设备寻找服务过程中发生错误,错误信息:%@",error.localizedDescription);
[self writeToLog:[NSString stringWithFormat:@"外围设备寻找服务过程中发生错误,错误信息:%@",error.localizedDescription]];
}
//遍历查找到的服务
CBUUID *serviceUUID=[CBUUID UUIDWithString:kServiceUUID];
CBUUID *characteristicUUID=[CBUUID UUIDWithString:kCharacteristicUUID];
for (CBService *service in peripheral.services) {
if([service.UUID isEqual:serviceUUID]){
//外围设备查找指定服务中的特征
[peripheral discoverCharacteristics:@[characteristicUUID] forService:service];
}
}
}
//外围设备寻找到特征后
-(void)peripheral:(CBPeripheral *)peripheral didDiscoverCharacteristicsForService:(CBService *)service error:(NSError *)error{
NSLog(@"已发现可用特征...");
[self writeToLog:@"已发现可用特征..."];
if (error) {
NSLog(@"外围设备寻找特征过程中发生错误,错误信息:%@",error.localizedDescription);
[self writeToLog:[NSString stringWithFormat:@"外围设备寻找特征过程中发生错误,错误信息:%@",error.localizedDescription]];
}
//遍历服务中的特征
CBUUID *serviceUUID=[CBUUID UUIDWithString:kServiceUUID];
CBUUID *characteristicUUID=[CBUUID UUIDWithString:kCharacteristicUUID];
if ([service.UUID isEqual:serviceUUID]) {
for (CBCharacteristic *characteristic in service.characteristics) {
if ([characteristic.UUID isEqual:characteristicUUID]) {
//情景一:通知
/*找到特征后设置外围设备为已通知状态(订阅特征):
*1.调用此方法会触发代理方法:-(void)peripheral:(CBPeripheral *)peripheral didUpdateNotificationStateForCharacteristic:(CBCharacteristic *)characteristic error:(NSError *)error
*2.调用此方法会触发外围设备的订阅代理方法
*/
[peripheral setNotifyValue:YES forCharacteristic:characteristic];
//情景二:读取
// [peripheral readValueForCharacteristic:characteristic];
// if(characteristic.value){
// NSString *value=[[NSString alloc]initWithData:characteristic.value encoding:NSUTF8StringEncoding];
// NSLog(@"读取到特征值:%@",value);
// }
}
}
}
}
//特征值被更新后
-(void)peripheral:(CBPeripheral *)peripheral didUpdateNotificationStateForCharacteristic:(CBCharacteristic *)characteristic error:(NSError *)error{
NSLog(@"收到特征更新通知...");
[self writeToLog:@"收到特征更新通知..."];
if (error) {
NSLog(@"更新通知状态时发生错误,错误信息:%@",error.localizedDescription);
}
//给特征值设置新的值
CBUUID *characteristicUUID=[CBUUID UUIDWithString:kCharacteristicUUID];
if ([characteristic.UUID isEqual:characteristicUUID]) {
if (characteristic.isNotifying) {
if (characteristic.properties==CBCharacteristicPropertyNotify) {
NSLog(@"已订阅特征通知.");
[self writeToLog:@"已订阅特征通知."];
return;
}else if (characteristic.properties ==CBCharacteristicPropertyRead) {
//从外围设备读取新值,调用此方法会触发代理方法:-(void)peripheral:(CBPeripheral *)peripheral didUpdateValueForCharacteristic:(CBCharacteristic *)characteristic error:(NSError *)error
[peripheral readValueForCharacteristic:characteristic];
}
}else{
NSLog(@"停止已停止.");
[self writeToLog:@"停止已停止."];
//取消连接
[self.centralManager cancelPeripheralConnection:peripheral];
}
}
}
//更新特征值后(调用readValueForCharacteristic:方法或者外围设备在订阅后更新特征值都会调用此代理方法)
-(void)peripheral:(CBPeripheral *)peripheral didUpdateValueForCharacteristic:(CBCharacteristic *)characteristic error:(NSError *)error{
if (error) {
NSLog(@"更新特征值时发生错误,错误信息:%@",error.localizedDescription);
[self writeToLog:[NSString stringWithFormat:@"更新特征值时发生错误,错误信息:%@",error.localizedDescription]];
return;
}
if (characteristic.value) {
NSString *value=[[NSString alloc]initWithData:characteristic.value encoding:NSUTF8StringEncoding];
NSLog(@"读取到特征值:%@",value);
[self writeToLog:[NSString stringWithFormat:@"读取到特征值:%@",value]];
}else{
NSLog(@"未发现特征值.");
[self writeToLog:@"未发现特征值."];
}
}
#pragma mark - 属性
-(NSMutableArray *)peripherals{
if(!_peripherals){
_peripherals=[NSMutableArray array];
}
return _peripherals;
}
#pragma mark - 私有方法
/**
* 记录日志
*
* @param info 日志信息
*/
-(void)writeToLog:(NSString *)info{
self.log.text=[NSString stringWithFormat:@"%@\r\n%@",self.log.text,info];
}
@end上面程序运行的流程图如下:
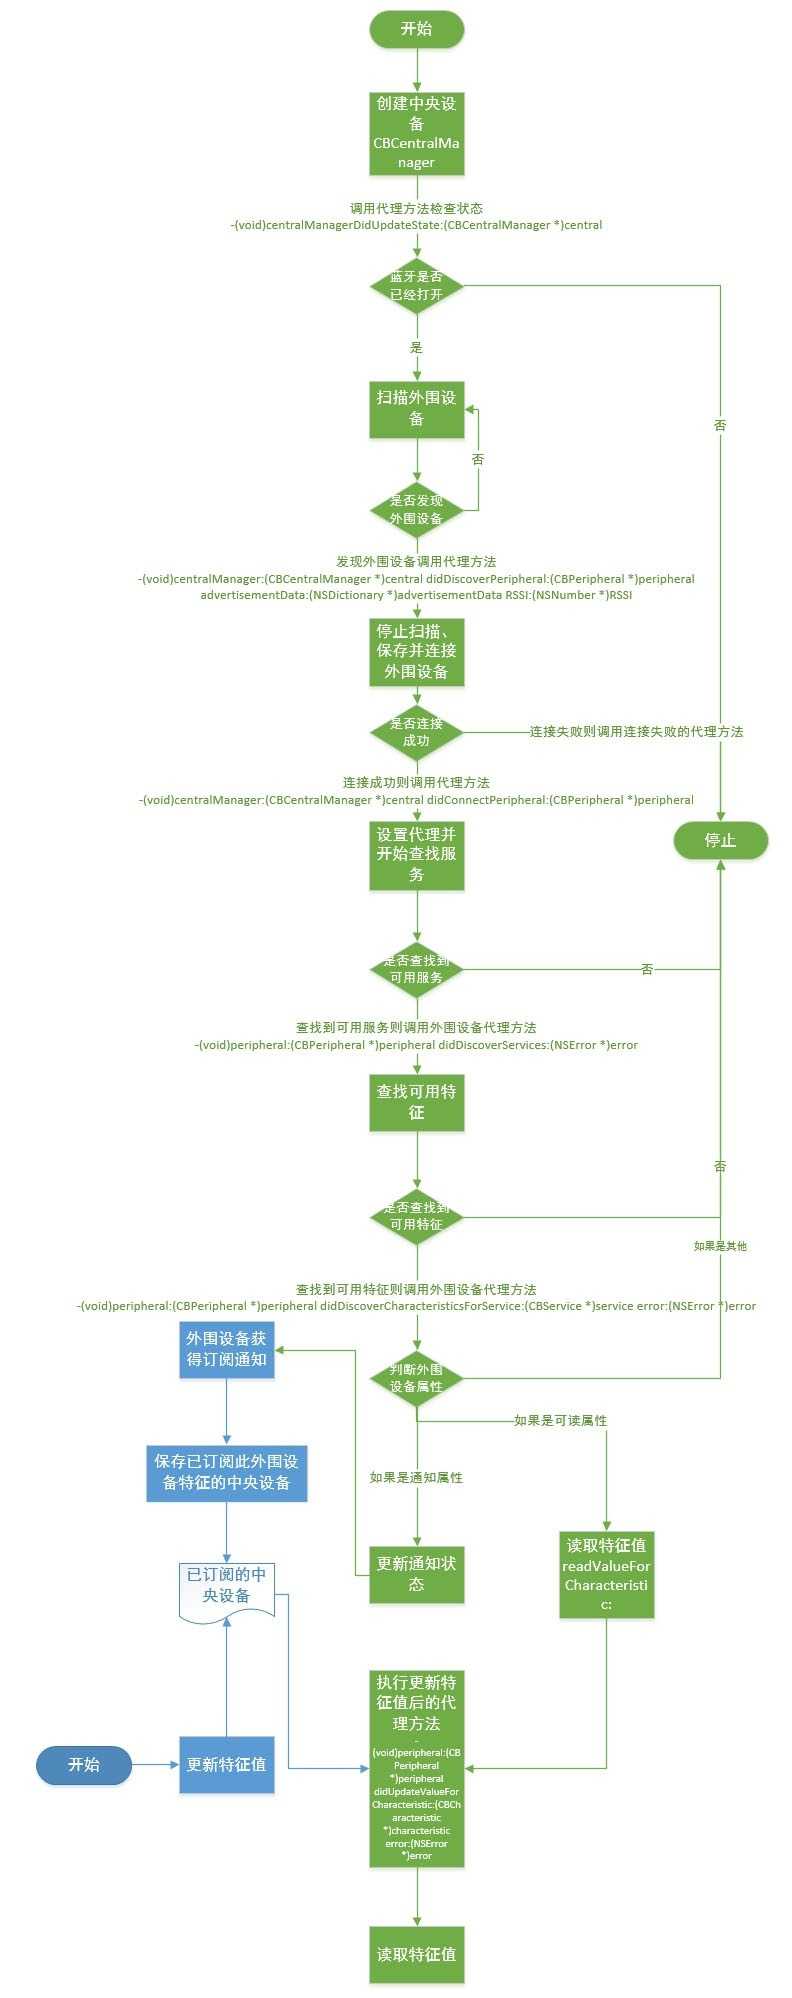

有了上面两个程序就可以分别运行在两台支持BLE的iOS设备上,当两个应用建立连接后,一旦外围设备更新特征之后,中央设备就可以立即获取到更新后的值。需要强调的是使用CoreBluetooth开发的应用不仅仅可以和其他iOS设备进行蓝牙通信,还可以同其他第三方遵循BLE规范的设备进行蓝牙通讯,这里就不再赘述。
Social
现在很多应用都内置“社交分享”功能,可以将看到的新闻、博客、广告等内容分享到微博、微信、QQ、空间等,其实从iOS6.0开始苹果官方就内置了Social.framework专门来实现社交分享功能,利用这个框架开发者只需要几句代码就可以实现内容分享。下面就以一个分享到新浪微博的功能为例来演示Social框架的应用,整个过程分为:创建内容编辑控制器,设置分享内容(文本内容、图片、超链接等),设置发送(或取消)后的回调事件,展示控制器。
程序代码:
#import "ViewController.h"
#import <Social/Social.h>
@interface ViewController ()
@end
@implementation ViewController
#pragma mark - 控制器视图事件
- (void)viewDidLoad {
[super viewDidLoad];
}
#pragma mark - UI事件
- (IBAction)shareClick:(UIBarButtonItem *)sender {
[self shareToSina];
}
#pragma mark - 私有方法
-(void)shareToSina{
//检查新浪微博服务是否可用
if(![SLComposeViewController isAvailableForServiceType:SLServiceTypeSinaWeibo]){
NSLog(@"新浪微博服务不可用.");
return;
}
//初始化内容编写控制器,注意这里指定分享类型为新浪微博
SLComposeViewController *composeController=[SLComposeViewController composeViewControllerForServiceType:SLServiceTypeSinaWeibo];
//设置默认信息
[composeController setInitialText:@"Kenshin Cui‘s Blog..."];
//添加图片
[composeController addImage:[UIImage imageNamed:@"stevenChow"]];
//添加连接
[composeController addURL:[NSURL URLWithString:@"http://www.cnblogs.com/kenshincui"]];
//设置发送完成后的回调事件
__block SLComposeViewController *composeControllerForBlock=composeController;
composeController.completionHandler=^(SLComposeViewControllerResult result){
if (result==SLComposeViewControllerResultDone) {
NSLog(@"开始发送...");
}
[composeControllerForBlock dismissViewControllerAnimated:YES completion:nil];
};
//显示编辑视图
[self presentViewController:composeController animated:YES completion:nil];
}
@end运行效果:
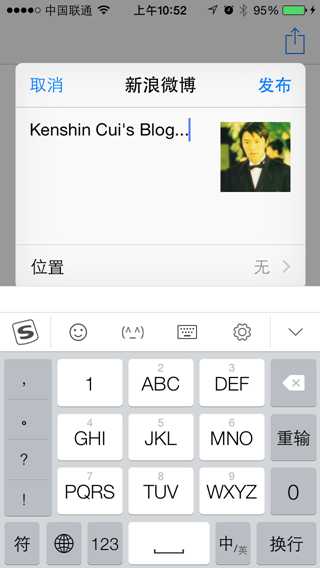
发送成功之后:
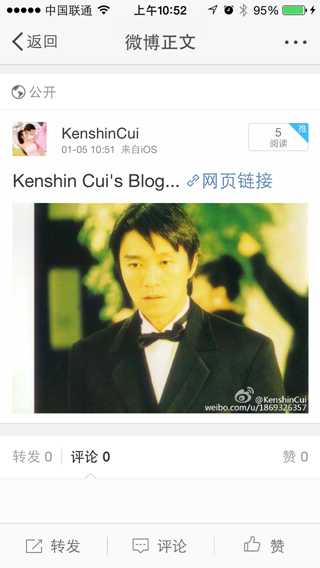
在这个过程中开发人员不需要知道新浪微博的更多分享细节,Social框架中已经统一了分享的接口,你可以通过ServiceType设置是分享到Facebook、Twitter、新浪微博、腾讯微博,而不关心具体的细节实现。那么当运行上面的示例时它是怎么知道用哪个账户来发送微博呢?其实在iOS的设置中有专门设置Facebook、Twitter、微博的地方:
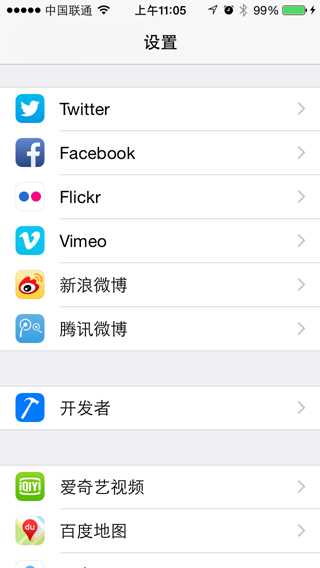
必须首先在这里设置微博账户才能完成上面的发送,不然Social框架也不可能知道具体使用哪个账户来发送。
当然,通过上面的设置界面应该可以看到,苹果官方默认支持的分享并不太多,特别是对于国内的应用只支持新浪微博和腾讯微博(事实上从iOS7苹果才考虑支持腾讯微博),那么如果要分享到微信、人人、开心等等国内较为知名的社交网络怎么办呢?目前最好的选择就是使用第三方框架,因为如果要自己实现各个应用的接口还是比较复杂的。当前使用较多的就是友盟社会化组件、ShareSDK,而且现在百度也出了社会化分享组件。今天无法对所有组件都进行一一介绍,这里就以友盟社交化组件为例简单做一下介绍:
1. 注册友盟账号并新建应用获得AppKey。
2. 下载友盟SDK并将下载的文件放到项目中(注意下载的过程中可以选择所需要的分享服务)
3. 在应用程序中设置友盟的AppKey。
4. 分享时调用presentSnsIconSheetView: appKey: shareText: shareImage: shareToSnsNames: delegate:方法或者presentSnsController: appKey: shareText: shareImage: shareToSnsNames: delegate:方法显示分享列表(注意这个过程中要使用某些服务需要到对应的平台去申请并对应扩展框架进行设置,否则分享列表中不会显示对应的分享按钮)。
下面是一个简单的示例:
#import "ViewController.h"
#import "UMSocial.h"
#import "UMSocialWechatHandler.h"
@interface ViewController ()<UMSocialUIDelegate>
@end
@implementation ViewController
#pragma mark - 控制器视图事件
- (void)viewDidLoad {
[super viewDidLoad];
}
#pragma mark - UI事件
- (IBAction)shareClick:(UIBarButtonItem *)sender {
//设置微信AppId、appSecret,分享url
// [UMSocialWechatHandler setWXAppId:@"wx30dbea5d5a258ed3" appSecret:@"cd36a9829e4b49a0dcac7b4162da5a5" url:@"http://www.cmj.com/social-UM"];
//微信好友、微信朋友圈、微信收藏、QQ空间、QQ好友、来往好友等都必须经过各自的平台集成否则不会出现在分享列表,例如上面是设置微信的AppId和appSecret
[UMSocialSnsService presentSnsIconSheetView:self appKey:@"54aa0a0afd98c5209f000efa" shareText:@"Kenshin Cui‘s Blog..." shareImage:[UIImage imageNamed:@"stevenChow"] shareToSnsNames:@[UMShareToSina,UMShareToTencent,UMShareToRenren,UMShareToDouban] delegate:self];
}
#pragma mark - UMSocialSnsService代理
//分享完成
-(void)didFinishGetUMSocialDataInViewController:(UMSocialResponseEntity *)response{
//分享成功
if(response.responseCode==UMSResponseCodeSuccess){
NSLog(@"分享成功");
}
}
@end运行效果:
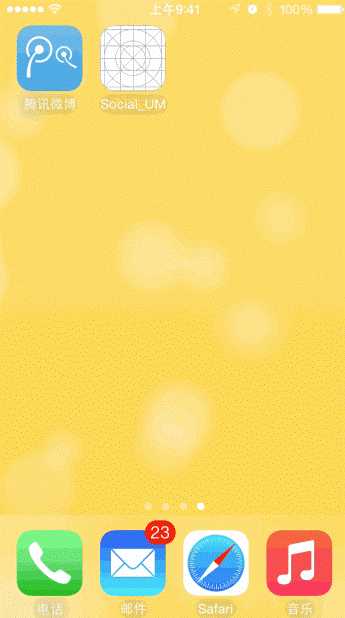
Game Center是由苹果发布的在线多人游戏社交网络,通过它游戏玩家可以邀请好友进行多人游戏,它也会记录玩家的成绩并在排行榜中展示,同时玩家每经过一定的阶段会获得不同的成就。这里就简单介绍一下如何在自己的应用中集成Game Center服务来让用户获得积分、成就以及查看游戏排行和已获得成就。
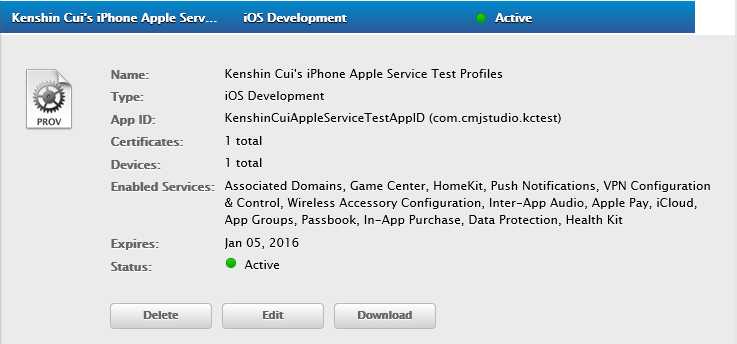
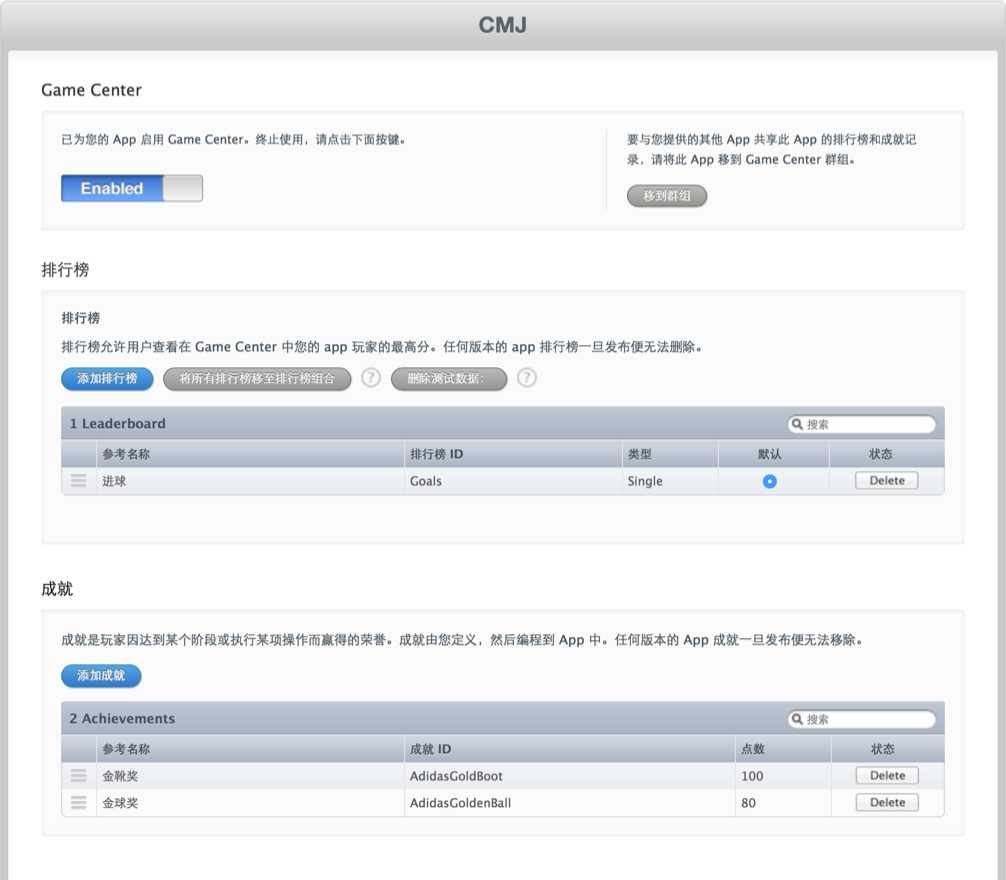
由于Game Center是苹果推出的一项重要服务,苹果官方对于它的控制相当严格,因此使用Game Center之前必须要做许多准备工作。通常需要经过以下几个步骤(下面的准备工作主要是针对真机的,模拟器省略Provisioning Profile配置过程):
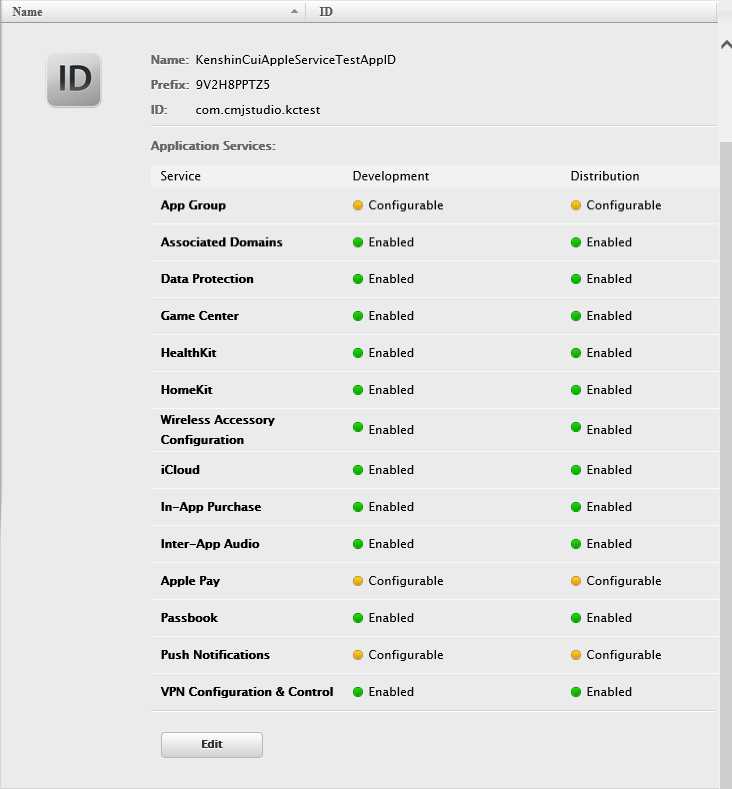
1. 在苹果开发者中心创建支持Game Center服务的App ID并指定具体的Bundle ID,假设是“com.cmjstudio.kctest”(注意这个Bundle ID就是日后要开发的游戏的Bundle ID)。
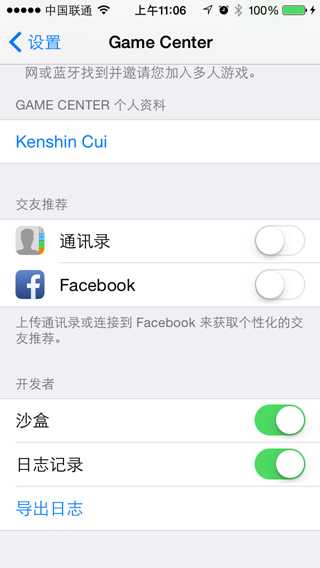
GKLocalPlayer:表示本地玩家,在GameKit中还有一个GKPlayer表示联机玩家,为了保证非联网用户也可以正常使用游戏功能,一般使用GKLocalPlayer。
GKScore:管理游戏积分,例如设置积分、排名等。
GKLeaderboard:表示游戏排行榜,主用用于管理玩家排名,例如加载排行榜、设置默认排行榜、加载排行榜图片等。
GKAchievement:表示成就,主用用于管理玩家成就,例如加载成就、提交成就,重置成就等。
GKAchievementDescription:成就描述信息,包含成就的标题、获得前描述、获得后描述、是否可重复获得成就等信息。
GKGameCenterViewController:排行榜、成就查看视图控制器。如果应用本身不需要自己开发排行榜、成就查看试图可以直接调用此控制器。
下面就以一个简单的示例来完成排行榜、成就设置和查看,在这个演示程序中通过两种方式来查看排行和成就:一种是直接使用框架自带的GKGameCenterViewContrller调用系统视图查看,另一种是通过API自己读取排行榜、成就信息并显示。此外在应用中有两个添加按钮分别用于设置得分和成就。应用大致布局如下(图片较大可点击查看大图):
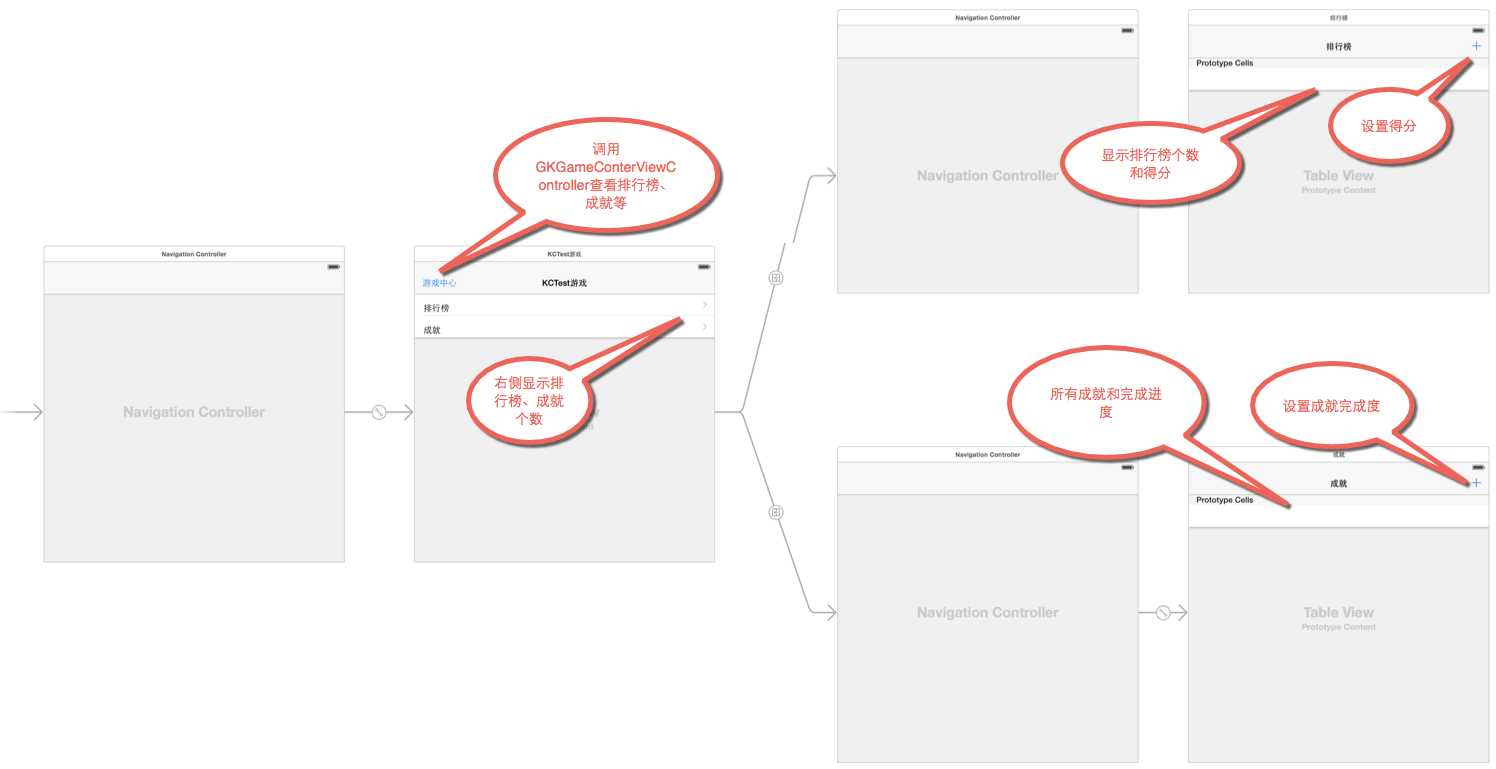
1.首先看一下主视图控制器KCMainTableViewController:
主视图控制器调用GKLeaderboard的loadLeaderboardsWithCompletionHandler:方法加载了所有排行榜,这个过程需要注意每个排行榜(GKLeaderboard)中的scores属性是没有值的,如果要让每个排行榜的scores属性有值必须调用一次排行榜的loadScoresWithCompletionHandler:方法。
调用GKAchievement的loadAchievementsWithCompletionHandler:方法加载加载成就,注意这个方法只能获得完成度不为0的成就,如果完成度为0是获得不到的;然后调用GKAchievementDesciption的loadAchievementDescriptionsWithCompletionHandler:方法加载了所有成就描述,这里加载的是所有成就描述(不管完成度是否为0);紧接着调用了每个成就描述的loadImageWithCompletionHandler:方法加载成就图片。
将获得的排行榜、成就、成就描述、成就图片信息保存,并在导航到详情视图时传递给排行榜视图控制器和成就视图控制器以便在子控制器视图中展示。
在主视图控制器左上方添加查看游戏中心控制按钮,点击按钮调用GKGameCenterViewController来展示排行榜、成就、玩家信息,这是系统自带的一个游戏中心视图方便和后面我们自己获得的信息对比。
程序如下
#import "KCMainTableViewController.h"
#import <GameKit/GameKit.h>
#import "KCLeaderboardTableViewController.h"
#import "KCAchievementTableViewController.h"
@interface KCMainTableViewController ()<GKGameCenterControllerDelegate>
@property (strong,nonatomic) NSArray *leaderboards;//排行榜对象数组
@property (strong,nonatomic) NSArray *achievements;//成就
@property (strong,nonatomic) NSArray *achievementDescriptions;//成就描述
@property (strong,nonatomic) NSMutableDictionary *achievementImages;//成就图片
@property (weak, nonatomic) IBOutlet UILabel *leaderboardLabel; //排行个数
@property (weak, nonatomic) IBOutlet UILabel *achievementLable; //成就个数
@end
@implementation KCMainTableViewController
#pragma mark - 控制器视图事件
- (void)viewDidLoad {
[super viewDidLoad];
[self authorize];
}
#pragma mark - UI事件
- (IBAction)viewGameCenterClick:(UIBarButtonItem *)sender {
[self viewGameCenter];
}
#pragma mark - GKGameCenterViewController代理方法
//点击完成
-(void)gameCenterViewControllerDidFinish:(GKGameCenterViewController *)gameCenterViewController{
NSLog(@"完成.");
[gameCenterViewController dismissViewControllerAnimated:YES completion:nil];
}
#pragma mark -导航
-(void)prepareForSegue:(UIStoryboardSegue *)segue sender:(id)sender{
//如果是导航到排行榜,则将当前排行榜传递到排行榜视图
if ([segue.identifier isEqualToString:@"leaderboard"]) {
UINavigationController *navigationController=segue.destinationViewController;
KCLeaderboardTableViewController *leaderboardController=[navigationController.childViewControllers firstObject];
leaderboardController.leaderboards=self.leaderboards;
}else if ([segue.identifier isEqualToString:@"achievement"]) {
UINavigationController *navigationController=segue.destinationViewController;
KCAchievementTableViewController *achievementController=[navigationController.childViewControllers firstObject];
achievementController.achievements=self.achievements;
achievementController.achievementDescriptions=self.achievementDescriptions;
achievementController.achievementImages=self.achievementImages;
}
}
#pragma mark - 私有方法
//检查是否经过认证,如果没经过认证则弹出Game Center登录界面
-(void)authorize{
//创建一个本地用户
GKLocalPlayer *localPlayer= [GKLocalPlayer localPlayer];
//检查用于授权,如果没有登录则让用户登录到GameCenter(注意此事件设置之后或点击登录界面的取消按钮都会被调用)
[localPlayer setAuthenticateHandler:^(UIViewController * controller, NSError *error) {
if ([[GKLocalPlayer localPlayer] isAuthenticated]) {
NSLog(@"已授权.");
[self setupUI];
}else{
//注意:在设置中找到Game Center,设置其允许沙盒,否则controller为nil
[self presentViewController:controller animated:YES completion:nil];
}
}];
}
//UI布局
-(void)setupUI{
//更新排行榜个数
[GKLeaderboard loadLeaderboardsWithCompletionHandler:^(NSArray *leaderboards, NSError *error) {
if (error) {
NSLog(@"加载排行榜过程中发生错误,错误信息:%@",error.localizedDescription);
}
self.leaderboards=leaderboards;
self.leaderboardLabel.text=[NSString stringWithFormat:@"%i",leaderboards.count];
//获取得分,注意只有调用了loadScoresWithCompletionHandler:方法之后leaderboards中的排行榜中的scores属性才有值,否则为nil
[leaderboards enumerateObjectsUsingBlock:^(id obj, NSUInteger idx, BOOL *stop) {
GKLeaderboard *leaderboard=obj;
[leaderboard loadScoresWithCompletionHandler:^(NSArray *scores, NSError *error) {
}];
}];
}];
//更新获得成就个数,注意这个个数不一定等于iTunes Connect中的总成就个数,此方法只能获取到成就完成进度不为0的成就
[GKAchievement loadAchievementsWithCompletionHandler:^(NSArray *achievements, NSError *error) {
if (error) {
NSLog(@"加载成就过程中发生错误,错误信息:%@",error.localizedDescription);
}
self.achievements=achievements;
self.achievementLable.text=[NSString stringWithFormat:@"%i",achievements.count];
//加载成就描述(注意,即使没有获得此成就也能获取到)
[GKAchievementDescription loadAchievementDescriptionsWithCompletionHandler:^(NSArray *descriptions, NSError *error) {
if (error) {
NSLog(@"加载成就描述信息过程中发生错误,错误信息:%@",error.localizedDescription);
return ;
}
self.achievementDescriptions=descriptions;
//加载成就图片
_achievementImages=[NSMutableDictionary dictionary];
[descriptions enumerateObjectsUsingBlock:^(id obj, NSUInteger idx, BOOL *stop) {
GKAchievementDescription *description=(GKAchievementDescription *)obj;
[description loadImageWithCompletionHandler:^(UIImage *image, NSError *error) {
[_achievementImages setObject:image forKey:description.identifier];
}];
}];
}];
}];
}
//查看Game Center
-(void)viewGameCenter{
if (![GKLocalPlayer localPlayer].isAuthenticated) {
NSLog(@"未获得用户授权.");
return;
}
//Game Center视图控制器
GKGameCenterViewController *gameCenterController=[[GKGameCenterViewController alloc]init];
//设置代理
gameCenterController.gameCenterDelegate=self;
//显示
[self presentViewController:gameCenterController animated:YES completion:nil];
}
@end2.然后看一下排行榜控制器视图KCLeaderboardTableViewController:
在排行榜控制器视图中定义一个leaderboards属性用于接收主视图控制器传递的排行榜信息并且通过一个UITableView展示排行榜名称、得分等。
在排行榜控制器视图中通过GKScore的reportScores: withCompletionHandler:设置排行榜得分,注意每个GKScore对象必须设置value属性来表示得分(GKScore是通过identifier来和排行榜关联起来的)。
程序如下
#import "KCLeaderboardTableViewController.h"
#import <GameKit/GameKit.h>
//排行榜标识,就是iTunes Connect中配置的排行榜ID
#define kLeaderboardIdentifier1 @"Goals"
@interface KCLeaderboardTableViewController ()
@end
@implementation KCLeaderboardTableViewController
- (void)viewDidLoad {
[super viewDidLoad];
}
#pragma mark - UI事件
//添加得分(这里指的是进球数)
- (IBAction)addScoreClick:(UIBarButtonItem *)sender {
[self addScoreWithIdentifier:kLeaderboardIdentifier1 value:100];
}
#pragma mark - UITableView数据源方法
-(NSInteger)tableView:(UITableView *)tableView sectionForSectionIndexTitle:(NSString *)title atIndex:(NSInteger)index{
return 1;
}
-(NSInteger)tableView:(UITableView *)tableView numberOfRowsInSection:(NSInteger)section{
return self.leaderboards.count;
}
-(UITableViewCell *)tableView:(UITableView *)tableView cellForRowAtIndexPath:(NSIndexPath *)indexPath{
static NSString *identtityKey=@"myTableViewCellIdentityKey1";
UITableViewCell *cell=[self.tableView dequeueReusableCellWithIdentifier:identtityKey];
if(cell==nil){
cell=[[UITableViewCell alloc]initWithStyle:UITableViewCellStyleValue1 reuseIdentifier:identtityKey];
}
GKLeaderboard *leaderboard=self.leaderboards[indexPath.row];
GKScore *score=[leaderboard.scores firstObject];
NSLog(@"scores:%@",leaderboard.scores);
cell.textLabel.text=leaderboard.title;//排行榜标题
cell.detailTextLabel.text=[NSString stringWithFormat:@"%lld",score.value]; //排行榜得分
return cell;
}
#pragma mark - 属性
#pragma mark - 私有方法
/**
* 设置得分
*
* @param identifier 排行榜标识
* @param value 得分
*/
-(void)addScoreWithIdentifier:(NSString *)identifier value:(int64_t)value{
if (![GKLocalPlayer localPlayer].isAuthenticated) {
NSLog(@"未获得用户授权.");
return;
}
//创建积分对象
GKScore *score=[[GKScore alloc]initWithLeaderboardIdentifier:identifier];
//设置得分
score.value=value;
//提交积分到Game Center服务器端,注意保存是异步的,并且支持离线提交
[GKScore reportScores:@[score] withCompletionHandler:^(NSError *error) {
if(error){
NSLog(@"保存积分过程中发生错误,错误信息:%@",error.localizedDescription);
return ;
}
NSLog(@"添加积分成功.");
}];
}
@end3.最后就是成就视图控制器KCAchievementTableViewController:
在成就视图控制器定义achievements、achievementDescriptions、achievementImages三个属性分别表示成就、成就描述、成就图片,这三个属性均从主视图控制器中传递进来,然后使用UITableView展示成就、成就图片、成就进度。
创建GKAchievemnt对象(通过identifier属性来表示具体的成就)并指定完成度,通过调用GKAchievement的reportAchievements: withCompletionHandler:方法提交完成度到Game Center服务器。
程序如下
#import "KCAchievementTableViewController.h"
#import <GameKit/GameKit.h>
//成就标识,就是iTunes Connect中配置的成就ID
#define kAchievementIdentifier1 @"AdidasGoldenBall"
#define kAchievementIdentifier2 @"AdidasGoldBoot"
@interface KCAchievementTableViewController ()
@end
@implementation KCAchievementTableViewController
#pragma mark - 控制器视图方法
- (void)viewDidLoad {
[super viewDidLoad];
}
#pragma mark - UI事件
//添加成就
- (IBAction)addAchievementClick:(UIBarButtonItem *)sender {
[self addAchievementWithIdentifier:kAchievementIdentifier1];
}
#pragma mark - UITableView数据源方法
-(NSInteger)tableView:(UITableView *)tableView sectionForSectionIndexTitle:(NSString *)title atIndex:(NSInteger)index{
return 1;
}
-(NSInteger)tableView:(UITableView *)tableView numberOfRowsInSection:(NSInteger)section{
return self.achievementDescriptions.count;
}
-(UITableViewCell *)tableView:(UITableView *)tableView cellForRowAtIndexPath:(NSIndexPath *)indexPath{
static NSString *identtityKey=@"myTableViewCellIdentityKey1";
UITableViewCell *cell=[self.tableView dequeueReusableCellWithIdentifier:identtityKey];
if(cell==nil){
cell=[[UITableViewCell alloc]initWithStyle:UITableViewCellStyleValue1 reuseIdentifier:identtityKey];
}
GKAchievementDescription *desciption=[self.achievementDescriptions objectAtIndex:indexPath.row];
cell.textLabel.text=desciption.title ;//成就标题
//如果已经获得成就则加载进度,否则为0
double percent=0.0;
GKAchievement *achievement=[self getAchievementWithIdentifier:desciption.identifier];
if (achievement) {
percent=achievement.percentComplete;
}
cell.detailTextLabel.text=[NSString stringWithFormat:@"%3.2f%%",percent]; //成就完成度
//设置成就图片
cell.imageView.image=[self.achievementImages valueForKey:desciption.identifier];
return cell;
}
#pragma mark - 私有方法
//添加指定类别的成就
-(void)addAchievementWithIdentifier:(NSString *)identifier{
if (![GKLocalPlayer localPlayer].isAuthenticated) {
NSLog(@"未获得用户授权.");
return;
}
//创建成就
GKAchievement *achievement=[[GKAchievement alloc]initWithIdentifier:identifier];
achievement.percentComplete=100;//设置此成就完成度,100代表获得此成就
NSLog(@"%@",achievement);
//保存成就到Game Center服务器,注意保存是异步的,并且支持离线提交
[GKAchievement reportAchievements:@[achievement] withCompletionHandler:^(NSError *error) {
if(error){
NSLog(@"保存成就过程中发生错误,错误信息:%@",error.localizedDescription);
return ;
}
NSLog(@"添加成就成功.");
}];
}
//根据标识获得已取得的成就
-(GKAchievement *)getAchievementWithIdentifier:(NSString *)identifier{
for (GKAchievement *achievement in self.achievements) {
if ([achievement.identifier isEqualToString:identifier]) {
return achievement;
}
}
return nil;
}
@end运行效果:
大家都知道做iOS开发本身的收入有三种来源:出售应用、内购和广告。国内用户通常很少直接购买应用,因此对于开发者而言(特别是个人开发者),内购和广告收入就成了主要的收入来源。内购营销模式,通常软件本身是不收费的,但是要获得某些特权就必须购买一些道具,而内购的过程是由苹果官方统一来管理的,所以和Game Center一样,在开发内购程序之前要做一些准备工作(下面的准备工作主要是针对真机的,模拟器省略Provisioning Profile配置过程):
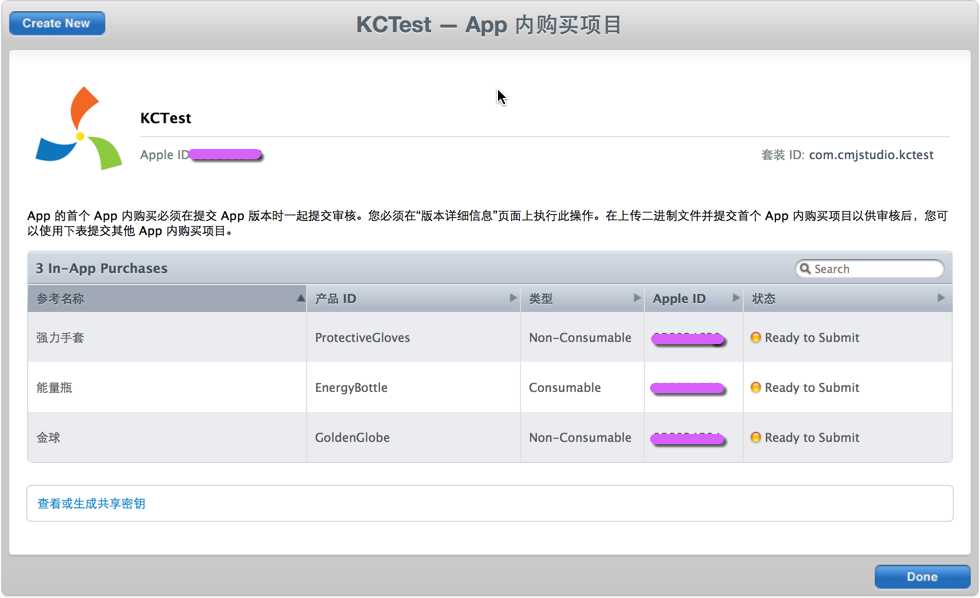
开发内购应用时需要使用StoreKit.framework,下面是这个框架中常用的几个类:
SKProduct:可购买的产品(例如上面设置的能量瓶、强力手套等),其productIdentifier属性对应iTunes Connect中配置的“产品ID“,但是此类不建议直接初始化使用,而是要通过SKProductRequest来加载可用产品(避免出现购买到无效的产品)。
SKProductRequest:产品请求类,主要用于加载产品列表(包括可用产品和不可用产品),通常加载完之后会通过其-(void)productsRequest:(SKProductsRequest )request didReceiveResponse:(SKProductsResponse )response代理方法获得响应,拿到响应中的可用产品。
SKPayment:产品购买支付类,保存了产品ID、购买数量等信息(注意与其对应的有一个SKMutablePayment对象,此对象可以修改产品数量等信息)。
SKPaymentQueue:产品购买支付队列,一旦将一个SKPayment添加到此队列就会向苹果服务器发送请求完成此次交易。注意交易的状态反馈不是通过代理完成的,而是通过一个交易监听者(类似于代理,可以通过队列的addTransactionObserver来设置)。
SKPaymentTransaction:一次产品购买交易,通常交易完成后支付队列会调用交易监听者的-(void)paymentQueue:(SKPaymentQueue )queue updatedTransactions:(NSArray )transaction方法反馈交易情况,并在此方法中将交易对象返回。
SKStoreProductViewController:应用程序商店产品展示视图控制器,用于在应用程序内部展示此应用在应用商店的情况。(例如可以使用它让用户在应用内完成评价,注意由于本次演示的示例程序没有正式提交到应用商店,所以在此暂不演示此控制器视图的使用)。
了解了以上几个常用的开发API之后,下面看一下应用内购买的流程:
1. 通过SKProductRequest获得可购买产品SKProduct数组(SKProductRequest会根据程序的Bundle ID去对应的内购配置中获取指定ID的产品对象),这个过程中需要知道产品标识(必须和iTuens Connect中的对应起来),可以存储到沙盒中也可以存储到数据库中(下面的Demo中定义成了宏定义)。
2. 请求完成后可以在SKProductRequest的-(void)productsRequest:(SKProductsRequest )request didReceiveResponse:(SKProductsResponse )response代理方法中获得SKProductResponse对象,这个对象中保存了products属性表示可用产品对象数组。
3. 给SKPaymentQueue设置一个监听者来获得交易的状态(它类似于一个代理),监听者通过-(void)paymentQueue:(SKPaymentQueue )queue updatedTransactions:(NSArray )transaction方法反馈交易的变化状态(通常在此方法中可以根据交易成功、恢复成功等状态来做一些处理)。
4. 一旦用户决定购买某个产品(SKProduct),就可以根据SKProduct来创建一个对应的支付对象SKPayment,只要将这个对象加入到SKPaymentQueue中就会触发购买行为(将订单提交到苹果服务器),一旦一个交易发生变化就会触发SKPaymentQueue监听者来反馈交易情况。
5. 交易提交给苹果服务器之后如果不出意外的话通常就会弹出一个确认购买的对话框,引导用户完成交易,最终完成交易后(通常是完成交易,用户点击”好“)会调用交易监听者-(void)paymentQueue:(SKPaymentQueue )queue updatedTransactions:(NSArray )transaction方法将此次交易的所有交易对象SKPaymentTransaction数组返回,可以通过交易状态判断交易情况。
6. 通常一次交易完成后需要对本次交易进行验证,避免越狱机器模拟苹果官方的反馈造成交易成功假象。苹果官方提供了一个验证的URL,只要将交易成功后的凭证(这个凭证从iOS7之后在交易成功会会存储到沙盒中)传递给这个地址就会给出交易状态和本次交易的详细信息,通过这些信息(通常可以根据交易状态、Bundler ID、ProductID等确认)可以标识出交易是否真正完成。
7. 对于非消耗品,用户在完成购买后如果用户使用其他机器登录或者用户卸载重新安装应用后通常希望这些非消耗品能够恢复(事实上如果不恢复用户再次购买也不会成功)。调用SKPaymentQueue的restoreCompletedTransactions就可以完成恢复,恢复后会调用交易监听者的paymentQueue:(SKPaymentQueue )queue updatedTransactions:(NSArray )transaction方法反馈恢复的交易(也就是已购买的非消耗品交易,注意这个过程中如果没有非消耗品可恢复,是不会调用此方法的)。
下面通过一个示例程序演示内购和恢复的整个过程,程序界面大致如下:
主界面中展示了所有可购买产品和售价,以及购买情况。
选择一个产品点”购买“可以购买此商品,购买完成后刷新购买状态(如果是非消耗品则显示已购买,如果是消耗品则显示购买个数)。
程序卸载后重新安装可以点击”恢复购买“来恢复已购买的非消耗品。
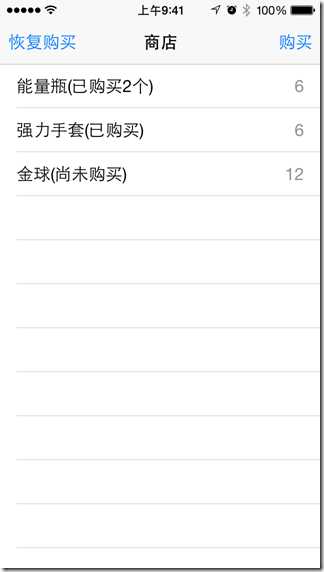
程序代码:
#import "KCMainTableViewController.h"
#import <StoreKit/StoreKit.h>
#define kAppStoreVerifyURL @"https://buy.itunes.apple.com/verifyReceipt" //实际购买验证URL
#define kSandboxVerifyURL @"https://sandbox.itunes.apple.com/verifyReceipt" //开发阶段沙盒验证URL
//定义可以购买的产品ID,必须和iTunes Connect中设置的一致
#define kProductID1 @"ProtectiveGloves" //强力手套,非消耗品
#define kProductID2 @"GoldenGlobe" //金球,非消耗品
#define kProductID3 @"EnergyBottle" //能量瓶,消耗品
@interface KCMainTableViewController ()<SKProductsRequestDelegate,SKPaymentTransactionObserver>
@property (strong,nonatomic) NSMutableDictionary *products;//有效的产品
@property (assign,nonatomic) int selectedRow;//选中行
@end
@implementation KCMainTableViewController
#pragma mark - 控制器视图方法
- (void)viewDidLoad {
[super viewDidLoad];
[self loadProducts];
[self addTransactionObjserver];
}
#pragma mark - UI事件
//购买产品
- (IBAction)purchaseClick:(UIBarButtonItem *)sender {
NSString *productIdentifier=self.products.allKeys[self.selectedRow];
SKProduct *product=self.products[productIdentifier];
if (product) {
[self purchaseProduct:product];
}else{
NSLog(@"没有可用商品.");
}
}
//恢复购买
- (IBAction)restorePurchaseClick:(UIBarButtonItem *)sender {
[self restoreProduct];
}
#pragma mark - UITableView数据源方法
- (NSInteger)numberOfSectionsInTableView:(UITableView *)tableView {
return 1;
}
- (NSInteger)tableView:(UITableView *)tableView numberOfRowsInSection:(NSInteger)section {
return self.products.count;
}
- (UITableViewCell *)tableView:(UITableView *)tableView cellForRowAtIndexPath:(NSIndexPath *)indexPath {
static NSString *identtityKey=@"myTableViewCellIdentityKey1";
UITableViewCell *cell=[self.tableView dequeueReusableCellWithIdentifier:identtityKey];
if(cell==nil){
cell=[[UITableViewCell alloc]initWithStyle:UITableViewCellStyleValue1 reuseIdentifier:identtityKey];
}
cell.accessoryType=UITableViewCellAccessoryNone;
NSString *key=self.products.allKeys[indexPath.row];
SKProduct *product=self.products[key];
NSString *purchaseString;
NSUserDefaults *defaults=[NSUserDefaults standardUserDefaults];
if ([product.productIdentifier isEqualToString:kProductID3]) {
purchaseString=[NSString stringWithFormat:@"已购买%i个",[defaults integerForKey:product.productIdentifier]];
}else{
if([defaults boolForKey:product.productIdentifier]){
purchaseString=@"已购买";
}else{
purchaseString=@"尚未购买";
}
}
cell.textLabel.text=[NSString stringWithFormat:@"%@(%@)",product.localizedTitle,purchaseString] ;
cell.detailTextLabel.text=[NSString stringWithFormat:@"%@",product.price];
return cell;
}
#pragma mark - UITableView代理方法
-(void)tableView:(UITableView *)tableView didSelectRowAtIndexPath:(NSIndexPath *)indexPath{
UITableViewCell *currentSelected=[tableView cellForRowAtIndexPath:indexPath];
currentSelected.accessoryType=UITableViewCellAccessoryCheckmark;
self.selectedRow=indexPath.row;
}
-(void)tableView:(UITableView *)tableView didDeselectRowAtIndexPath:(NSIndexPath *)indexPath{
UITableViewCell *currentSelected=[tableView cellForRowAtIndexPath:indexPath];
currentSelected.accessoryType=UITableViewCellAccessoryNone;
}
#pragma mark - SKProductsRequestd代理方法
/**
* 产品请求完成后的响应方法
*
* @param request 请求对象
* @param response 响应对象,其中包含产品信息
*/
-(void)productsRequest:(SKProductsRequest *)request didReceiveResponse:(SKProductsResponse *)response{
//保存有效的产品
_products=[NSMutableDictionary dictionary];
[response.products enumerateObjectsUsingBlock:^(id obj, NSUInteger idx, BOOL *stop) {
SKProduct *product=obj;
[_products setObject:product forKey:product.productIdentifier];
}];
//由于这个过程是异步的,加载成功后重新刷新表格
[self.tableView reloadData];
}
-(void)requestDidFinish:(SKRequest *)request{
NSLog(@"请求完成.");
}
-(void)request:(SKRequest *)request didFailWithError:(NSError *)error{
if (error) {
NSLog(@"请求过程中发生错误,错误信息:%@",error.localizedDescription);
}
}
#pragma mark - SKPaymentQueue监听方法
/**
* 交易状态更新后执行
*
* @param queue 支付队列
* @param transactions 交易数组,里面存储了本次请求的所有交易对象
*/
-(void)paymentQueue:(SKPaymentQueue *)queue updatedTransactions:(NSArray *)transactions{
[transactions enumerateObjectsUsingBlock:^(id obj, NSUInteger idx, BOOL *stop) {
SKPaymentTransaction *paymentTransaction=obj;
if (paymentTransaction.transactionState==SKPaymentTransactionStatePurchased){//已购买成功
NSLog(@"交易\"%@\"成功.",paymentTransaction.payment.productIdentifier);
//购买成功后进行验证
[self verifyPurchaseWithPaymentTransaction];
//结束支付交易
[queue finishTransaction:paymentTransaction];
}else if(paymentTransaction.transactionState==SKPaymentTransactionStateRestored){//恢复成功,对于非消耗品才能恢复,如果恢复成功则transaction中记录的恢复的产品交易
NSLog(@"恢复交易\"%@\"成功.",paymentTransaction.payment.productIdentifier);
[queue finishTransaction:paymentTransaction];//结束支付交易
//恢复后重新写入偏好配置,重新加载UITableView
[[NSUserDefaults standardUserDefaults]setBool:YES forKey:paymentTransaction.payment.productIdentifier];
[self.tableView reloadData];
}else if(paymentTransaction.transactionState==SKPaymentTransactionStateFailed){
if (paymentTransaction.error.code==SKErrorPaymentCancelled) {//如果用户点击取消
NSLog(@"取消购买.");
}
NSLog(@"ErrorCode:%i",paymentTransaction.error.code);
}
}];
}
//恢复购买完成
-(void)paymentQueueRestoreCompletedTransactionsFinished:(SKPaymentQueue *)queue{
NSLog(@"恢复完成.");
}
#pragma mark - 私有方法
/**
* 添加支付观察者监控,一旦支付后则会回调观察者的状态更新方法:
-(void)paymentQueue:(SKPaymentQueue *)queue updatedTransactions:(NSArray *)transactions
*/
-(void)addTransactionObjserver{
//设置支付观察者(类似于代理),通过观察者来监控购买情况
[[SKPaymentQueue defaultQueue] addTransactionObserver:self];
}
/**
* 加载所有产品,注意产品一定是从服务器端请求获得,因为有些产品可能开发人员知道其存在性,但是不经过审核是无效的;
*/
-(void)loadProducts{
//定义要获取的产品标识集合
NSSet *sets=[NSSet setWithObjects:kProductID1,kProductID2,kProductID3, nil];
//定义请求用于获取产品
SKProductsRequest *productRequest=[[SKProductsRequest alloc]initWithProductIdentifiers:sets];
//设置代理,用于获取产品加载状态
productRequest.delegate=self;
//开始请求
[productRequest start];
}
/**
* 购买产品
*
* @param product 产品对象
*/
-(void)purchaseProduct:(SKProduct *)product{
//如果是非消耗品,购买过则提示用户
NSUserDefaults *defaults=[NSUserDefaults standardUserDefaults];
if ([product.productIdentifier isEqualToString:kProductID3]) {
NSLog(@"当前已经购买\"%@\" %i 个.",kProductID3,[defaults integerForKey:product.productIdentifier]);
}else if([defaults boolForKey:product.productIdentifier]){
NSLog(@"\"%@\"已经购买过,无需购买!",product.productIdentifier);
return;
}
//创建产品支付对象
SKPayment *payment=[SKPayment paymentWithProduct:product];
//支付队列,将支付对象加入支付队列就形成一次购买请求
if (![SKPaymentQueue canMakePayments]) {
NSLog(@"设备不支持购买.");
return;
}
SKPaymentQueue *paymentQueue=[SKPaymentQueue defaultQueue];
//添加都支付队列,开始请求支付
// [self addTransactionObjserver];
[paymentQueue addPayment:payment];
}
/**
* 恢复购买,对于非消耗品如果应用重新安装或者机器重置后可以恢复购买
* 注意恢复时只能一次性恢复所有非消耗品
*/
-(void)restoreProduct{
SKPaymentQueue *paymentQueue=[SKPaymentQueue defaultQueue];
//设置支付观察者(类似于代理),通过观察者来监控购买情况
// [paymentQueue addTransactionObserver:self];
//恢复所有非消耗品
[paymentQueue restoreCompletedTransactions];
}
/**
* 验证购买,避免越狱软件模拟苹果请求达到非法购买问题
*
*/
-(void)verifyPurchaseWithPaymentTransaction{
//从沙盒中获取交易凭证并且拼接成请求体数据
NSURL *receiptUrl=[[NSBundle mainBundle] appStoreReceiptURL];
NSData *receiptData=[NSData dataWithContentsOfURL:receiptUrl];
NSString *receiptString=[receiptData base64EncodedStringWithOptions:NSDataBase64EncodingEndLineWithLineFeed];//转化为base64字符串
NSString *bodyString = [NSString stringWithFormat:@"{\"receipt-data\" : \"%@\"}", receiptString];//拼接请求数据
NSData *bodyData = [bodyString dataUsingEncoding:NSUTF8StringEncoding];
//创建请求到苹果官方进行购买验证
NSURL *url=[NSURL URLWithString:kSandboxVerifyURL];
NSMutableURLRequest *requestM=[NSMutableURLRequest requestWithURL:url];
requestM.HTTPBody=bodyData;
requestM.HTTPMethod=@"POST";
//创建连接并发送同步请求
NSError *error=nil;
NSData *responseData=[NSURLConnection sendSynchronousRequest:requestM returningResponse:nil error:&error];
if (error) {
NSLog(@"验证购买过程中发生错误,错误信息:%@",error.localizedDescription);
return;
}
NSDictionary *dic=[NSJSONSerialization JSONObjectWithData:responseData options:NSJSONReadingAllowFragments error:nil];
NSLog(@"%@",dic);
if([dic[@"status"] intValue]==0){
NSLog(@"购买成功!");
NSDictionary *dicReceipt= dic[@"receipt"];
NSDictionary *dicInApp=[dicReceipt[@"in_app"] firstObject];
NSString *productIdentifier= dicInApp[@"product_id"];//读取产品标识
//如果是消耗品则记录购买数量,非消耗品则记录是否购买过
NSUserDefaults *defaults=[NSUserDefaults standardUserDefaults];
if ([productIdentifier isEqualToString:kProductID3]) {
int purchasedCount=[defaults integerForKey:productIdentifier];//已购买数量
[[NSUserDefaults standardUserDefaults] setInteger:(purchasedCount+1) forKey:productIdentifier];
}else{
[defaults setBool:YES forKey:productIdentifier];
}
[self.tableView reloadData];
//在此处对购买记录进行存储,可以存储到开发商的服务器端
}else{
NSLog(@"购买失败,未通过验证!");
}
}
@end运行效果(这是程序在卸载后重新安装的运行效果,卸载前已经购买”强力手套“,因此程序运行后点击了”恢复购买“):
上面也提到做iOS开发另一收益来源就是广告,在iOS上有很多广告服务可以集成,使用比较多的就是苹果的iAd、谷歌的Admob,下面简单演示一下如何使用iAd来集成广告。使用iAd集成广告的过程比较简单,首先引入iAd.framework框架,然后创建ADBannerView来展示广告,通常会设置ADBannerView的代理方法来监听广告点击并在广告加载失败时隐藏广告展示控件。下面的代码简单的演示了这个过程:
#import "ViewController.h"
#import <iAd/iAd.h>
@interface ViewController ()<ADBannerViewDelegate>
@property (weak, nonatomic) IBOutlet ADBannerView *advertiseBanner;//广告展示视图
@end
@implementation ViewController
- (void)viewDidLoad {
[super viewDidLoad];
//设置代理
self.advertiseBanner.delegate=self;
}
#pragma mark - ADBannerView代理方法
//广告加载完成
-(void)bannerViewDidLoadAd:(ADBannerView *)banner{
NSLog(@"广告加载完成.");
}
//点击Banner后离开之前,返回NO则不会展开全屏广告
-(BOOL)bannerViewActionShouldBegin:(ADBannerView *)banner willLeaveApplication:(BOOL)willLeave{
NSLog(@"点击Banner后离开之前.");
return YES;
}
//点击banner后全屏显示,关闭后调用
-(void)bannerViewActionDidFinish:(ADBannerView *)banner{
NSLog(@"广告已关闭.");
}
//获取广告失败
-(void)bannerView:(ADBannerView *)banner didFailToReceiveAdWithError:(NSError *)error{
NSLog(@"加载广告失败.");
self.advertiseBanner.hidden=YES;
}
@end运行效果:
iCloud是苹果提供的云端服务,用户可以将通讯录、备忘录、邮件、照片、音乐、视频等备份到云服务器并在各个苹果设备间直接进行共享而无需关心数据同步问题,甚至即使你的设备丢失后在一台新的设备上也可以通过Apple ID登录同步。当然这些内容都是iOS内置的功能,那么对于开放者如何利用iCloud呢?苹果已经将云端存储功能开放给开发者,利用iCloud开发者可以存储两类数据:用户文档和应用数据、应用配置项。前者主要用于一些用户文档、文件的存储,后者更类似于日常开放中的偏好设置,只是这些配置信息会同步到云端。
要进行iCloud开发同样需要一些准备工作(下面的准备工作主要是针对真机的,模拟器省略Provisioning Profile配置过程):
1、2步骤仍然是创建App ID启用iCloud服务、生成对应的配置(Provisioning Profile),这个过程中Bundle ID可以使用通配符(Data Protection、iCloud、Inter-App Audio、Passbook服务在创建App ID时其中的Bundle ID是可以使用通配ID的)。
3.在Xcode中创建项目(假设项目名称为“kctest”)并在项目的Capabilities中找到iCloud并打开。这里需要注意的就是由于在此应用中要演示文档存储和首选项存储,因此在Service中勾选“Key-value storae”和“iCloud Documents”:
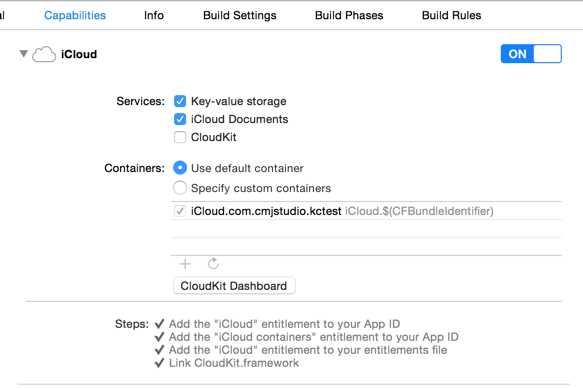
在项目中会自动生成一个”kctest.entitlements”配置文件,这个文档配置了文档存储容器标识、键值对存储容器标识等信息。

4.无论是真机还是模拟器都必须在iOS“设置”中找到iCloud设置登录账户,注意这个账户不必是沙盒测试用户。
A.首先看一下如何进行文档存储。文档存储主要是使用UIDocument类来完成,这个类提供了新建、修改(其实在API中是覆盖操作)、查询文档、打开文档、删除文档的功能。
UIDocument对文档的新增、修改、删除、读取全部基于一个云端URL来完成(事实上在开发过程中新增、修改只是一步简单的保存操作),对于开发者而言没有本地和云端之分,这样大大简化了开发过程。这个URL可以通过NSFileManager的URLForUbiquityContainerIdentifier:方法获取,identifier是云端存储容器的唯一标识,如果传入nil则代表第一个容器(事实上这个容器可以通过前面生成的“kctest.entiements”中的Ubiquity Container Identifiers来获取。如上图可以看到这是一个数组,可以配置多个容器,例如我们的第一个容器标识是“iCloud.
-(void)saveToURL:forSaveOperation:completionHandler::将指定URL的文档保存到iCloud(可以是新增或者覆盖,通过saveOperation参数设定)。
-(void)openWithCompletionHandler::打开当前文档。
注意:删除一个iCloud文档是使用NSFileManager的removeItemAtURL:error:方法来完成的。
由于实际开发过程中数据的存储和读取情况是复杂的,因此UIDocument在设计时并没有提供统一的存储方式来保存数据,而是希望开发者自己继承UIDocument类并重写-(id)contentsForType:(NSString )typeName error:(NSError *__autoreleasing )outError和-(BOOL)loadFromContents:(id)contents ofType:(NSString )typeName error:(NSError *__autoreleasing )outError方法来根据不同的文档类型自己来操作数据(contents)。这两个方法分别在保存文档(-(void)saveToURL:forSaveOperation:completionHandler:)和打开文档(-(void)openWithCompletionHandler:)时调用。通常在子类中会定义一个属性A来存储文档数据,当保存文档时,会通过-(id)contentsForType:(NSString )typeName error:(NSError *__autoreleasing )outError方法将A转化为NSData或者NSFileWrapper(UIDocument保存数据的本质就是保存转化得到的NSData或者NSFileWrapper);当打开文档时,会通过-(BOOL)loadFromContents:(id)contents ofType:(NSString )typeName error:(NSError *__autoreleasing )outError方法将云端下载的NSData或者NSFileWrapper数据转化为A对应类型的数据。为了方便演示下面简单定义一个继承自UIDocument的KCDocument类,在其中定义一个data属性存储数据:
#import "KCDocument.h"
@interface KCDocument()
@end
@implementation KCDocument
#pragma mark - 重写父类方法
/**
* 保存时调用
*
* @param typeName <#typeName description#>
* @param outError <#outError description#>
*
* @return <#return value description#>
*/
-(id)contentsForType:(NSString *)typeName error:(NSError *__autoreleasing *)outError{
if (self.data) {
return [self.data copy];
}
return [NSData data];
}
/**
* 读取数据时调用
*
* @param contents <#contents description#>
* @param typeName <#typeName description#>
* @param outError <#outError description#>
*
* @return <#return value description#>
*/
-(BOOL)loadFromContents:(id)contents ofType:(NSString *)typeName error:(NSError *__autoreleasing *)outError{
self.data=[contents copy];
return true;
}
@end如果要加载iCloud中的文档列表就需要使用另一个类NSMetadataQuery,通常考虑到网络的原因并不会一次性加载所有数据,而利用NSMetadataQuery并指定searchScopes为NSMetadataQueryUbiquitousDocumentScope来限制查找iCloud文档数据。使用NSMetadataQuery还可以通过谓词限制搜索关键字等信息,并在搜索完成之后通过通知的形式通知客户端搜索的情况。
大家都知道微软的OneNote云笔记本软件,通过它可以实现多种不同设置间的笔记同步,这里就简单实现一个基于iCloud服务的笔记软件。在下面的程序中实现笔记的新增、修改、保存、读取等操作。程序界面大致如下,点击界面右上方增加按钮增加一个笔记,点击某个笔记可以查看并编辑。
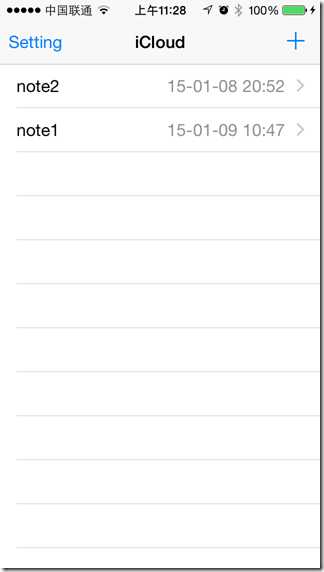
在主视图控制器首先查询所有iCloud保存的文档并在查询通知中遍历查询结果保存文档名称和创建日期到UITableView展示;其次当用户点击了增加按钮会调用KCDocument完成文档添加并导航到文档详情界面编辑文档内容。
#import "KCMainTableViewController.h"
#import "KCDocument.h"
#import "KCDetailViewController.h"
#define kContainerIdentifier @"iCloud.com.cmjstudio.kctest" //容器id,可以从生产的entitiements文件中查看Ubiquity Container Identifiers(注意其中的$(CFBundleIdentifier)替换为BundleID)
@interface KCMainTableViewController ()
@property (strong,nonatomic) KCDocument *document;//当前选中的管理对象
@property (strong,nonatomic) NSMutableDictionary *files; //现有文件名、创建日期集合
@property (strong,nonatomic) NSMetadataQuery *dataQuery;//数据查询对象,用于查询iCloud文档
@end
@implementation KCMainTableViewController
#pragma mark - 控制器视图方法
- (void)viewDidLoad {
[super viewDidLoad];
[self loadDocuments];
}
#pragma mark - UI事件
//新建文档
- (IBAction)addDocumentClick:(UIBarButtonItem *)sender {
UIAlertController *promptController=[UIAlertController alertControllerWithTitle:@"KCTest" message:@"请输入笔记名称" preferredStyle:UIAlertControllerStyleAlert];
[promptController addTextFieldWithConfigurationHandler:^(UITextField *textField) {
textField.placeholder=@"笔记名称";
}];
UIAlertAction *okAction=[UIAlertAction actionWithTitle:@"确定" style:UIAlertActionStyleDefault handler:^(UIAlertAction *action) {
UITextField *textField= promptController.textFields[0];
[self addDocument:textField.text];
}];
[promptController addAction:okAction];
UIAlertAction *cancelAction=[UIAlertAction actionWithTitle:@"取消" style:UIAlertActionStyleCancel handler:^(UIAlertAction *action) {
}];
[promptController addAction:cancelAction];
[self presentViewController:promptController animated:YES completion:nil];
}
#pragma mark - 导航
- (void)prepareForSegue:(UIStoryboardSegue *)segue sender:(id)sender {
if ([segue.identifier isEqualToString:@"noteDetail"]) {
KCDetailViewController *detailController= segue.destinationViewController;
detailController.document=self.document;
}
}
#pragma mark - 属性
-(NSMetadataQuery *)dataQuery{
if (!_dataQuery) {
//创建一个iCloud查询对象
_dataQuery=[[NSMetadataQuery alloc]init];
_dataQuery.searchScopes=@[NSMetadataQueryUbiquitousDocumentsScope];
//注意查询状态是通过通知的形式告诉监听对象的
[[NSNotificationCenter defaultCenter] addObserver:self selector:@selector(metadataQueryFinish:) name:NSMetadataQueryDidFinishGatheringNotification object:_dataQuery];//数据获取完成通知
[[NSNotificationCenter defaultCenter] addObserver:self selector:@selector(metadataQueryFinish:) name:NSMetadataQueryDidUpdateNotification object:_dataQuery];//查询更新通知
}
return _dataQuery;
}
#pragma mark - 私有方法
/**
* 取得云端存储文件的地址
*
* @param fileName 文件名,如果文件名为nil则重新创建一个url
*
* @return 文件地址
*/
-(NSURL *)getUbiquityFileURL:(NSString *)fileName{
//取得云端URL基地址(参数中传入nil则会默认获取第一个容器)
NSURL *url= [[NSFileManager defaultManager] URLForUbiquityContainerIdentifier:kContainerIdentifier];
//取得Documents目录
url=[url URLByAppendingPathComponent:@"Documents"];
//取得最终地址
url=[url URLByAppendingPathComponent:fileName];
return url;
}
/**
* 添加文档到iCloud
*
* @param fileName 文件名称(不包括后缀)
*/
-(void)addDocument:(NSString *)fileName{
//取得保存URL
fileName=[NSString stringWithFormat:@"%@.txt",fileName];
NSURL *url=[self getUbiquityFileURL:fileName];
/**
创建云端文档操作对象
*/
KCDocument *document= [[KCDocument alloc]initWithFileURL:url];
[document saveToURL:url forSaveOperation:UIDocumentSaveForCreating completionHandler:^(BOOL success) {
if (success) {
NSLog(@"保存成功.");
[self loadDocuments];
[self.tableView reloadData];
self.document=document;
[self performSegueWithIdentifier:@"noteDetail" sender:self];
}else{
NSLog(@"保存失败.");
}
}];
}
/**
* 加载文档列表
*/
-(void)loadDocuments{
[self.dataQuery startQuery];
}
/**
* 获取数据完成后的通知执行方法
*
* @param notification 通知对象
*/
-(void)metadataQueryFinish:(NSNotification *)notification{
NSLog(@"数据获取成功!");
NSArray *items=self.dataQuery.results;//查询结果集
self.files=[NSMutableDictionary dictionary];
//变量结果集,存储文件名称、创建日期
[items enumerateObjectsUsingBlock:^(id obj, NSUInteger idx, BOOL *stop) {
NSMetadataItem *item=obj;
NSString *fileName=[item valueForAttribute:NSMetadataItemFSNameKey];
NSDate *date=[item valueForAttribute:NSMetadataItemFSContentChangeDateKey];
NSDateFormatter *dateformate=[[NSDateFormatter alloc]init];
dateformate.dateFormat=@"YY-MM-dd HH:mm";
NSString *dateString= [dateformate stringFromDate:date];
[self.files setObject:dateString forKey:fileName];
}];
[self.tableView reloadData];
}
-(void)removeDocument:(NSString *)fileName{
NSURL *url=[self getUbiquityFileURL:fileName];
NSError *error=nil;
//删除文件
[[NSFileManager defaultManager] removeItemAtURL:url error:&error];
if (error) {
NSLog(@"删除文档过程中发生错误,错误信息:%@",error.localizedDescription);
}
[self.files removeObjectForKey:fileName];//从集合中删除
}
#pragma mark - Table view data source
- (NSInteger)numberOfSectionsInTableView:(UITableView *)tableView {
return 1;
}
- (NSInteger)tableView:(UITableView *)tableView numberOfRowsInSection:(NSInteger)section {
return self.files.count;
}
- (UITableViewCell *)tableView:(UITableView *)tableView cellForRowAtIndexPath:(NSIndexPath *)indexPath {
static NSString *identtityKey=@"myTableViewCellIdentityKey1";
UITableViewCell *cell=[self.tableView dequeueReusableCellWithIdentifier:identtityKey];
if(cell==nil){
cell=[[UITableViewCell alloc]initWithStyle:UITableViewCellStyleValue1 reuseIdentifier:identtityKey];
cell.accessoryType=UITableViewCellAccessoryDisclosureIndicator;
}
NSArray *fileNames=self.files.allKeys;
NSString *fileName=fileNames[indexPath.row];
cell.textLabel.text=fileName;
cell.detailTextLabel.text=[self.files valueForKey:fileName];
return cell;
}
- (void)tableView:(UITableView *)tableView commitEditingStyle:(UITableViewCellEditingStyle)editingStyle forRowAtIndexPath:(NSIndexPath *)indexPath {
if (editingStyle == UITableViewCellEditingStyleDelete) {
UITableViewCell *cell=[self.tableView cellForRowAtIndexPath:indexPath];
[self removeDocument:cell.textLabel.text];
[tableView deleteRowsAtIndexPaths:@[indexPath] withRowAnimation:UITableViewRowAnimationFade];
} else if (editingStyle == UITableViewCellEditingStyleInsert) {
// Create a new instance of the appropriate class, insert it into the array, and add a new row to the table view
}
}
#pragma mark - UITableView 代理方法
-(void)tableView:(UITableView *)tableView didSelectRowAtIndexPath:(NSIndexPath *)indexPath{
UITableViewCell *cell=[self.tableView cellForRowAtIndexPath:indexPath];
NSURL *url=[self getUbiquityFileURL:cell.textLabel.text];
self.document=[[KCDocument alloc]initWithFileURL:url];
[self performSegueWithIdentifier:@"noteDetail" sender:self];
}
@end当新增一个笔记或选择一个已存在的笔记后可以查看、保存笔记内容。
#import "KCDetailViewController.h"
#import "KCDocument.h"
#define kSettingAutoSave @"com.cmjstudio.kctest.settings.autosave"
@interface KCDetailViewController ()
@property (weak, nonatomic) IBOutlet UITextView *textView;
@end
@implementation KCDetailViewController
#pragma mark - 控制器视图方法
- (void)viewDidLoad {
[super viewDidLoad];
[self setupUI];
}
-(void)viewWillDisappear:(BOOL)animated{
[super viewWillDisappear:animated];
//根据首选项来确定离开当前控制器视图是否自动保存
BOOL autoSave=[[NSUbiquitousKeyValueStore defaultStore] boolForKey:kSettingAutoSave];
if (autoSave) {
[self saveDocument];
}
}
#pragma mark - 私有方法
-(void)setupUI{
UIBarButtonItem *rightButtonItem=[[UIBarButtonItem alloc]initWithBarButtonSystemItem:UIBarButtonSystemItemSave target:self action:@selector(saveDocument)];
self.navigationItem.rightBarButtonItem=rightButtonItem;
if (self.document) {
//打开文档,读取文档
[self.document openWithCompletionHandler:^(BOOL success) {
if(success){
NSLog(@"读取数据成功.");
NSString *dataText=[[NSString alloc]initWithData:self.document.data encoding:NSUTF8StringEncoding];
self.textView.text=dataText;
}else{
NSLog(@"读取数据失败.");
}
}];
}
}
/**
* 保存文档
*/
-(void)saveDocument{
if (self.document) {
NSString *dataText=self.textView.text;
NSData *data=[dataText dataUsingEncoding:NSUTF8StringEncoding];
self.document.data=data;
[self.document saveToURL:self.document.fileURL forSaveOperation:UIDocumentSaveForOverwriting completionHandler:^(BOOL success) {
NSLog(@"保存成功!");
}];
}
}
@end到目前为止都是关于如何使用iCloud来保存文档的内容,上面也提到过还可以使用iCloud来保存首选项,这在很多情况下通常很有用,特别是对于开发了iPhone版又开发了iPad版的应用,如果用户在一台设备上进行了首选项配置之后到另一台设备上也能使用是多么优秀的体验啊。相比文档存储,首选项存储要简单的多,在上面“kctest.entitlements”中可以看到首选项配置并非像文档一样可以包含多个容器,这里只有一个Key-Value Store,通常使用NSUbiquitousKeyValueStore的defaultStore来获取,它的使用方法和NSUserDefaults几乎完全一样,当键值对存储发生变化后可以通过NSUbiquitousKeyValueStoreDidChangeExternallyNotification等获得对应的通知。在上面的笔记应用中有一个”设置“按钮用于设置退出笔记详情视图后是否自动保存,这个选项就是通过iCloud的首选项来存储的。
#import "KCSettingTableViewController.h"
#define kSettingAutoSave @"com.cmjstudio.kctest.settings.autosave"
@interface KCSettingTableViewController ()
@property (weak, nonatomic) IBOutlet UISwitch *autoSaveSetting;
@end
@implementation KCSettingTableViewController
- (void)viewDidLoad {
[super viewDidLoad];
[self setupUI];
}
#pragma mark - UI事件
- (IBAction)autoSaveClick:(UISwitch *)sender {
[self setSetting:sender.on];
}
#pragma mark - 私有方法
-(void)setupUI{
//设置iCloud中的首选项值
NSUbiquitousKeyValueStore *defaults=[NSUbiquitousKeyValueStore defaultStore];
self.autoSaveSetting.on= [defaults boolForKey:kSettingAutoSave];
//添加存储变化通知
[[NSNotificationCenter defaultCenter] addObserver:self selector:@selector(
keyValueStoreChange:) name:NSUbiquitousKeyValueStoreDidChangeExternallyNotification object:defaults];
}
/**
* key-value store发生变化或存储空间不足
*
* @param notification 通知对象
*/
-(void)keyValueStoreChange:(NSNotification *)notification{
NSLog(@"Key-value store change...");
}
/**
* 设置首选项
*
* @param value 是否自动保存
*/
-(void)setSetting:(BOOL)value{
//iCloud首选项设置
NSUbiquitousKeyValueStore *defaults=[NSUbiquitousKeyValueStore defaultStore];
[defaults setBool:value forKey:kSettingAutoSave];
[defaults synchronize];//同步
}
@end运行效果:
Passbook是苹果推出的一个管理登机牌、会员卡、电影票、优惠券等信息的工具。Passbook就像一个卡包,用于存放你的购物卡、积分卡、电影票、礼品卡等,而这些票据就是一个“Pass”。和物理票据不同的是你可以动态更新Pass的信息,提醒用户优惠券即将过期;甚至如果你的Pass中包含地理位置信息的话当你到达某个商店还可以动态提示用户最近商店有何种优惠活动;当用户将一张团购券添加到Passbook之后,用户到了商店之后Passbook可以自动弹出团购券,店员扫描之后进行消费、积分等等都是Passbook的应用场景。Passbook可以管理多类票据,苹果将其划分为五类:
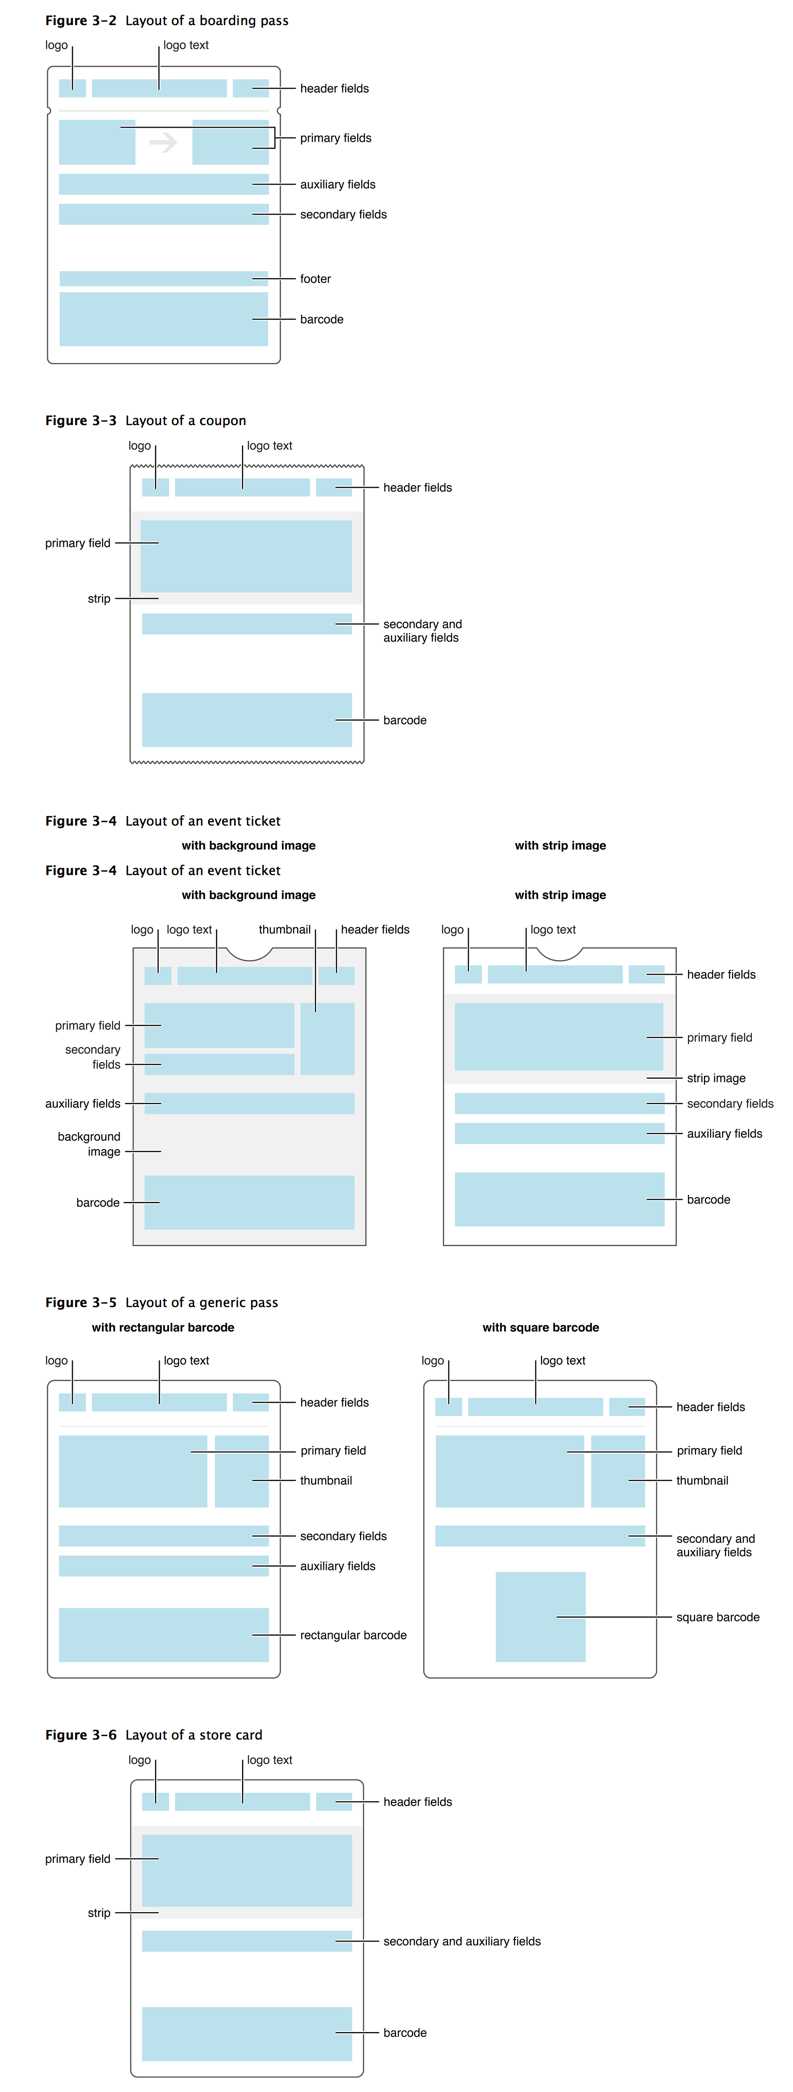


–系统应用与系统服务
iOS开发过程中有时候难免会使用iOS内置的一些应用软件和服务,例如QQ通讯录、微信电话本会使用iOS的通讯录,一些第三方软件会在应用内发送短信等。今天将和大家一起学习如何使用系统应用、使用系统服务:
调用系统应用
使用系统服务
短信与邮件
通讯录
蓝牙
社交
Game Center
应用内购买
iCloud
Passbook
目
录
系统应用
在开发某些应用时可能希望能够调用iOS系统内置的电话、短信、邮件、浏览器应用,此时你可以直接使用UIApplication的OpenURL:方法指定特定的协议来打开不同的系统应用。常用的协议如下:
打电话:tel:或者tel://、telprompt:或telprompt://(拨打电话前有提示)
发短信:sms:或者sms://
发送邮件:mailto:或者mailto://
启动浏览器:http:或者http://
下面以一个简单的demo演示如何调用上面几种系统应用:
//
// ViewController.m
// iOSSystemApplication
//
// Created by Kenshin Cui on 14/04/05.
// Copyright (c) 2014年 cmjstudio. All rights reserved.
//
@interface ViewController ()
@end
@implementation ViewController
}
//打电话
- (IBAction)callClicK:(UIButton *)sender {
NSString *phoneNumber=@”18500138888”;
// NSString *url=[NSString stringWithFormat:@”tel://%@”,phoneNumber];//这种方式会直接拨打电话
NSString *url=[NSString stringWithFormat:@”telprompt://%@”,phoneNumber];//这种方式会提示用户确认是否拨打电话
[self openUrl:url];
}
//发送短信
- (IBAction)sendMessageClick:(UIButton *)sender {
NSString *phoneNumber=@”18500138888”;
NSString *url=[NSString stringWithFormat:@”sms://%@”,phoneNumber];
[self openUrl:url];
}
//发送邮件
- (IBAction)sendEmailClick:(UIButton *)sender {
NSString *mailAddress=@”kenshin@hotmail.com”;
NSString *url=[NSString stringWithFormat:@”mailto://%@”,mailAddress];
[self openUrl:url];
}
//浏览网页
- (IBAction)browserClick:(UIButton *)sender {
NSString *url=@”http://www.cnblogs.com/kenshincui“;
[self openUrl:url];
}
-(void)openUrl:(NSString *)urlStr{
//注意url中包含协议名称,iOS根据协议确定调用哪个应用,例如发送邮件是“sms://”其中“//”可以省略写成“sms:”(其他协议也是如此)
NSURL *url=[NSURL URLWithString:urlStr];
UIApplication *application=[UIApplication sharedApplication];
if(![application canOpenURL:url]){
NSLog(@”无法打开\”%@\”,请确保此应用已经正确安装.”,url);
return;
}
[[UIApplication sharedApplication] openURL:url];
}
@end
不难发现当openURL:方法只要指定一个URL Schame并且已经安装了对应的应用程序就可以打开此应用。当然,如果是自己开发的应用也可以调用openURL方法来打开。假设你现在开发了一个应用A,如果用户机器上已经安装了此应用,并且在应用B中希望能够直接打开A。那么首先需要确保应用A已经配置了Url Types,具体方法就是在plist文件中添加URL types节点并配置URL Schemas作为具体协议,配置URL identifier作为这个URL的唯一标识,如下图:
iOSApplication_URLTypes
然后就可以调用openURL方法像打开系统应用一样打开第三方应用程序了:
//打开第三方应用
- (IBAction)thirdPartyApplicationClick:(UIButton *)sender {
NSString *url=@”cmj://myparams”;
[self openUrl:url];
}
就像调用系统应用一样,协议后面可以传递一些参数(例如上面传递的myparams),这样一来在应用中可以在AppDelegate的-(BOOL)application:(UIApplication )application openURL:(NSURL )url sourceApplication:(NSString *)sourceApplication annotation:(id)annotation代理方法中接收参数并解析。
-(BOOL)application:(UIApplication )application openURL:(NSURL )url sourceApplication:(NSString *)sourceApplication annotation:(id)annotation{
NSString *str=[NSString stringWithFormat:@”url:%@,source application:%@,params:%@”,url,sourceApplication,[url host]];
NSLog(@”%@”,str);
return YES;//是否打开
}
系统服务
短信与邮件
调用系统内置的应用来发送短信、邮件相当简单,但是这么操作也存在着一些弊端:当你点击了发送短信(或邮件)操作之后直接启动了系统的短信(或邮件)应用程序,我们的应用其实此时已经处于一种挂起状态,发送完(短信或邮件)之后无法自动回到应用界面。如果想要在应用程序内部完成这些操作则可以利用iOS中的MessageUI.framework,它提供了关于短信和邮件的UI接口供开发者在应用程序内部调用。从框架名称不难看出这是一套UI接口,提供有现成的短信和邮件的编辑界面,开发人员只需要通过编程的方式给短信和邮件控制器设置对应的参数即可。
在MessageUI.framework中主要有两个控制器类分别用于发送短信(MFMessageComposeViewController)和邮件(MFMailComposeViewController),它们均继承于UINavigationController。由于两个类使用方法十分类似,这里主要介绍一下MFMessageComposeViewController使用步骤:
创建MFMessageComposeViewController对象。
设置收件人recipients、信息正文body,如果运行商支持主题和附件的话可以设置主题subject、附件attachments(可以通过canSendSubject、canSendAttachments方法判断是否支持)
设置代理messageComposeDelegate(注意这里不是delegate属性,因为delegate属性已经留给UINavigationController,MFMessageComposeViewController没有覆盖此属性而是重新定义了一个代理),实现代理方法获得发送状态。
下面自定义一个发送短信的界面演示MFMessageComposeViewController的使用:
MFMessageComposeViewController_Layout
用户通过在此界面输入短信信息点击“发送信息”调用MFMessageComposeViewController界面来展示或进一步编辑信息,点击MFMessageComposeViewController中的“发送”来完成短信发送工作,当然用户也可能点击“取消”按钮回到前一个短信编辑页面。
MFMessageComposeViewController
实现代码:
//
// KCSendMessageViewController.m
// iOSSystemApplication
//
// Created by Kenshin Cui on 14/04/05.
// Copyright (c) 2014年 cmjstudio. All rights reserved.
//
}
(IBAction)sendMessageClick:(UIButton *)sender {
//如果能发送文本信息
if([MFMessageComposeViewController canSendText]){
MFMessageComposeViewController *messageController=[[MFMessageComposeViewController alloc]init];
//收件人
messageController.recipients=[self.receivers.text componentsSeparatedByString:@”,”];
//信息正文
messageController.body=self.body.text;
//设置代理,注意这里不是delegate而是messageComposeDelegate
messageController.messageComposeDelegate=self;
//如果运行商支持主题
if([MFMessageComposeViewController canSendSubject]){
messageController.subject=self.subject.text;
}
//如果运行商支持附件
if ([MFMessageComposeViewController canSendAttachments]) {
/第一种方法/
//messageController.attachments=…;
/*第二种方法*/
NSArray *attachments= [self.attachments.text componentsSeparatedByString:@","];
if (attachments.count>0) {
[attachments enumerateObjectsUsingBlock:^(id obj, NSUInteger idx, BOOL *stop) {
NSString *path=[[NSBundle mainBundle]pathForResource:obj ofType:nil];
NSURL *url=[NSURL fileURLWithPath:path];
[messageController addAttachmentURL:url withAlternateFilename:obj];
}];
}
/*第三种方法*/
// NSString *path=[[NSBundle mainBundle]pathForResource:@”photo.jpg” ofType:nil];
// NSURL *url=[NSURL fileURLWithPath:path];
// NSData *data=[NSData dataWithContentsOfURL:url];
/**
* attatchData:文件数据
* uti:统一类型标识,标识具体文件类型,详情查看:帮助文档中System-Declared Uniform Type Identifiers
* fileName:展现给用户看的文件名称
*/
// [messageController addAttachmentData:data typeIdentifier:@”public.image” filename:@”photo.jpg”];
}
[self presentViewController:messageController animated:YES completion:nil];
}
}
//发送完成,不管成功与否
-(void)messageComposeViewController:(MFMessageComposeViewController *)controller didFinishWithResult:(MessageComposeResult)result{
switch (result) {
case MessageComposeResultSent:
NSLog(@”发送成功.”);
break;
case MessageComposeResultCancelled:
NSLog(@”取消发送.”);
break;
default:
NSLog(@”发送失败.”);
break;
}
[self dismissViewControllerAnimated:YES completion:nil];
}
@end
这里需要强调一下:
MFMessageComposeViewController的代理不是通过delegate属性指定的而是通过messageComposeDelegate指定的。
可以通过几种方式来指定发送的附件,在这个过程中请务必指定文件的后缀,否则在发送后无法正确识别文件类别(例如如果发送的是一张jpg图片,在发送后无法正确查看图片)。
无论发送成功与否代理方法-(void)messageComposeViewController:(MFMessageComposeViewController *)controller didFinishWithResult:(MessageComposeResult)result都会执行,通过代理参数中的result来获得发送状态。
其实只要熟悉了MFMessageComposeViewController之后,那么用于发送邮件的MFMailComposeViewController用法和步骤完全一致,只是功能不同。下面看一下MFMailComposeViewController的使用:
//
// KCSendEmailViewController.m
// iOSSystemApplication
//
// Created by Kenshin Cui on 14/04/05.
// Copyright (c) 2014年 cmjstudio. All rights reserved.
//
(IBAction)sendEmailClick:(UIButton *)sender {
//判断当前是否能够发送邮件
if ([MFMailComposeViewController canSendMail]) {
MFMailComposeViewController *mailController=[[MFMailComposeViewController alloc]init];
//设置代理,注意这里不是delegate,而是mailComposeDelegate
mailController.mailComposeDelegate=self;
//设置收件人
[mailController setToRecipients:[self.toTecipients.text componentsSeparatedByString:@”,”]];
//设置抄送人
if (self.ccRecipients.text.length>0) {
[mailController setCcRecipients:[self.ccRecipients.text componentsSeparatedByString:@”,”]];
}
//设置密送人
if (self.bccRecipients.text.length>0) {
[mailController setBccRecipients:[self.bccRecipients.text componentsSeparatedByString:@”,”]];
}
//设置主题
[mailController setSubject:self.subject.text];
//设置内容
[mailController setMessageBody:self.body.text isHTML:YES];
//添加附件
if (self.attachments.text.length>0) {
NSArray *attachments=[self.attachments.text componentsSeparatedByString:@”,”] ;
[attachments enumerateObjectsUsingBlock:^(id obj, NSUInteger idx, BOOL *stop) {
NSString *file=[[NSBundle mainBundle] pathForResource:obj ofType:nil];
NSData *data=[NSData dataWithContentsOfFile:file];
[mailController addAttachmentData:data mimeType:@”image/jpeg” fileName:obj];//第二个参数是mimeType类型,jpg图片对应image/jpeg
}];
}
[self presentViewController:mailController animated:YES completion:nil];
}
}
-(void)mailComposeController:(MFMailComposeViewController )controller didFinishWithResult:(MFMailComposeResult)result error:(NSError )error{
switch (result) {
case MFMailComposeResultSent:
NSLog(@”发送成功.”);
break;
case MFMailComposeResultSaved://如果存储为草稿(点取消会提示是否存储为草稿,存储后可以到系统邮件应用的对应草稿箱找到)
NSLog(@”邮件已保存.”);
break;
case MFMailComposeResultCancelled:
NSLog(@”取消发送.”);
break;
default:
NSLog(@"发送失败.");
break;
}
if (error) {
NSLog(@"发送邮件过程中发生错误,错误信息:%@",error.localizedDescription);
}
[self dismissViewControllerAnimated:YES completion:nil];
}
@end
运行效果:
MFMailComposeViewController_Layout MFMailComposeViewController
通讯录
AddressBook
iOS中带有一个Contacts应用程序来管理联系人,但是有些时候我们希望自己的应用能够访问或者修改这些信息,这个时候就要用到AddressBook.framework框架。iOS中的通讯录是存储在数据库中的,由于iOS的权限设计,开发人员是不允许直接访问通讯录数据库的,必须依靠AddressBook提供的标准API来实现通讯录操作。通过AddressBook.framework开发者可以从底层去操作AddressBook.framework的所有信息,但是需要注意的是这个框架是基于C语言编写的,无法使用ARC来管理内存,开发者需要自己管理内存。下面大致介绍一下通讯录操作中常用的类型:
ABAddressBookRef:代表通讯录对象,通过该对象开发人员不用过多的关注通讯录的存储方式,可以直接以透明的方式去访问、保存(在使用AddressBook.framework操作联系人时,所有的增加、删除、修改后都必须执行保存操作,类似于Core Data)等。
ABRecordRef:代表一个通用的记录对象,可以是一条联系人信息,也可以是一个群组,可以通过ABRecordGetRecordType()函数获得具体类型。如果作为联系人(事实上也经常使用它作为联系人),那么这个记录记录了一个完整的联系人信息(姓名、性别、电话、邮件等),每条记录都有一个唯一的ID标示这条记录(可以通过ABRecordGetRecordID()函数获得)。
ABPersonRef:代表联系人信息,很少直接使用,实际开发过程中通常会使用类型为“kABPersonType”的ABRecordRef来表示联系人(由此可见ABPersonRef其实是一种类型为“kABPersonType”的ABRecordRef)
ABGroupRef:代表群组,与ABPersonRef类似,很少直接使用ABGroupRef,而是使用类型为“kABGroupType”的ABRecordRef来表示群组,一个群组可以包含多个联系人,一个联系人也同样可以多个群组。
由于通讯录操作的关键是对ABRecordRef的操作,首先看一下常用的操作通讯录记录的方法:
ABPersonCreate():创建一个类型为“kABPersonType”的ABRecordRef。
ABRecordCopyValue():取得指定属性的值。
ABRecordCopyCompositeName():取得联系人(或群组)的复合信息(对于联系人则包括:姓、名、公司等信息,对于群组则返回组名称)。
ABRecordSetValue():设置ABRecordRef的属性值。注意在设置ABRecordRef的值时又分为单值属性和多值属性:单值属性设置只要通过ABRecordSetValue()方法指定属性名和值即可;多值属性则要先通过创建一个ABMutableMultiValueRef类型的变量,然后通过ABMultiValueAddValueAndLabel()方法依次添加属性值,最后通过ABRecordSetValue()方法将ABMutableMultiValueRef类型的变量设置为记录值。
ABRecordRemoveValue():删除指定的属性值。
注意:
由于联系人访问时(读取、设置、删除时)牵扯到大量联系人属性,可以到ABPerson.h中查询或者直接到帮助文档“Personal Information Properties”
通讯录的访问步骤一般如下:
调用ABAddressBookCreateWithOptions()方法创建通讯录对象ABAddressBookRef。
调用ABAddressBookRequestAccessWithCompletion()方法获得用户授权访问通讯录。
调用ABAddressBookCopyArrayOfAllPeople()、ABAddressBookCopyPeopleWithName()方法查询联系人信息。
读取联系人后如果要显示联系人信息则可以调用ABRecord相关方法读取相应的数据;如果要进行修改联系人信息,则可以使用对应的方法修改ABRecord信息,然后调用ABAddressBookSave()方法提交修改;如果要删除联系人,则可以调用ABAddressBookRemoveRecord()方法删除,然后调用ABAddressBookSave()提交修改操作。
也就是说如果要修改或者删除都需要首先查询对应的联系人,然后修改或删除后提交更改。如果用户要增加一个联系人则不用进行查询,直接调用ABPersonCreate()方法创建一个ABRecord然后设置具体的属性,调用ABAddressBookAddRecord方法添加即可。
下面就通过一个示例演示一下如何通过ABAddressBook.framework访问通讯录,这个例子中通过一个UITableViewController模拟一下通讯录的查看、删除、添加操作。
主控制器视图,用于显示联系人,修改删除联系人:
KCContactViewController.h
//
// KCTableViewController.h
// AddressBook
//
// Created by Kenshin Cui on 14/04/05.
// Copyright (c) 2014年 cmjstudio. All rights reserved.
//
@interface KCContactTableViewController ()
@property (assign,nonatomic) ABAddressBookRef addressBook;//通讯录
@property (strong,nonatomic) NSMutableArray *allPerson;//通讯录所有人员
@property (assign,nonatomic) int isModify;//标识是修改还是新增,通过选择cell进行导航则认为是修改,否则视为新增
@property (assign,nonatomic) UITableViewCell *selectedCell;//当前选中的单元格
@end
@implementation KCContactTableViewController
(void)viewDidLoad {
[super viewDidLoad];
//请求访问通讯录并初始化数据
[self requestAddressBook];
}
//由于在整个视图控制器周期内addressBook都驻留在内存中,所有当控制器视图销毁时销毁该对象
-(void)dealloc{
if (self.addressBook!=NULL) {
CFRelease(self.addressBook);
}
}
//点击删除按钮
- (IBAction)trashClick:(UIBarButtonItem *)sender {
self.tableView.editing=!self.tableView.editing;
}
(NSInteger)numberOfSectionsInTableView:(UITableView *)tableView {
return 1;
}
(NSInteger)tableView:(UITableView *)tableView numberOfRowsInSection:(NSInteger)section {
return self.allPerson.count;
}
(UITableViewCell )tableView:(UITableView )tableView cellForRowAtIndexPath:(NSIndexPath *)indexPath {
static NSString *identtityKey=@”myTableViewCellIdentityKey1”;
UITableViewCell *cell=[tableView dequeueReusableCellWithIdentifier:identtityKey];
if(cell==nil){
cell=[[UITableViewCell alloc]initWithStyle:UITableViewCellStyleValue1 reuseIdentifier:identtityKey];
}
//取得一条人员记录
ABRecordRef recordRef=(__bridge ABRecordRef)self.allPerson[indexPath.row];
//取得记录中得信息
NSString firstName=(__bridge NSString ) ABRecordCopyValue(recordRef, kABPersonFirstNameProperty);//注意这里进行了强转,不用自己释放资源
NSString lastName=(__bridge NSString )ABRecordCopyValue(recordRef, kABPersonLastNameProperty);
ABMultiValueRef phoneNumbersRef= ABRecordCopyValue(recordRef, kABPersonPhoneProperty);//获取手机号,注意手机号是ABMultiValueRef类,有可能有多条
// NSArray phoneNumbers=(__bridge NSArray )ABMultiValueCopyArrayOfAllValues(phoneNumbersRef);//取得CFArraryRef类型的手机记录并转化为NSArrary
long count= ABMultiValueGetCount(phoneNumbersRef);
// for(int i=0;i
-(void)tableView:(UITableView )tableView didSelectRowAtIndexPath:(NSIndexPath )indexPath{
self.isModify=1;
self.selectedCell=[tableView cellForRowAtIndexPath:indexPath];
[self performSegueWithIdentifier:@”AddPerson” sender:self];
}
(void)prepareForSegue:(UIStoryboardSegue *)segue sender:(id)sender {
if([segue.identifier isEqualToString:@”AddPerson”]){
UINavigationController navigationController=(UINavigationController )segue.destinationViewController;
//根据导航控制器取得添加/修改人员的控制器视图
KCAddPersonViewController addPersonController=(KCAddPersonViewController )navigationController.topViewController;
addPersonController.delegate=self;
//如果是通过选择cell进行的导航操作说明是修改,否则为添加
if (self.isModify) {
UITableViewCell *cell=self.selectedCell;
addPersonController.recordID=(ABRecordID)cell.tag;//设置
NSArray *array=[cell.textLabel.text componentsSeparatedByString:@” “];
if (array.count>0) {
addPersonController.firstNameText=[array firstObject];
}
if (array.count>1) {
addPersonController.lastNameText=[array lastObject];
}
addPersonController.workPhoneText=cell.detailTextLabel.text;
}
}
}
-(void)editPersonWithFirstName:(NSString )firstName lastName:(NSString )lastName workNumber:(NSString *)workNumber{
if (self.isModify) {
UITableViewCell *cell=self.selectedCell;
NSIndexPath *indexPath= [self.tableView indexPathForCell:cell];
[self modifyPersonWithRecordID:(ABRecordID)cell.tag firstName:firstName lastName:lastName workNumber:workNumber];
[self.tableView reloadRowsAtIndexPaths:@[indexPath] withRowAnimation:UITableViewRowAnimationRight];
}else{
[self addPersonWithFirstName:firstName lastName:lastName workNumber:workNumber];//通讯簿中添加信息
[self initAllPerson];//重新初始化数据
[self.tableView reloadData];
}
self.isModify=0;
}
-(void)cancelEdit{
self.isModify=0;
}
/**
* 请求访问通讯录
*/
-(void)requestAddressBook{
//创建通讯录对象
self.addressBook=ABAddressBookCreateWithOptions(NULL, NULL);
//请求访问用户通讯录,注意无论成功与否block都会调用
ABAddressBookRequestAccessWithCompletion(self.addressBook, ^(bool granted, CFErrorRef error) {
if (!granted) {
NSLog(@"未获得通讯录访问权限!");
}
[self initAllPerson];
});
}
/**
* 取得所有通讯录记录
*/
-(void)initAllPerson{
//取得通讯录访问授权
ABAuthorizationStatus authorization= ABAddressBookGetAuthorizationStatus();
//如果未获得授权
if (authorization!=kABAuthorizationStatusAuthorized) {
NSLog(@”尚未获得通讯录访问授权!”);
return ;
}
//取得通讯录中所有人员记录
CFArrayRef allPeople= ABAddressBookCopyArrayOfAllPeople(self.addressBook);
self.allPerson=(__bridge NSMutableArray *)allPeople;
//释放资源
CFRelease(allPeople);
}
/**
* 删除指定的记录
*
* @param recordRef 要删除的记录
*/
-(void)removePersonWithRecord:(ABRecordRef)recordRef{
ABAddressBookRemoveRecord(self.addressBook, recordRef, NULL);//删除
ABAddressBookSave(self.addressBook, NULL);//删除之后提交更改
}
/**
* 根据姓名删除记录
*/
-(void)removePersonWithName:(NSString *)personName{
CFStringRef personNameRef=(__bridge CFStringRef)(personName);
CFArrayRef recordsRef= ABAddressBookCopyPeopleWithName(self.addressBook, personNameRef);//根据人员姓名查找
CFIndex count= CFArrayGetCount(recordsRef);//取得记录数
for (CFIndex i=0; i
@interface KCAddPersonViewController ()
@property (weak, nonatomic) IBOutlet UITextField *firstName;
@property (weak, nonatomic) IBOutlet UITextField *lastName;
@property (weak, nonatomic) IBOutlet UITextField *workPhone;
@end
@implementation KCAddPersonViewController
(IBAction)cancelClick:(UIBarButtonItem *)sender {
[self.delegate cancelEdit];
[self dismissViewControllerAnimated:YES completion:nil];
}
(IBAction)doneClick:(UIBarButtonItem *)sender {
//调用代理方法
[self.delegate editPersonWithFirstName:self.firstName.text lastName:self.lastName.text workNumber:self.workPhone.text];
[self dismissViewControllerAnimated:YES completion:nil];
}
-(void)setupUI{
if (self.recordID) {//如果ID不为0则认为是修改,此时需要初始化界面
self.firstName.text=self.firstNameText;
self.lastName.text=self.lastNameText;
self.workPhone.text=self.workPhoneText;
}
}
@end
运行效果:
AddressBook
备注:
1.上文中所指的以Ref结尾的对象事实上是该对象的指针(或引用),在C语言的框架中多数类型会以Ref结尾,这个类型本身就是一个指针,定义时不需要加“*”。
2.通常方法中包含copy、create、new、retain等关键字的方法创建的变量使用之后需要调用对应的release方法释放。例如:使用ABPersonCreate();创建完ABRecordRef变量后使用CFRelease()方法释放。
3.在与很多C语言框架交互时可以都存在Obj-C和C语言类型之间的转化(特别是Obj-C和Core Foundation框架中的一些转化),此时可能会用到桥接,只要在强转之后前面加上”__bridge”即可,经过桥接转化后的类型不需要再去手动维护内存,也就不需要使用对应的release方法释放内存。
4.AddressBook框架中很多类型的创建、属性设置等都是以这个类型名开发头的方法来创建的,事实上如果大家熟悉了其他框架会发现也都是类似的,这是Apple开发中约定俗成的命名规则(特别是C语言框架)。例如:要给ABRecordRef类型的变量设置属性则可以通过ABRecordSetValue()方法完成。
AddressBookUI
使用AddressBook.framework来操作通讯录特点就是可以对通讯录有更加精确的控制,但是缺点就是面对大量C语言API稍嫌麻烦,于是Apple官方提供了另一套框架供开发者使用,那就是AddressBookUI.framework。例如前面查看、新增、修改人员的界面这个框架就提供了现成的控制器视图供开发者使用。下面是这个框架中提供的控制器视图:
ABPersonViewController:用于查看联系人信息(可设置编辑)。需要设置displayedPerson属性来设置要显示或编辑的联系人。
ABNewPersonViewController:用于新增联系人信息。
ABUnknownPersonViewController:用于显示一个未知联系人(尚未保存的联系人)信息。需要设置displayedPerson属性来设置要显示的未知联系人。
以上三个控制器视图均继承于UIViewController,在使用过程中必须使用一个UINavigationController进行包装,否则只能看到视图内容无法进行操作(例如对于ABNewPersonViewController如果不使用UINavigationController进行包装则没有新增和取消按钮),同时注意包装后的控制器视图不需要处理具体新增、修改逻辑(增加和修改的处理逻辑对应的控制器视图内部已经完成),但是必须处理控制器的关闭操作(调用dismissViewControllerAnimated::方法),并且可以通过代理方法获得新增、修改的联系人。下面看一下三个控制器视图的代理方法:
1.ABPersonViewController的displayViewDelegate代理方法:
-(BOOL)personViewController:(ABPersonViewController *)personViewController shouldPerformDefaultActionForPerson:(ABRecordRef)person property:(ABPropertyID)property identifier:(ABMultiValueIdentifier)identifier:此方法会在选择了一个联系人属性后触发,四个参数分别代表:使用的控制器视图、所查看的联系人、所选则的联系人属性、该属性是否是多值属性。
2.ABNewPersonViewController的newPersonViewDelegate代理方法:
-(void)newPersonViewController:(ABNewPersonViewController *)newPersonView didCompleteWithNewPerson:(ABRecordRef)person:点击取消或完成后触发,如果参数中的person为NULL说明点击了取消,否则说明点击了完成。无论是取消还是完成操作,此方法调用时保存操作已经进行完毕,不需要在此方法中自己保存联系人信息。
3.ABUnkownPersonViewcontroller的unkownPersonViewDelegate代理方法:
-(void)unknownPersonViewController:(ABUnknownPersonViewController *)unknownCardViewController didResolveToPerson:(ABRecordRef)person:保存此联系人时调用,调用后将此联系人返回。
-(BOOL)unknownPersonViewController:(ABUnknownPersonViewController *)personViewController shouldPerformDefaultActionForPerson:(ABRecordRef)person property:(ABPropertyID)property identifier:(ABMultiValueIdentifier)identifier:选择一个位置联系人属性之后执行,返回值代表是否执行默认的选择操作(例如如果是手机号,默认操作会拨打此电话)
除了上面三类控制器视图在AddressBookUI中还提供了另外一个控制器视图ABPeoplePickerNavigationController,它与之前介绍的UIImagePickerController、MPMediaPickerController类似,只是他是用来选择一个联系人的。这个控制器视图本身继承于UINavigationController,视图自身的“组”、“取消”按钮操作不需要开发者来完成(例如开发者不用在点击取消是关闭当前控制器视图,它自身已经实现了关闭方法),当然这里主要说一下这个控制器视图的peoplePickerDelegate代理方法:
-(void)peoplePickerNavigationController:(ABPeoplePickerNavigationController )peoplePicker didSelectPerson:(ABRecordRef)person:选择一个联系人后执行。此代理方法实现后代理方法“-(void)peoplePickerNavigationController:(ABPeoplePickerNavigationController )peoplePicker didSelectPerson:(ABRecordRef)person property:(ABPropertyID)property identifier:(ABMultiValueIdentifier)identifier”不会再执行。并且一旦实现了这个代理方法用户只能选择到联系人视图,无法查看具体联系人的信息。
-(void)peoplePickerNavigationControllerDidCancel:(ABPeoplePickerNavigationController *)peoplePicker:用户点击取消后执行。
-(void)peoplePickerNavigationController:(ABPeoplePickerNavigationController )peoplePicker didSelectPerson:(ABRecordRef)person property:(ABPropertyID)property identifier:(ABMultiValueIdentifier)identifier:选择联系人具体的属性后执行,注意如果要执行此方法则不能实现-(void)peoplePickerNavigationController:(ABPeoplePickerNavigationController )peoplePicker didSelectPerson:(ABRecordRef)person代理方法,此时如果点击一个具体联系人会导航到联系人详细信息界面,用户点击具体的属性后触发此方法。
下面就看一下上面四个控制器视图的使用方法,在下面的程序中定义了四个按钮,点击不同的按钮调用不同的控制器视图用于演示:
//
// ViewController.m
// AddressBookUI
//
// Created by Kenshin Cui on 14/04/05.
// Copyright (c) 2014年 cmjstudio. All rights reserved.
//
//添加联系人
- (IBAction)addPersonClick:(UIButton *)sender {
ABNewPersonViewController *newPersonController=[[ABNewPersonViewController alloc]init];
//设置代理
newPersonController.newPersonViewDelegate=self;
//注意ABNewPersonViewController必须包装一层UINavigationController才能使用,否则不会出现取消和完成按钮,无法进行保存等操作
UINavigationController *navigationController=[[UINavigationController alloc]initWithRootViewController:newPersonController];
[self presentViewController:navigationController animated:YES completion:nil];
}
//
- (IBAction)unknownPersonClick:(UIButton *)sender {
ABUnknownPersonViewController *unknownPersonController=[[ABUnknownPersonViewController alloc]init];
//设置未知人员
ABRecordRef recordRef=ABPersonCreate();
ABRecordSetValue(recordRef, kABPersonFirstNameProperty, @”Kenshin”, NULL);
ABRecordSetValue(recordRef, kABPersonLastNameProperty, @”Cui”, NULL);
ABMultiValueRef multiValueRef=ABMultiValueCreateMutable(kABStringPropertyType);
ABMultiValueAddValueAndLabel(multiValueRef, @”18500138888”, kABHomeLabel, NULL);
ABRecordSetValue(recordRef, kABPersonPhoneProperty, multiValueRef, NULL);
unknownPersonController.displayedPerson=recordRef;
//设置代理
unknownPersonController.unknownPersonViewDelegate=self;
//设置其他属性
unknownPersonController.allowsActions=YES;//显示标准操作按钮
unknownPersonController.allowsAddingToAddressBook=YES;//是否允许将联系人添加到地址簿
CFRelease(multiValueRef);
CFRelease(recordRef);
//使用导航控制器包装
UINavigationController *navigationController=[[UINavigationController alloc]initWithRootViewController:unknownPersonController];
[self presentViewController:navigationController animated:YES completion:nil];
}
- (IBAction)showPersonClick:(UIButton *)sender {
ABPersonViewController *personController=[[ABPersonViewController alloc]init];
//设置联系人
ABAddressBookRef addressBook=ABAddressBookCreateWithOptions(NULL, NULL);
ABRecordRef recordRef= ABAddressBookGetPersonWithRecordID(addressBook, 1);//取得id为1的联系人记录
personController.displayedPerson=recordRef;
//设置代理
personController.personViewDelegate=self;
//设置其他属性
personController.allowsActions=YES;//是否显示发送信息、共享联系人等按钮
personController.allowsEditing=YES;//允许编辑
// personController.displayedProperties=@[@(kABPersonFirstNameProperty),@(kABPersonLastNameProperty)];//显示的联系人属性信息,默认显示所有信息
//使用导航控制器包装
UINavigationController *navigationController=[[UINavigationController alloc]initWithRootViewController:personController];
[self presentViewController:navigationController animated:YES completion:nil];
}
//完成新增(点击取消和完成按钮时调用),注意这里不用做实际的通讯录增加工作,此代理方法调用时已经完成新增,当保存成功的时候参数中得person会返回保存的记录,如果点击取消person为NULL
-(void)newPersonViewController:(ABNewPersonViewController *)newPersonView didCompleteWithNewPerson:(ABRecordRef)person{
//如果有联系人信息
if (person) {
NSLog(@”%@ 信息保存成功.”,(__bridge NSString *)(ABRecordCopyCompositeName(person)));
}else{
NSLog(@”点击了取消.”);
}
//关闭模态视图窗口
[self dismissViewControllerAnimated:YES completion:nil];
}
//保存未知联系人时触发
-(void)unknownPersonViewController:(ABUnknownPersonViewController *)unknownCardViewController didResolveToPerson:(ABRecordRef)person{
if (person) {
NSLog(@”%@ 信息保存成功!”,(__bridge NSString *)(ABRecordCopyCompositeName(person)));
}
[self dismissViewControllerAnimated:YES completion:nil];
}
//选择一个人员属性后触发,返回值YES表示触发默认行为操作,否则执行代理中自定义的操作
-(BOOL)unknownPersonViewController:(ABUnknownPersonViewController *)personViewController shouldPerformDefaultActionForPerson:(ABRecordRef)person property:(ABPropertyID)property identifier:(ABMultiValueIdentifier)identifier{
if (person) {
NSLog(@”选择了属性:%i,值:%@.”,property,(__bridge NSString *)ABRecordCopyValue(person, property));
}
return NO;
}
//选择一个人员属性后触发,返回值YES表示触发默认行为操作,否则执行代理中自定义的操作
-(BOOL)personViewController:(ABPersonViewController *)personViewController shouldPerformDefaultActionForPerson:(ABRecordRef)person property:(ABPropertyID)property identifier:(ABMultiValueIdentifier)identifier{
if (person) {
NSLog(@”选择了属性:%i,值:%@.”,property,(__bridge NSString *)ABRecordCopyValue(person, property));
}
return NO;
}
//选择一个联系人后,注意这个代理方法实现后属性选择的方法将不会再调用
-(void)peoplePickerNavigationController:(ABPeoplePickerNavigationController *)peoplePicker didSelectPerson:(ABRecordRef)person{
if (person) {
NSLog(@”选择了%@.”,(__bridge NSString *)(ABRecordCopyCompositeName(person)));
}
}
//选择属性之后,注意如果上面的代理方法实现后此方法不会被调用
//-(void)peoplePickerNavigationController:(ABPeoplePickerNavigationController *)peoplePicker didSelectPerson:(ABRecordRef)person property:(ABPropertyID)property identifier:(ABMultiValueIdentifier)identifier{
// if (person && property) {
// NSLog(@”选择了属性:%i,值:%@.”,property,(__bridge NSString *)ABRecordCopyValue(person, property));
// }
//}
//点击取消按钮
-(void)peoplePickerNavigationControllerDidCancel:(ABPeoplePickerNavigationController *)peoplePicker{
NSLog(@”取消选择.”);
}
@end
运行效果:
ABPersonViewController ABNewPersonViewController
ABUnkownPersonViewController ABPeoplePickerNaviagationController
注意:

为了让大家可以更加清楚的看到几个控制器视图的使用,这里并没有结合前面的UITableViewController来使用,事实上大家结合前面UITableViewController可以做一个完善的通讯录应用。
蓝牙
随着蓝牙低功耗技术BLE(Bluetooth Low Energy)的发展,蓝牙技术正在一步步成熟,如今的大部分移动设备都配备有蓝牙4.0,相比之前的蓝牙技术耗电量大大降低。从iOS的发展史也不难看出苹果目前对蓝牙技术也是越来越关注,例如苹果于2013年9月发布的iOS7就配备了iBeacon技术,这项技术完全基于蓝牙传输。但是众所周知苹果的设备对于权限要求也是比较高的,因此在iOS中并不能像Android一样随意使用蓝牙进行文件传输(除非你已经越狱)。在iOS中进行蓝牙传输应用开发常用的框架有如下几种:
GameKit.framework:iOS7之前的蓝牙通讯框架,从iOS7开始过期,但是目前多数应用还是基于此框架。
MultipeerConnectivity.framework:iOS7开始引入的新的蓝牙通讯开发框架,用于取代GameKit。
CoreBluetooth.framework:功能强大的蓝牙开发框架,要求设备必须支持蓝牙4.0。
前两个框架使用起来比较简单,但是缺点也比较明显:仅仅支持iOS设备,传输内容仅限于沙盒或者照片库中用户选择的文件,并且第一个框架只能在同一个应用之间进行传输(一个iOS设备安装应用A,另一个iOS设备上安装应用B是无法传输的)。当然CoreBluetooth就摆脱了这些束缚,它不再局限于iOS设备之间进行传输,你可以通过iOS设备向Android、Windows Phone以及其他安装有蓝牙4.0芯片的智能设备传输,因此也是目前智能家居、无线支付等热门智能设备所推崇的技术。
GameKit
其实从名称来看这个框架并不是专门为了支持蓝牙传输而设计的,它是为游戏设计的。而很多游戏中会用到基于蓝牙的点对点信息传输,因此这个框架中集成了蓝牙传输模块。前面也说了这个框架本身有很多限制,但是在iOS7之前的很多蓝牙传输都是基于此框架的,所以有必要对它进行了解。GameKit中的蓝牙使用设计很简单,并没有给开发者留有太多的复杂接口,而多数连接细节开发者是不需要关注的。GameKit中提供了两个关键类来操作蓝牙连接:
GKPeerPickerController:蓝牙查找、连接用的视图控制器,通常情况下应用程序A打开后会调用此控制器的show方法来展示一个蓝牙查找的视图,一旦发现了另一个同样在查找蓝牙连接的客户客户端B就会出现在视图列表中,此时如果用户点击连接B,B客户端就会询问用户是否允许A连接B,如果允许后A和B之间建立一个蓝牙连接。
GKSession:连接会话,主要用于发送和接受传输数据。一旦A和B建立连接GKPeerPickerController的代理方法会将A、B两者建立的会话(GKSession)对象传递给开发人员,开发人员拿到此对象可以发送和接收数据。
其实理解了上面两个类之后,使用起来就比较简单了,下面就以一个图片发送程序来演示GameKit中蓝牙的使用。此程序一个客户端运行在模拟器上作为客户端A,另一个运行在iPhone真机上作为客户端B(注意A、B必须运行同一个程序,GameKit蓝牙开发是不支持两个不同的应用传输数据的)。两个程序运行之后均调用GKPeerPickerController来发现周围蓝牙设备,一旦A发现了B之后就开始连接B,然后iOS会询问用户是否接受连接,一旦接受之后就会调用GKPeerPickerController的-(void)peerPickerController:(GKPeerPickerController )picker didConnectPeer:(NSString )peerID toSession:(GKSession )session代理方法,在此方法中可以获得连接的设备id(peerID)和连接会话(session);此时可以设置会话的数据接收句柄(相当于一个代理)并保存会话以便发送数据时使用;一旦一端(假设是A)调用会话的sendDataToAllPeers: withDataMode: error:方法发送数据,此时另一端(假设是B)就会调用句柄的- (void) receiveData:(NSData )data fromPeer:(NSString )peer inSession: (GKSession )session context:(void *)context方法,在此方法可以获得发送数据并处理。下面是程序代码:
//
// ViewController.m
// GameKit
//
// Created by Kenshin Cui on 14/04/05.
// Copyright (c) 2014年 cmjstudio. All rights reserved.
//
(void)viewDidLoad {
[super viewDidLoad];
GKPeerPickerController *pearPickerController=[[GKPeerPickerController alloc]init];
pearPickerController.delegate=self;
[pearPickerController show];
}
(IBAction)selectClick:(UIBarButtonItem *)sender {
UIImagePickerController *imagePickerController=[[UIImagePickerController alloc]init];
imagePickerController.delegate=self;
[self presentViewController:imagePickerController animated:YES completion:nil];
}
(IBAction)sendClick:(UIBarButtonItem *)sender {
NSData *data=UIImagePNGRepresentation(self.imageView.image);
NSError *error=nil;
[self.session sendDataToAllPeers:data withDataMode:GKSendDataReliable error:&error];
if (error) {
NSLog(@”发送图片过程中发生错误,错误信息:%@”,error.localizedDescription);
}
}
/**
* 连接到某个设备
*
* @param picker 蓝牙点对点连接控制器
* @param peerID 连接设备蓝牙传输ID
* @param session 连接会话
*/
-(void)peerPickerController:(GKPeerPickerController )picker didConnectPeer:(NSString )peerID toSession:(GKSession *)session{
self.session=session;
NSLog(@”已连接客户端设备:%@.”,peerID);
//设置数据接收处理句柄,相当于代理,一旦数据接收完成调用它的-receiveData:fromPeer:inSession:context:方法处理数据
[self.session setDataReceiveHandler:self withContext:nil];
[picker dismiss];//一旦连接成功关闭窗口
}
-(void)imagePickerController:(UIImagePickerController )picker didFinishPickingMediaWithInfo:(NSDictionary )info{
self.imageView.image=[info objectForKey:UIImagePickerControllerOriginalImage];
[self dismissViewControllerAnimated:YES completion:nil];
}
-(void)imagePickerControllerDidCancel:(UIImagePickerController *)picker{
[self dismissViewControllerAnimated:YES completion:nil];
}
@end
运行效果(左侧是真机,右侧是模拟器,程序演示了两个客户端互发图片的场景:首先是模拟器发送图片给真机,然后真机发送图片给模拟器):
MultipeerConnectivity
前面已经说了GameKit相关的蓝牙操作类从iOS7已经全部过期,苹果官方推荐使用MultipeerConnectivity代替。但是应该了解,MultipeerConnectivity.framework并不仅仅支持蓝牙连接,准确的说它是一种支持Wi-Fi网络、P2P Wi-Fi已经蓝牙个人局域网的通信框架,它屏蔽了具体的连接技术,让开发人员有统一的接口编程方法。通过MultipeerConnectivity连接的节点之间可以安全的传递信息、流或者其他文件资源而不必通过网络服务。此外使用MultipeerConnectivity进行近场通信也不再局限于同一个应用之间传输,而是可以在不同的应用之间进行数据传输(当然如果有必要的话你仍然可以选择在一个应用程序之间传输)。
要了解MultipeerConnectivity的使用必须要清楚一个概念:广播(Advertisting)和发现(Disconvering),这很类似于一种Client-Server模式。假设有两台设备A、B,B作为广播去发送自身服务,A作为发现的客户端。一旦A发现了B就试图建立连接,经过B同意二者建立连接就可以相互发送数据。在使用GameKit框架时,A和B既作为广播又作为发现,当然这种情况在MultipeerConnectivity中也很常见。
A.广播
无论是作为服务器端去广播还是作为客户端去发现广播服务,那么两个(或更多)不同的设备之间必须要有区分,通常情况下使用MCPeerID对象来区分一台设备,在这个设备中可以指定显示给对方查看的名称(display name)。另外不管是哪一方,还必须建立一个会话MCSession用于发送和接受数据。通常情况下会在会话的-(void)session:(MCSession )session peer:(MCPeerID )peerID didChangeState:(MCSessionState)state代理方法中跟踪会话状态(已连接、正在连接、未连接);在会话的-(void)session:(MCSession )session didReceiveData:(NSData )data fromPeer:(MCPeerID *)peerID代理方法中接收数据;同时还会调用会话的-(void)sendData: toPeers:withMode: error:方法去发送数据。
广播作为一个服务器去发布自身服务,供周边设备发现连接。在MultipeerConnectivity中使用MCAdvertiserAssistant来表示一个广播,通常创建广播时指定一个会话MCSession对象将广播服务和会话关联起来。一旦调用广播的start方法周边的设备就可以发现该广播并可以连接到此服务。在MCSession的代理方法中可以随时更新连接状态,一旦建立了连接之后就可以通过MCSession的connectedPeers获得已经连接的设备。
B.发现
前面已经说过作为发现的客户端同样需要一个MCPeerID来标志一个客户端,同时会拥有一个MCSession来监听连接状态并发送、接受数据。除此之外,要发现广播服务,客户端就必须要随时查找服务来连接,在MultipeerConnectivity中提供了一个控制器MCBrowserViewController来展示可连接和已连接的设备(这类似于GameKit中的GKPeerPickerController),当然如果想要自己定制一个界面来展示设备连接的情况你可以选择自己开发一套UI界面。一旦通过MCBroserViewController选择一个节点去连接,那么作为广播的节点就会收到通知,询问用户是否允许连接。由于初始化MCBrowserViewController的过程已经指定了会话MCSession,所以连接过程中会随时更新会话状态,一旦建立了连接,就可以通过会话的connected属性获得已连接设备并且可以使用会话发送、接受数据。
下面用两个不同的应用程序来演示使用MultipeerConnectivity的使用过程,其中一个应用运行在模拟器中作为广播节点,另一个运行在iPhone真机上作为发现节点,并且实现两个节点的图片互传。
首先看一下作为广播节点的程序:
界面:
MultipeerConnectivity_Advertiser
点击“开始广播”来发布服务,一旦有节点连接此服务就可以使用“选择照片”来从照片库中选取一张图片并发送到所有已连接节点。
程序:
//
// ViewController.m
// MultipeerConnectivity_Advertiser
//
// Created by Kenshin Cui on 14/04/05.
// Copyright (c) 2015年 cmjstudio. All rights reserved.
//
}
-(void)session:(MCSession )session peer:(MCPeerID )peerID didChangeState:(MCSessionState)state{
NSLog(@”didChangeState”);
switch (state) {
case MCSessionStateConnected:
NSLog(@”连接成功.”);
break;
case MCSessionStateConnecting:
NSLog(@”正在连接…”);
break;
default:
NSLog(@”连接失败.”);
break;
}
}
//接收数据
-(void)session:(MCSession )session didReceiveData:(NSData )data fromPeer:(MCPeerID *)peerID{
NSLog(@”开始接收数据…”);
UIImage *image=[UIImage imageWithData:data];
[self.photo setImage:image];
//保存到相册
UIImageWriteToSavedPhotosAlbum(image, nil, nil, nil);
}
-(void)imagePickerController:(UIImagePickerController )picker didFinishPickingMediaWithInfo:(NSDictionary )info{
UIImage *image=[info objectForKey:UIImagePickerControllerOriginalImage];
[self.photo setImage:image];
//发送数据给所有已连接设备
NSError *error=nil;
[self.session sendData:UIImagePNGRepresentation(image) toPeers:[self.session connectedPeers] withMode:MCSessionSendDataUnreliable error:&error];
NSLog(@”开始发送数据…”);
if (error) {
NSLog(@”发送数据过程中发生错误,错误信息:%@”,error.localizedDescription);
}
[self.imagePickerController dismissViewControllerAnimated:YES completion:nil];
}
-(void)imagePickerControllerDidCancel:(UIImagePickerController *)picker{
[self.imagePickerController dismissViewControllerAnimated:YES completion:nil];
}
@end
再看一下作为发现节点的程序:
界面:
MultipeerConnectivity_Discover
点击“查找设备”浏览可用服务,点击服务建立连接;一旦建立了连接之后就可以点击“选择照片”会从照片库中选择一张图片并发送给已连接的节点。
程序:
//
// ViewController.m
// MultipeerConnectivity
//
// Created by Kenshin Cui on 14/04/05.
// Copyright (c) 2015年 cmjstudio. All rights reserved.
//
}
(IBAction)browserClick:(UIBarButtonItem *)sender {
_browserController=[[MCBrowserViewController alloc]initWithServiceType:@”cmj-stream” session:self.session];
_browserController.delegate=self;
[self presentViewController:_browserController animated:YES completion:nil];
}
-(void)browserViewControllerDidFinish:(MCBrowserViewController *)browserViewController{
NSLog(@”已选择”);
[self.browserController dismissViewControllerAnimated:YES completion:nil];
}
-(void)browserViewControllerWasCancelled:(MCBrowserViewController *)browserViewController{
NSLog(@”取消浏览.”);
[self.browserController dismissViewControllerAnimated:YES completion:nil];
}
-(void)session:(MCSession )session peer:(MCPeerID )peerID didChangeState:(MCSessionState)state{
NSLog(@”didChangeState”);
switch (state) {
case MCSessionStateConnected:
NSLog(@”连接成功.”);
[self.browserController dismissViewControllerAnimated:YES completion:nil];
break;
case MCSessionStateConnecting:
NSLog(@”正在连接…”);
break;
default:
NSLog(@”连接失败.”);
break;
}
}
//接收数据
-(void)session:(MCSession )session didReceiveData:(NSData )data fromPeer:(MCPeerID *)peerID{
NSLog(@”开始接收数据…”);
UIImage *image=[UIImage imageWithData:data];
[self.photo setImage:image];
//保存到相册
UIImageWriteToSavedPhotosAlbum(image, nil, nil, nil);
}
-(void)imagePickerController:(UIImagePickerController )picker didFinishPickingMediaWithInfo:(NSDictionary )info{
UIImage *image=[info objectForKey:UIImagePickerControllerOriginalImage];
[self.photo setImage:image];
//发送数据给所有已连接设备
NSError *error=nil;
[self.session sendData:UIImagePNGRepresentation(image) toPeers:[self.session connectedPeers] withMode:MCSessionSendDataUnreliable error:&error];
NSLog(@”开始发送数据…”);
if (error) {
NSLog(@”发送数据过程中发生错误,错误信息:%@”,error.localizedDescription);
}
[self.imagePickerController dismissViewControllerAnimated:YES completion:nil];
}
-(void)imagePickerControllerDidCancel:(UIImagePickerController *)picker{
[self.imagePickerController dismissViewControllerAnimated:YES completion:nil];
}
@end
在两个程序中无论是MCBrowserViewController还是MCAdvertiserAssistant在初始化的时候都指定了一个服务类型“cmj-photo”,这是唯一标识一个服务类型的标记,可以按照官方的要求命名,应该尽可能表达服务的作用。需要特别指出的是,如果广播命名为“cmj-photo”那么发现节点只有在MCBrowserViewController中指定为“cmj-photo”才能发现此服务。
运行效果:
CoreBluetooth
无论是GameKit还是MultipeerConnectivity,都只能在iOS设备之间进行数据传输,这就大大降低了蓝牙的使用范围,于是从iOS6开始苹果推出了CoreBluetooth.framework,这个框架最大的特点就是完全基于BLE4.0标准并且支持非iOS设备。当前BLE应用相当广泛,不再仅仅是两个设备之间的数据传输,它还有很多其他应用市场,例如室内定位、无线支付、智能家居等等,这也使得CoreBluetooth成为当前最热门的蓝牙技术。
CoreBluetooth设计同样也是类似于客户端-服务器端的设计,作为服务器端的设备称为外围设备(Peripheral),作为客户端的设备叫做中央设备(Central),CoreBlueTooth整个框架就是基于这两个概念来设计的。
Central_Peripheral
外围设备和中央设备在CoreBluetooth中使用CBPeripheralManager和CBCentralManager表示。
CBPeripheralManager:外围设备通常用于发布服务、生成数据、保存数据。外围设备发布并广播服务,告诉周围的中央设备它的可用服务和特征。
CBCentralManager:中央设备使用外围设备的数据。中央设备扫描到外围设备后会就会试图建立连接,一旦连接成功就可以使用这些服务和特征。
外围设备和中央设备之间交互的桥梁是服务(CBService)和特征(CBCharacteristic),二者都有一个唯一的标识UUID(CBUUID类型)来唯一确定一个服务或者特征,每个服务可以拥有多个特征,下面是他们之间的关系:
Peripheral_Central_Service_Characteristic
一台iOS设备(注意iPhone4以下设备不支持BLE,另外iOS7.0、8.0模拟器也无法模拟BLE)既可以作为外围设备又可以作为中央设备,但是不能同时即是外围设备又是中央设备,同时注意建立连接的过程不需要用户手动选择允许,这一点和前面两个框架是不同的,这主要是因为BLE应用场景不再局限于两台设备之间资源共享了。
A.外围设备
创建一个外围设备通常分为以下几个步骤:
创建外围设备CBPeripheralManager对象并指定代理。
创建特征CBCharacteristic、服务CBSerivce并添加到外围设备
外围设备开始广播服务(startAdvertisting:)。
和中央设备CBCentral进行交互。
下面是简单的程序示例,程序有两个按钮“启动”和“更新”,点击启动按钮则创建外围设备、添加服务和特征并开始广播,一旦发现有中央设备连接并订阅了此服务的特征则通过更新按钮更新特征数据,此时已订阅的中央设备就会收到更新数据。
界面设计:
PeripheralPeer
程序设计:
//
// ViewController.m
// PeripheralApp
//
// Created by Kenshin Cui on 14/04/05.
// Copyright (c) 2014年 cmjstudio. All rights reserved.
// 外围设备(周边设备)
@interface ViewController ()
@property (strong,nonatomic) CBPeripheralManager *peripheralManager;//外围设备管理器
@property (strong,nonatomic) NSMutableArray *centralM;//订阅此外围设备特征的中心设备
@property (strong,nonatomic) CBMutableCharacteristic *characteristicM;//特征
@property (weak, nonatomic) IBOutlet UITextView *log; //日志记录
@end
@implementation ViewController
//创建外围设备
- (IBAction)startClick:(UIBarButtonItem *)sender {
_peripheralManager=[[CBPeripheralManager alloc]initWithDelegate:self queue:nil];
}
//更新数据
- (IBAction)transferClick:(UIBarButtonItem *)sender {
[self updateCharacteristicValue];
}
//外围设备状态发生变化后调用
-(void)peripheralManagerDidUpdateState:(CBPeripheralManager *)peripheral{
switch (peripheral.state) {
case CBPeripheralManagerStatePoweredOn:
NSLog(@”BLE已打开.”);
[self writeToLog:@”BLE已打开.”];
//添加服务
[self setupService];
break;
    default:
        NSLog(@"此设备不支持BLE或未打开蓝牙功能,无法作为外围设备.");
        [self writeToLog:@"此设备不支持BLE或未打开蓝牙功能,无法作为外围设备."];
        break;
}
}
//外围设备添加服务后调用
-(void)peripheralManager:(CBPeripheralManager )peripheral didAddService:(CBService )service error:(NSError *)error{
if (error) {
NSLog(@”向外围设备添加服务失败,错误详情:%@”,error.localizedDescription);
[self writeToLog:[NSString stringWithFormat:@”向外围设备添加服务失败,错误详情:%@”,error.localizedDescription]];
return;
}
//添加服务后开始广播
NSDictionary *dic=@{CBAdvertisementDataLocalNameKey:kPeripheralName};//广播设置
[self.peripheralManager startAdvertising:dic];//开始广播
NSLog(@"向外围设备添加了服务并开始广播...");
[self writeToLog:@"向外围设备添加了服务并开始广播..."];
}
-(void)peripheralManagerDidStartAdvertising:(CBPeripheralManager )peripheral error:(NSError )error{
if (error) {
NSLog(@”启动广播过程中发生错误,错误信息:%@”,error.localizedDescription);
[self writeToLog:[NSString stringWithFormat:@”启动广播过程中发生错误,错误信息:%@”,error.localizedDescription]];
return;
}
NSLog(@”启动广播…”);
[self writeToLog:@”启动广播…”];
}
//订阅特征
-(void)peripheralManager:(CBPeripheralManager )peripheral central:(CBCentral )central didSubscribeToCharacteristic:(CBCharacteristic *)characteristic{
NSLog(@”中心设备:%@ 已订阅特征:%@.”,central,characteristic);
[self writeToLog:[NSString stringWithFormat:@”中心设备:%@ 已订阅特征:%@.”,central.identifier.UUIDString,characteristic.UUID]];
//发现中心设备并存储
if (![self.centralM containsObject:central]) {
[self.centralM addObject:central];
}
/*中心设备订阅成功后外围设备可以更新特征值发送到中心设备,一旦更新特征值将会触发中心设备的代理方法:
-(void)peripheral:(CBPeripheral )peripheral didUpdateValueForCharacteristic:(CBCharacteristic )characteristic error:(NSError *)error
*/
// [self updateCharacteristicValue];
}
//取消订阅特征
-(void)peripheralManager:(CBPeripheralManager )peripheral central:(CBCentral )central didUnsubscribeFromCharacteristic:(CBCharacteristic *)characteristic{
NSLog(@”didUnsubscribeFromCharacteristic”);
}
-(void)peripheralManager:(CBPeripheralManager )peripheral didReceiveWriteRequests:(CBATTRequest )request{
NSLog(@”didReceiveWriteRequests”);
}
-(void)peripheralManager:(CBPeripheralManager )peripheral willRestoreState:(NSDictionary )dict{
NSLog(@”willRestoreState”);
}
-(NSMutableArray *)centralM{
if (!_centralM) {
_centralM=[NSMutableArray array];
}
return _centralM;
}
//创建特征、服务并添加服务到外围设备
-(void)setupService{
/1.创建特征/
//创建特征的UUID对象
CBUUID *characteristicUUID=[CBUUID UUIDWithString:kCharacteristicUUID];
//特征值
// NSString *valueStr=kPeripheralName;
// NSData *value=[valueStr dataUsingEncoding:NSUTF8StringEncoding];
//创建特征
/** 参数
* uuid:特征标识
* properties:特征的属性,例如:可通知、可写、可读等
* value:特征值
* permissions:特征的权限
*/
CBMutableCharacteristic *characteristicM=[[CBMutableCharacteristic alloc]initWithType:characteristicUUID properties:CBCharacteristicPropertyNotify value:nil permissions:CBAttributePermissionsReadable];
self.characteristicM=characteristicM;
// CBMutableCharacteristic *characteristicM=[[CBMutableCharacteristic alloc]initWithType:characteristicUUID properties:CBCharacteristicPropertyRead value:nil permissions:CBAttributePermissionsReadable];
// characteristicM.value=value;
/*创建服务并且设置特征*/
//创建服务UUID对象
CBUUID *serviceUUID=[CBUUID UUIDWithString:kServiceUUID];
//创建服务
CBMutableService *serviceM=[[CBMutableService alloc]initWithType:serviceUUID primary:YES];
//设置服务的特征
[serviceM setCharacteristics:@[characteristicM]];


/*将服务添加到外围设备*/
[self.peripheralManager addService:serviceM];
}
//更新特征值
-(void)updateCharacteristicValue{
//特征值
NSString *valueStr=[NSString stringWithFormat:@”%@ –%@”,kPeripheralName,[NSDate date]];
NSData *value=[valueStr dataUsingEncoding:NSUTF8StringEncoding];
//更新特征值
[self.peripheralManager updateValue:value forCharacteristic:self.characteristicM onSubscribedCentrals:nil];
[self writeToLog:[NSString stringWithFormat:@”更新特征值:%@”,valueStr]];
}
/**
* 记录日志
*
* @param info 日志信息
*/
-(void)writeToLog:(NSString *)info{
self.log.text=[NSString stringWithFormat:@”%@\r\n%@”,self.log.text,info];
}
@end
上面程序运行的流程如下(图中蓝色代表外围设备操作,绿色部分表示中央设备操作):
PeripheralFlow
B.中央设备
中央设备的创建一般可以分为如下几个步骤:
创建中央设备管理对象CBCentralManager并指定代理。
扫描外围设备,一般发现可用外围设备则连接并保存外围设备。
查找外围设备服务和特征,查找到可用特征则读取特征数据。
下面是一个简单的中央服务器端实现,点击“启动”按钮则开始扫描周围的外围设备,一旦发现了可用的外围设备则建立连接并设置外围设备的代理,之后开始查找其服务和特征。一旦外围设备的特征值做了更新,则可以在代理方法中读取更新后的特征值。
界面设计:
CentralPeer
程序设计:
//
// ViewController.m
// CentralApp
//
// Created by Kenshin Cui on 14/04/05.
// Copyright (c) 2014年 cmjstudio. All rights reserved.
// 中心设备
@interface ViewController ()
//中心服务器状态更新后
-(void)centralManagerDidUpdateState:(CBCentralManager *)central{
switch (central.state) {
case CBPeripheralManagerStatePoweredOn:
NSLog(@”BLE已打开.”);
[self writeToLog:@”BLE已打开.”];
//扫描外围设备
// [central scanForPeripheralsWithServices:@[[CBUUID UUIDWithString:kServiceUUID]] options:@{CBCentralManagerScanOptionAllowDuplicatesKey:@YES}];
[central scanForPeripheralsWithServices:nil options:@{CBCentralManagerScanOptionAllowDuplicatesKey:@YES}];
break;
    default:
        NSLog(@"此设备不支持BLE或未打开蓝牙功能,无法作为外围设备.");
        [self writeToLog:@"此设备不支持BLE或未打开蓝牙功能,无法作为外围设备."];
        break;
}
}
/**
* 发现外围设备
*
* @param central 中心设备
* @param peripheral 外围设备
* @param advertisementData 特征数据
* @param RSSI 信号质量(信号强度)
*/
-(void)centralManager:(CBCentralManager )central didDiscoverPeripheral:(CBPeripheral )peripheral advertisementData:(NSDictionary )advertisementData RSSI:(NSNumber )RSSI{
NSLog(@”发现外围设备…”);
[self writeToLog:@”发现外围设备…”];
//停止扫描
[self.centralManager stopScan];
//连接外围设备
if (peripheral) {
//添加保存外围设备,注意如果这里不保存外围设备(或者说peripheral没有一个强引用,无法到达连接成功(或失败)的代理方法,因为在此方法调用完就会被销毁
if(![self.peripherals containsObject:peripheral]){
[self.peripherals addObject:peripheral];
}
NSLog(@”开始连接外围设备…”);
[self writeToLog:@”开始连接外围设备…”];
[self.centralManager connectPeripheral:peripheral options:nil];
}
}
//连接到外围设备
-(void)centralManager:(CBCentralManager )central didConnectPeripheral:(CBPeripheral )peripheral{
NSLog(@”连接外围设备成功!”);
[self writeToLog:@”连接外围设备成功!”];
//设置外围设备的代理为当前视图控制器
peripheral.delegate=self;
//外围设备开始寻找服务
[peripheral discoverServices:@[[CBUUID UUIDWithString:kServiceUUID]]];
}
//连接外围设备失败
-(void)centralManager:(CBCentralManager )central didFailToConnectPeripheral:(CBPeripheral )peripheral error:(NSError *)error{
NSLog(@”连接外围设备失败!”);
[self writeToLog:@”连接外围设备失败!”];
}
//外围设备寻找到服务后
-(void)peripheral:(CBPeripheral )peripheral didDiscoverServices:(NSError )error{
NSLog(@”已发现可用服务…”);
[self writeToLog:@”已发现可用服务…”];
if(error){
NSLog(@”外围设备寻找服务过程中发生错误,错误信息:%@”,error.localizedDescription);
[self writeToLog:[NSString stringWithFormat:@”外围设备寻找服务过程中发生错误,错误信息:%@”,error.localizedDescription]];
}
//遍历查找到的服务
CBUUID *serviceUUID=[CBUUID UUIDWithString:kServiceUUID];
CBUUID *characteristicUUID=[CBUUID UUIDWithString:kCharacteristicUUID];
for (CBService *service in peripheral.services) {
if([service.UUID isEqual:serviceUUID]){
//外围设备查找指定服务中的特征
[peripheral discoverCharacteristics:@[characteristicUUID] forService:service];
}
}
}
//外围设备寻找到特征后
-(void)peripheral:(CBPeripheral )peripheral didDiscoverCharacteristicsForService:(CBService )service error:(NSError *)error{
NSLog(@”已发现可用特征…”);
[self writeToLog:@”已发现可用特征…”];
if (error) {
NSLog(@”外围设备寻找特征过程中发生错误,错误信息:%@”,error.localizedDescription);
[self writeToLog:[NSString stringWithFormat:@”外围设备寻找特征过程中发生错误,错误信息:%@”,error.localizedDescription]];
}
//遍历服务中的特征
CBUUID *serviceUUID=[CBUUID UUIDWithString:kServiceUUID];
CBUUID *characteristicUUID=[CBUUID UUIDWithString:kCharacteristicUUID];
if ([service.UUID isEqual:serviceUUID]) {
for (CBCharacteristic *characteristic in service.characteristics) {
if ([characteristic.UUID isEqual:characteristicUUID]) {
//情景一:通知
/*找到特征后设置外围设备为已通知状态(订阅特征):
1.调用此方法会触发代理方法:-(void)peripheral:(CBPeripheral )peripheral didUpdateNotificationStateForCharacteristic:(CBCharacteristic )characteristic error:(NSError )error
*2.调用此方法会触发外围设备的订阅代理方法
*/
[peripheral setNotifyValue:YES forCharacteristic:characteristic];
//情景二:读取
// [peripheral readValueForCharacteristic:characteristic];
// if(characteristic.value){
// NSString *value=[[NSString alloc]initWithData:characteristic.value encoding:NSUTF8StringEncoding];
// NSLog(@”读取到特征值:%@”,value);
// }
}
}
}
}
//特征值被更新后
-(void)peripheral:(CBPeripheral )peripheral didUpdateNotificationStateForCharacteristic:(CBCharacteristic )characteristic error:(NSError *)error{
NSLog(@”收到特征更新通知…”);
[self writeToLog:@”收到特征更新通知…”];
if (error) {
NSLog(@”更新通知状态时发生错误,错误信息:%@”,error.localizedDescription);
}
//给特征值设置新的值
CBUUID *characteristicUUID=[CBUUID UUIDWithString:kCharacteristicUUID];
if ([characteristic.UUID isEqual:characteristicUUID]) {
if (characteristic.isNotifying) {
if (characteristic.properties==CBCharacteristicPropertyNotify) {
NSLog(@”已订阅特征通知.”);
[self writeToLog:@”已订阅特征通知.”];
return;
}else if (characteristic.properties ==CBCharacteristicPropertyRead) {
//从外围设备读取新值,调用此方法会触发代理方法:-(void)peripheral:(CBPeripheral )peripheral didUpdateValueForCharacteristic:(CBCharacteristic )characteristic error:(NSError *)error
[peripheral readValueForCharacteristic:characteristic];
}
    }else{
        NSLog(@"停止已停止.");
        [self writeToLog:@"停止已停止."];
        //取消连接
        [self.centralManager cancelPeripheralConnection:peripheral];
    }
}
}
//更新特征值后(调用readValueForCharacteristic:方法或者外围设备在订阅后更新特征值都会调用此代理方法)
-(void)peripheral:(CBPeripheral )peripheral didUpdateValueForCharacteristic:(CBCharacteristic )characteristic error:(NSError *)error{
if (error) {
NSLog(@”更新特征值时发生错误,错误信息:%@”,error.localizedDescription);
[self writeToLog:[NSString stringWithFormat:@”更新特征值时发生错误,错误信息:%@”,error.localizedDescription]];
return;
}
if (characteristic.value) {
NSString *value=[[NSString alloc]initWithData:characteristic.value encoding:NSUTF8StringEncoding];
NSLog(@”读取到特征值:%@”,value);
[self writeToLog:[NSString stringWithFormat:@”读取到特征值:%@”,value]];
}else{
NSLog(@”未发现特征值.”);
[self writeToLog:@”未发现特征值.”];
}
}
-(NSMutableArray *)peripherals{
if(!_peripherals){
_peripherals=[NSMutableArray array];
}
return _peripherals;
}
/**
* 记录日志
*
* @param info 日志信息
*/
-(void)writeToLog:(NSString *)info{
self.log.text=[NSString stringWithFormat:@”%@\r\n%@”,self.log.text,info];
}
@end
上面程序运行的流程图如下:
CentralFlow
有了上面两个程序就可以分别运行在两台支持BLE的iOS设备上,当两个应用建立连接后,一旦外围设备更新特征之后,中央设备就可以立即获取到更新后的值。需要强调的是使用CoreBluetooth开发的应用不仅仅可以和其他iOS设备进行蓝牙通信,还可以同其他第三方遵循BLE规范的设备进行蓝牙通讯,这里就不再赘述。
注意:本节部分图片来自于互联网,版权归原作者所有。
社交
Social
现在很多应用都内置“社交分享”功能,可以将看到的新闻、博客、广告等内容分享到微博、微信、QQ、空间等,其实从iOS6.0开始苹果官方就内置了Social.framework专门来实现社交分享功能,利用这个框架开发者只需要几句代码就可以实现内容分享。下面就以一个分享到新浪微博的功能为例来演示Social框架的应用,整个过程分为:创建内容编辑控制器,设置分享内容(文本内容、图片、超链接等),设置发送(或取消)后的回调事件,展示控制器。
程序代码:
//
// ViewController.m
// Social
//
// Created by Kenshin Cui on 14/04/05.
// Copyright (c) 2015年 cmjstudio. All rights reserved.
//
}
-(void)shareToSina{
//检查新浪微博服务是否可用
if(![SLComposeViewController isAvailableForServiceType:SLServiceTypeSinaWeibo]){
NSLog(@”新浪微博服务不可用.”);
return;
}
//初始化内容编写控制器,注意这里指定分享类型为新浪微博
SLComposeViewController *composeController=[SLComposeViewController composeViewControllerForServiceType:SLServiceTypeSinaWeibo];
//设置默认信息
[composeController setInitialText:@”Kenshin Cui’s Blog…”];
//添加图片
[composeController addImage:[UIImage imageNamed:@”stevenChow”]];
//添加连接
[composeController addURL:[NSURL URLWithString:@”http://www.cnblogs.com/kenshincui“]];
//设置发送完成后的回调事件
__block SLComposeViewController *composeControllerForBlock=composeController;
composeController.completionHandler=^(SLComposeViewControllerResult result){
if (result==SLComposeViewControllerResultDone) {
NSLog(@”开始发送…”);
}
[composeControllerForBlock dismissViewControllerAnimated:YES completion:nil];
};
//显示编辑视图
[self presentViewController:composeController animated:YES completion:nil];
}
@end
运行效果:
Social
发送成功之后:
Social_SinaWeibo
在这个过程中开发人员不需要知道新浪微博的更多分享细节,Social框架中已经统一了分享的接口,你可以通过ServiceType设置是分享到Facebook、Twitter、新浪微博、腾讯微博,而不关心具体的细节实现。那么当运行上面的示例时它是怎么知道用哪个账户来发送微博呢?其实在iOS的设置中有专门设置Facebook、Twitter、微博的地方:
Social_SinaSetting
必须首先在这里设置微博账户才能完成上面的发送,不然Social框架也不可能知道具体使用哪个账户来发送。
第三方框架
当然,通过上面的设置界面应该可以看到,苹果官方默认支持的分享并不太多,特别是对于国内的应用只支持新浪微博和腾讯微博(事实上从iOS7苹果才考虑支持腾讯微博),那么如果要分享到微信、人人、开心等等国内较为知名的社交网络怎么办呢?目前最好的选择就是使用第三方框架,因为如果要自己实现各个应用的接口还是比较复杂的。当前使用较多的就是友盟社会化组件、ShareSDK,而且现在百度也出了社会化分享组件。今天无法对所有组件都进行一一介绍,这里就以友盟社交化组件为例简单做一下介绍:
注册友盟账号并新建应用获得AppKey。
下载友盟SDK并将下载的文件放到项目中(注意下载的过程中可以选择所需要的分享服务)。
在应用程序中设置友盟的AppKey。
分享时调用presentSnsIconSheetView: appKey: shareText: shareImage: shareToSnsNames: delegate:方法或者presentSnsController: appKey: shareText: shareImage: shareToSnsNames: delegate:方法显示分享列表(注意这个过程中要使用某些服务需要到对应的平台去申请并对应扩展框架进行设置,否则分享列表中不会显示对应的分享按钮)。
下面是一个简单的示例:
//
// ViewController.m
// Social_UM
//
// Created by Kenshin Cui on 14/04/05.
// Copyright (c) 2015年 cmjstudio. All rights reserved.
//
@interface ViewController ()
@end
@implementation ViewController
}
}
//分享完成
-(void)didFinishGetUMSocialDataInViewController:(UMSocialResponseEntity *)response{
//分享成功
if(response.responseCode==UMSResponseCodeSuccess){
NSLog(@”分享成功”);
}
}
@end
运行效果:
Social_UM
注意:在第一次使用某个分享服务是需要输入相应的账号获得授权才能分享。
GameCenter
Game Center是由苹果发布的在线多人游戏社交网络,通过它游戏玩家可以邀请好友进行多人游戏,它也会记录玩家的成绩并在排行榜中展示,同时玩家每经过一定的阶段会获得不同的成就。这里就简单介绍一下如何在自己的应用中集成Game Center服务来让用户获得积分、成就以及查看游戏排行和已获得成就。
由于Game Center是苹果推出的一项重要服务,苹果官方对于它的控制相当严格,因此使用Game Center之前必须要做许多准备工作。通常需要经过以下几个步骤(下面的准备工作主要是针对真机的,模拟器省略Provisioning Profile配置过程):
在苹果开发者中心创建支持Game Center服务的App ID并指定具体的Bundle ID,假设是“com.cmjstudio.kctest”(注意这个Bundle ID就是日后要开发的游戏的Bundle ID)。 GameCenter_AppID
基于“com.cmjstudio.kctest”创建开发者配置文件(或描述文件)并导入对应的设备(创建过程中选择支持Game Center服务的App ID,这样iOS设备在运行指定Boundle ID应用程序就知道此应用支持Game Center服务)。 GameCenter_AppProfiler
在iTunes Connect中创建一个应用(假设叫“KCTest”,这是一款足球竞技游戏)并指定“套装ID”为之前创建的“com.cmjstudio.kctest”,让应用和这个App关联(注意这个应用不需要提交)。
在iTunes Connect的“用户和职能”中创建沙盒测试用户(由于在测试阶段应用还没有正式提交到App Store,所以只有沙盒用户可以登录Game Center)。
在iTunes Connect中配置此应用Game Center(这里配置了游戏在游戏中心的显示名称为“CMJ”),在其中添加排行榜和成就(假设添加一个排行榜ID“Goals”表示进球个数;两个成就ID分别为“AdidasGoldBall”、“AdidasGoldBoot”代表金球奖和金靴奖成就,点数分别为80、100)。GameCenter_AppConfig
在iOS“设置”中找到Game Center允许沙盒,否则真机无法调试(如果是模拟器不需要此项设置)。 GameCenter_DeviceConfig
有了以上准备就可以在应用程序中增加积分、添加成就了,当然在实际开发过程积分和成就都是基于玩家所通过的关卡来完成的,为了简化这个过程这里就直接通过几个按钮手动触发这些事件。Game Center开发需要使用GameKit框架,首先熟悉一下常用的几个类:
GKLocalPlayer:表示本地玩家,在GameKit中还有一个GKPlayer表示联机玩家,为了保证非联网用户也可以正常使用游戏功能,一般使用GKLocalPlayer。
GKScore:管理游戏积分,例如设置积分、排名等。
GKLeaderboard:表示游戏排行榜,主用用于管理玩家排名,例如加载排行榜、设置默认排行榜、加载排行榜图片等。
GKAchievement:表示成就,主用用于管理玩家成就,例如加载成就、提交成就,重置成就等。
GKAchievementDescription:成就描述信息,包含成就的标题、获得前描述、获得后描述、是否可重复获得成就等信息。
GKGameCenterViewController:排行榜、成就查看视图控制器。如果应用本身不需要自己开发排行榜、成就查看试图可以直接调用此控制器。
下面就以一个简单的示例来完成排行榜、成就设置和查看,在这个演示程序中通过两种方式来查看排行和成就:一种是直接使用框架自带的GKGameCenterViewContrller调用系统视图查看,另一种是通过API自己读取排行榜、成就信息并显示。此外在应用中有两个添加按钮分别用于设置得分和成就。应用大致布局如下(图片较大可点击查看大图):
GameCenter_Layout
1.首先看一下主视图控制器KCMainTableViewController:
主视图控制器调用GKLeaderboard的loadLeaderboardsWithCompletionHandler:方法加载了所有排行榜,这个过程需要注意每个排行榜(GKLeaderboard)中的scores属性是没有值的,如果要让每个排行榜的scores属性有值必须调用一次排行榜的loadScoresWithCompletionHandler:方法。
调用GKAchievement的loadAchievementsWithCompletionHandler:方法加载加载成就,注意这个方法只能获得完成度不为0的成就,如果完成度为0是获得不到的;然后调用GKAchievementDesciption的loadAchievementDescriptionsWithCompletionHandler:方法加载了所有成就描述,这里加载的是所有成就描述(不管完成度是否为0);紧接着调用了每个成就描述的loadImageWithCompletionHandler:方法加载成就图片。
将获得的排行榜、成就、成就描述、成就图片信息保存,并在导航到详情视图时传递给排行榜视图控制器和成就视图控制器以便在子控制器视图中展示。
在主视图控制器左上方添加查看游戏中心控制按钮,点击按钮调用GKGameCenterViewController来展示排行榜、成就、玩家信息,这是系统自带的一个游戏中心视图方便和后面我们自己获得的信息对比。
程序如下
//
// KCMainTableViewController.m
// kctest
//
// Created by Kenshin Cui on 14/4/5.
// Copyright (c) 2015年 cmjstudio. All rights reserved.
// 静态表格
@interface KCMainTableViewController ()
@property (strong,nonatomic) NSArray *leaderboards;//排行榜对象数组
@property (strong,nonatomic) NSArray *achievements;//成就
@property (strong,nonatomic) NSArray *achievementDescriptions;//成就描述
@property (strong,nonatomic) NSMutableDictionary *achievementImages;//成就图片
@property (weak, nonatomic) IBOutlet UILabel *leaderboardLabel; //排行个数
@property (weak, nonatomic) IBOutlet UILabel *achievementLable; //成就个数
@end
@implementation KCMainTableViewController
(void)viewDidLoad {
[super viewDidLoad];
[self authorize];
}
//点击完成
-(void)gameCenterViewControllerDidFinish:(GKGameCenterViewController *)gameCenterViewController{
NSLog(@”完成.”);
[gameCenterViewController dismissViewControllerAnimated:YES completion:nil];
}
-(void)prepareForSegue:(UIStoryboardSegue *)segue sender:(id)sender{
//如果是导航到排行榜,则将当前排行榜传递到排行榜视图
if ([segue.identifier isEqualToString:@”leaderboard”]) {
UINavigationController *navigationController=segue.destinationViewController;
KCLeaderboardTableViewController *leaderboardController=[navigationController.childViewControllers firstObject];
leaderboardController.leaderboards=self.leaderboards;
}else if ([segue.identifier isEqualToString:@”achievement”]) {
UINavigationController *navigationController=segue.destinationViewController;
KCAchievementTableViewController *achievementController=[navigationController.childViewControllers firstObject];
achievementController.achievements=self.achievements;
achievementController.achievementDescriptions=self.achievementDescriptions;
achievementController.achievementImages=self.achievementImages;
}
}
//检查是否经过认证,如果没经过认证则弹出Game Center登录界面
-(void)authorize{
//创建一个本地用户
GKLocalPlayer *localPlayer= [GKLocalPlayer localPlayer];
//检查用于授权,如果没有登录则让用户登录到GameCenter(注意此事件设置之后或点击登录界面的取消按钮都会被调用)
[localPlayer setAuthenticateHandler:^(UIViewController * controller, NSError *error) {
if ([[GKLocalPlayer localPlayer] isAuthenticated]) {
NSLog(@”已授权.”);
[self setupUI];
}else{
//注意:在设置中找到Game Center,设置其允许沙盒,否则controller为nil
[self presentViewController:controller animated:YES completion:nil];
}
}];
}
//UI布局
-(void)setupUI{
//更新排行榜个数
[GKLeaderboard loadLeaderboardsWithCompletionHandler:^(NSArray *leaderboards, NSError *error) {
if (error) {
NSLog(@”加载排行榜过程中发生错误,错误信息:%@”,error.localizedDescription);
}
self.leaderboards=leaderboards;
self.leaderboardLabel.text=[NSString stringWithFormat:@”%i”,leaderboards.count];
//获取得分,注意只有调用了loadScoresWithCompletionHandler:方法之后leaderboards中的排行榜中的scores属性才有值,否则为nil
[leaderboards enumerateObjectsUsingBlock:^(id obj, NSUInteger idx, BOOL *stop) {
GKLeaderboard *leaderboard=obj;
[leaderboard loadScoresWithCompletionHandler:^(NSArray *scores, NSError *error) {
}];
}];
}];
//更新获得成就个数,注意这个个数不一定等于iTunes Connect中的总成就个数,此方法只能获取到成就完成进度不为0的成就
[GKAchievement loadAchievementsWithCompletionHandler:^(NSArray *achievements, NSError *error) {
if (error) {
NSLog(@”加载成就过程中发生错误,错误信息:%@”,error.localizedDescription);
}
self.achievements=achievements;
self.achievementLable.text=[NSString stringWithFormat:@”%i”,achievements.count];
//加载成就描述(注意,即使没有获得此成就也能获取到)
[GKAchievementDescription loadAchievementDescriptionsWithCompletionHandler:^(NSArray *descriptions, NSError *error) {
if (error) {
NSLog(@”加载成就描述信息过程中发生错误,错误信息:%@”,error.localizedDescription);
return ;
}
self.achievementDescriptions=descriptions;
//加载成就图片
_achievementImages=[NSMutableDictionary dictionary];
[descriptions enumerateObjectsUsingBlock:^(id obj, NSUInteger idx, BOOL *stop) {
GKAchievementDescription description=(GKAchievementDescription )obj;
[description loadImageWithCompletionHandler:^(UIImage *image, NSError *error) {
[_achievementImages setObject:image forKey:description.identifier];
}];
}];
}];
}];
}
//查看Game Center
-(void)viewGameCenter{
if (![GKLocalPlayer localPlayer].isAuthenticated) {
NSLog(@”未获得用户授权.”);
return;
}
//Game Center视图控制器
GKGameCenterViewController *gameCenterController=[[GKGameCenterViewController alloc]init];
//设置代理
gameCenterController.gameCenterDelegate=self;
//显示
[self presentViewController:gameCenterController animated:YES completion:nil];
}
@end
2.然后看一下排行榜控制器视图KCLeaderboardTableViewController:
在排行榜控制器视图中定义一个leaderboards属性用于接收主视图控制器传递的排行榜信息并且通过一个UITableView展示排行榜名称、得分等。
在排行榜控制器视图中通过GKScore的reportScores: withCompletionHandler:设置排行榜得分,注意每个GKScore对象必须设置value属性来表示得分(GKScore是通过identifier来和排行榜关联起来的)。
程序如下
//
// KCLeaderboardTableViewController.m
// kctest
//
// Created by Kenshin Cui on 14/4/5.
// Copyright (c) 2015年 cmjstudio. All rights reserved.
//
@interface KCLeaderboardTableViewController ()
@end
@implementation KCLeaderboardTableViewController
//添加得分(这里指的是进球数)
- (IBAction)addScoreClick:(UIBarButtonItem *)sender {
[self addScoreWithIdentifier:kLeaderboardIdentifier1 value:100];
}
-(NSInteger)tableView:(UITableView )tableView sectionForSectionIndexTitle:(NSString )title atIndex:(NSInteger)index{
return 1;
}
-(NSInteger)tableView:(UITableView *)tableView numberOfRowsInSection:(NSInteger)section{
return self.leaderboards.count;
}
-(UITableViewCell )tableView:(UITableView )tableView cellForRowAtIndexPath:(NSIndexPath *)indexPath{
static NSString *identtityKey=@”myTableViewCellIdentityKey1”;
UITableViewCell *cell=[self.tableView dequeueReusableCellWithIdentifier:identtityKey];
if(cell==nil){
cell=[[UITableViewCell alloc]initWithStyle:UITableViewCellStyleValue1 reuseIdentifier:identtityKey];
}
GKLeaderboard *leaderboard=self.leaderboards[indexPath.row];
GKScore *score=[leaderboard.scores firstObject];
NSLog(@”scores:%@”,leaderboard.scores);
cell.textLabel.text=leaderboard.title;//排行榜标题
cell.detailTextLabel.text=[NSString stringWithFormat:@”%lld”,score.value]; //排行榜得分
return cell;
}
/**
* 设置得分
*
* @param identifier 排行榜标识
* @param value 得分
*/
-(void)addScoreWithIdentifier:(NSString *)identifier value:(int64_t)value{
if (![GKLocalPlayer localPlayer].isAuthenticated) {
NSLog(@”未获得用户授权.”);
return;
}
//创建积分对象
GKScore *score=[[GKScore alloc]initWithLeaderboardIdentifier:identifier];
//设置得分
score.value=value;
//提交积分到Game Center服务器端,注意保存是异步的,并且支持离线提交
[GKScore reportScores:@[score] withCompletionHandler:^(NSError *error) {
if(error){
NSLog(@”保存积分过程中发生错误,错误信息:%@”,error.localizedDescription);
return ;
}
NSLog(@”添加积分成功.”);
}];
}
@end
3.最后就是成就视图控制器KCAchievementTableViewController:
在成就视图控制器定义achievements、achievementDescriptions、achievementImages三个属性分别表示成就、成就描述、成就图片,这三个属性均从主视图控制器中传递进来,然后使用UITableView展示成就、成就图片、成就进度。
创建GKAchievemnt对象(通过identifier属性来表示具体的成就)并指定完成度,通过调用GKAchievement的reportAchievements: withCompletionHandler:方法提交完成度到Game Center服务器。
程序如下
//
// KCAchievementTableViewController.m
// kctest
//
// Created by Kenshin Cui on 14/4/5.
// Copyright (c) 2015年 cmjstudio. All rights reserved.
//
@interface KCAchievementTableViewController ()
@end
@implementation KCAchievementTableViewController
}
//添加成就
- (IBAction)addAchievementClick:(UIBarButtonItem *)sender {
[self addAchievementWithIdentifier:kAchievementIdentifier1];
}
-(NSInteger)tableView:(UITableView )tableView sectionForSectionIndexTitle:(NSString )title atIndex:(NSInteger)index{
return 1;
}
-(NSInteger)tableView:(UITableView *)tableView numberOfRowsInSection:(NSInteger)section{
return self.achievementDescriptions.count;
}
-(UITableViewCell )tableView:(UITableView )tableView cellForRowAtIndexPath:(NSIndexPath *)indexPath{
static NSString *identtityKey=@”myTableViewCellIdentityKey1”;
UITableViewCell *cell=[self.tableView dequeueReusableCellWithIdentifier:identtityKey];
if(cell==nil){
cell=[[UITableViewCell alloc]initWithStyle:UITableViewCellStyleValue1 reuseIdentifier:identtityKey];
}
GKAchievementDescription *desciption=[self.achievementDescriptions objectAtIndex:indexPath.row];
cell.textLabel.text=desciption.title ;//成就标题
//如果已经获得成就则加载进度,否则为0
double percent=0.0;
GKAchievement *achievement=[self getAchievementWithIdentifier:desciption.identifier];
if (achievement) {
percent=achievement.percentComplete;
}
cell.detailTextLabel.text=[NSString stringWithFormat:@”%3.2f%%”,percent]; //成就完成度
//设置成就图片
cell.imageView.image=[self.achievementImages valueForKey:desciption.identifier];
return cell;
}
//添加指定类别的成就
-(void)addAchievementWithIdentifier:(NSString *)identifier{
if (![GKLocalPlayer localPlayer].isAuthenticated) {
NSLog(@”未获得用户授权.”);
return;
}
//创建成就
GKAchievement *achievement=[[GKAchievement alloc]initWithIdentifier:identifier];
achievement.percentComplete=100;//设置此成就完成度,100代表获得此成就
NSLog(@”%@”,achievement);
//保存成就到Game Center服务器,注意保存是异步的,并且支持离线提交
[GKAchievement reportAchievements:@[achievement] withCompletionHandler:^(NSError *error) {
if(error){
NSLog(@”保存成就过程中发生错误,错误信息:%@”,error.localizedDescription);
return ;
}
NSLog(@”添加成就成功.”);
}];
}
//根据标识获得已取得的成就
-(GKAchievement )getAchievementWithIdentifier:(NSString )identifier{
for (GKAchievement *achievement in self.achievements) {
if ([achievement.identifier isEqualToString:identifier]) {
return achievement;
}
}
return nil;
}
@end
运行效果:
GameCenter_Effect
注意首次使用游戏时由于没有对Game Center授权,会提示用户登录Game Center。
内购
大家都知道做iOS开发本身的收入有三种来源:出售应用、内购和广告。国内用户通常很少直接购买应用,因此对于开发者而言(特别是个人开发者),内购和广告收入就成了主要的收入来源。内购营销模式,通常软件本身是不收费的,但是要获得某些特权就必须购买一些道具,而内购的过程是由苹果官方统一来管理的,所以和Game Center一样,在开发内购程序之前要做一些准备工作(下面的准备工作主要是针对真机的,模拟器省略Provisioning Profile配置过程):
前四步和Game Center基本完全一致,只是在选择服务时不是选择Game Center而是要选择内购服务(In-App Purchase)。
到iTuens Connect中设置“App 内购买项目”,这里仍然以上面的“KCTest”项目为例,假设这个足球竞技游戏中有三种道具,分别为“强力手套”(增强防御)、“金球”(增加金球率)和“能量瓶”(提供足够体力),前两者是非消耗品只用一次性购买,后者是消耗品用完一次必须再次购买。In-App_Purchase_Config
到iTunes Connect中找到“协议、税务和银行业务”增加“iOS Paid Applications”协议,并完成所有配置后等待审核通过(注意这一步如果不设置在应用程序中无法获得可购买产品)。
在iOS“设置”中找到”iTunes Store与App Store“,在这里可以选择使用沙盒用户登录或者处于注销状态,但是一定注意不能使用真实用户登录,否则下面的购买测试不会成功,因为到目前为止我们的应用并没有真正通过苹果官方审核只能用沙盒测试用户(如果是模拟器不需要此项设置)。
有了上面的设置之后保证应用程序Bundle ID和iTunes Connect中的Bundle ID(或者说App ID中配置的Bundle ID)一致即可准备开发。
开发内购应用时需要使用StoreKit.framework,下面是这个框架中常用的几个类:
SKProduct:可购买的产品(例如上面设置的能量瓶、强力手套等),其productIdentifier属性对应iTunes Connect中配置的“产品ID“,但是此类不建议直接初始化使用,而是要通过SKProductRequest来加载可用产品(避免出现购买到无效的产品)。
SKProductRequest:产品请求类,主要用于加载产品列表(包括可用产品和不可用产品),通常加载完之后会通过其-(void)productsRequest:(SKProductsRequest )request didReceiveResponse:(SKProductsResponse )response代理方法获得响应,拿到响应中的可用产品。
SKPayment:产品购买支付类,保存了产品ID、购买数量等信息(注意与其对应的有一个SKMutablePayment对象,此对象可以修改产品数量等信息)。
SKPaymentQueue:产品购买支付队列,一旦将一个SKPayment添加到此队列就会向苹果服务器发送请求完成此次交易。注意交易的状态反馈不是通过代理完成的,而是通过一个交易监听者(类似于代理,可以通过队列的addTransactionObserver来设置)。
SKPaymentTransaction:一次产品购买交易,通常交易完成后支付队列会调用交易监听者的-(void)paymentQueue:(SKPaymentQueue )queue updatedTransactions:(NSArray )transaction方法反馈交易情况,并在此方法中将交易对象返回。
SKStoreProductViewController:应用程序商店产品展示视图控制器,用于在应用程序内部展示此应用在应用商店的情况。(例如可以使用它让用户在应用内完成评价,注意由于本次演示的示例程序没有正式提交到应用商店,所以在此暂不演示此控制器视图的使用)。
了解了以上几个常用的开发API之后,下面看一下应用内购买的流程:
通过SKProductRequest获得可购买产品SKProduct数组(SKProductRequest会根据程序的Bundle ID去对应的内购配置中获取指定ID的产品对象),这个过程中需要知道产品标识(必须和iTuens Connect中的对应起来),可以存储到沙盒中也可以存储到数据库中(下面的Demo中定义成了宏定义)。
请求完成后可以在SKProductRequest的-(void)productsRequest:(SKProductsRequest )request didReceiveResponse:(SKProductsResponse )response代理方法中获得SKProductResponse对象,这个对象中保存了products属性表示可用产品对象数组。
给SKPaymentQueue设置一个监听者来获得交易的状态(它类似于一个代理),监听者通过-(void)paymentQueue:(SKPaymentQueue )queue updatedTransactions:(NSArray )transaction方法反馈交易的变化状态(通常在此方法中可以根据交易成功、恢复成功等状态来做一些处理)。
一旦用户决定购买某个产品(SKProduct),就可以根据SKProduct来创建一个对应的支付对象SKPayment,只要将这个对象加入到SKPaymentQueue中就会触发购买行为(将订单提交到苹果服务器),一旦一个交易发生变化就会触发SKPaymentQueue监听者来反馈交易情况。
交易提交给苹果服务器之后如果不出意外的话通常就会弹出一个确认购买的对话框,引导用户完成交易,最终完成交易后(通常是完成交易,用户点击”好“)会调用交易监听者-(void)paymentQueue:(SKPaymentQueue )queue updatedTransactions:(NSArray )transaction方法将此次交易的所有交易对象SKPaymentTransaction数组返回,可以通过交易状态判断交易情况。
通常一次交易完成后需要对本次交易进行验证,避免越狱机器模拟苹果官方的反馈造成交易成功假象。苹果官方提供了一个验证的URL,只要将交易成功后的凭证(这个凭证从iOS7之后在交易成功会会存储到沙盒中)传递给这个地址就会给出交易状态和本次交易的详细信息,通过这些信息(通常可以根据交易状态、Bundler ID、ProductID等确认)可以标识出交易是否真正完成。
对于非消耗品,用户在完成购买后如果用户使用其他机器登录或者用户卸载重新安装应用后通常希望这些非消耗品能够恢复(事实上如果不恢复用户再次购买也不会成功)。调用SKPaymentQueue的restoreCompletedTransactions就可以完成恢复,恢复后会调用交易监听者的paymentQueue:(SKPaymentQueue )queue updatedTransactions:(NSArray )transaction方法反馈恢复的交易(也就是已购买的非消耗品交易,注意这个过程中如果没有非消耗品可恢复,是不会调用此方法的)。
下面通过一个示例程序演示内购和恢复的整个过程,程序界面大致如下:
主界面中展示了所有可购买产品和售价,以及购买情况。
选择一个产品点”购买“可以购买此商品,购买完成后刷新购买状态(如果是非消耗品则显示已购买,如果是消耗品则显示购买个数)。
程序卸载后重新安装可以点击”恢复购买“来恢复已购买的非消耗品。
In-App_Purchase_Layout
程序代码:
//
// KCMainTableViewController.m
// kctest
//
// Created by Kenshin Cui on 14/4/5.
// Copyright (c) 2015年 cmjstudio. All rights reserved.
//
//定义可以购买的产品ID,必须和iTunes Connect中设置的一致
@interface KCMainTableViewController ()
(void)viewDidLoad {
[super viewDidLoad];
[self loadProducts];
[self addTransactionObjserver];
}
//购买产品
- (IBAction)purchaseClick:(UIBarButtonItem *)sender {
NSString *productIdentifier=self.products.allKeys[self.selectedRow];
SKProduct *product=self.products[productIdentifier];
if (product) {
[self purchaseProduct:product];
}else{
NSLog(@”没有可用商品.”);
}
}
//恢复购买
- (IBAction)restorePurchaseClick:(UIBarButtonItem *)sender {
[self restoreProduct];
}
(NSInteger)numberOfSectionsInTableView:(UITableView *)tableView {
return 1;
}
(NSInteger)tableView:(UITableView *)tableView numberOfRowsInSection:(NSInteger)section {
return self.products.count;
}
(UITableViewCell )tableView:(UITableView )tableView cellForRowAtIndexPath:(NSIndexPath *)indexPath {
static NSString *identtityKey=@”myTableViewCellIdentityKey1”;
UITableViewCell *cell=[self.tableView dequeueReusableCellWithIdentifier:identtityKey];
if(cell==nil){
cell=[[UITableViewCell alloc]initWithStyle:UITableViewCellStyleValue1 reuseIdentifier:identtityKey];
}
cell.accessoryType=UITableViewCellAccessoryNone;
NSString *key=self.products.allKeys[indexPath.row];
SKProduct *product=self.products[key];
NSString *purchaseString;
NSUserDefaults *defaults=[NSUserDefaults standardUserDefaults];
if ([product.productIdentifier isEqualToString:kProductID3]) {
purchaseString=[NSString stringWithFormat:@”已购买%i个”,[defaults integerForKey:product.productIdentifier]];
}else{
if([defaults boolForKey:product.productIdentifier]){
purchaseString=@”已购买”;
}else{
purchaseString=@”尚未购买”;
}
}
cell.textLabel.text=[NSString stringWithFormat:@”%@(%@)”,product.localizedTitle,purchaseString] ;
cell.detailTextLabel.text=[NSString stringWithFormat:@”%@”,product.price];
return cell;
}
-(void)tableView:(UITableView )tableView didSelectRowAtIndexPath:(NSIndexPath )indexPath{
UITableViewCell *currentSelected=[tableView cellForRowAtIndexPath:indexPath];
currentSelected.accessoryType=UITableViewCellAccessoryCheckmark;
self.selectedRow=indexPath.row;
}
-(void)tableView:(UITableView )tableView didDeselectRowAtIndexPath:(NSIndexPath )indexPath{
UITableViewCell *currentSelected=[tableView cellForRowAtIndexPath:indexPath];
currentSelected.accessoryType=UITableViewCellAccessoryNone;
}
/**
* 产品请求完成后的响应方法
*
* @param request 请求对象
* @param response 响应对象,其中包含产品信息
*/
-(void)productsRequest:(SKProductsRequest )request didReceiveResponse:(SKProductsResponse )response{
//保存有效的产品
_products=[NSMutableDictionary dictionary];
[response.products enumerateObjectsUsingBlock:^(id obj, NSUInteger idx, BOOL *stop) {
SKProduct *product=obj;
[_products setObject:product forKey:product.productIdentifier];
}];
//由于这个过程是异步的,加载成功后重新刷新表格
[self.tableView reloadData];
}
-(void)requestDidFinish:(SKRequest *)request{
NSLog(@”请求完成.”);
}
-(void)request:(SKRequest )request didFailWithError:(NSError )error{
if (error) {
NSLog(@”请求过程中发生错误,错误信息:%@”,error.localizedDescription);
}
}
/**
* 交易状态更新后执行
*
* @param queue 支付队列
* @param transactions 交易数组,里面存储了本次请求的所有交易对象
*/
-(void)paymentQueue:(SKPaymentQueue )queue updatedTransactions:(NSArray )transactions{
[transactions enumerateObjectsUsingBlock:^(id obj, NSUInteger idx, BOOL *stop) {
SKPaymentTransaction *paymentTransaction=obj;
if (paymentTransaction.transactionState==SKPaymentTransactionStatePurchased){//已购买成功
NSLog(@”交易\”%@\”成功.”,paymentTransaction.payment.productIdentifier);
//购买成功后进行验证
[self verifyPurchaseWithPaymentTransaction];
//结束支付交易
[queue finishTransaction:paymentTransaction];
}else if(paymentTransaction.transactionState==SKPaymentTransactionStateRestored){//恢复成功,对于非消耗品才能恢复,如果恢复成功则transaction中记录的恢复的产品交易
NSLog(@”恢复交易\”%@\”成功.”,paymentTransaction.payment.productIdentifier);
[queue finishTransaction:paymentTransaction];//结束支付交易
        //恢复后重新写入偏好配置,重新加载UITableView
        [[NSUserDefaults standardUserDefaults]setBool:YES forKey:paymentTransaction.payment.productIdentifier];
        [self.tableView reloadData];
    }else if(paymentTransaction.transactionState==SKPaymentTransactionStateFailed){
        if (paymentTransaction.error.code==SKErrorPaymentCancelled) {//如果用户点击取消
            NSLog(@"取消购买.");
        }
        NSLog(@"ErrorCode:%i",paymentTransaction.error.code);
    }

}];
}
//恢复购买完成
-(void)paymentQueueRestoreCompletedTransactionsFinished:(SKPaymentQueue *)queue{
NSLog(@”恢复完成.”);
}
/**
* 添加支付观察者监控,一旦支付后则会回调观察者的状态更新方法:
-(void)paymentQueue:(SKPaymentQueue )queue updatedTransactions:(NSArray )transactions
*/
-(void)addTransactionObjserver{
//设置支付观察者(类似于代理),通过观察者来监控购买情况
[[SKPaymentQueue defaultQueue] addTransactionObserver:self];
}
/**
* 加载所有产品,注意产品一定是从服务器端请求获得,因为有些产品可能开发人员知道其存在性,但是不经过审核是无效的;
*/
-(void)loadProducts{
//定义要获取的产品标识集合
NSSet *sets=[NSSet setWithObjects:kProductID1,kProductID2,kProductID3, nil];
//定义请求用于获取产品
SKProductsRequest *productRequest=[[SKProductsRequest alloc]initWithProductIdentifiers:sets];
//设置代理,用于获取产品加载状态
productRequest.delegate=self;
//开始请求
[productRequest start];
}
/**
* 购买产品
*
* @param product 产品对象
*/
-(void)purchaseProduct:(SKProduct *)product{
//如果是非消耗品,购买过则提示用户
NSUserDefaults *defaults=[NSUserDefaults standardUserDefaults];
if ([product.productIdentifier isEqualToString:kProductID3]) {
NSLog(@”当前已经购买\”%@\” %i 个.”,kProductID3,[defaults integerForKey:product.productIdentifier]);
}else if([defaults boolForKey:product.productIdentifier]){
NSLog(@”\”%@\”已经购买过,无需购买!”,product.productIdentifier);
return;
}
//创建产品支付对象
SKPayment *payment=[SKPayment paymentWithProduct:product];
//支付队列,将支付对象加入支付队列就形成一次购买请求
if (![SKPaymentQueue canMakePayments]) {
    NSLog(@"设备不支持购买.");
    return;
}
SKPaymentQueue *paymentQueue=[SKPaymentQueue defaultQueue];
//添加都支付队列,开始请求支付
// [self addTransactionObjserver];
[paymentQueue addPayment:payment];
}
/**
* 恢复购买,对于非消耗品如果应用重新安装或者机器重置后可以恢复购买
* 注意恢复时只能一次性恢复所有非消耗品
*/
-(void)restoreProduct{
SKPaymentQueue *paymentQueue=[SKPaymentQueue defaultQueue];
//设置支付观察者(类似于代理),通过观察者来监控购买情况
// [paymentQueue addTransactionObserver:self];
//恢复所有非消耗品
[paymentQueue restoreCompletedTransactions];
}
/**
* 验证购买,避免越狱软件模拟苹果请求达到非法购买问题
*
*/
-(void)verifyPurchaseWithPaymentTransaction{
//从沙盒中获取交易凭证并且拼接成请求体数据
NSURL *receiptUrl=[[NSBundle mainBundle] appStoreReceiptURL];
NSData *receiptData=[NSData dataWithContentsOfURL:receiptUrl];
NSString *receiptString=[receiptData base64EncodedStringWithOptions:NSDataBase64EncodingEndLineWithLineFeed];//转化为base64字符串

NSString *bodyString = [NSString stringWithFormat:@"{\"receipt-data\" : \"%@\"}", receiptString];//拼接请求数据
NSData *bodyData = [bodyString dataUsingEncoding:NSUTF8StringEncoding];

//创建请求到苹果官方进行购买验证
NSURL *url=[NSURL URLWithString:kSandboxVerifyURL];
NSMutableURLRequest *requestM=[NSMutableURLRequest requestWithURL:url];
requestM.HTTPBody=bodyData;
requestM.HTTPMethod=@"POST";
//创建连接并发送同步请求
NSError *error=nil;
NSData *responseData=[NSURLConnection sendSynchronousRequest:requestM returningResponse:nil error:&error];
if (error) {
    NSLog(@"验证购买过程中发生错误,错误信息:%@",error.localizedDescription);
    return;
}
NSDictionary *dic=[NSJSONSerialization JSONObjectWithData:responseData options:NSJSONReadingAllowFragments error:nil];
NSLog(@"%@",dic);
if([dic[@"status"] intValue]==0){
    NSLog(@"购买成功!");
    NSDictionary *dicReceipt= dic[@"receipt"];
    NSDictionary *dicInApp=[dicReceipt[@"in_app"] firstObject];
    NSString *productIdentifier= dicInApp[@"product_id"];//读取产品标识
    //如果是消耗品则记录购买数量,非消耗品则记录是否购买过
    NSUserDefaults *defaults=[NSUserDefaults standardUserDefaults];
    if ([productIdentifier isEqualToString:kProductID3]) {
        int purchasedCount=[defaults integerForKey:productIdentifier];//已购买数量
        [[NSUserDefaults standardUserDefaults] setInteger:(purchasedCount+1) forKey:productIdentifier];
    }else{
        [defaults setBool:YES forKey:productIdentifier];
    }
    [self.tableView reloadData];
    //在此处对购买记录进行存储,可以存储到开发商的服务器端
}else{
    NSLog(@"购买失败,未通过验证!");
}
}
@end
运行效果(这是程序在卸载后重新安装的运行效果,卸载前已经购买”强力手套“,因此程序运行后点击了”恢复购买“):
In_AppPurchase_Effect
扩展–广告
上面也提到做iOS开发另一收益来源就是广告,在iOS上有很多广告服务可以集成,使用比较多的就是苹果的iAd、谷歌的Admob,下面简单演示一下如何使用iAd来集成广告。使用iAd集成广告的过程比较简单,首先引入iAd.framework框架,然后创建ADBannerView来展示广告,通常会设置ADBannerView的代理方法来监听广告点击并在广告加载失败时隐藏广告展示控件。下面的代码简单的演示了这个过程:
//
// ViewController.m
// kctest
//
// Created by Kenshin Cui on 14/4/5.
// Copyright (c) 2015年 cmjstudio. All rights reserved.
//
//广告加载完成
-(void)bannerViewDidLoadAd:(ADBannerView *)banner{
NSLog(@”广告加载完成.”);
}
//点击Banner后离开之前,返回NO则不会展开全屏广告
-(BOOL)bannerViewActionShouldBegin:(ADBannerView *)banner willLeaveApplication:(BOOL)willLeave{
NSLog(@”点击Banner后离开之前.”);
return YES;
}
//点击banner后全屏显示,关闭后调用
-(void)bannerViewActionDidFinish:(ADBannerView *)banner{
NSLog(@”广告已关闭.”);
}
//获取广告失败
-(void)bannerView:(ADBannerView )banner didFailToReceiveAdWithError:(NSError )error{
NSLog(@”加载广告失败.”);
self.advertiseBanner.hidden=YES;
}
@end
运行效果:
iAd
iCloud
iCloud是苹果提供的云端服务,用户可以将通讯录、备忘录、邮件、照片、音乐、视频等备份到云服务器并在各个苹果设备间直接进行共享而无需关心数据同步问题,甚至即使你的设备丢失后在一台新的设备上也可以通过Apple ID登录同步。当然这些内容都是iOS内置的功能,那么对于开放者如何利用iCloud呢?苹果已经将云端存储功能开放给开发者,利用iCloud开发者可以存储两类数据:用户文档和应用数据、应用配置项。前者主要用于一些用户文档、文件的存储,后者更类似于日常开放中的偏好设置,只是这些配置信息会同步到云端。
要进行iCloud开发同样需要一些准备工作(下面的准备工作主要是针对真机的,模拟器省略Provisioning Profile配置过程):
1、2步骤仍然是创建App ID启用iCloud服务、生成对应的配置(Provisioning Profile),这个过程中Bundle ID可以使用通配符(Data Protection、iCloud、Inter-App Audio、Passbook服务在创建App ID时其中的Bundle ID是可以使用通配ID的)。
3.在Xcode中创建项目(假设项目名称为“kctest”)并在项目的Capabilities中找到iCloud并打开。这里需要注意的就是由于在此应用中要演示文档存储和首选项存储,因此在Service中勾选“Key-value storae”和“iCloud Documents”:
iCloud_CapabilitiesConfig
在项目中会自动生成一个”kctest.entitlements”配置文件,这个文档配置了文档存储容器标识、键值对存储容器标识等信息。
iCloud_EntiementsFile
4.无论是真机还是模拟器都必须在iOS“设置”中找到iCloud设置登录账户,注意这个账户不必是沙盒测试用户。
A.首先看一下如何进行文档存储。文档存储主要是使用UIDocument类来完成,这个类提供了新建、修改(其实在API中是覆盖操作)、查询文档、打开文档、删除文档的功能。
UIDocument对文档的新增、修改、删除、读取全部基于一个云端URL来完成(事实上在开发过程中新增、修改只是一步简单的保存操作),对于开发者而言没有本地和云端之分,这样大大简化了开发过程。这个URL可以通过NSFileManager的URLForUbiquityContainerIdentifier:方法获取,identifier是云端存储容器的唯一标识,如果传入nil则代表第一个容器(事实上这个容器可以通过前面生成的“kctest.entiements”中的Ubiquity Container Identifiers来获取。如上图可以看到这是一个数组,可以配置多个容器,例如我们的第一个容器标识是“iCloud.
-(void)saveToURL:forSaveOperation:completionHandler::将指定URL的文档保存到iCloud(可以是新增或者覆盖,通过saveOperation参数设定)。
-(void)openWithCompletionHandler::打开当前文档。
注意:删除一个iCloud文档是使用NSFileManager的removeItemAtURL:error:方法来完成的。
由于实际开发过程中数据的存储和读取情况是复杂的,因此UIDocument在设计时并没有提供统一的存储方式来保存数据,而是希望开发者自己继承UIDocument类并重写-(id)contentsForType:(NSString )typeName error:(NSError *__autoreleasing )outError和-(BOOL)loadFromContents:(id)contents ofType:(NSString )typeName error:(NSError *__autoreleasing )outError方法来根据不同的文档类型自己来操作数据(contents)。这两个方法分别在保存文档(-(void)saveToURL:forSaveOperation:completionHandler:)和打开文档(-(void)openWithCompletionHandler:)时调用。通常在子类中会定义一个属性A来存储文档数据,当保存文档时,会通过-(id)contentsForType:(NSString )typeName error:(NSError *__autoreleasing )outError方法将A转化为NSData或者NSFileWrapper(UIDocument保存数据的本质就是保存转化得到的NSData或者NSFileWrapper);当打开文档时,会通过-(BOOL)loadFromContents:(id)contents ofType:(NSString )typeName error:(NSError *__autoreleasing )outError方法将云端下载的NSData或者NSFileWrapper数据转化为A对应类型的数据。为了方便演示下面简单定义一个继承自UIDocument的KCDocument类,在其中定义一个data属性存储数据:
//
// KCDocument.m
// kctest
//
// Created by Kenshin Cui on 14/4/5.
// Copyright (c) 2015年 cmjstudio. All rights reserved.
//
@interface KCDocument()
@end
@implementation KCDocument
/**
* 保存时调用
*
* @param typeName <#typeName description#>
* @param outError <#outError description#>
*
* @return <#return value description#>
*/
-(id)contentsForType:(NSString )typeName error:(NSError *__autoreleasing )outError{
if (self.data) {
return [self.data copy];
}
return [NSData data];
}
/**
* 读取数据时调用
*
* @param contents <#contents description#>
* @param typeName <#typeName description#>
* @param outError <#outError description#>
*
* @return <#return value description#>
*/
-(BOOL)loadFromContents:(id)contents ofType:(NSString )typeName error:(NSError *__autoreleasing )outError{
self.data=[contents copy];
return true;
}
@end
如果要加载iCloud中的文档列表就需要使用另一个类NSMetadataQuery,通常考虑到网络的原因并不会一次性加载所有数据,而利用NSMetadataQuery并指定searchScopes为NSMetadataQueryUbiquitousDocumentScope来限制查找iCloud文档数据。使用NSMetadataQuery还可以通过谓词限制搜索关键字等信息,并在搜索完成之后通过通知的形式通知客户端搜索的情况。
大家都知道微软的OneNote云笔记本软件,通过它可以实现多种不同设置间的笔记同步,这里就简单实现一个基于iCloud服务的笔记软件。在下面的程序中实现笔记的新增、修改、保存、读取等操作。程序界面大致如下,点击界面右上方增加按钮增加一个笔记,点击某个笔记可以查看并编辑。
iCloud_layout
在主视图控制器首先查询所有iCloud保存的文档并在查询通知中遍历查询结果保存文档名称和创建日期到UITableView展示;其次当用户点击了增加按钮会调用KCDocument完成文档添加并导航到文档详情界面编辑文档内容。
//
// KCMainTableViewController.m
// kctest
//
// Created by Kenshin Cui on 14/4/5.
// Copyright (c) 2015年 cmjstudio. All rights reserved.
//
@interface KCMainTableViewController ()
@property (strong,nonatomic) KCDocument *document;//当前选中的管理对象
@property (strong,nonatomic) NSMutableDictionary *files; //现有文件名、创建日期集合
@property (strong,nonatomic) NSMetadataQuery *dataQuery;//数据查询对象,用于查询iCloud文档
@end
@implementation KCMainTableViewController
(void)viewDidLoad {
[super viewDidLoad];
[self loadDocuments];
}
//新建文档
- (IBAction)addDocumentClick:(UIBarButtonItem *)sender {
UIAlertController *promptController=[UIAlertController alertControllerWithTitle:@”KCTest” message:@”请输入笔记名称” preferredStyle:UIAlertControllerStyleAlert];
[promptController addTextFieldWithConfigurationHandler:^(UITextField *textField) {
textField.placeholder=@”笔记名称”;
}];
UIAlertAction *okAction=[UIAlertAction actionWithTitle:@”确定” style:UIAlertActionStyleDefault handler:^(UIAlertAction *action) {
UITextField *textField= promptController.textFields[0];
[self addDocument:textField.text];
}];
[promptController addAction:okAction];
UIAlertAction *cancelAction=[UIAlertAction actionWithTitle:@”取消” style:UIAlertActionStyleCancel handler:^(UIAlertAction *action) {
}];
[promptController addAction:cancelAction];
[self presentViewController:promptController animated:YES completion:nil];
}
-(NSMetadataQuery *)dataQuery{
if (!_dataQuery) {
//创建一个iCloud查询对象
_dataQuery=[[NSMetadataQuery alloc]init];
_dataQuery.searchScopes=@[NSMetadataQueryUbiquitousDocumentsScope];
//注意查询状态是通过通知的形式告诉监听对象的
[[NSNotificationCenter defaultCenter] addObserver:self selector:@selector(metadataQueryFinish:) name:NSMetadataQueryDidFinishGatheringNotification object:_dataQuery];//数据获取完成通知
[[NSNotificationCenter defaultCenter] addObserver:self selector:@selector(metadataQueryFinish:) name:NSMetadataQueryDidUpdateNotification object:_dataQuery];//查询更新通知
}
return _dataQuery;
}
/**
* 取得云端存储文件的地址
*
* @param fileName 文件名,如果文件名为nil则重新创建一个url
*
* @return 文件地址
*/
-(NSURL )getUbiquityFileURL:(NSString )fileName{
//取得云端URL基地址(参数中传入nil则会默认获取第一个容器)
NSURL *url= [[NSFileManager defaultManager] URLForUbiquityContainerIdentifier:kContainerIdentifier];
//取得Documents目录
url=[url URLByAppendingPathComponent:@”Documents”];
//取得最终地址
url=[url URLByAppendingPathComponent:fileName];
return url;
}
/**
* 添加文档到iCloud
*
* @param fileName 文件名称(不包括后缀)
*/
-(void)addDocument:(NSString *)fileName{
//取得保存URL
fileName=[NSString stringWithFormat:@”%@.txt”,fileName];
NSURL *url=[self getUbiquityFileURL:fileName];
/**
 创建云端文档操作对象
 */
KCDocument *document= [[KCDocument alloc]initWithFileURL:url];
[document saveToURL:url forSaveOperation:UIDocumentSaveForCreating completionHandler:^(BOOL success) {
    if (success) {
        NSLog(@"保存成功.");
        [self loadDocuments];
        [self.tableView reloadData];
        self.document=document;
        [self performSegueWithIdentifier:@"noteDetail" sender:self];
    }else{
        NSLog(@"保存失败.");
    }

}];
}
/**
* 加载文档列表
*/
-(void)loadDocuments{
[self.dataQuery startQuery];
}
/**
* 获取数据完成后的通知执行方法
*
* @param notification 通知对象
*/
-(void)metadataQueryFinish:(NSNotification *)notification{
NSLog(@”数据获取成功!”);
NSArray *items=self.dataQuery.results;//查询结果集
self.files=[NSMutableDictionary dictionary];
//变量结果集,存储文件名称、创建日期
[items enumerateObjectsUsingBlock:^(id obj, NSUInteger idx, BOOL *stop) {
NSMetadataItem *item=obj;
NSString *fileName=[item valueForAttribute:NSMetadataItemFSNameKey];
NSDate *date=[item valueForAttribute:NSMetadataItemFSContentChangeDateKey];
NSDateFormatter *dateformate=[[NSDateFormatter alloc]init];
dateformate.dateFormat=@”YY-MM-dd HH:mm”;
NSString *dateString= [dateformate stringFromDate:date];
[self.files setObject:dateString forKey:fileName];
}];
[self.tableView reloadData];
}
-(void)removeDocument:(NSString *)fileName{
NSURL *url=[self getUbiquityFileURL:fileName];
NSError *error=nil;
//删除文件
[[NSFileManager defaultManager] removeItemAtURL:url error:&error];
if (error) {
NSLog(@”删除文档过程中发生错误,错误信息:%@”,error.localizedDescription);
}
[self.files removeObjectForKey:fileName];//从集合中删除
}
(NSInteger)numberOfSectionsInTableView:(UITableView *)tableView {
return 1;
}
(NSInteger)tableView:(UITableView *)tableView numberOfRowsInSection:(NSInteger)section {
return self.files.count;
}
(UITableViewCell )tableView:(UITableView )tableView cellForRowAtIndexPath:(NSIndexPath *)indexPath {
static NSString *identtityKey=@”myTableViewCellIdentityKey1”;
UITableViewCell *cell=[self.tableView dequeueReusableCellWithIdentifier:identtityKey];
if(cell==nil){
cell=[[UITableViewCell alloc]initWithStyle:UITableViewCellStyleValue1 reuseIdentifier:identtityKey];
cell.accessoryType=UITableViewCellAccessoryDisclosureIndicator;
}
NSArray *fileNames=self.files.allKeys;
NSString *fileName=fileNames[indexPath.row];
cell.textLabel.text=fileName;
cell.detailTextLabel.text=[self.files valueForKey:fileName];
return cell;
}
(void)tableView:(UITableView )tableView commitEditingStyle:(UITableViewCellEditingStyle)editingStyle forRowAtIndexPath:(NSIndexPath )indexPath {
if (editingStyle == UITableViewCellEditingStyleDelete) {
UITableViewCell *cell=[self.tableView cellForRowAtIndexPath:indexPath];
[self removeDocument:cell.textLabel.text];
[tableView deleteRowsAtIndexPaths:@[indexPath] withRowAnimation:UITableViewRowAnimationFade];
} else if (editingStyle == UITableViewCellEditingStyleInsert) {
// Create a new instance of the appropriate class, insert it into the array, and add a new row to the table view
}
}
-(void)tableView:(UITableView )tableView didSelectRowAtIndexPath:(NSIndexPath )indexPath{
UITableViewCell *cell=[self.tableView cellForRowAtIndexPath:indexPath];
NSURL *url=[self getUbiquityFileURL:cell.textLabel.text];
self.document=[[KCDocument alloc]initWithFileURL:url];
[self performSegueWithIdentifier:@”noteDetail” sender:self];
}
@end
当新增一个笔记或选择一个已存在的笔记后可以查看、保存笔记内容。
//
// ViewController.m
// kctest
//
// Created by Kenshin Cui on 14/4/5.
// Copyright (c) 2015年 cmjstudio. All rights reserved.
//
@interface KCDetailViewController ()
@property (weak, nonatomic) IBOutlet UITextView *textView;
@end
@implementation KCDetailViewController
-(void)viewWillDisappear:(BOOL)animated{
[super viewWillDisappear:animated];
//根据首选项来确定离开当前控制器视图是否自动保存
BOOL autoSave=[[NSUbiquitousKeyValueStore defaultStore] boolForKey:kSettingAutoSave];
if (autoSave) {
[self saveDocument];
}
}
-(void)setupUI{
UIBarButtonItem *rightButtonItem=[[UIBarButtonItem alloc]initWithBarButtonSystemItem:UIBarButtonSystemItemSave target:self action:@selector(saveDocument)];
self.navigationItem.rightBarButtonItem=rightButtonItem;
if (self.document) {
    //打开文档,读取文档
    [self.document openWithCompletionHandler:^(BOOL success) {
        if(success){
            NSLog(@"读取数据成功.");
            NSString *dataText=[[NSString alloc]initWithData:self.document.data encoding:NSUTF8StringEncoding];
            self.textView.text=dataText;
        }else{
            NSLog(@"读取数据失败.");
        }
    }];
}
}
/**
* 保存文档
*/
-(void)saveDocument{
if (self.document) {
NSString *dataText=self.textView.text;
NSData *data=[dataText dataUsingEncoding:NSUTF8StringEncoding];
self.document.data=data;
[self.document saveToURL:self.document.fileURL forSaveOperation:UIDocumentSaveForOverwriting completionHandler:^(BOOL success) {
NSLog(@”保存成功!”);
}];
}
}
@end
到目前为止都是关于如何使用iCloud来保存文档的内容,上面也提到过还可以使用iCloud来保存首选项,这在很多情况下通常很有用,特别是对于开发了iPhone版又开发了iPad版的应用,如果用户在一台设备上进行了首选项配置之后到另一台设备上也能使用是多么优秀的体验啊。相比文档存储,首选项存储要简单的多,在上面“kctest.entitlements”中可以看到首选项配置并非像文档一样可以包含多个容器,这里只有一个Key-Value Store,通常使用NSUbiquitousKeyValueStore的defaultStore来获取,它的使用方法和NSUserDefaults几乎完全一样,当键值对存储发生变化后可以通过NSUbiquitousKeyValueStoreDidChangeExternallyNotification等获得对应的通知。在上面的笔记应用中有一个”设置“按钮用于设置退出笔记详情视图后是否自动保存,这个选项就是通过iCloud的首选项来存储的。
//
// KCSettingTableViewController.m
// kctest
//
// Created by Kenshin Cui on 14/4/5.
// Copyright (c) 2015年 cmjstudio. All rights reserved.
//
@interface KCSettingTableViewController ()
@property (weak, nonatomic) IBOutlet UISwitch *autoSaveSetting;
@end
@implementation KCSettingTableViewController
-(void)setupUI{
//设置iCloud中的首选项值
NSUbiquitousKeyValueStore *defaults=[NSUbiquitousKeyValueStore defaultStore];
self.autoSaveSetting.on= [defaults boolForKey:kSettingAutoSave];
//添加存储变化通知
[[NSNotificationCenter defaultCenter] addObserver:self selector:@selector(
keyValueStoreChange:) name:NSUbiquitousKeyValueStoreDidChangeExternallyNotification object:defaults];
}
/**
* key-value store发生变化或存储空间不足
*
* @param notification 通知对象
*/
-(void)keyValueStoreChange:(NSNotification *)notification{
NSLog(@”Key-value store change…”);
}
/**
* 设置首选项
*
* @param value 是否自动保存
*/
-(void)setSetting:(BOOL)value{
//iCloud首选项设置
NSUbiquitousKeyValueStore *defaults=[NSUbiquitousKeyValueStore defaultStore];
[defaults setBool:value forKey:kSettingAutoSave];
[defaults synchronize];//同步
}
@end
运行效果:
iCloud_Effect
注意:所有的存储到iCloud的文档、首选项都是首先存储到本地,然后通过daemon进程同步到iCloud的,保存、读取的文件都是本地同步副本并不一定是真实的iCloud存储文件。
Passbook
Passbook是苹果推出的一个管理登机牌、会员卡、电影票、优惠券等信息的工具。Passbook就像一个卡包,用于存放你的购物卡、积分卡、电影票、礼品卡等,而这些票据就是一个“Pass”。和物理票据不同的是你可以动态更新Pass的信息,提醒用户优惠券即将过期;甚至如果你的Pass中包含地理位置信息的话当你到达某个商店还可以动态提示用户最近商店有何种优惠活动;当用户将一张团购券添加到Passbook之后,用户到了商店之后Passbook可以自动弹出团购券,店员扫描之后进行消费、积分等等都是Passbook的应用场景。Passbook可以管理多类票据,苹果将其划分为五类:
登机牌(Boarding pass)
优惠券(Coupon)
活动票据、入场券(Event ticket)
购物卡、积分卡(Store Cards)
普通票据(自定义票据)(Generic pass)
苹果的划分一方面出于不同票据功能及展示信息不同,另一方面也是为了统一票据的设计,下面是苹果官方关于五种票据的布局设计布局:
Passbook_LayoutCompare
既然一个票据就是一个Pass,那么什么是Pass呢?在iOS中一个Pass其实就是一个.pkpass文件,事实上它是一个Zip压缩包,只是这个压缩包要按照一定的目录结构来设计,下面是一个Pass包的目录结构(注意不同的票据类型会适当删减):
Pass Package
├── icon.png
├── icon@2x.png
├── logo.png
├── logo@2x.png
├── thumbnail.png
├── thumbnail@2x.png
├── background.png
├── background@2x.png
├── strip.png
├── strip@2x.png
├── manifest.json
├── fr.lproj
│ └── pass.strings
├── de.lproj
│ └── pass.strings
├── pass.json
└── signature
也就是说在Passbook应用中显示的内容其实就是一个按照上面文件列表来组织的一个压缩包。在.pkpass文件中除了图标icon、缩略图thumbnail和logo外最重要的就是pass.json、manifest.json和signature。
1.pass.json
这个文件描述了Pass的布局、颜色设置、文本描述信息等,也就是说具体Pass包如何展示其实就是通过这个JSON文件来配置的,关于pass.json的具体配置项在此不再一一介绍,大家可以查看苹果官方帮助文档“Pass Design and Creation”。这里主要说一下其中关键的几个配置项:
passTypeIdentifier:pass唯一标识,这个值类似于App ID,需要从开发者中心创建,并且这个标识必须以“pass”开头(例如下面的示例中取名为“pass.com.cmjstudio.mypassbook”)。
teamIdentifier:团队标识,申请苹果开发者账号时会分配一个唯一的团队标识(可以在苹果开发者中心–查看账户信息中查看”Team ID“)。
barcode:二维码信息配置,主要指定二维码内容、类型、编码格式。
locations:地理位置信息,可以配置相关位置的文本信息。
2.manifest.json
manifest.json从名称可以看出这个文件主要用来描述当前Pass包中的文件目录组织结构。这个文件记录了除“manifest.json”、“signature”外的文件和对应的sha1哈希值(注意:哈希值可以通过”openssl sha1 [ 文件路径]“命令获得)。
3.signature
signature是一个签名文件。虽然manifest.json存储了哈希值,但是大家都知道hash算法是公开的,如何保证一个pass包是合法的,未经修改的呢?那就是使用一个签名文件来验证。
了解了以上内容后基本上对于如何定义一个pass包有了简单的概念。有了pass包之后对于添加pass到passbook应用是比较简单的。但事实上通常大家看到的passbook应用中添加的pass包并不是手动组织的,而是通过程序来完成pass包制作的。举例来说:如果你在美团上购买一张电影票之后,会告诉你一个优惠码,这个优惠码会显示到pass中。由于这个优惠码是动态生成的,所以直接手动制作出一个pass包是不现实的。通常情况下pass包的生成都是通过后台服务器动态生成,然后返回给iOS客户端来读取和添加的,手动制作pass包的情况是比较少的,除非你的票据信息是一成不变的。当然为了演示Passbook应用,这里还是会以手动方式演示一个pass包的生成过程,了解了这个过程之后相信在服务器端通过一些后台程序生成一个pass包也不在话下(下面的生成过程均可通过服务器端编程来实现)。
同其他Apple服务开发类似,做Passbook开发同样需要一些准备工作:
1. 在苹果开发者中心新建Pass Type ID(例如这里新建一个“pass.com.cmjstudio.mypassbook”),并且基于这个Pass Type ID创建一个Passbook证书(在mac上找到钥匙串,选择”从证书颁发机构请求证书“,生成一个证书请求文件;将此文件上传到对应的Pass Type ID下生成证书文件)如下
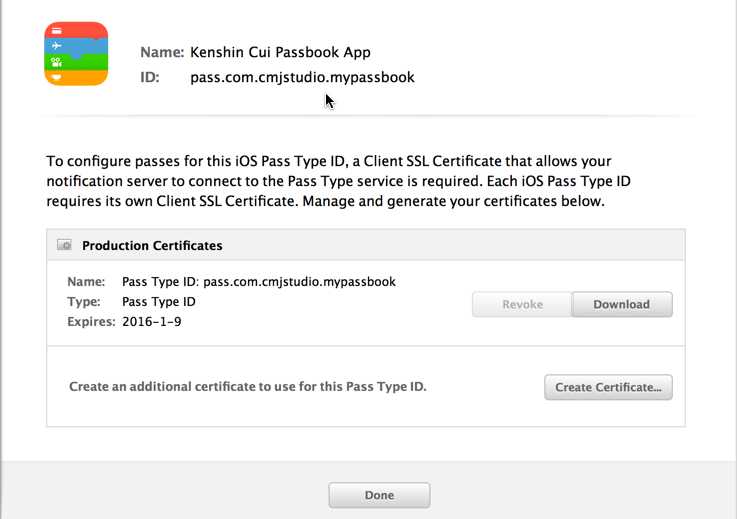
下载证书后,将此证书导入Mac中(此处配置的Pass Type ID对应pass.json中的”passTypeIdentitifier“,此证书用于生成签名文件signature。)。
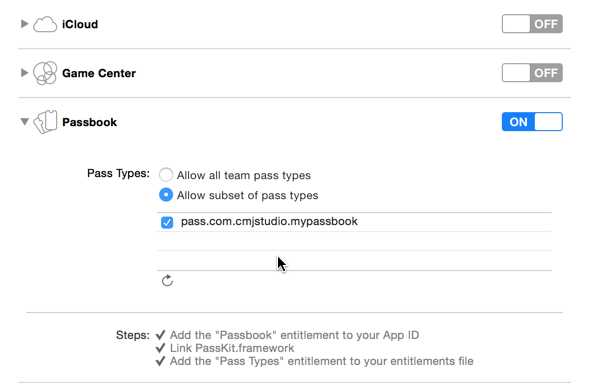
{
    "formatVersion":1,
    "passTypeIdentifier":"pass.com.cmjstudio.mypassbook",
    "serialNumber":"54afe978584e3",
    "teamIdentifier":"JB74M3J7RY",
    "authenticationToken":"bc83dde3304d766d5b1aea631827f84c",
    "barcode":{"message":"userName KenshinCui","altText":"会员详情见背面","format":"PKBarcodeFormatQR","messageEncoding":"iso-8859-1"},
    "locations":[
                 {"longitude":-122.3748889,"latitude":37.6189722},{"longitude":-122.03118,"latitude":37.33182}],
    "organizationName":"CMJ Coffee",
    "logoText":"CMJ Coffee",
    "description":"",
    "foregroundColor":"rgb(2,2,4)",
    "backgroundColor":"rgb(244,244,254)",
    "storeCard":{
        "headerFields":[{"key":"date","label":"余额","value":"¥8888.50"}],
        "secondaryFields":[{"key":"more","label":"VIP会员","value":"Kenshin Cui"}],
        "backFields":[
                      {"key":"records","label":"消费记录(最近10次)","value":" 9/23    ¥107.00     无糖冰美式\n 9/21    ¥58.00      黑魔卡\n 8/25    ¥44.00      魔卡\n 8/23    ¥107.00     无糖冰美式\n 8/18    ¥107.00     无糖冰美式\n 7/29    ¥58.00      黑魔卡\n 7/26    ¥44.00      魔卡\n 7/13    ¥58.00      黑魔卡\n 7/11    ¥44.00      魔卡\n 6/20    ¥44.00      魔卡\n"},
                      {"key":"phone","label":"联系方式","value":"4008-888-88"},
                      {"key":"terms","label":"会员规则","value":"(1)本电子票涉及多个环节,均为人工操作,用户下单后,1-2个工作日内下发,电子票并不一定能立即收到,建议千品用户提前1天购买,如急需使用,请谨慎下单; \n(2)此劵为电子劵,属特殊产品,一经购买不支持退款(敬请谅解); \n(3)特别注意:下单时请将您需要接收电子票的手机号码,填入收件人信息,如号码填写错误,损失自负;购买成功后,商家于周一至周五每天中午11点和下午17点发2维码/短信到您手机(周六至周日当天晚上发1次),请用户提前购买,凭此信息前往影院前台兑换即可; \n(4)订购成功后,(您在购买下单后的当天,给您发送电子券,系统会自动识别;如果您的手机能接收二维码,那收到的就是彩信,不能接收二维码的话,系统将会自动转成短信发送给您),短信为16位数,如:1028**********; 每个手机号码只可购买6张,如需购买6张以上的请在订单附言填写不同的手机号码,并注明张数(例如团购10张,1350755****号码4张,1860755****号码6张);\n(5)电子票有效期至2016年2月30日,不与其他优惠券同时使用"},
                      {"key":"support","label":"技术支持","value":"http://www.cmjstudio.com\n\n                                            \n                                            \n                                          "}]
    },
    "labelColor":"rgb(87,88,93)"
}
{
    "pass.json":"3292f96c4676aefe7122abb47f86be0d95a6faaf",
    "icon@2x.png":"83438c13dfd7c4a5819a12f6df6dc74b71060289",
    "icon.png":"83438c13dfd7c4a5819a12f6df6dc74b71060289",
    "logo@2x.png":"83438c13dfd7c4a5819a12f6df6dc74b71060289",
    "logo.png":"83438c13dfd7c4a5819a12f6df6dc74b71060289",
    "strip@2x.png":"885ff9639c90147a239a7a77e7adc870d5e047e2",
    "strip.png":"885ff9639c90147a239a7a77e7adc870d5e047e2"
}openssl pkcs12 -in mypassbook.p12 -clcerts -nokeys -out mypassbook.pem -passin pass:456789d.从.p12导出秘钥文件mypassbookkey.pem(这里设置密码为123456):
openssl pkcs12 -in mypassbook.p12 -nocerts -out mypassbookkey.pem -passin pass:456789 -passout pass:123456e.根据AWDRCA.pem、mypassbook.pem、mypassbookkey.pem、manifest.json生成signature文件(按照提示输入mypassbookkey.pem导出时设置的密码123456):
openssl smime -binary -sign -certfile AWDRCA.pem -signer mypassbook.pem -inkey mypassbookkey.pem -in manifest.json -out signature -outform DERzip -r mypassbook.pkpass manifest.json pass.json signature logo.png logo@2x.png icon.png icon@2x.png strip.png strip@2x.png
到这里一个pass制作完成了,此处可以在mac中打开预览:
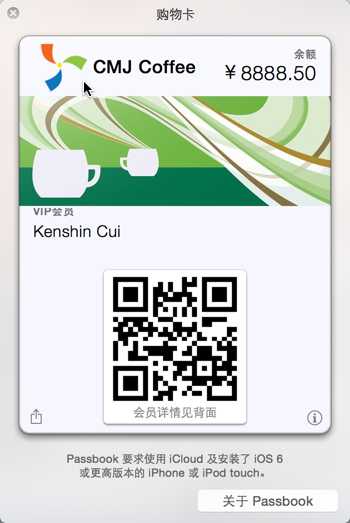
到这里一个Pass就只做完成了,下面就看一下在iOS中如何添加这个Pass到Passbook,这里直接将上面制作完成的Pass放到Bundle中完成添加。当然这些都是一步步手动完成的,前面也说了实际开发中这个Pass是服务器端来动态生成的,在添加时会从服务器端下载,这个过程在示例中就不再演示。iOS中提供了PassKit.framework框架来进行Passbook开发,下面的代码演示了添加Pass到Passbook应用的过程:
#import "ViewController.h"
#import <PassKit/PassKit.h>

@interface ViewController ()<PKAddPassesViewControllerDelegate>
@property (strong,nonatomic) PKPass *pass;//票据
@property (strong,nonatomic) PKAddPassesViewController *addPassesController;//票据添加控制器
@end

@implementation ViewController

- (void)viewDidLoad {
    [super viewDidLoad];
}
#pragma mark - UI事件
- (IBAction)addPassClick:(UIBarButtonItem *)sender {
    //确保pass合法,否则无法添加
    [self addPass];
}

#pragma mark - 属性
/**
 *  创建Pass对象
 *
 *  @return Pass对象
 */
-(PKPass *)pass{
    if (!_pass) {
        NSString *passPath=[[NSBundle mainBundle] pathForResource:@"mypassbook.pkpass" ofType:nil];
        NSData *passData=[NSData dataWithContentsOfFile:passPath];
        NSError *error=nil;
        _pass=[[PKPass alloc]initWithData:passData error:&error];
        if (error) {
            NSLog(@"创建Pass过程中发生错误,错误信息:%@",error.localizedDescription);
            return nil;
        }
    }
    return _pass;
}

/**
 *  创建添加Pass的控制器
 *
 *  @return <#return value description#>
 */
-(PKAddPassesViewController *)addPassesController{
    if (!_addPassesController) {
        _addPassesController=[[PKAddPassesViewController alloc]initWithPass:self.pass];
        _addPassesController.delegate=self;//设置代理
    }
    return _addPassesController;
}

#pragma mark - 私有方法
-(void)addPass{
    if (![PKAddPassesViewController canAddPasses]) {
        NSLog(@"无法添加Pass.");
        return;
    }

    [self presentViewController:self.addPassesController animated:YES completion:nil];
}

#pragma mark - PKAddPassesViewController代理方法
-(void)addPassesViewControllerDidFinish:(PKAddPassesViewController *)controller{
    NSLog(@"添加成功.");
    [self.addPassesController dismissViewControllerAnimated:YES completion:nil];
    //添加成功后转到Passbook应用并展示添加的Pass
    NSLog(@"%@",self.pass.passURL);
    [[UIApplication sharedApplication] openURL:self.pass.passURL];
}
@end
运行效果:
iOS开发之--通讯录、蓝牙、内购、GameCenter、iCloud、Passbook功能开发汇总
标签:
原文地址:http://blog.csdn.net/baihuaxiu123/article/details/51289499