标签:
自定义UIImageView控件
一、实现思路
//
//  YYViewController.m
//
//
//  Created by apple on 14-6-22.
//  Copyright (c) 2014年 itcase. All rights reserved.
//

#import "YYViewController.h"

@interface YYViewController ()

@end

@implementation YYViewController

- (void)viewDidLoad
{
    [super viewDidLoad];
    //系统的UIImageview的使用
//    1.创建一个UIImageView
    UIImageView *iv=[[UIImageView alloc]init];
//    2.设置图片
    iv.image=[UIImage imageNamed:@"me"];
//    3.设置frame
    iv.frame=CGRectMake(100, 100, 100, 100);
//    4.把创建的自定义的view添加到界面上
    [self.view addSubview:iv];
}
@end
实现效果:
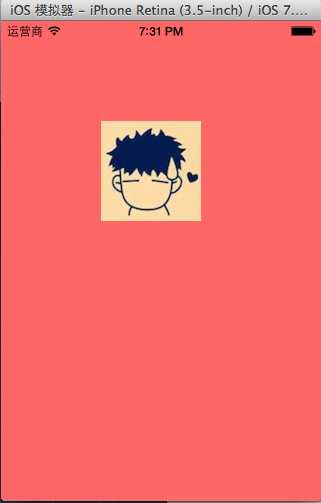
使用Quartz2D自定义View,代码如下:
新建一个自定义的类,让其继承自UIView,YYimageView.h文件代码如下:
 1 //
 2 //  YYimageView.h
 3 //
 4 //
 5 //  Created by apple on 14-6-22.
 6 //  Copyright (c) 2014年 itcase. All rights reserved.
 7 //
 8
 9 #import <UIKit/UIKit.h>
10
11 @interface YYimageView : UIView
12 @property(nonatomic,strong)UIImage *image;
13 @end
在自定义类的实现中,重写DrawRect:方法绘制并渲染图形。YYimageView.m文件代码如下:
 1 //
 2 //  YYimageView.m
 3 //
 4 //
 5 //  Created by apple on 14-6-22.
 6 //  Copyright (c) 2014年 itcase. All rights reserved.
 7 //
 8
 9 #import "YYimageView.h"
10
11 @implementation YYimageView
12
13 //重写drawRect:方法
14 - (void)drawRect:(CGRect)rect
15 {
16     [self.image drawInRect:rect];
17 }
18
19 @end
在主控制器中,模仿系统自带的UIImageView的使用过程,实现同样的效果。
 1 //
 2 //  YYViewController.m
 3 //
 4 //
 5 //  Created by apple on 14-6-22.
 6 //  Copyright (c) 2014年 itcase. All rights reserved.
 7 //
 8
 9 #import "YYViewController.h"
10 #import "YYimageView.h"
11
12 @interface YYViewController ()
13
14 @end
15
16 @implementation YYViewController
17
18 - (void)viewDidLoad
19 {
20     [super viewDidLoad];
21
22 //    //系统的UIImageview的使用
23 ////    1.创建一个UIImageView
24 //    UIImageView *iv=[[UIImageView alloc]init];
25 ////    2.设置图片
26 //    iv.image=[UIImage imageNamed:@"me"];
27 ////    3.设置frame
28 //    iv.frame=CGRectMake(100, 100, 100, 100);
29 ////    4.把创建的自定义的view添加到界面上
30 //    [self.view addSubview:iv];
31
32
33     //自定义UIImageView
34     //1.创建
35     //2.设置图片
36     //3.设置frame
37     //4.把创建的自定义的view添加到界面上
38     YYimageView *yyiv=[[YYimageView alloc]init];
39     yyiv.image=[UIImage imageNamed:@"me"];
40     yyiv.frame=CGRectMake(100, 100, 100, 100);
41     [self.view addSubview:yyiv];
42
43 }
44 @end
三、完善
存在的问题?
在界面上,添加一个按钮,要求点击按钮,能够实现图片的切换。
 1 //
 2 //  YYViewController.m
 3 //
 4 //
 5 //  Created by apple on 14-6-22.
 6 //  Copyright (c) 2014年 itcase. All rights reserved.
 7 //
 8
 9 #import "YYViewController.h"
10 #import "YYimageView.h"
11
12 @interface YYViewController ()
13 @property(nonatomic,strong)UIImageView *imageView;
14 @end
15
16 @implementation YYViewController
17
18 - (void)viewDidLoad
19 {
20     [super viewDidLoad];
21
22     //系统的UIImageview的使用
23 //    1.创建一个UIImageView
24     UIImageView *iv=[[UIImageView alloc]init];
25 //    2.设置图片
26     iv.image=[UIImage imageNamed:@"me"];
27 //    3.设置frame
28     iv.frame=CGRectMake(100, 100, 100, 100);
29 //    4.把创建的自定义的view添加到界面上
30     [self.view addSubview:iv];
31     self.imageView=iv;
32
33
34     //自定义UIImageView
35     //1.创建
36     //2.设置图片
37     //3.设置frame
38     //4.把创建的自定义的view添加到界面上
39 //    YYimageView *yyiv=[[YYimageView alloc]init];
40 //    yyiv.image=[UIImage imageNamed:@"me"];
41 //    yyiv.frame=CGRectMake(100, 100, 100, 100);
42 //    [self.view addSubview:yyiv];
43
44     //添加一个button按钮,当点击button按钮的时候,切换图片
45     UIButton *btn=[[UIButton alloc]initWithFrame:CGRectMake(100, 300, 100, 50)];
46     [btn setTitleColor:[UIColor blackColor] forState:UIControlStateNormal];
47     [btn setTitle:@"点击切换" forState:UIControlStateNormal];
48     [btn addTarget:self action:@selector(btnClick) forControlEvents:UIControlEventTouchUpInside];
49     [self.view addSubview:btn];
50
51 }
52
53 -(void)btnClick
54 {
55     UIImage *image=[UIImage imageNamed:@"psb.jpeg"];
56     self.imageView.image=image;
57 }
58 @end
点击按钮后,实现图片的切换。
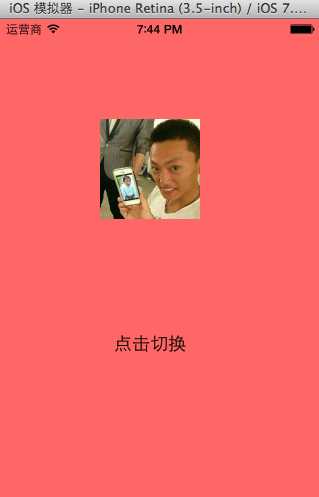
完善后的代码如下:
主控制器中,YYViewController.m文件的代码:
 1 //
 2 //  YYViewController.m
 3 //
 4 //
 5 //  Created by apple on 14-6-22.
 6 //  Copyright (c) 2014年 itcase. All rights reserved.
 7 //
 8
 9 #import "YYViewController.h"
10 #import "YYimageView.h"
11
12 @interface YYViewController ()
13 @property(nonatomic,strong)UIImageView *imageView;
14 @property(nonatomic,strong)YYimageView *yyimageView;
15 @end
16
17 @implementation YYViewController
18
19 - (void)viewDidLoad
20 {
21     [super viewDidLoad];
22
23 //    //系统的UIImageview的使用
24 ////    1.创建一个UIImageView
25 //    UIImageView *iv=[[UIImageView alloc]init];
26 ////    2.设置图片
27 //    iv.image=[UIImage imageNamed:@"me"];
28 ////    3.设置frame
29 //    iv.frame=CGRectMake(100, 100, 100, 100);
30 ////    4.把创建的自定义的view添加到界面上
31 //    [self.view addSubview:iv];
32 //    self.imageView=iv;
33
34
35     //自定义UIImageView
36     //1.创建
37     //2.设置图片
38     //3.设置frame
39     //4.把创建的自定义的view添加到界面上
40     YYimageView *yyiv=[[YYimageView alloc]init];
41     yyiv.image=[UIImage imageNamed:@"me"];
42     yyiv.frame=CGRectMake(100, 100, 100, 100);
43     [self.view addSubview:yyiv];
44     self.yyimageView=yyiv;
45
46     //添加一个button按钮,当点击button按钮的时候,切换图片
47     UIButton *btn=[[UIButton alloc]initWithFrame:CGRectMake(100, 300, 100, 50)];
48     [btn setTitleColor:[UIColor blackColor] forState:UIControlStateNormal];
49     [btn setTitle:@"点击切换" forState:UIControlStateNormal];
50     [btn addTarget:self action:@selector(btnClick) forControlEvents:UIControlEventTouchUpInside];
51     [self.view addSubview:btn];
52
53 }
54
55 -(void)btnClick
56 {
57     NSLog(@"按钮被点击了");
58     UIImage *image=[UIImage imageNamed:@"psb.jpeg"];
59 //    self.imageView.image=image;
60     self.yyimageView.image=image;
61 }
62 @end
YYimageView.m文件的代码:
 1 //
 2 //  YYimageView.m
 3 //
 4 //
 5 //  Created by apple on 14-6-22.
 6 //  Copyright (c) 2014年 itcase. All rights reserved.
 7 //
 8
 9 #import "YYimageView.h"
10
11 @implementation YYimageView
12
13 //重写drawRect:方法
14 - (void)drawRect:(CGRect)rect
15 {
16     [self.image drawInRect:rect];
17 }
18
19 //重写set方法
20 -(void)setImage:(UIImage *)image
21 {
22     _image=image;
23     [self setNeedsDisplay];
24 }
25 @end
绘制基本图形
一、简单说明
图形上下文(Graphics Context):是一个CGContextRef类型的数据
图形上下文的作用:保存绘图信息、绘图状态
决定绘制的输出目标(绘制到什么地方去?)(输出目标可以是PDF文件、Bitmap或者显示器的窗口上)

相同的一套绘图序列,指定不同的Graphics Context,就可将相同的图像绘制到不同的目标上。
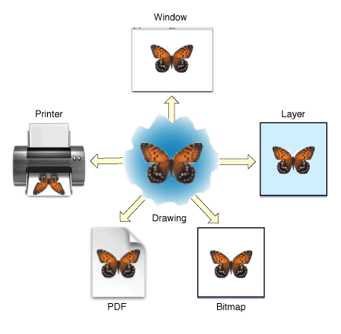
Quartz2D提供了以下几种类型的Graphics Context:
Bitmap Graphics Context
PDF Graphics Context
Window Graphics Context
Layer Graphics Context
Printer Graphics Context
只要上下文不同,绘制的地方就不同。
本文说明如何把图片绘制到Bitmap上面去,即要求生成一张图片,图片上面保存了绘图信息。
Bitmap就是图片,相当于系统的UIimage。一个UIImage就是一个Bitmap
二、怎么把图片绘制到Bitmap上?
注意:不能在drawRect:方法中直接获取Bitmap的上下文,需要我们自己进行创建。
代码示例:
 8
 9 #import "YYViewController.h"
10
11 @interface YYViewController ()
12 @property (weak, nonatomic) IBOutlet UIImageView *iv;
13 @end
14
15 @implementation YYViewController
16
17 - (void)viewDidLoad
18 {
19     [super viewDidLoad];
20
21     //加载图片
22     //0.创建一个Bitmap上下文
23     //c语言的方法
24 //    CGBitmapContextCreate(<#void *data#>, <#size_t width#>, <#size_t height#>, <#size_t bitsPerComponent#>, <#size_t bytesPerRow#>, <#CGColorSpaceRef space#>, <#CGBitmapInfo bitmapInfo#>)
25     //oc中封装的方法
26     //方法1
27 //    UIGraphicsBeginImageContext(<#CGSize size#>);
28     //方法2
29     UIGraphicsBeginImageContextWithOptions( CGSizeMake(200, 200), NO, 0);
30     //1.获取bitmap上下文
31     CGContextRef ctx = UIGraphicsGetCurrentContext();
32     //2.绘图(画一个圆)
33     CGContextAddEllipseInRect(ctx, CGRectMake(0, 0, 100, 100));
34     //3.渲染
35     CGContextStrokePath(ctx);
36     //4.获取生成的图片
37     UIImage *image=UIGraphicsGetImageFromCurrentImageContext();
38     //5.显示生成的图片到imageview
39     self.iv.image=image;
40     //6.保存绘制好的图片到文件中
41     //先将图片转换为二进制数据,然后再将图片写到文件中
42 //    UIImageJPEGRepresentation(image, 1); //第二个参数为保存的图片的效果
43     NSData *data=UIImagePNGRepresentation(image);
44     [data writeToFile:@"/Users/apple/Desktop/abc.png" atomically:YES];
45 }
46
47 - (void)didReceiveMemoryWarning
48 {
49     [super didReceiveMemoryWarning];
50     // Dispose of any resources that can be recreated.
51 }
52
53 @end
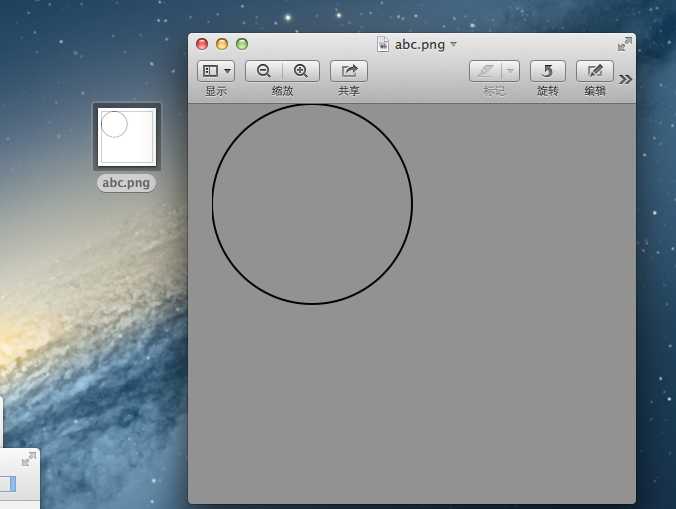
程序执行效果:
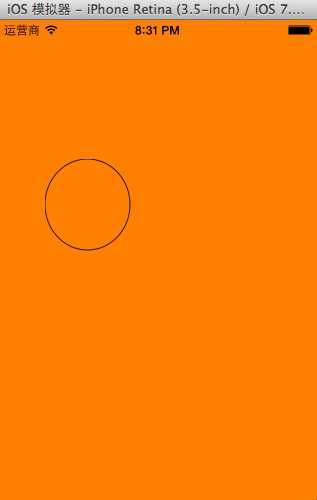
程序执行完毕后,会在指定的位置创建一个abc.png的图片
补充说明:
//方法1 UIGraphicsBeginImageContext(<#CGSize size#>);
//方法2 UIGraphicsBeginImageContextWithOptions(CGSize size, BOOL opaque, CGFloat scale)
CGSize size:指定将来创建出来的bitmap的大小
BOOL opaque:默认为YES,不透明,位图中没有绘制的区域会以黑色显示;NO代表透明,位图中没有绘制的区域会以透明显示;主要是用 于绘图时进行性能优化的开关。创建出来的bitmap就对应一个UIImage对象
iOS--Quartz2D使用(自定义UIImageView控件、绘制基本图形)
标签:
原文地址:http://blog.csdn.net/nvermore_/article/details/51315852