标签:
navigation controller是一种层次结构的container view controller,即其通过一个view controllers栈来管理内部的content view controllers。如图 11所示最上两层属于Navigation view的层次结构。
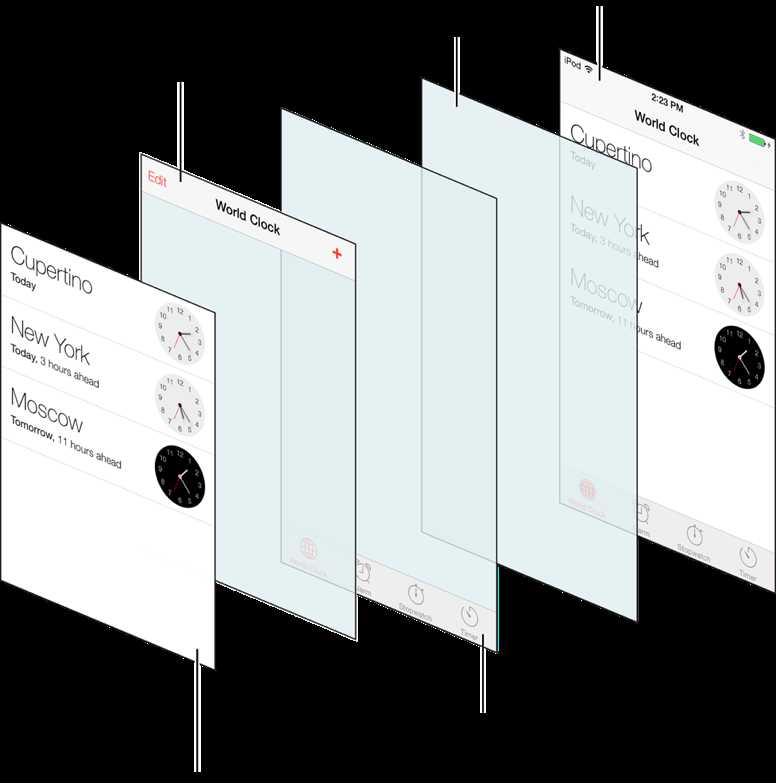
图 11 The views of a navigation interface
1 组成对象
Navigation Controller通过使用一些对象来实现交互的接口,用户(软件工程师)负责提供这些对象,而其余的由Navigation Controller自身实现。特别是需要显示的content view controllers,若需接收消息,还可以提供delegate对象。
如图 12所示的组成对象。用户仅可以修改navigation bar 和toolbar对象的部分行为和显示内容;其中对于UINavigationBar对象,Navigation Controller将自身设置为其delegate,从而保证不被改变。
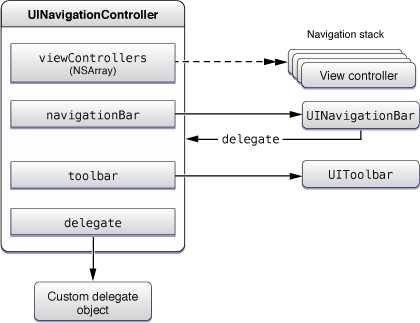
图 12 Objects managed by the navigation controller
注意:
用户提供的content view controllers是按先进后出的顺序进行操作的,并且在栈中的第一个view controller是无法被弹出的,将该view controller称为root view controller。
2 创建Navigation
2.1 Storyboard方式
使用Xcode的Storyboard方式创建Navigation Controller非常简单,一般不需用户再配置过多的内容。可以按如下的步骤进行创建:
a) 从library中拖动一个navigation controller控价。
b) Interface Builder会自动创建一对controller:navigation controller 和view controller。其将该view controller自动配置为root view controller。如图 13所示。
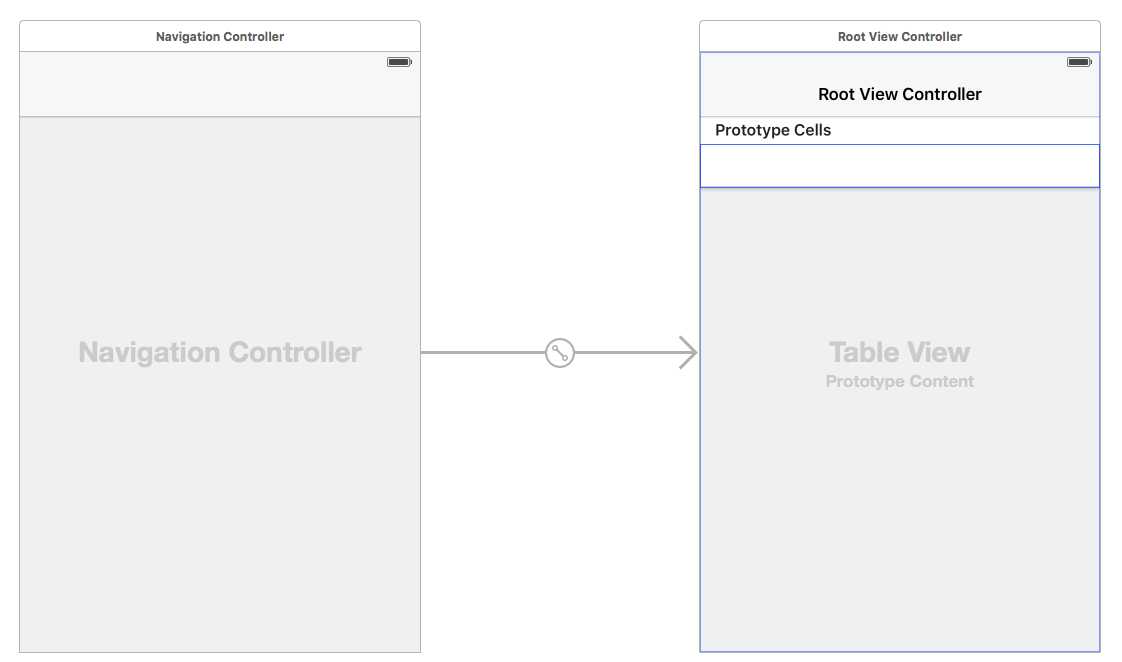
图 13 navigation controller控价
c) 若需要修改navigation controller的root view controller,那么可以在Attributes inspector中修改其"root view controller"属性。
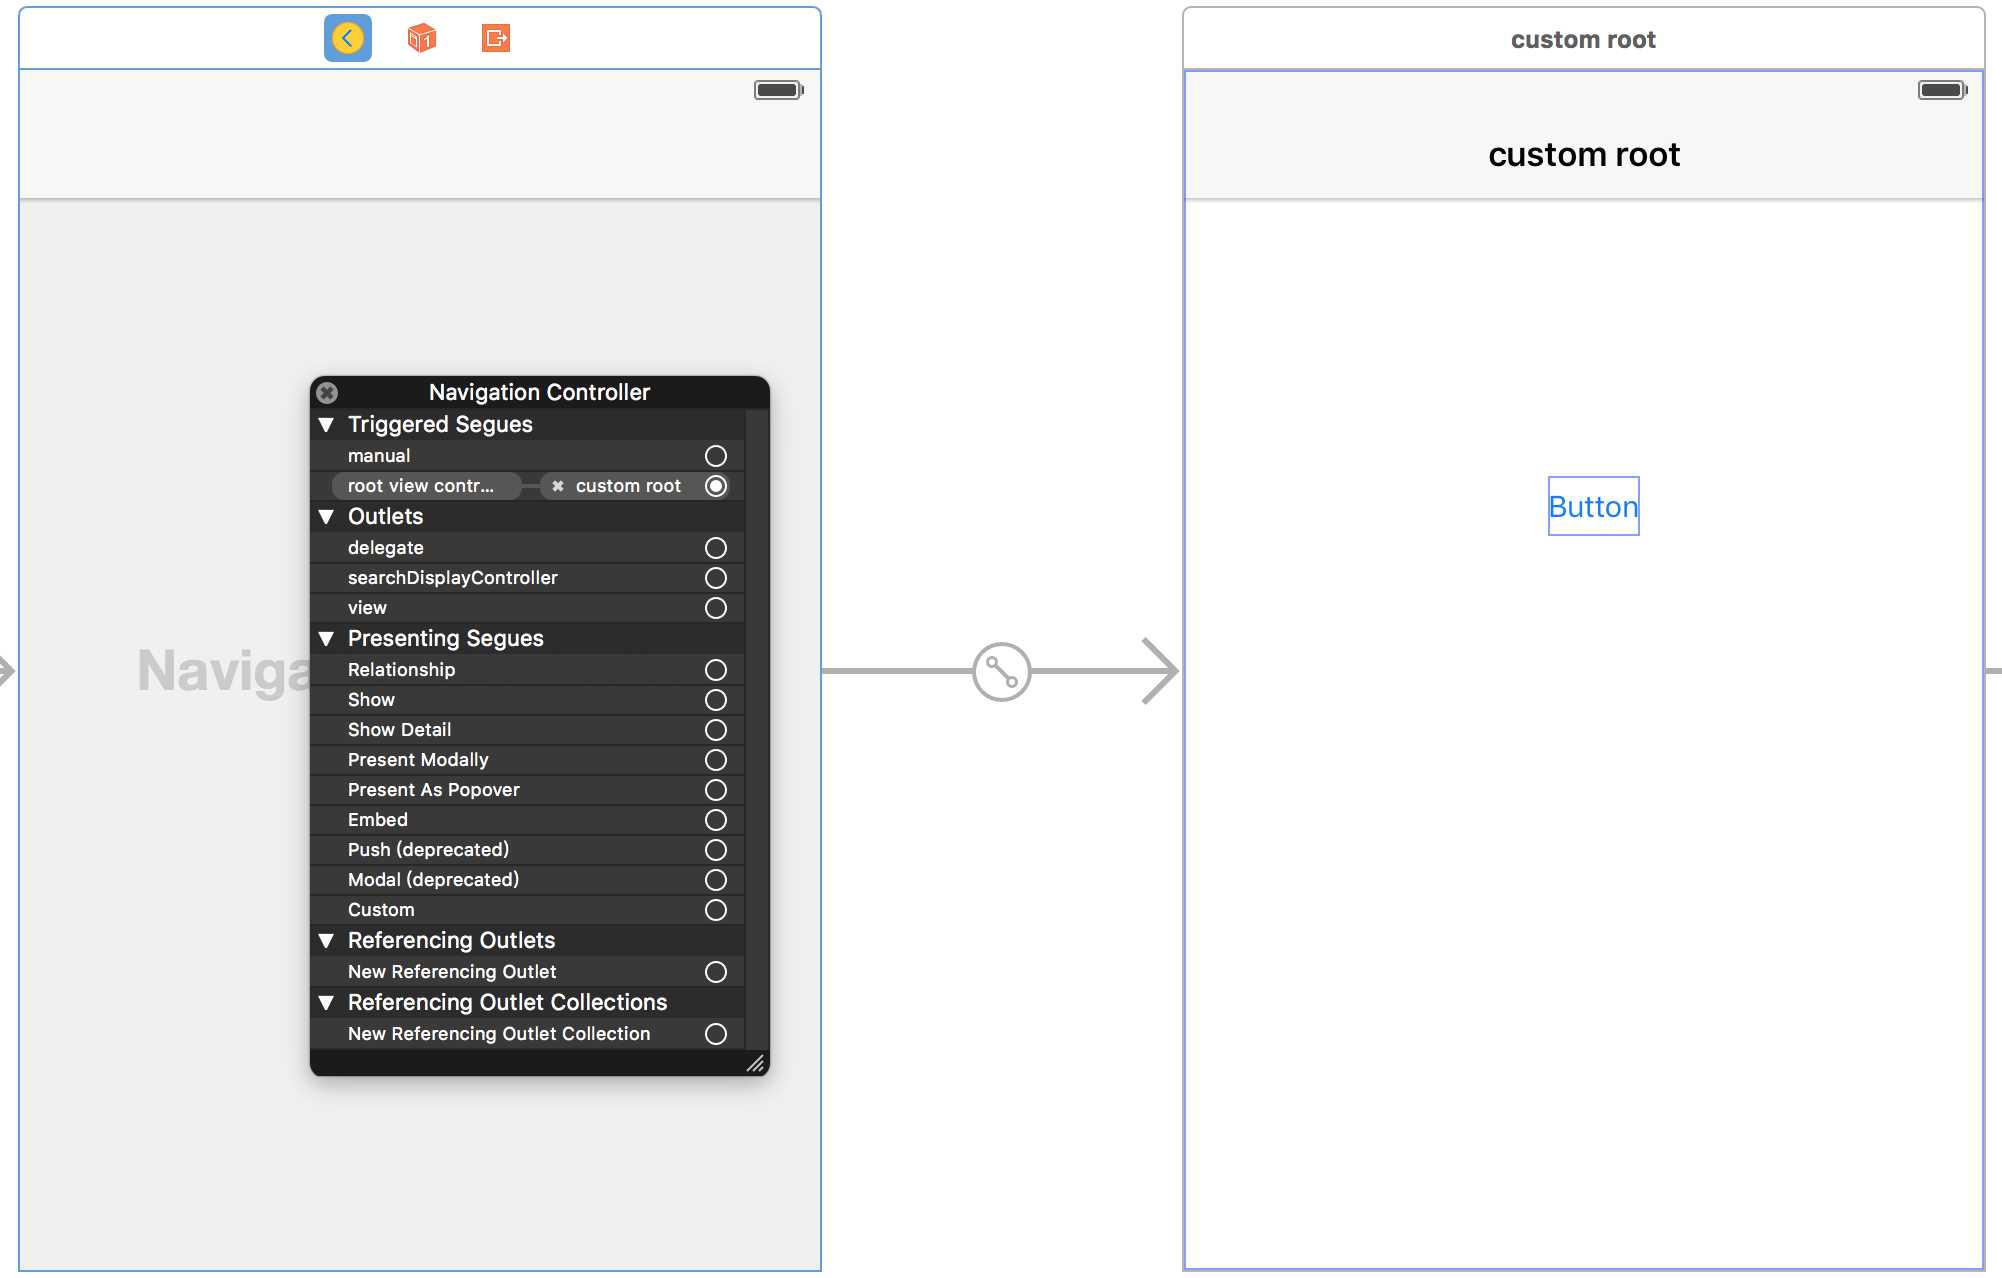
图 14 修改navigation 的root view cotroller
d) 若需要后续再添加新的content view controller,只需在某个响应对象中"show"一个view controller即可,从而当单击该对象即可弹出新的view controller,并将其添加到栈顶。如图 15所示。
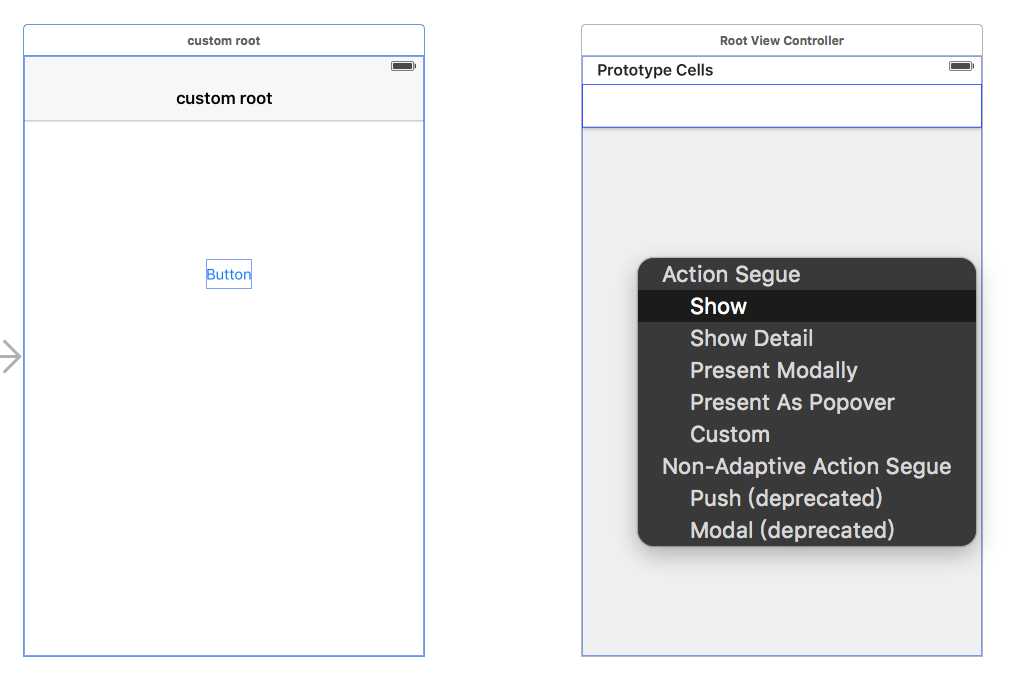
图 15 在navigation controller层次结构中添加新的content view controller
e) 若需要修改新的content view controller的返回按钮内容,可以选中其上级的view controller的navigation item,从而在Attributes inspector中修改返回按钮的显示内容。如图 16和图 17所示。
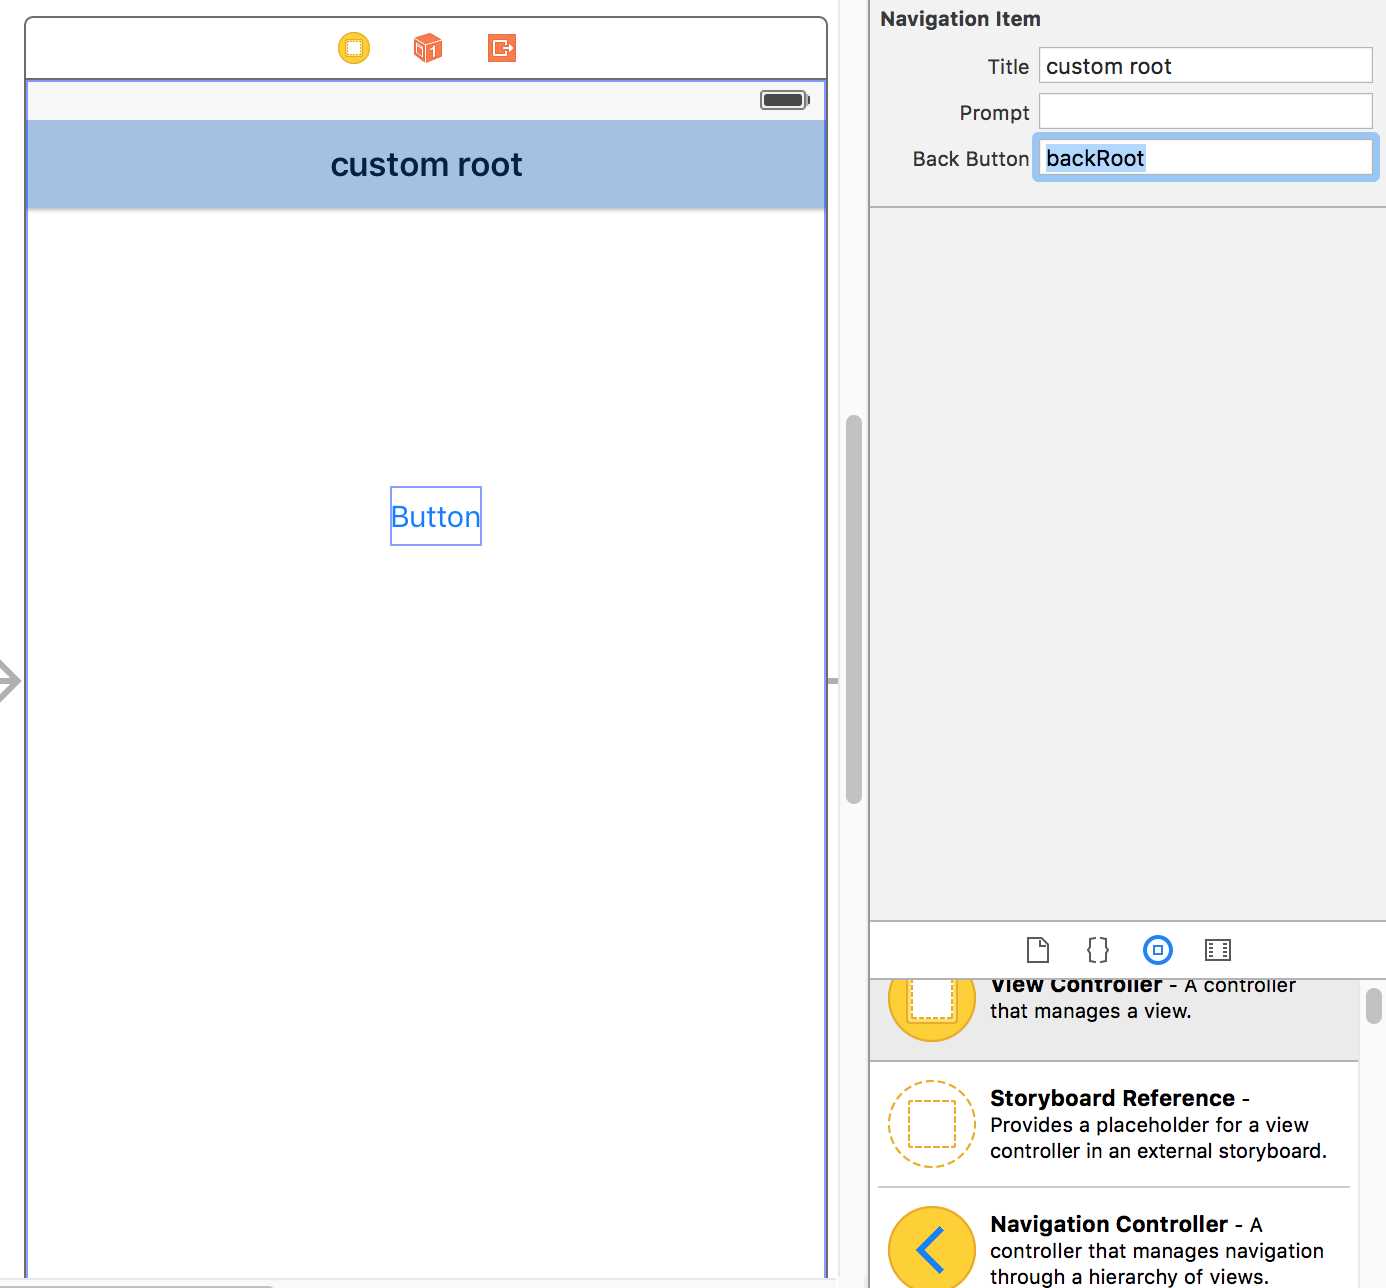
图 16 返回按钮设计图
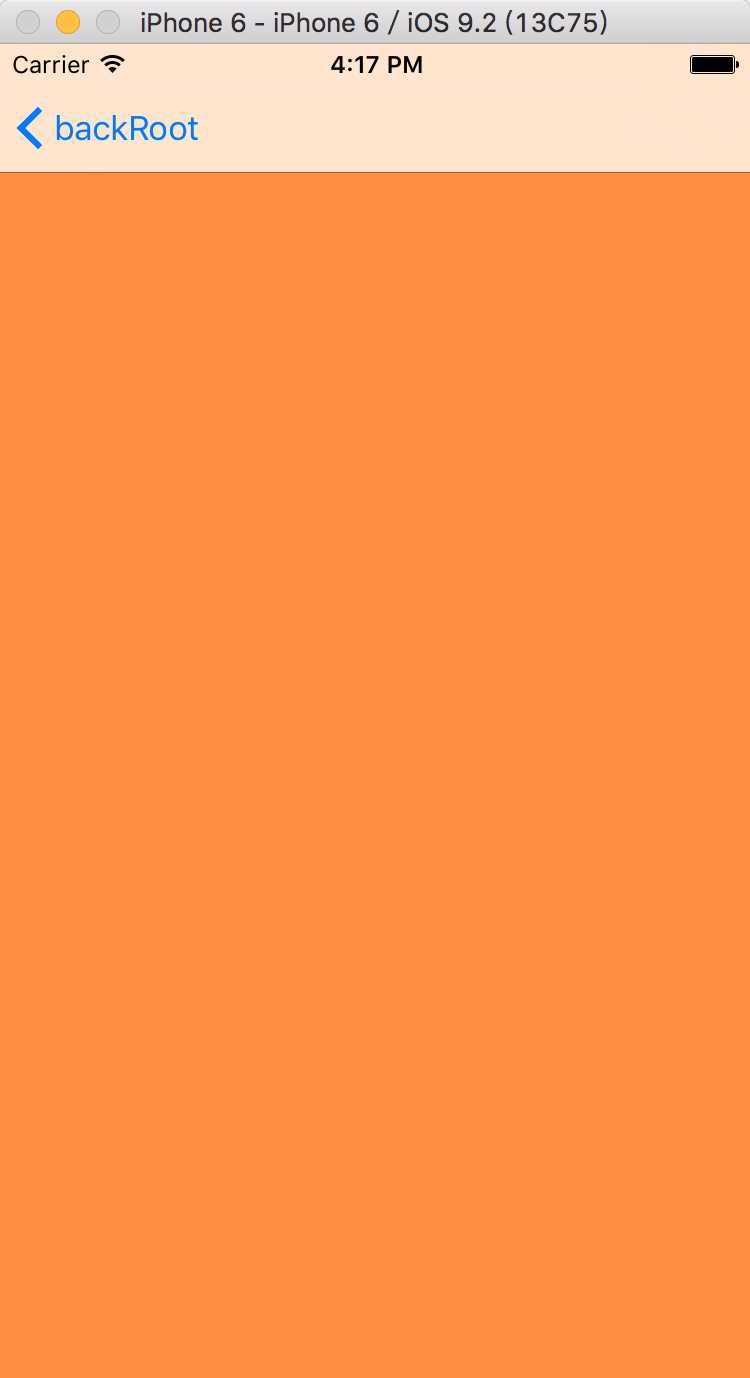
图 17 展示效果图
2.2 Program方式
通过程序方式创建navigation也不是非常难,由于导航其实是一个UINavigationController控制器类。所以若创建一个navigation,只需创建一个UINavigationController对象,然后将其添加为某个view controller的层次结构中。其中需要注意的是在创建UINavigationController对象时,需要传递一个root view controller对象。
如下所示:
3 Navigation控制
3.1 全屏配置
Navigation视图中的content view controller的显示位置默认都是在navigation bar 和toolbar(tab bar)之间,若需要配置全屏的显示方式,需要做如下的配置:
a) 设置顶层的window (或parent view)为全屏显示;
b) 隐藏navigation bar,即将navigation controller的translucent属性设置为YES;若在Interface Builder中可以去掉Attributes inspector中选项的勾选;
c) 隐藏toolbar,即将toolbar的translucent属性设置为YES;若在Interface Builder中可以去掉Attributes inspector中选项的勾选;
d) 将content view controller的wantsFullScreenLayout属性设置为YES。
3.2 栈操作
Navigation中的栈是用于存放Content View Controller,而栈顶的Content VC是当前屏幕的显示视图。UIKit提供如表 11所示的几种方式来管理栈内容,即几种入栈和出栈的操作。
表 11 Options for managing the navigation stack
|
场景 |
描述 |
|
显示层次结构的下一层content(入栈) |
用户可以使用segue或者是pushViewController:animated:方法将新content view controller压入栈中,从而在屏幕中显示这个新入栈的VC。 |
|
退出层次结构中的栈顶元素(出栈) |
可以直接通Navigation controller的"返回按钮"弹出栈顶的content view controller,即从栈中移除该view controller;也可以以程序的方式调用popViewControllerAnimated:方法。 |
|
返回到之前的栈元素(入栈或出栈) |
可以通过setViewControllers:animated:方法返回到之前的状态,若指定的VC在栈中,则弹出之山的元素,将指定VC作为栈顶元素;若指定VC不在栈中,则将VC入栈。 |
|
返回到root VC(出栈) |
可以使用popToRootViewControllerAnimated:方法,返回到root view controller,即除了root VC,将栈中所有的content view controller都弹出。 |
|
返回到指定的content VC(出栈) |
可以使用popToViewController:animated:方法一次性弹出多个content view controller,直到指定的view controller为栈顶元素,即将指定的view cotroller作为栈顶元素。 |
3.3 栈状态监听
不管什么时候对Navigation中的栈进行入栈和出栈操作,都会向content view controller元素和delegate对象发生消息,从而提醒栈中的状态发生变化。如图 18所示,当进行入栈操作时,会向栈顶元素发送viewWillDisapper消息,及向新插入的元素发送viewWillAppear消息,同时也向delegate对象发送willShowViewController消息;当完成出入栈操作时,还会向相应元素发送didXXX消息。
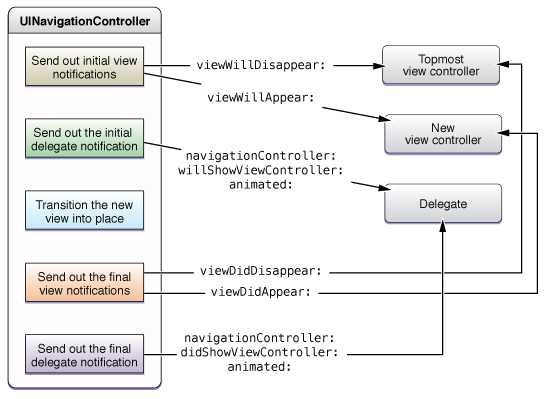
图 18 Messages sent during stack changes
4 定制Navigation Bar
4.1 层次结构
4.1.1 UINavigationBar类型
Navigation Bar类似Navigation Container,其内部也拥有一个栈,不同的是Navigation Bar栈中元素类型是UINavigationItem类型。如图 19所示中的UINavigationBar类中的items为NSArray的数组,其指向Navigation item stack(即为Navigation Bar栈);而bar的Delegate指向UINavigationController对象;topItem指向栈顶的元素,backItem指向栈顶下的元素(即栈中第二个元素)。
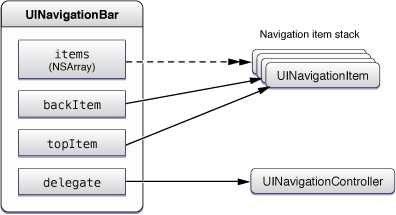
图 19 navigation bar成员结构
4.1.2 UINavigationItem类型
Navigation bar栈与Navigation栈是同时进行入栈出栈操作,在Navigation栈中的Content View Controller元素都有一个UINavigationItem类型的navigationItem属性,所以Navigation中的每个Content View Controller都拥有一个独立UINavigationItem对象,而每一个UINavigationItem又有三个位置显示数据:左、中和右,如图 110所示。
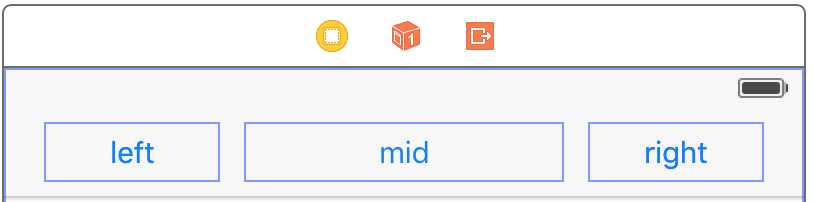
图 110 UINavigationItem结构
其实对于UINavigationItem类,其成员有许多成员属性,可位于导航栏的左、中和右位置,如表 12所示。
表 12 UINavigationItem类成员属性
|
可显示位置 |
属性名 |
类型 |
描述 |
|
左侧 |
backBarButtonItem |
UIBarButtonItem |
在NavigationBar左边中默认设置一个返回到上一级(Navigation栈的下一层)按钮,此属性就是为这个功能。若自定义了左边导航项,则该项不显示。 |
|
leftBarButtonItems |
NSArray<UIBarButtonItem*> |
此属性为一个UIBarButtonItem类型的数组,当向导航栏左侧添加多个控件时,则由该属性存储。 | |
|
leftBarButtonItem |
UIBarButtonItem |
当左边只有一项时,则显示此属性。 | |
|
中侧 |
titleView |
UIView |
其为UIView类似,与其它项类型不同。默认是显示UINavigationItem对象的标题名。 |
|
右侧 |
rightBarButtonItems |
NSArray<UIBarButtonItem *> |
此属性为一个UIBarButtonItem类型的数组,当向导航栏右侧添加多个控件时,则由该属性存储。 |
|
rightBarButtonItem |
UIBarButtonItem |
当右侧只有一项时,则显示此属性。 |
4.1.3 UIBarButtonItem类型
UIBarButtonItem类型是才是存放控价的容器,其具有多种属性,具体表示语义如表 13所示。
表 13 UIBarButtonItem类的成员列表
|
属性名 |
类型 |
描述 |
|
customView |
UIView |
自定义控件就存储在该属性中。 |
|
action |
SEL |
为指定的响应方法地址 |
|
target |
id |
action响应方法所在的对象 |
|
width |
CGFloat |
控件的宽度 |
|
style |
UIBarButtonItemStyle |
控件的类型 |
4.2 配置导航项
4.2.1 配置规则
可以自定义view controller中的导航栏(UINavigationItem),但其三个位置的修改有一定的规则:
1) 左边位置
2) 中间位置
3) 右边位置
4.2.2 Storyboard方式
可以直接从interface Builder库中直接拖动一个UIView或其子类到导航栏的三个位置之一中,并且由于Navigation栈中元素(view controller)都有一个UINavigationItem,所以彼此之间互不影响。如图 111所示的启动效果图。
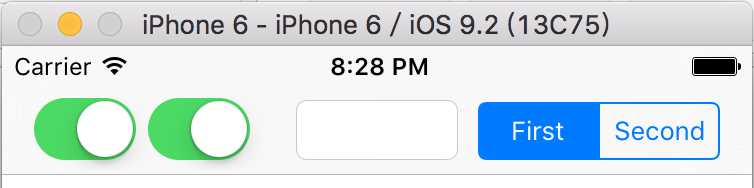
图 111 导航栏配置效果图
注意:
目前测试可以直接拖动到导航栏的控件有:Button、Segmented control、text field、Slider、Switch、Progress View、UIView。
4.2.3 Program方式
采用程序方式配置导航栏也非常简单,只需从view controller中获取UINavigationItem对象,接着在其三个位置中设置一个UIBarButtonItem对象即可。如下所示。
5 参考文献
[1] View Controller Catalog for IOS
iOS UIKit:Navigation Controllers
标签:
原文地址:http://www.cnblogs.com/hlwfirst/p/5467667.html