标签:
对于前端系列,自然少不了AngularJs的介绍了。在前面文章中,我们介绍了如何使用KnockoutJs来打造一个单页面程序,后面一篇文章将介绍如何使用AngularJs的开发一个单页面应用程序。在开始使用AngularJs开发SPA之前,我觉得有必要详细介绍下AngularJs所涉及的知识点。所有也就有了这篇文章。
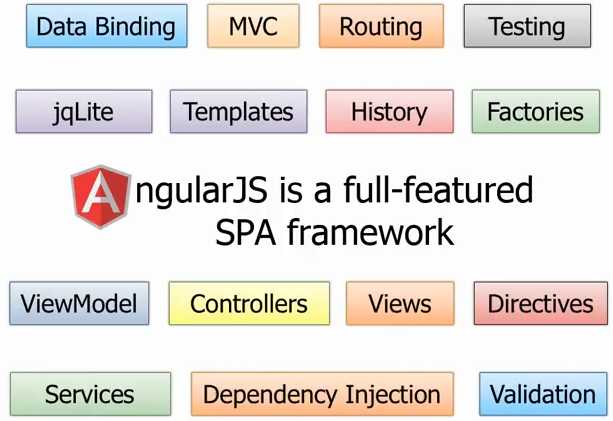
AngularJS是Google推出的一款Web应用开发框架。它提供了一系列兼容性良好并可扩展的服务,包括数据绑定、DOM操作、MVC和依赖注入等特性。相信下面图片可以更好地诠释AngularJs具体支持哪些特性。

从上图可以发现,AngularJs几乎支持构建一个Web应用的所有内容——数据绑定、表单验证、路由、依赖注入、控制器、模板和视图等。
但并不是所有的应用都适合用AngularJs来做。AngularJS主要考虑的是构建CURD应用,但至少90%的Web应用都是CURD应用。哪什么不适合用AngularJs来做呢? 如游戏、图像界面编辑器等应用不适合用AngularJs来构建。
接下来,我们就详细介绍了AngularJS的几个核心知识点,其中包括:
在没有使用AngularJs的Web应用,要实现前台页面逻辑通过给HTML元素设置ID,然后使用Js或Jquery通过ID来获取HTML DOM元素。而AngularJS不再需要给HTML元素设置ID,而是使用指令的方式来指导HTML元素的行为。这样做的好处是开发人员看到HTML元素以及指令(Directive)就可以理解其行为,而传统设置Id的方式并不能给你带来任何有用的信息,你需要深入去查看对应的Js代码来理解其行为。
上面介绍了这么多,好像没有正式介绍指令是什么呢?光顾着介绍指令的好处和传统方式的不同了。指令可以理解为声明特殊的标签或属性。AngularJs内置了很多的指令,你所看到的所有以ng开头的所有标签,如ng-app、ng-init、ng-if、ng-model等。
ng-app:用于标识页面是一个AngularJs页面。一般加载HTML的根对象上。
ng-init 用于初始化了一个变量
ng-model:用户在Property和Html控件之间建立双向的数据绑定(Data Binding)。这样Html控件的值改变会反应到Property上,反过来也同样成立。
AngularJs通过表达式的方式将数据绑定到HTML标签内。AngularJs的表达式写在双大括号内:{{expression}}
下面具体看一个指令的例子:
<!DOCTYPE html>
<html ng-app xmlns="http://www.w3.org/1999/xhtml">
<head>
    <meta http-equiv="Content-Type" content="text/html; charset=utf-8" />
    <title>Using Directives and Data Binding Syntax</title>
</head>
<body ng-init="name = ‘欢迎学习AngularJS‘">
    <div>
        Name: <input type="text" ng-model="name" /> {{name}}
    </div>
    <script src="/Scripts/angular.min.js"></script>
</body>
</html>
效果在线预览:点击此运行
从在线预览的页面可以发现,当我们改变输入框的值时,对应的改变会反应到name属性上,从而反应到表达式的值。AngularJs中双向绑定的使用主要是靠ng-model指令来完成的。前面说的都是一些AngularJs内置的指令,其实我们也可以自定义指令。关于这部分内容将会在后面介绍到。
在Asp.net MVC中提供了两种页面渲染模板,一种是Aspx,另一种是Razor.然而Asp.net MVC的这两种模板都是后端模板,即页面的渲染都是在服务端来完成的。这样不可避免会加重服务器端的压力。AngularJs的模板指的是前端模板。AngularJS有内置的前端模板引擎,即所有页面渲染的操作都是放在浏览器端来渲染的,这也是SPA程序的一个优势所在,所有前端框架都内置了前端模板引擎,将页面的渲染放在前端来做,从而减轻服务端的压力。
在AngularJs中的模板就是指带有ng-app指令的HTML代码。AngularJs发现Html页面是否需要用AngularJs模板引擎去渲染的标志就是ng-app标签。
在AngularJs中,我们写的其实也并不是纯的Html页面,而是模板,最终用户看到的Html页面(也就是视图)是通过模板渲染后的结果。
下面来看下模板的例子:
<!DOCTYPE html>
<html ng-app="mainApp">
<head>
    <meta http-equiv="Content-Type" content="text/html; charset=utf-8" />
    <title>Template Demo</title>
      <script src="http://sandbox.runjs.cn/uploads/rs/376/pbcx3e1z/angular.min.js"></script>
    <script>
        (function() {
              // 创建模块
                var mainApp = angular.module("mainApp",[]);
               // 创建控制器,并注入scope
                 mainApp.controller("tempController", ["$scope", function ($scope) {
         $scope.val = "Welcome to Study AngularJs.";
            }]);
        })()
    </script>
</head>
<body>
    <h2>AngularJS 模块演示</h2>

    <div ng-controller="tempController">
        <div><input type="text" ng-model="val">  {{val}}</div>
    </div>

</body>
</html>
在线预览地址:点击此运行
其实模板中的例子中,我们就已经定义了名为"tempController"的控制器了。接下来,我们再详细介绍下AngularJs中的控制器。其实AngularJs中控制器的作用与Asp.net MVC中控制器的作用是一样的,都是模型和视图之间的桥梁。而AngularJs的模型对象就是$scope。所以AngularJs控制器知识$scope和视图之间的桥梁,它通过操作$scope对象来改变视图。下面代码演示了控制器的使用:
<!DOCTYPE html>
<html ng-app="mainApp">
<head>
    <meta http-equiv="Content-Type" content="text/html; charset=utf-8" />
    <title>AngularJS 控制器演示</title>
    <script src="http://sandbox.runjs.cn/uploads/rs/376/pbcx3e1z/angular.min.js">
    </script>

     <script>
        (function() {
              // 创建模块
                var mainApp = angular.module("mainApp", []);
                mainApp.controller("cntoController", ["$scope", function ($scope) {
                                var defaultValue = "Learninghard 前端系列";
                                    $scope.val = defaultValue;
                                $scope.click = function () {
                                    $scope.val = defaultValue;
                                };
                            }]);
        })()
    </script>
</head>
<body>
    <h2>AngularJS 控制器演示</h2>
    <div ng-controller="cntoController">
        <div><textarea ng-model="val"></textarea></div>
        <div>{{val}}</div>
        <div><button ng-click="click()">重置</button></div>
    </div>

</body>
</html>
在线预览效果:点击此运行
之所以说AngularJs框架=MVC+MVVM,是因为AngularJs除了支持双向绑定外(即MVVM特点),还支持路由。在之前介绍的KnockoutJs实现的SPA中,其中路由借用了Asp.net MVC中路由机制。有了AngularJs之后,我们Web前端页面完全可以不用Asp.net MVC来做了,完全可以使用AngularJs框架来做。
单页Web应用由于没有后端URL资源定位的支持,需要自己实现URL资源定位。AngularJs使用浏览器URL"#"后的字符串来定位资源。路由机制并非在AngularJS核心文件内,你需要另外加入angular-route.min.js脚本。并且创建mainApp模块的时候需要添加对ngRoute的依赖。
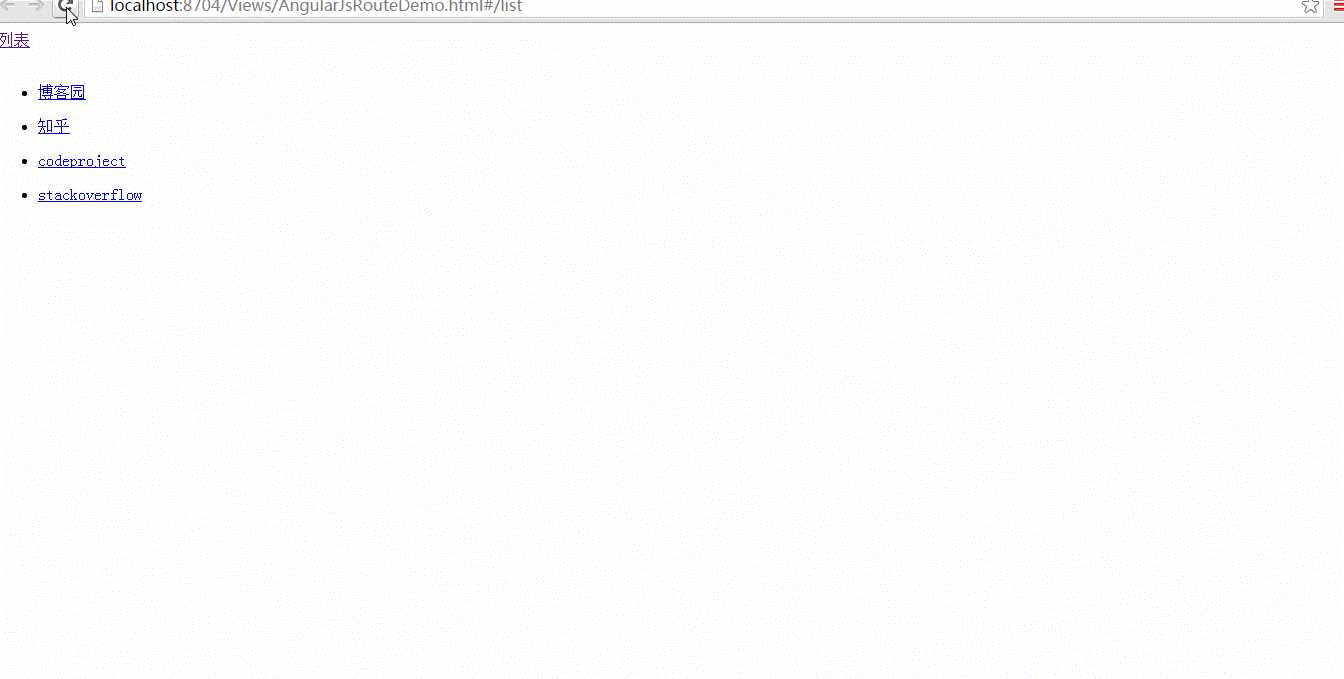
下面让我们具体看看路由的例子来感受下AngularJs中路由的使用。具体的示例代码如下:
主页面 AngularJsRouteDemo.html
<!DOCTYPE html>
<html ng-app="mainApp" xmlns="http://www.w3.org/1999/xhtml">
<head>
    <meta http-equiv="Content-Type" content="text/html; charset=utf-8" />
    <title>AngularJs路由演示</title>
    <script src="http://sandbox.runjs.cn/uploads/rs/376/pbcx3e1z/angular.min.js"></script>
    <script src="http://sandbox.runjs.cn/uploads/rs/376/pbcx3e1z/angular-route.min.js"></script>
    <script>
        (function() {
            // 设置当前模块依赖,“ngRoute”,用.NET的解就是给这个类库添加“ngRoute”引用
            var mainApp = angular.module("mainApp", [‘ngRoute‘]);
            mainApp.config([‘$routeProvider‘, function($routeProvider) {
                // 路由配置
                var route = $routeProvider;
                // 指定URL为“/” 控制器:“listController”,模板:“route-list.html”
                route.when(‘/list‘, { controller: ‘listController‘, templateUrl: ‘route-list.html‘ });
                // 注意“/view/:id” 中的 “:id” 用于捕获参数ID
                route.when(‘/view/:id‘, { controller: ‘viewController‘, templateUrl: ‘route-view.html‘ });
                // 跳转
                route.when("/", { redirectTo: ‘/list‘ });
                route.otherwise({ redirectTo: ‘/list‘ });
            }]);

            //创建一个提供数据的服务器
            mainApp.factory("service", function() {
                var list = [
                    { id: 1, title: "博客园", url: "http://www.cnblogs.com" },
                    { id: 2, title: "知乎", url: "http://www.zhihu.com" },
                    { id: 3, title: "codeproject", url: "http://www.codeproject.com/" },
                    { id: 4, title: "stackoverflow", url: "http://www.stackoverflow.com/" }
                ];
                return function(id) {
                    //假如ID为无效值返回所有
                    if (!id) return list;
                    var t = 0;
                    //匹配返回的项目
                    angular.forEach(list, function(v, i) {
                        if (v.id == id) t = i;
                    });
                    return list[t];
                }
            });

            // 创建控制器 listController,注入提供数据服务
            mainApp.controller("listController", ["$scope", "service", function($scope, service) {
                //获取所有数据
                $scope.list = service();
            }]);

            // 创建查看控制器 viewController, 注意应为需要获取URL ID参数 我们多设置了一个 依赖注入参数 “$routeParams” 通过它获取传入的 ID参数
            mainApp.controller("viewController", ["$scope", "service", ‘$routeParams‘, function($scope, service, $routeParams) {
                $scope.model = service($routeParams.id || 0) || {};
            }]);
        })()
    </script>
</head>
<body>
    <div><a href="#/list">列表</a></div>
    <br />
    <div ng-view>
    </div>

</body>
</html>
列表页面 route-list.html
<ul ng-repeat="item in list">
    <li><a href="#view/{{item.id}}">{{item.title}}</a></li>
</ul>
详细页面 route-view.html
<div>
    <div>网站ID:{{model.id}}</div>
    <div>网站名称:<a href="{{model.url}}" rel="nofollow">{{model.title}}</a></div>
    <div>访问地址:{{model.url}}</div>
</div>
在线预览地址:点击此运行

前面我们已经介绍过指令了。除了AngularJs内置的指令外,我们也可以自定义指令来供我们程序使用。
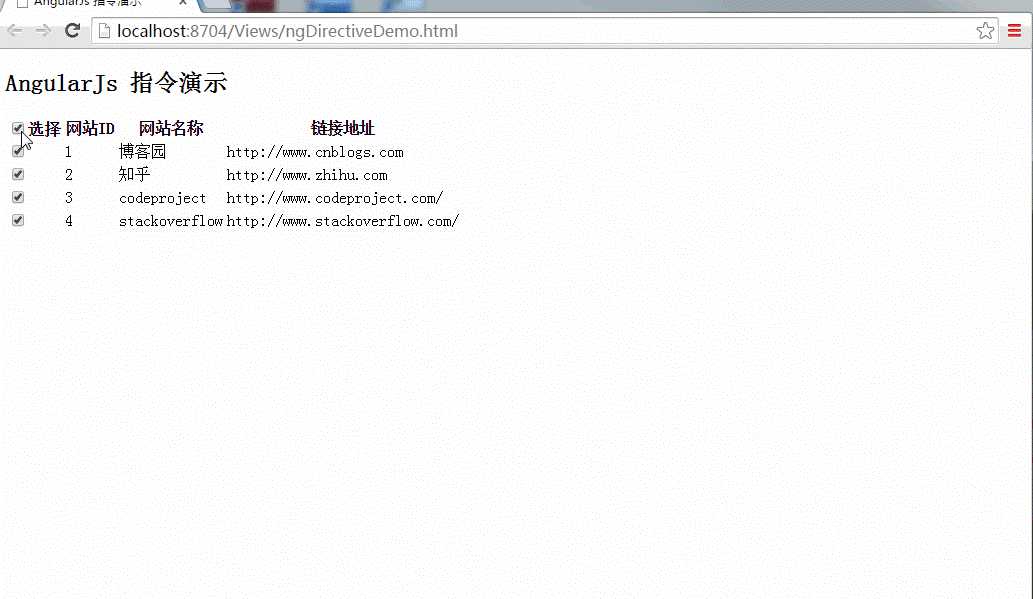
如果我们在程序中需要对DOM操作的话,我们可以使用指令来完成。下面让我们来看下一个全选复选框的自定义指令的实现:
<!DOCTYPE html>
<html ng-app="mainApp" xmlns="http://www.w3.org/1999/xhtml">
<head>
    <meta http-equiv="Content-Type" content="text/html; charset=utf-8" />
    <title>AngularJs 指令演示</title>
    <script src="http://sandbox.runjs.cn/uploads/rs/376/pbcx3e1z/jquery-1.10.2.min.js"></script>
    <script src="http://sandbox.runjs.cn/uploads/rs/376/pbcx3e1z/angular.min.js"></script>
    <script>
        (function(){
            var mainApp = angular.module("mainApp", []);
            //创建一个提供数据的服务器
            mainApp.factory("service", function () {
        var list = [
           { id: 1, title: "博客园", url: "http://www.cnblogs.com" },
           { id: 2, title: "知乎", url: "http://www.zhihu.com" },
           { id: 3, title: "codeproject", url: "http://www.codeproject.com/" },
           { id: 4, title: "stackoverflow", url: "http://www.stackoverflow.com/" }
        ];
        return function (id) {
            //假如ID为无效值返回所有
            if (!id) return list;
            var t = 0;
            //匹配返回的项目
            angular.forEach(list, function (v, i) {
                if (v.id == id) t = i;
            });
            return list[t];
        };
    });

            mainApp.directive(‘imCheck‘, [function () {
        return {
            restrict: ‘A‘,
            replace: false,
            link: function (scope, element) {
                var all = "thead input[type=‘checkbox‘]";
                var item = "tbody input[type=‘checkbox‘]";
                //当点击选择所有项目
                element.on("change", all, function () {
                    var o = $(this).prop("checked");
                    var tds = element.find(item);
                    tds.each(function (i, check) {
                        $(check).prop("checked", o);
                    });
                });
                //子项修改时的超值
                element.on("change", item, function () {
                    var o = $(this).prop("checked");
                    var isChecked = true;
                    if (o) {
                        element.find(item).each(function () {
                            if (!$(this).prop("checked")) {
                                isChecked = false;
                                return false;
                            }
                            return true;
                        });
                    }
                    element.find(all).prop("checked", o && isChecked);
                });
            }
        };
    }]);

            mainApp.controller("dectController", [‘$scope‘, ‘service‘, function ($scope, service) {
        $scope.list = service();
    }]);

        })()
    </script>
</head>
<body>
    <h2>AngularJs 指令演示</h2>
    <table ng-controller="dectController" im-check>
        <thead>
            <tr>
                <th><input type="checkbox">选择</th>
                <th>网站ID</th>
                <th>网站名称</th>
                <th>链接地址</th>
            </tr>
        </thead>
        <tbody>
            <tr ng-repeat="item in list">
                <td><input type="checkbox"></td>
                <td>{{item.id}}</td>
                <td>{{item.title}}</td>
                <td>{{item.url}}</td>
            </tr>
        </tbody>
    </table>


</body>
</html>
演示效果:点击此运行

在上面的路由例子和自定义指令中都有用到AngularJs中的服务。我理解AngularJs的服务主要是封装请求数据的内容。就如.NET解决方案的层次结构中的Services层。然后AngularJs中的服务一个很重要的一点是:服务是单例的。一个服务在AngularJS应用中只会被注入实例化一次,并贯穿整个生命周期,与控制器进行通信。即控制器操作$scope对象来改变视图,如果控制器需要请求数据的话,则是调用服务来请求数据的,而服务获得数据可以通过Http服务(AngularJS内置的服务)来请求后端的Web API来获得所需要的数据。
AngularJS系统内置的服务以$开头,我们也可以自己定义一个服务。定义服务的方式有如下几种:
在前面的例子我们都是以factory方法创建服务的,接下来演示下如何使用$provide服务来创建一个服务,具体的代码如下所示:
<!DOCTYPE html>
<html ng-app="mainApp" xmlns="http://www.w3.org/1999/xhtml">
<head>
    <meta http-equiv="Content-Type" content="text/html; charset=utf-8" />
    <title>AngularJs 指令演示</title>
    <script src="http://sandbox.runjs.cn/uploads/rs/376/pbcx3e1z/jquery-1.10.2.min.js"></script>
    <script src="http://sandbox.runjs.cn/uploads/rs/376/pbcx3e1z/angular.min.js"></script>
    <script>
        (function(){
            var mainApp = angular.module("mainApp", []).config([‘$provide‘, function($provide){
            // 使用系统内置的$provide服务来创建一个提供数据的服务器
            $provide.factory("service", function () {
        var list = [
           { id: 1, title: "博客园", url: "http://www.cnblogs.com" },
           { id: 2, title: "知乎", url: "http://www.zhihu.com" },
           { id: 3, title: "codeproject", url: "http://www.codeproject.com/" },
           { id: 4, title: "stackoverflow", url: "http://www.stackoverflow.com/" }
        ];
        return function (id) {
            //假如ID为无效值返回所有
            if (!id) return list;
            var t = 0;
            //匹配返回的项目
            angular.forEach(list, function (v, i) {
                if (v.id == id) t = i;
            });
            return list[t];
        };
     });
            }]);

            mainApp.directive(‘imCheck‘, [function () {
        return {
            restrict: ‘A‘,
            replace: false,
            link: function (scope, element) {
                var all = "thead input[type=‘checkbox‘]";
                var item = "tbody input[type=‘checkbox‘]";
                //当点击选择所有项目
                element.on("change", all, function () {
                    var o = $(this).prop("checked");
                    var tds = element.find(item);
                    tds.each(function (i, check) {
                        $(check).prop("checked", o);
                    });
                });
                //子项修改时的超值
                element.on("change", item, function () {
                    var o = $(this).prop("checked");
                    var isChecked = true;
                    if (o) {
                        element.find(item).each(function () {
                            if (!$(this).prop("checked")) {
                                isChecked = false;
                                return false;
                            }
                            return true;
                        });
                    }
                    element.find(all).prop("checked", o && isChecked);
                });
            }
        };
    }]);

        mainApp.controller("dectController", [‘$scope‘, ‘service‘, function ($scope, service) {
        $scope.list = service();
    }]);

        })()
    </script>
</head>
<body>
    <h2>AngularJs 指令演示</h2>
    <table ng-controller="dectController" im-check>
        <thead>
            <tr>
                <th><input type="checkbox">选择</th>
                <th>网站ID</th>
                <th>网站名称</th>
                <th>链接地址</th>
            </tr>
        </thead>
        <tbody>
            <tr ng-repeat="item in list">
                <td><input type="checkbox"></td>
                <td>{{item.id}}</td>
                <td>{{item.title}}</td>
                <td>{{item.url}}</td>
            </tr>
        </tbody>
    </table>
</body>
</html>
具体的运行效果与上面的效果一样。点击此运行
AngularJs过滤器就是用来格式化数据的,包括排序,筛选、转化数据等操作。下面代码创建了一个反转过滤器。
<!DOCTYPE html>
<html ng-app="mainApp" xmlns="http://www.w3.org/1999/xhtml">
<head>
    <meta http-equiv="Content-Type" content="text/html; charset=utf-8" />
    <title>AngularJs 过滤器演示</title>

    <script src="http://sandbox.runjs.cn/uploads/rs/376/pbcx3e1z/angular.min.js"></script>
  <script>
        (function () {
            var mainApp = angular.module("mainApp", []);

                        // 定义反转过滤器,过滤器用来格式化数据(转化,排序,筛选等操作)。
                    mainApp.filter(‘reverse‘, function() {
                        return function(input, uppercase) {
                            input = input || ‘‘;
                            var out = "";
                            for (var i = 0; i < input.length; i++) {
                                out = input.charAt(i) + out;
                            }

                            if (uppercase) {
                                out = out.toUpperCase();
                            }
                        return out;
                        };
                        });

                        mainApp.controller("filterController", [‘$scope‘, function($scope) {
                            $scope.greeting = "AngularJs";
                        }]);
            })()
    </script>
</head>
<body>
    <div ng-controller="filterController">
        <input ng-model="greeting" type="text"><br>
        No filter: {{greeting}}<br>
        Reverse: {{greeting|reverse}}<br>
        Reverse + uppercase: {{greeting|reverse:true}}<br>
    </div>

</body>
</html>
具体的运行效果:点击此运行
前面例子中的实现方式并不是我们在实际开发中推荐的方式,因为上面的例子都是把所有的前端逻辑都放在一个Html文件里面,这不利于后期的维护。一旦业务逻辑一复杂,这个Html文件将会变得复杂,导致跟踪问题和fix bug难度变大。在后端开发过程中,我们经常讲职责单一,将功能相似的代码放在一起。前端开发也同样可以这样做。对应的模块化框架有:RequireJs、SeaJs等。
也可以使用AngularJs内置的模块化来更好地组织代码结构。具体的代码请到本文结尾进行下载。这里给出一张采用模块化开发的截图:

到这里,本文的所有内容就结束了,在后面的一篇文章中,我将分享使用AngularJs实现一个简易的权限管理系统。
更多内容参考:
本文所有源码下载:AngularJsQuickStart
标签:
原文地址:http://www.cnblogs.com/Leo_wl/p/5470493.html