标签:
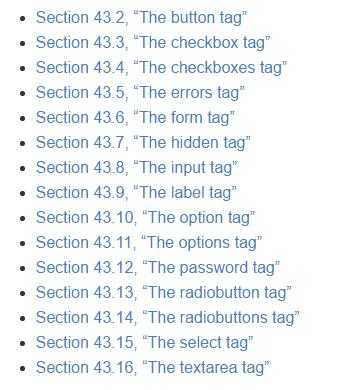
Spring提供了一些jsp页面常用的form标签,很大程度上提高了我们开发的速度,不用再一个个的标签去绑定属性,而且后台接收数据也很简单,可以直接接收object对象作为属性。官方form标签介绍的网址为http://docs.spring.io/spring/docs/4.2.6.RELEASE/spring-framework-reference/htmlsingle/#spring-form-tld。包含以下的标签:

在jsp页面使用spring提供的标签需要引入相关的taglib:<%@ taglib prefix="form" uri="http://www.springframework.org/tags/form" %>
简要说下几个关键的标签。
form标签包含了几个特有的属性:
2. option和options标签
option标签是配合form:select标签使用的,用于下拉列表。如果option数据从后台传过来的集合,可以使用options标签,它有一个items属性,可用集合、map和数组数据。itemLabel标签显示标签名称。itemValue 显示值。相同的还有checkboxes和radiobuttons标签。
3. error标签
error标签用于向页面输出后台传递的错误信息。需要配合Volidator使用。
如何从前端绑定数据到后台呢,springmvc提供了一个@initBinder注解,可用于我们绑定表单数据到后台方法。被注解的方法有一个参数WebDataBinder,可用于数据绑定和验证。
例如我们现在有一个表单,表单代码如下:
1  <form:form>
2         用户:<input name="user" type="text"/>
3         地址:<input name="address" type="text"/>
4         <input type="submit" value="提交"/>
5  </form:form>
我们需要提交用户和地址到后台接收,并且存在两个对象,分别是User和UserWarpper对象:
1 public class User {
2
3     private String userName;
4     private int age;
5     // getter setter...
6 }
1 public class UserWarpper {
2
3     private User user;
4     private String address;
5     //getter setter...
6 }
绑定表单数据到后台需要对绑定的数据新建一个属性编辑器PropertyEditorSupport,此处的对User进行数据绑定:
 1 public class UserPropertyEditor extends PropertyEditorSupport{
 2
 3     @Override
 4     public void setAsText(String text) throws IllegalArgumentException {
 5             if(text!=null){
 6                 User user = new User();
 7                 user.setName(text);
 8                 setValue(user);
 9             }
10
11     }
12 }
下一步只需要在请求的controller里注册即可:
 1 @Controller
 2 @RequestMapping("/form")
 3 public class MyFormController {
 4
 5     @InitBinder
 6     public void init(WebDataBinder binder){
 7         binder.registerCustomEditor(User.class, new UserPropertyEditor());
 8     }
 9
10     @RequestMapping("/submit")
11     public void submit(UserWarpper userWarpper){
12
13     }
14 }
假设前端输入的是用户的name属性,那么在请求提交表单的时候,会将表单中的user属性包装成user对象并设置到UserWarpper对象中。
此外,WebDataBinder还有一个addValidators(Validator...)方法还可以用于数据的验证,配合errors标签向前端输出错误信息。
首先建立验证器:
 1 public class MyValidator implements Validator{
 2
 3     @Override
 4     public boolean supports(Class<?> clazz) {
 5         return User.class.equals(clazz);
 6     }
 7
 8     @Override
 9     public void validate(Object target, Errors errors) {
10         ValidationUtils.rejectIfEmpty(errors, "name", "名称不能为空!");
11     }
12
13 }
然后在initBinder注解的方法中添加验证器:
binder.addValidators(new MyValidator());
那么在前端中显示错误信息的代码如下:
1 <form:errors path="name"/>
如果要显示所有错误信息,使用“*”。
spring内置了很多基本的属性编辑器,如时间编辑器等等可供我们使用:
1   binder.registerCustomEditor(Boolean.class, new CustomBooleanEditor(true));
2    binder.registerCustomEditor(Number.class, new CustomNumberEditor(Number.class, true));
3    binder.registerCustomEditor(ArrayList.class, new CustomCollectionEditor(ArrayList.class, true));
4    binder.registerCustomEditor(Date.class, new CustomDateEditor(new SimpleDateFormat("yyyy-MM-DD"), true));
标签:
原文地址:http://www.cnblogs.com/bigbang92/p/spring-initbinder-webdatabinder.html