标签:
2016年5月24日(妙味课堂js预热课程-2笔记)
一、前言
1、window.onload(事件):是在页面加载完成以后来执行一个功能;
如 window.onload=function(){
alert(“a”)
}
这是一个匿名函数,因为在function后面括号前面没有名字;
即在页面加载完成以后弹出一个警告框!
2、如何提取行间事件;
3、为什么一定要用到onload?
二、主要内容
1、收缩展开菜单——if判断
如果菜单已经是显示的,把菜单隐藏;
如果菜单已经是隐藏的,把菜单显示。
<script type="text/javascript">
window.onload=function () {
var oBtn=document.getElementById("btn");
var oUl=document.getElementById("ul1");
oBtn.onclick=function () {
if (oUl.style.display=="block"){
oUl.style.display="none";
}else {
oUl.style.display="block";
}
}
}
</script>
2、全选功能
注意点:
a:get Elements By TagName通过标签名选择一组元素
b:这一组元素的长度可以按照这个alert(aInput.length);语句来弹出;
c: aInput[0].checked=true;其中checked是复选框checkbox独有的属性,其属性值由true和false;
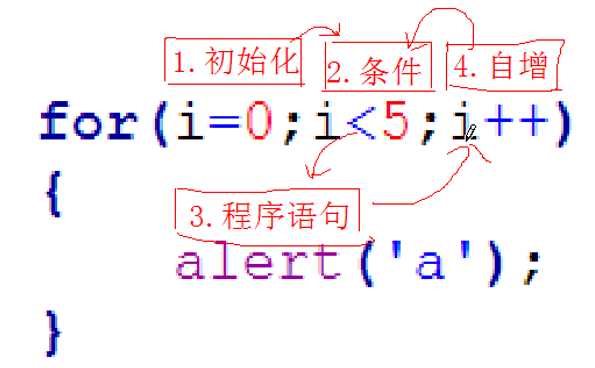
d:for循环;
var i=0;
for(i=0;i《5;i++){
alert(“i”);
}
运行该代码,则会弹出0,1,2,3,4,5;
此全选代码为:
<script type="text/javascript">
window.onload=function () {
var oBtn=document.getElementById("btn");
var aInput=document.getElementsByTagName("input");
var i=0;
oBtn.onclick=function () {
for (i=0;i<aInput.length;i++){
aInput[i].checked=true;
}
}
}
</script>
e:注意事件提取与for循环的运用:如点击每一个按钮都会弹出一个“a”;
则js代码如下:
<script type="text/javascript">
window.onload=function () {
var oBtn=document.getElementById("input");
var i=0;
for (i=0;i<aInput.length;i++){
aBtn[i].onclick=function () {
alert("a");
}
}
}
</script>
重点词:this
<script type="text/javascript">
window.onload=function () {
var oBtn=document.getElementById("input");
var i=0;
for (i=0;i<aInput.length;i++){
aBtn[i].onclick=function () {
alert(this.value);
}
}
}
</script>
this指的是当前发生事件的那个元素;
3、选项卡(tab标签)
class=“active”当前被选中状态
第一步:制作三个点击按钮:(其中一个按钮为选中状态)
<input class="active" type="button" value="1" />
<input type="button" value="2" />
<input type="button" value="3" />
第二步:为按钮加简单样式:
<style>
input{background: white ;}
.active{background: yellow;}
</style>
第三步:加事件,即点击之后按钮变为yellow;
<script type="text/javascript">
window.onload=function () {
var aBtn=document.getElementsByTagName("input");
var i=0;
for(i=0;i<aBtn.length;i++){
aBtn[i].onclick=function () {
for(i=0;i<aBtn.length;i++){
aBtn[i].className=‘‘;
}
this.className="active"
}
}
}
</script>
因此选项卡的头部就完成了,接下来做选项卡的下面部分;
第四步:在下面加内容,以及为其内容加样式,并设置第一部分内容显示,其他内容隐藏;
<div style="display:block">111</div>
<div>222</div>
<div>333</div>
div{width:200px;height:200px;background:#ccc;display:none;}
第五步:同样的为内容加点击事件:
<script type="text/javascript">
window.onload=function () {
var aBtn=document.getElementsByTagName("input");
var aDiv=document.getElementsByTagName("div");
var i=0;
for(i=0;i<aBtn.length;i++){
aBtn[i].index=i;
aBtn[i].onclick=function () {
for(i=0;i<aBtn.length;i++){
aBtn[i].className=‘‘;
aDiv[i].style.display=‘none‘;
}
this.className="active";
aDiv[this.index].style.display="block";
}
}
}
</script>
这样选项卡就完成了。
效果原理为:
1、点击按钮时,改变class的style.display
2、选项卡的头部标签:
所有按钮的className都为空
让当前按钮的className为active
(注意this的使用)
3、选项卡内容
所有div的display都为none
让当前div的display为block
(注意当前编号的使用即aBtn[i].index=i;)
标签:
原文地址:http://www.cnblogs.com/zzjeny/p/5525760.html