那么接下来就开始整个LAMP环境的搭建吧,这里我采用的是源码编译安装,虽然用yum安装会非常省事,但是由于yum安装的各种包版本可能比较老,在不同的系统上yum可能支持性不好,对后续的维护可能会有影响,所以综合考虑后,还是决定用源码编译来部署LAMP环境,如果为了图省事,以后就会有源源不断的麻烦事涌来,这样做得不偿失,做运维,在起初环境的设计和部署上一定要谨慎周全的考虑,把各方各面都要考虑周全,谨小慎微,容不得一点的纰漏,不然后期维护会非常的头疼,这一点是通用的,切记!!!这里我就用LAMP的环境搭建来做个事例吧,搭建过程中必须要做到条理清晰,思路严谨,任何的马虎都有可能为后期的维护带来巨大的隐患。
那么在搭建LAMP之前,首先简单地介绍一下LAMP的相关概念,以及整个LAMP源码编译的实验环境(由于条件限制,这里我用的是虚拟机来进行的实验,不过真实的生产环境操作一样),大体步骤(这个是整个实验的指导思路,脉络,后面的整个实验都是按照这个步骤有条不紊的进行,确保实验高质量的完成)
在安装LAMP之前,对LAMP进行了解是肯定的了, 首先就说说其含义
LAMP指的是linux,Apache,Mysql以及Php的简称,通过大量的生产环境的实践证明,在网络应用和开发环境方面,LAMP组合是非常棒的黄金搭档,它们的结合提供了非常强大功能。
linux作为底层的操作系统,提供灵活且可定制性的应用平台,为其他组件稳定高效的运行在其之上提供了保障
Apache作为Web服务器,提供了功能强大,稳定且支撑能力突出的web平台,为网站提供了强力支柱
Mysql也是一款非常优秀的数据库,从其产生的从多衍生数据库就可见证明其强大
Php是一种开发源代码的多用途脚本语言,可嵌入html中,适用于web开发,且其编写的数据可访问mysql数据库及linux提供的动态内容
Apache2.4版本开始不自带apr库,所以需要下载相应的库文件(百度云盘:http::/pan.baidu.com/s/1bnL31c7)
1.apr(Apache依赖包) http://irrors.hust.edu.cn/apache/apr
2.apr-util (Apache依赖包) http://irrors.hust.edu.cn/apache/apr
3.pcre (Apache依赖包) http://sourceforge.net/projects/pcre/files/pcre/
4.Apache http://archive.apache.org/dist/httpd/
[root@localhost soft]#tar -zxvf
[root@localhost soft]#tar -zxvf apr-1.5.2.tar.gz
[root@localhost soft]#tar -zxvf apr-util-1.5.4.tar.g
[root@localhost soft]#tar -zxvf pcre-8.37.tar.g
将相关依赖包放入/soft/httpd-2.4.16/srclib/中
[root@localhost soft]#mv apr-1.5.2 /httpd-2.4.16/srclib/apr
[root@localhost soft]#mv apr-util /httpd-2.4.16/srclib/apr-util
[root@localhost soft]# cd /soft/httpd-2.4.16/srclib/
[root@localhost srclib]# cd apr 在目录apr下进入configure配置文件将$RM "cfgfile"这一行用#注销
[root@localhost apr]# ./configure --prefix=/usr/local/apr
[root@localhost apr]# make && make install
[root@localhost srclib]# cd apr-util
[root@localhost apr-util]# ./configure --prefix=/usr/local/apr-util --with-apr=/usr/local/apr/bin/apr-1-config
[root@localhost apr-util]# make && make install
[root@localhost srclib]# tar -zxvf pcre-8.37.tar.gz
[root@localhost srclib]# mv pcre-8.37 pcre
[root@localhost pcre-8.37]# ./configure --prefix=/usr/local/pcre
[root@localhost pcre-8.37]# make && make install
[root@localhost soft]# cd httpd-2.4.16
[root@localhost soft]# ./configure --prefix=/usr/local/apache2 --sysconfdir=/etc/httpd --with-z=/usr/local/zlib/ --enable-so --enable-deflate=shared --enable-expires=shared --enable-rewrite=shared --enable-static-support --with-apr=/usr/local/apr --with-apr-util=/usr/local/apr-util --with-pcre=/usr/local/pcre
[root@localhost soft]# make && make install
安装详解
#./configure \ #执行当前目录下软件自带的配置命令
#--prefix=/usr/local/apache2 \ #指定Apache软件安装的位置
#--sysconfdir=/etc/httpd \ #指定Apache服务器配置文件存放位置
# --with-z=/usr/local/zlib/ \ #指定zlib库文件的位置
# --enable-so \ #以动态共享对象(DSO)编译
# --enable-deflate=shared \ #缩小传输编码的支持
# --enable-expires=shared \ #期满头控制
# --enable-rewrite=shared \ #基于规则的URL操控
# --enable-static-support \ #建立一个静态链接版本的支持
#--with-apr=/usr/local/apr \ #加入apr依赖包安装路径
#--with-apr-util=/usr/local/apr-util \ #加入apr-util依赖包安装路径
#--with-pcre=/usr/local/pcre \ #加入pcre依赖包安装路径
进入/etc/httpd/httpd.conf配置文件,任意位置插入一行ServerName localhost:80
[root@localhost httpd]# /usr/local/apache2/bin/apachectl start
httpd (pid 55493) already running
[root@end ~]# cp /usr/local/apache2/bin/apachectl /etc/rc.d/init.d/httpd
[root@end ~]# service httpd start
httpd (pid 45005) already running
[root@localhost httpd]# netstat -na |grep 80
tcp 0 0 :::80 :::* LISTEN 24534/httpd
进入/etc/init.d/httpd,加入
# chkconfig: 345 61 61
# description:Apache httpd
[root@end ~]# chkconfig --add httpd
[root@end ~]# chkconfig httpd on
关闭iptables
[root@localhost httpd]# iptables -F 清空iptables防火墙策略
[root@localhost httpd]# service iptables stop 关闭防火墙
iptables: Setting chains to policy ACCEPT: filter [ OK ]
iptables: Flushing firewall rules: [ OK ]
iptables: Unloading modules: [ OK ]
[root@localhost httpd]# chkconfig iptables off 重启后防火墙依旧处于关闭状态
关闭selinux
两种方法
1.使用命令setenforce 0 系统重启即失效(不需要重启)
2.编辑配置文件/etc/sysconfig/selinux 将SELINUX=enforcing改为disabled状态( 须重启生效)
[root@localhost httpd]# setenforce 0 临时将selinux改为Permission状态,重启系统后失效
[root@localhost httpd]# cat /etc/sysconfig/selinux
# This file controls the state of SELinux on the system.
# SELINUX= can take one of these three values:
# enforcing - SELinux security policy is enforced.
# permissive - SELinux prints warnings instead of enforcing.
# disabled - No SELinux policy is loaded.
SELINUX=disabled 将selinux改为disabled状态,需要重启系统才能生效
# SELINUXTYPE= can take one of these two values:
# targeted - Targeted processes are protected,
# mls - Multi Level Security protection.
SELINUXTYPE=targeted
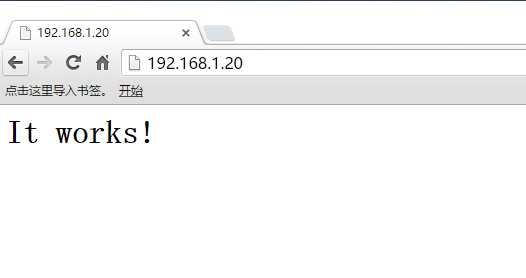
最后打开网页,输入网址http://ip即可查看网页内容
网页显示It works!就说明apache安装成功了

从mysql 5.5版本开始,mysql源码安装开始使用cmake了
下载cmake http://cmake.org/files/
下载ncurses http://ftp.gnu.org/gnu/ncurses/
下载bison http://ftp.gnu.org/gnu/bison
[root@localhost mysql]# tar -zxvf cmake-3.4.1.tar.gz
[root@localhost cmake-3.4.1]# ./configure
[root@localhost cmake-3.4.1]# make ; make install
[root@localhost mysql]# tar -zxvf bison-3.0.tar.gz
[root@localhost bison-3.0]# ./configure
[root@localhost bison-3.0]# make ; make install
[root@localhost mysql]# tar -zxvf ncurses-6.0.tar.gz
[root@localhost ncurses-6.0]# ./configure
[root@localhost ncurses-6.0]# make ; make install
解压mysql
[root@localhost soft]# tar -zxvf mysql-5.5.45.tar.gz
安装mysql
[root@localhost mysql-5.5.46]# cmake -DCMAKE_INSTALL_PREFIX=/usr/local/mysql -DMYSQL_DATADIR=/usr/local/mysql/data -DSYSCONFDIR=/etc -DWITH_MYISAM_STORAGE_ENGINE=1 -DWITH_INNOBASE_STORAGE_ENGINE=1 -DWITH_MEMORY_STORAGE_ENGINE=1 -DWITH_READLINE=1 -DMYSQL_UNIX_ADDR=/var/lib/mysql/mysql.sock -DMYSQL_TCP_PORT=3306 -DENABLED_LOCAL_INFILE=1 -DWITH_PARTITION_STORAGE_ENGINE=1 -DEXTRA_CHARSETS=all -DDEFAULT_CHARSET=utf8 -DDEFAULT_COLLATION=utf8_general_ci
编译mysql
[root@localhost mysql-5.5.46]#make ; make install
安装详解
# -DCMAKE_INSTALL_PREFIX=/usr/local/mysql \ #安装路径
# -DMYSQL_DATADIR=/usr/local/mysql/data \ #数据文件存放位置
# -DSYSCONFDIR=/etc \ #my.cnf路径
# -DWITH_MYISAM_STORAGE_ENGINE=1 \ #支持MyIASM引擎
# -DWITH_INNOBASE_STORAGE_ENGINE=1 \ #支持InnoDB引擎
# -DWITH_MEMORY_STORAGE_ENGINE=1 \ #支持Memory引擎
# -DWITH_READLINE=1 \ #快捷键功能(我没用过)
# -DMYSQL_UNIX_ADDR=/tmp/mysqld.sock \ #连接数据库socket路径
# -DMYSQL_TCP_PORT=3306 \ #端口
# -DENABLED_LOCAL_INFILE=1 \ #允许从本地导入数据
# -DWITH_PARTITION_STORAGE_ENGINE=1 \ #安装支持数据库分区
# -DEXTRA_CHARSETS=all \ #安装所有的字符集
# -DDEFAULT_CHARSET=utf8 \ #默认字符
# -DDEFAULT_COLLATION=utf8_general_ci \ #校验字符
[root@end mysql]# groupadd mysql 创建mysql组
[root@end mysql]# useradd -r -g mysql mysql 创建mysql用户并添加到mysql组
[root@end mysql]#chown -R mysql:mysql /usr/local/mysql 将mysql目录下的所有文件的所有者和所有组改为msyql
[root@end mysql]# chmod 777 scripts/mysql_install_db
[root@end mysql]# scripts/mysql_install_db --basedir=/usr/local/mysql --datadir=/usr/local/mysql/data --user=mysql
3-4.复制mysql服务启动配置文件(注意:在CentOS 6.4版操作系统的最小安装完成后,在/etc目录下会存在一个my.cnf,需要将此文件更名为其他的名字,如:/etc/my.cnf.bak,否则,该文件会干扰源码安装的MySQL的正确配置,造成无法启动) [root@end mysql]# cp /usr/local/mysql/support-files/my-medium.cnf /etc/my.cnf
[mysqld]
datadir=/usr/local/mysql/data
socket=/var/lib/mysql/mysql.sock
user=mysql
# Disabling symbolic-links is recommended to prevent assorted security risks
symbolic-links=0
[mysqld_safe]
log-error=/var/log/mysqld.log
pid-file=/var/run/mysqld/mysqld.pid
/usr/local/mysql/support-files/mysql.server /etc/rc.d/init.d/mysqld 将mysqld添加为服务
[root@end mysql]# chkconfig --add mysqld 将mysqld服务添加到chkconfig中
[root@end mysql]# chkconfig mysqld on 重启系统后服务自动运行
在文件/etc/profile末尾添加
PATH=/usr/local/mysql/bin:$PATH
[root@end mysql]# source /etc/profile 使修改的环境变量立即生效
[root@end mysql]# service mysqld start
Starting MySQL... [确定]
[root@end mysql]# netstat -tulnp |grep 3306
tcp 0 0 0.0.0.0:3306 0.0.0.0:* LISTEN 24351/mysqld
[root@localhost ncurses-6.0]# ps aux |grep mysql
root 48813 0.0 0.3 11304 1492 pts/2 S 16:47 0:00 /bin/sh /usr/local/mysql/bin/mysqld_safe --datadir=/usr/local/mysql/data --pid-file=/usr/local/mysql/data/localhost.localdomain.pid
mysql 48979 0.0 9.8 413156 37360 pts/2 Sl 16:47 0:00 /usr/local/mysql/bin/mysqld --basedir=/usr/local/mysql --datadir=/usr/local/mysql/data --plugin-dir=/usr/local/mysql/lib/plugin --user=mysql --log-error=/var/log/mysqld.log --pid-file=/usr/local/mysql/data/localhost.localdomain.pid --socket=/var/lib/mysql/mysql.sock
root 49018 0.0 0.2 103304 892 pts/2 S+ 16:53 0:00 grep mysql
[root@end mysql]# mysql -uroot 登录到mysql,首次登陆无密码
mysql> SET PASSWORD = PASSWORD(‘endmoon‘); 设置mysql密码
Query OK, 0 rows affected (0.00 sec)
[root@end mysql]# mysql -u root -p
Enter password: endmoon
mysql> GRANT ALL PRIVILEGES ON *.* TO ‘root‘@‘192.168.1.20‘ IDENTIFIED BY ‘password‘ WITH GRANT OPTION;
Query OK, 0 rows affected (0.00 sec)
防火墙的3306端口默认没有开启,若要远程访问,需要开启这个端口
打开/etc/sysconfig/iptables,在-A INPUT -m state --state NEW -m tcp -p tcp --dport 22 -j ACCEPT后面添加
-A INPUT -m state --state NEW -m tcp -p tcp --dport 3306 -j ACCEPT
[root@end mysql]# service iptables restart 使更改的防火墙配置生效
iptables:将链设置为政策 ACCEPT:filter [确定]
iptables:清除防火墙规则: [确定]
iptables:正在卸载模块: [确定]
iptables:应用防火墙规则: [确定]
那么mysql数据库的源码安装到这里就结束了
从php5.4开始,需要自己下载安装libXpm-dev了,但是由于包的依赖性原因,我就选择了yum方式来进行安装,通过网络yum源直接下载并进行安装了
下载php以及相关的库文件(百度网盘:http::/pan.baidu.com/s/1bnL31c7)
gd库以及php功能特性扩展库文件
libgd-2.1.1.tar.gz gd库文件(使php支持以下功能)
jpegsrc.v7.tar.gz jpeg库文件(使php支持jpeg格式图片)
zlib-1.2.7.tar.gz 数据压缩函数库(使php支持数据压缩功能)
freetype-2.6.tar.gz freetype库文件(使php支持多种字体格式文件)
libpng-1.2.56.tar.gz libpng库文件(使php支持png格式图片)
yum -y install libXpm
yum -y install libXpm-devel
安装完后libXpm配置文件默认在这个目录/usr/lib64/下
[root@end LAMP-php]# tar -zxvf autoconf-2.69.tar.gz
[root@end LAMP-php]# cd autoconf-2.69
[root@end autoconf-2.69]# ./configure
[root@end autoconf-2.69]# make ; make install
[root@end LAMP-php]# tar -zxvf libxml2-2.7.8.tar.gz
[root@end LAMP-php]# cd libxml2-2.7.8 将$RM "cfgfile"这行用#注释
[root@end libxml2-2.7.8]# ./configure --prefix=/usr/local/libxml2
[root@end libxml2-2.7.8]# make ; make install
[root@end LAMP-php]# tar -zxvf libmcrypt-2.5.8.tar.gz
[root@end LAMP-php]# cd libmcrypt-2.5.8
[root@end libmcrypt-2.5.8]# ./configure --prefix=/usr/local/libmcrypt
[root@end libmcrypt-2.5.8]# make ; make install
[root@end LAMP-php]# tar -zxvf zlib-1.2.7.tar.gz
[root@end LAMP-php]# cd zlib-1.2.7
[root@end zlib-1.2.7]# ./configure --prefix=/usr/local/zlib
[root@end zlib-1.2.7]# make ; make install
[root@end LAMP-php]# tar -zxvf libpng-1.2.56.tar.gz
[root@end LAMP-php]# cd libpng-1.2.56
[root@end libpng-1.2.56]# ./configure --prefix=/usr/local/libpng
[root@end libpng-1.2.56]# make ; make install
[root@end LAMP-php]# tar -zxvf jpegsrc.v7.tar.gz
[root@end LAMP-php]# cd jpeg-7/
[root@end jpeg-7]# mkdir /usr/local/jpeg6 建立jpeg6软件安装目录
[root@end jpeg-7]# mkdir /usr/local/jpeg6/bin 建立存放命令的目录
[root@end jpeg-7]# mkdir /usr/local/jpeg6/lib 创建jpeg6库文件所在目录
[root@end jpeg-7]# mkdir /usr/local/jpeg6/include 建立存放头文件目录
[root@end jpeg-7]# mkdir -p /usr/local/jpeg6/man/man1 建立存放手册目录
[root@end jpeg-7]# ./configure \
> --prefix=/usr/local/jpeg6/ \
> --enable-shared \ 建立共享库使用的GNUd libtool
> --enable-static 建立静态库使用的GNUlibtool
./configure --prefix=/usr/local/jpeg6/ --enable-shared --enable-static
[root@end jpeg-7]# make ; make install
[root@end LAMP-php]# tar -zxvf freetype-2.6.tar.gz
[root@end LAMP-php]# cd freetype-2.6
[root@end freetype-2.6]# ./configure --prefix=/usr/local/freetype
[root@end freetype-2.6]# make ; make install
[root@end LAMP-php]# tar -zxvf gd-2.0.32.tar.gz
[root@end LAMP-php]# cd gd-2.0.32
[root@end gd-2.0.32]# ./configure \ 进入vim gd_png.c 将16行改为#include "/usr/local/libpng/include/png.h"
> --prefix=/usr/local/gd2/ \ gd库文件安装目录
> --with-zlib=/usr/local/zlib/ \ 指定zlib安装路径
> --with-jpeg=/usr/local/jpeg6/ \ 指定jpeg6安装路径
> --with-png=/usr/local/libpng/ \ 指定libpng安装路径
> --with-freetype=/usr/local/freetype/ 指定freetype安装路径
./configure --prefix=/usr/local/gd2/ --with-zlib=/usr/local/zlib/ --with-jpeg=/usr/local/jpeg6/ --with-png=/usr/local/libpng/ --with-freetype=/usr/local/freetype
[root@end gd-2.0.32]# make ; make install
[root@end AMP]# tar -zxvf php-5.6.9.tar.gz
[root@end AMP]# cd php-5.6.9
[root@end php-5.6.9]# ./configure --prefix=/usr/local/php --with-config-file-path=/usr/local/php/etc --with-apxs2=/usr/local/apache2/bin/apxs --with-mysql=/usr/local/mysql --with-libxml-dir=/usr/local/libxml2 --with-png-dir=/usr/local/libpng --with-jpeg-dir=/usr/local/jpeg6 --with-freetype-dir=/usr/local/freetype --with-gd=/usr/local/gd2 --with-zlib-dir=/usr/local/zlib --with-mcrypt=/usr/local/libmcrypt --with-xpm-dir=/usr/lib64/ --with-mysqli=/usr/local/mysql/bin/mysql_config --enable-soap --enable-mbstring=all --enable-sockets
[root@end php-5.6.9]# make ; make install
安装详解
#./configure \ #执行当前目录下软件自带的配置命令
#--prefix=/usr/local/php/ \ #设置PHP5的安装路径
#--with-config-file-path=/usr/local/php/etc/ \ #指定PHP5配置文件存入的路径
#--with-apxs2=/usr/local/apache2/bin/apxs/ \ #指定PHP查找Apache2的位置
#--with-mysql=/usr/local/mysql/ \ #指定mysql的安装目录
#--with-libxml-dir=/usr/local/libxml2/ \ #指定php放置libxml2库的位置
#--with-png-dir=/usr/local/libpng/ \ #指定php放置libpng库的位置
#--with-jpeg-dir=/usr/local/jpeg6/ \ #指定php放置jpeg库的位置
#--with-freetype-dir=/usr/local/freetype/ \ #指定php放置freetype库的位置
#--with-gd=/usr/local/gd2/ \ #指定php放置gd库的位置
#--with-zlib-dir=/usr/local/zlib/ \ #指定php放置zlib库的位置
#--with-mcrypt=/usr/local/libmcrypt/ \ #指定php放置libcrypt库的位置
#--with-mysql=/usr/local/mysql/bin/mysql_config \ #变量激活新增加mysqli功能
#--enable-soap \ #变量激活soap和web services支持
#--enable-mbstring=all \ #使多字节字符串支持
#--enable-sockets \ #变量激活socket通信特性
cp php.ini-development /usr/local/php/etc/php.ini
进入Apache主配置文件/etc/httpd/http.conf中加入
AddType application/x-httpd-php .php .phtml
AddType application/x-httpd-php .php .php4 .php5
创建mkdir /usr/local/apache2/htdocs/test.php
进入test.php编辑
<?php
phpinfo();
?>
[root@localhost php-5.6.9]# service httpd restart
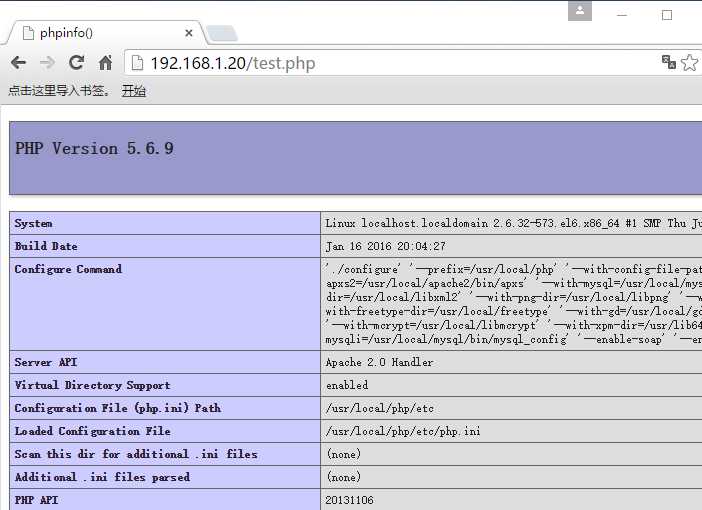
输入网址http://ip/test.php
看到php的版本信息网页,表示测试成功!!!
到这里LAMP源码部署就完成了,也就是Web的环境就准备妥当了,接下来就陆续会在此环境上部署各种Web应用了,敬请期待!

