标签:
ThinkPHP中自带能生成验证码的类:ThinkPHP/Library/Think/Verify.class.php
默认情况下,验证码的字体是随机使用 ThinkPHP/Library/Think/Verify/ttfs/目录下面的字体文件,我们可以指定验证码的字体
汉字的验证码:ThinkPHP/Library/Think/Verify/zhttfs/添加中文的字体格式
更改字体:ttf格式

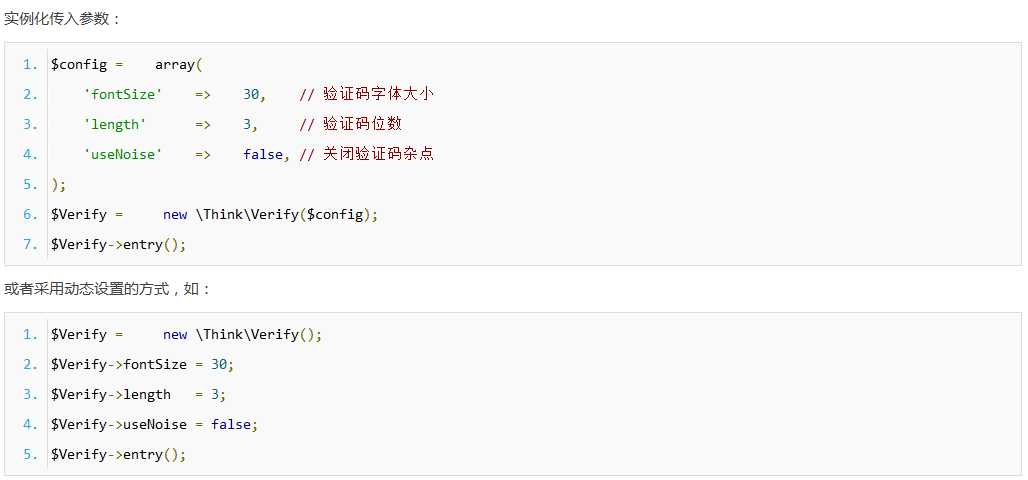

LoginController.class.php(Login方法和yzm方法)

<?php
namespace Home\Controller;
use Think\Controller;
class LoginController extends Controller
{
    public function Login()
    {
        if(empty($_POST))
        {
            $this->display();
        }
        else
        {
            //判断验证码是否正确
            $code = $_POST["yzm"];
            $verify = new \Think\Verify();
            if($verify->check($code))
            {
                if($_POST["uid"]!="")
                {
                    $model = D("users");

                    $uid = $_POST["uid"];
                    $pwd = $_POST["pwd"];

                    $attr = $model->field("Pwd")->find($uid);
                    //echo $attr["pwd"];

                    if($pwd == $attr["pwd"])
                    {
                        session("uid",$uid);
                        $this->success("登录成功","Main");
                    }
                    else
                    {
                        $this->error("登录失败");
                    }
                }
                else
                {
                    $this->error("登录失败");
                }

            }
            else
            {
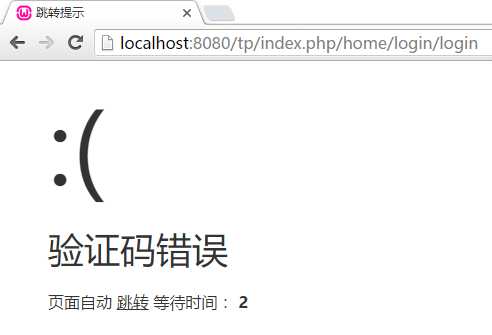
                $this->error("验证码错误");
            }
        }
    }

    //生成验证码的操作
    public function yzm()
    {
        $config =    array(
        ‘fontSize‘    =>    30,    // 验证码字体大小
        //‘length‘      =>    3,     // 验证码位数
        //‘useNoise‘    =>    false, // 关闭验证码杂点
        ‘imageW‘  => 300,
        ‘imageH‘  => 90,
        ‘useZh‘ => true,
        ‘fontttf‘ => ‘STXINWEI.TTF‘,
        );

        $Verify = new \Think\Verify($config);
        //$Verify->fontttf = ‘7.ttf‘;  // 验证码字体使用 ThinkPHP/Library/Think/Verify/ttfs/5.ttf
        $Verify->entry();
    }
}
Login.html

<!DOCTYPE html PUBLIC "-//W3C//DTD XHTML 1.0 Transitional//EN" "http://www.w3.org/TR/xhtml1/DTD/xhtml1-transitional.dtd">
<html xmlns="http://www.w3.org/1999/xhtml">
<head>
<meta http-equiv="Content-Type" content="text/html; charset=utf-8" />
<title>无标题文档</title>
<script src="../../../../../jquery-1.11.2.min.js"></script>
</head>

<body>
<h1>在这里登录好了</h1>
<form action="__ACTION__" method="post">
<div>用户名:<input type="text" name="uid" /></div>
<div>密码:<input type="password" name="pwd" /></div>
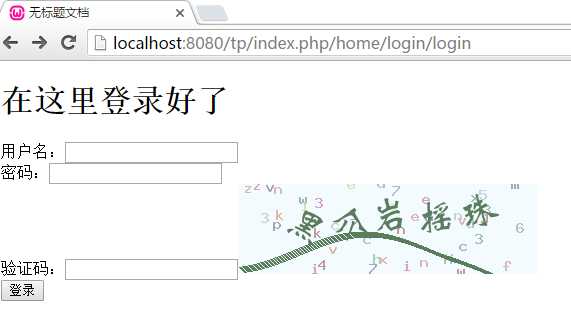
<div>验证码:<input type="text" name="yzm" /><img id="yzm" src="__CONTROLLER__/yzm" /></div>
<input type="submit" value="登录" />

</form>
</body>
</html>
<script type="text/javascript">
$(document).ready(function(e) {
    $("#yzm").click(function(){
        //点击图片验证码改变
        $(this).attr("src","__CONTROLLER__/yzm");

        })
});
</script>
显示效果:
当其中一个输入错误时都不能实现登录:
文件上传使用Think/Upload.class.php
关于savePath和rootPath
1.rootPath文件上传保存的根路径(一开始要规定的)$upload->rootPath = ‘./Public/‘;
2.savePath文件上传的保存路径(相对于根路径) $upload->savePath = ‘Uploads/‘; // 设置附件上传目录
//3. 上传成功 获取上传文件信息,$info遍历上传的路径
foreach($info as $file)
{
echo $file[‘savepath‘].$file[‘savename‘];
}
输出的结果:Uploads/2016-06-20/slide3.jpg
4.$upload->saveName = ‘‘;//保持上传文件名不变
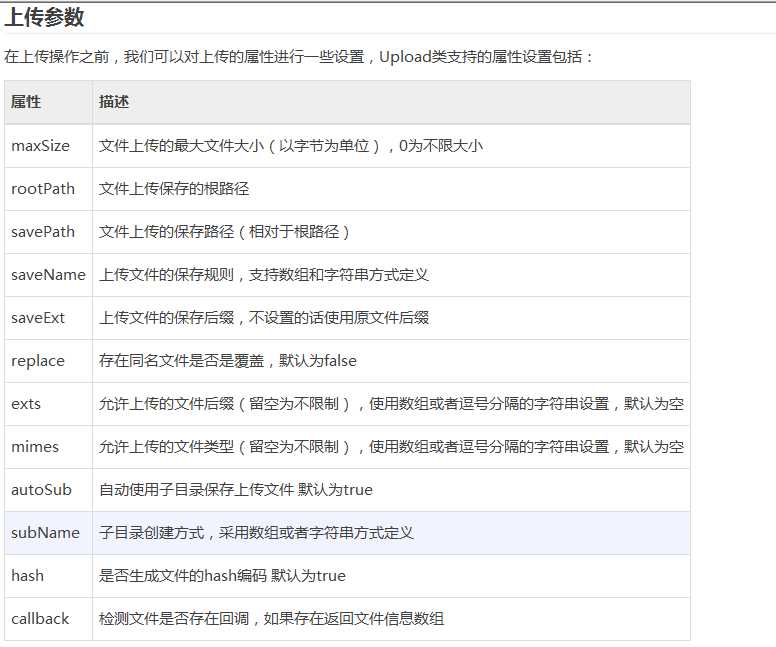
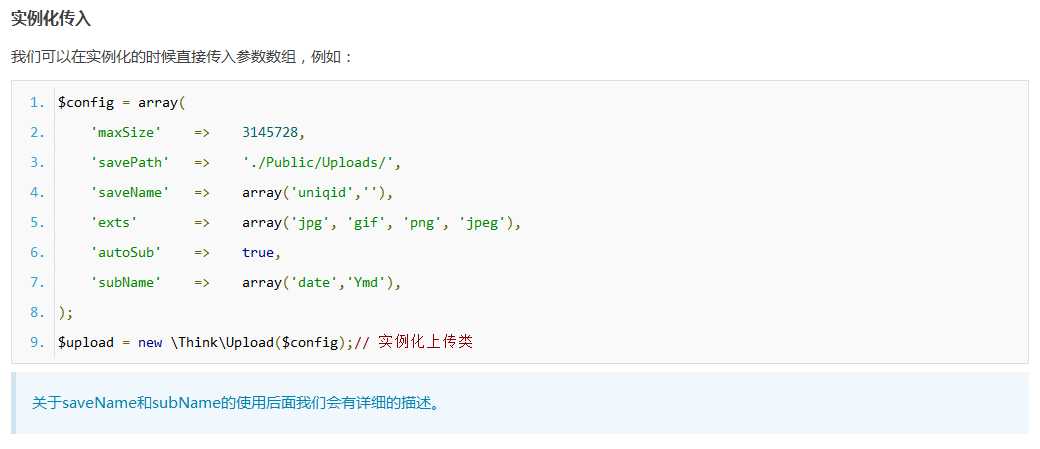
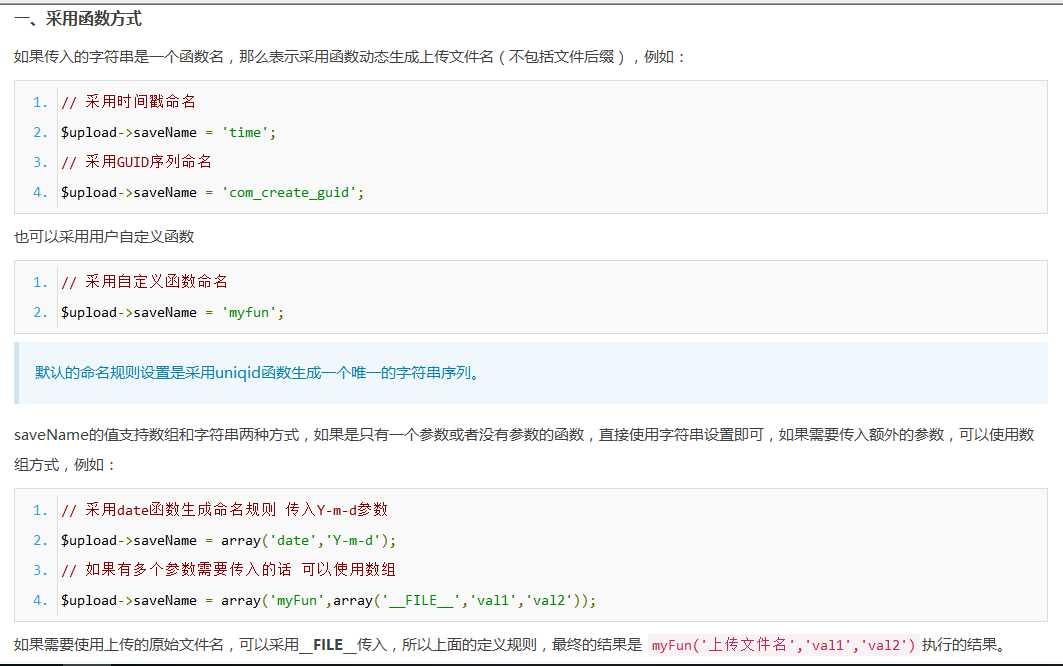
LoginController.class.php中的方法ShangChu

    //文件上传
    public function ShangChuan()
    {
         if(empty($_FILES))
         {
             $this->display();
         }
         else
         {
              $upload = new \Think\Upload();// 实例化上传类
              $upload->maxSize = 3145728 ;// 设置附件上传大小
              $upload->exts = array(‘jpg‘, ‘gif‘, ‘png‘, ‘jpeg‘);// 设置附件上传类型
              $upload->rootPath = ‘./Public/‘;
              $upload->savePath = ‘Uploads/‘; // 设置附件上传目录
              $upload->saveName = ‘‘;//保持上传文件名不变


              // 上传文件
              $info = $upload->upload();
              //var_dump($info);

              if(!$info)
              {
                   $this->error($upload->getError());
              }
              else
              {
                  // 上传成功 获取上传文件信息
                  foreach($info as $file)
                  {
                          echo $file[‘savepath‘].$file[‘savename‘];
                           //$this->success(‘上传成功!‘);
                  }
              }

         }
    }
ShangChu.html

<!DOCTYPE html PUBLIC "-//W3C//DTD XHTML 1.0 Transitional//EN" "http://www.w3.org/TR/xhtml1/DTD/xhtml1-transitional.dtd">
<html xmlns="http://www.w3.org/1999/xhtml">
<head>
<meta http-equiv="Content-Type" content="text/html; charset=utf-8" />
<title>文件上传</title>
</head>

<body>
<form action="__ACTION__" enctype="multipart/form-data" method="post" >

<input type="file" name="photo" />
<input type="submit" value="提交" >

</form>
</body>
</html>
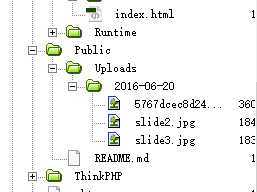
最后的结果是:
Public文件夹下新建的Upload目录下的
标签:
原文地址:http://www.cnblogs.com/Duriyya/p/5601087.html