标签:
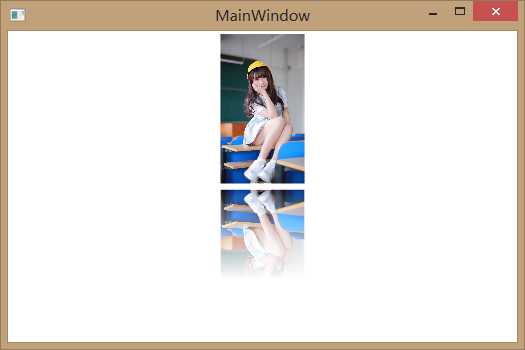
比较简单,主要用到ScaleTransfrom类和VisualBrush类
 1 <Window x:Class="实现图片倒影的方式.MainWindow"
 2         xmlns="http://schemas.microsoft.com/winfx/2006/xaml/presentation"
 3         xmlns:x="http://schemas.microsoft.com/winfx/2006/xaml"
 4         Title="MainWindow" Height="350" Width="525">
 5     <Grid HorizontalAlignment="Center">
 6         <Grid.RowDefinitions>
 7             <RowDefinition/>
 8             <RowDefinition/>
 9         </Grid.RowDefinitions>
10
11
12         <Image Grid.Row="0" Name="image" Source="C:\Users\天天开心\Pictures\58c3cbef76094b3605d27002a5cc7cd98c109d0f.jpg" Margin="3"></Image>
13         <Rectangle Grid.Row="1" Margin="3">
14             <Rectangle.Fill>
15                 <VisualBrush Visual="{Binding ElementName=image}">
16                     <VisualBrush.RelativeTransform>
17                         <ScaleTransform ScaleY="-1" CenterY=".5"></ScaleTransform>
18                     </VisualBrush.RelativeTransform>
19                 </VisualBrush>
20             </Rectangle.Fill>
21
22
23             <Rectangle.OpacityMask>
24                 <LinearGradientBrush StartPoint="0,0" EndPoint="0,1">
25                     <GradientStop Color="Black" Offset="0"></GradientStop>
26                     <GradientStop Color="Transparent" Offset=".6"></GradientStop>
27                 </LinearGradientBrush>
28             </Rectangle.OpacityMask>
29
30         </Rectangle>
31
32     </Grid>
33 </Window>
测试效果:

标签:
原文地址:http://www.cnblogs.com/zhaotianff/p/5616517.html