标签:

案例一:
隐藏扩展域,并去掉after,并去掉高度


<!DOCTYPE html>
<html lang="en">
<head>
    <meta charset="UTF-8">
    <title>Title</title>
    <style>
        .clearfix:after{   /*善用after和defore*/
            content: "111";  /*注意加引号*/
            clear: both;
            display: block;
            visibility: hidden;  /*隐藏并有高度*/
            height: 0;   /*去掉高度*/

        }
        .c{
            width: 100px;
            /*height: 100px;*/
            background-color:red;
        }
        .c .item{
            float:left;
            width:30px;
            background-color: green ;
        }

    </style>
</head>
<body>
    <div class=‘c clearfix‘>
        <div class=‘item‘>123</div>
        <div class=‘item‘>456</div>

    </div>

    <div class="test">内容</div>
</body>
</html>
案例二:
当鼠标放在一个图片上显示这个商品的信息,或者一些别的东西,比如
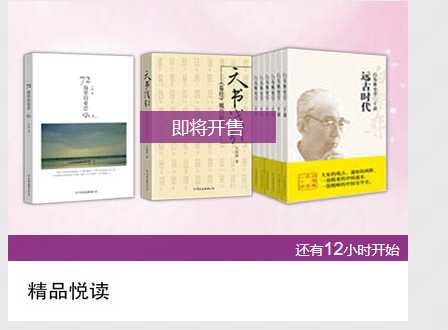
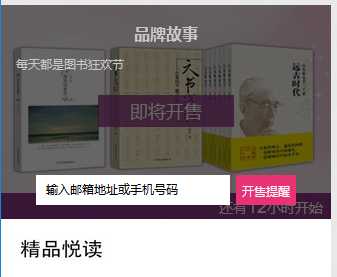
.touch:hover .content{}

<!DOCTYPE html>
<html>
    <head>
        <meta charset="UTF-8">
        <title></title>
        <style>
            .touch{
                width: 200px;
                height: 200px;
                overflow: hidden;
                position: relative;
            }
            .touch .content{
                position: absolute;
                left: 0;
                top: 0;
                right: 0;
                bottom: 0;
                background-color: rgba(0, 0, 0,.6);
                color: white;
                text-align: center;
                visibility: hidden;
            }
            .touch:hover .content{
                visibility: inherit;
            }

        </style>
    </head>
    <body>
        <div class="touch">
            <div><img src="2.jpg"></div>
            <div class="content">
                <div class="c1">ALEX</div>
                <div class="c1">500-1000(日)</div>
            </div>
        </div>
    </body>
</html>
案例三:
要求在当前页面不超出多余内容,超出了变成滚动条显示

<!DOCTYPE html>
<html>
    <head>
        <meta charset="UTF-8">
        <title></title>
        <style>
            body{
                margin: 0;
            }
            .pg_top{
                height: 48px;
                background-color: #dddddd;
            }
            .pg_body_menu{
                position: absolute;
                width: 180px;
                background-color: blueviolet;
                left: 0;
            }
            .pg_body_content{
                position: absolute;
                top: 48px;
                left: 190px;
                right: 0;
                bottom: 0;
                background-color: blueviolet;
                overflow: auto;  /*可以利用overflow变导航条*/
            }
        </style>
    </head>
    <body>
        <div class="pg_top">

        </div>
        <div class="pg_body">
            <div class="pg_body_menu">
                <p>1</p><p>1</p><p>1</p><p>1</p><p>1</p>
                    <p>1</p><p>1</p><p>1</p><p>1</p><p>1</p>
                        <p>1</p><p>1</p><p>1</p><p>1</p><p>1</p>
            </div>
            <div class="pg_body_content">
                <p>1</p><p>1</p><p>1</p><p>1</p><p>1</p>
                    <p>1</p><p>1</p><p>1</p><p>1</p><p>1</p>
                        <p>1</p><p>1</p><p>1</p><p>1</p><p>1</p>
                        <p>1</p><p>1</p><p>1</p><p>1</p><p>1</p>
                    <p>1</p><p>1</p><p>1</p><p>1</p><p>1</p>
                        <p>1</p><p>1</p><p>1</p><p>1</p><p>1</p>
            </div>
        </div>

    </body>
</html>
案例四:
尖角图标,尖角符号是向上,当鼠标点的时候尖角符号向下
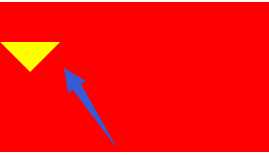
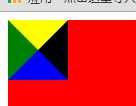

.c1{ /*这个是麻烦写法*/
                border-top: 30px solid yellow ;
                border-left: 30px solid green;
                border-bottom: 30px solid blue;
                border-right: 30px solid black;
                display: inline-block;
            }
            .c1{ /*半个*/
                border-top: 30px solid yellow ;
                border-left: 30px solid green;
                border-bottom: 0px solid blue;
                border-right: 30px solid black;
                display: inline-block;
            }

<!DOCTYPE html>
<html>
    <head>
        <meta charset="UTF-8">
        <title></title>
        <style>
            /*.c1{ 这个是麻烦写法
                border-top: 30px solid yellow ;
                border-left: 30px solid green;
                border-bottom: 0px solid blue;
                border-right: 30px solid black;
                display: inline-block;
            }*/
            .c1{
                border: 30px solid transparent ;
                border-top: 30px solid yellow ;
                display: inline-block;
                margin-top: 40px;
            }
            .c1:hover{
                border:  30px solid transparent;
                border-bottom: 30px solid yellow ;
                margin-top:10px ;
            }
        </style>
    </head>
    <body>
        <div style="height: 150px; background-color: red;">
            <div class="c1"></div>

        </div>
    </body>
</html>
案例五:
模态对话框
就是弹出一个框,然后显示一些内容(其实是分为三层)
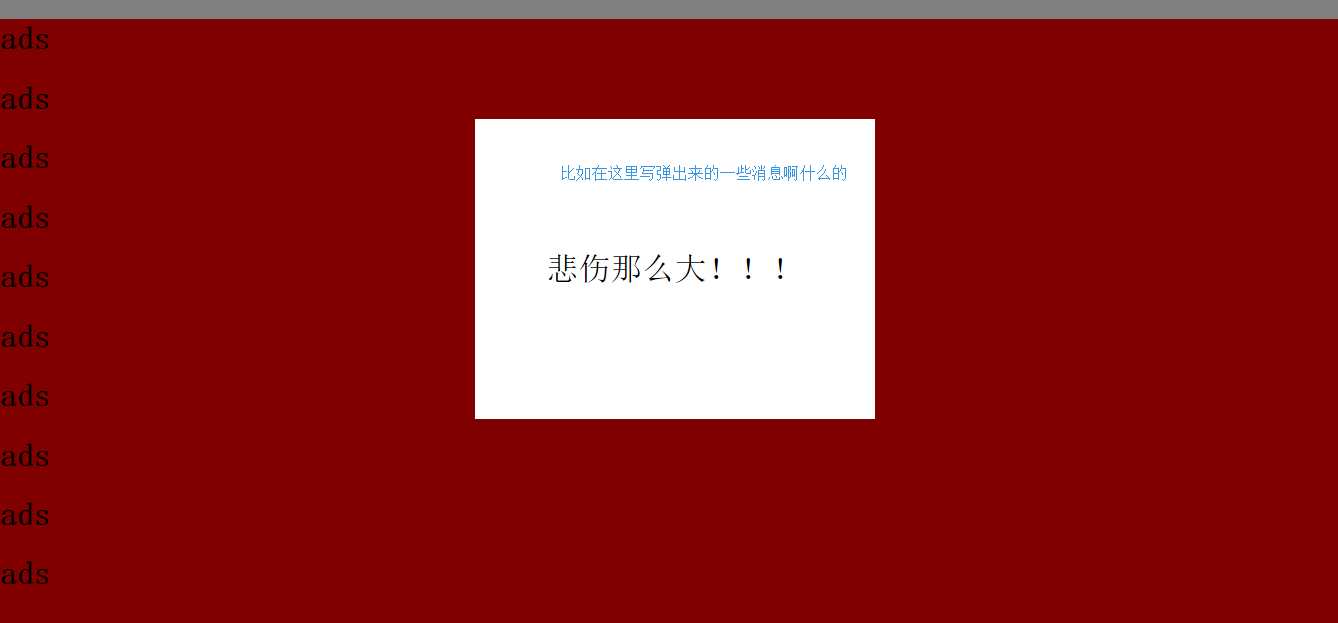

<!DOCTYPE html>
<html>
    <head>
        <meta charset="UTF-8">
        <title></title>
        <style>
            body{
                margin: 0;
            }
            .model{
                position: fixed;
                top: 0;
                right: 0;
                bottom: 0;
                left: 0;
                background-color: rgba(0,0,0,0.5);
                z-index: 2;
            }
            .content{
                height: 300px;
                width: 400px;
                background-color: white;
                color: #000000;
                position: fixed;
                top: 50%;
                left: 50%;
                z-index: 3;
                margin-left: -200px;
                margin-top: -200px;
                font-size:32px ;
                line-height: 300px;
                text-align: center;
            }
        </style>
    </head>
    <body>
        <div style="height: 2000px; background-color: red;">
            <h1>ads</h1><h1>ads</h1><h1>ads</h1><h1>ads</h1><h1>ads</h1>
            <h1>ads</h1><h1>ads</h1><h1>ads</h1><h1>ads</h1><h1>ads</h1>
        </div>
        <div class="model"></div>
        <div class="content">悲伤那么大!!!</div>
    </body>
</html>
案例六:
输入框里面有图片


<!DOCTYPE html>
<html>
    <head>
        <meta charset="UTF-8">
        <title></title>
        <style>
            .user{
                position: relative;
                width: 250px;
            }
            .user input{
                height: 30px;
                width: 150px;
                padding-right: 20px;

            }
            .user .ren{
                position: absolute;
                top: 8px;
                left: 160px;
            }
        </style>
    </head>
    <body>
        <div class="user">
            <input type="text" />
            <span class="ren">R<!--这里可以放图片--></span>

        </div>
    </body>
</html>
案例七:
商品加减框
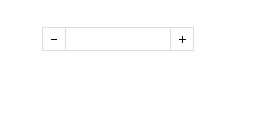

<!DOCTYPE html>
<html>
    <head>
        <meta charset="UTF-8">
        <title></title>
        <style>
            body{
                margin: 0;
            }
            .left{
                float: left;
            }
            .wrap{
                width: 150px;
                height: 22px;
                border: 1px solid #ddd;
                /*background-color: red;*/
                position: relative;
                left: 100px;
                top: 100px;
            }
            .wrap .minus{
                height: 22px;
                width: 22px;
                line-height: 22px;
                text-align: center;
            }
            .wrap .plus{
                height: 22px;
                width: 22px;
                line-height: 22px;
                text-align: center;
            }
            .wrap .count input{
                padding: 0;  /*input是有padding的*/
                border: 0;
                width: 104px;
                height: 22px;
                border-left: 1px solid #dddddd;
                border-right: 1px solid #dddddd;
            }
        </style>
    </head>
    <body>
        <div class="wrap">
            <div class="minus left">-</div>
            <div class="count left">
                <input type="text"  />
            </div>
            <div class="plus left">+</div>
        </div>
    </body>
</html>
案例八:
商品加减框加减,鼠标并变化样式


<!DOCTYPE html>
<html>
    <head>
        <meta charset="UTF-8">
        <title></title>
        <style>
            body{
                margin: 0;
            }
            .left{
                float: left;
            }
            .wrap{
                width: 150px;
                height: 22px;
                border: 1px solid #ddd;
                /*background-color: red;*/
                position: relative;
                left: 100px;
                top: 100px;
            }
            .wrap .minus{
                height: 22px;
                width: 22px;
                line-height: 22px;
                text-align: center;
                cursor: pointer;
            }
            .wrap .plus{
                height: 22px;
                width: 22px;
                line-height: 22px;
                text-align: center;
                cursor: pointer; /*当鼠标指的时候变样式*/
            }
            .wrap .count input{
                padding: 0;  /*input是有padding的*/
                border: 0;
                width: 104px;
                height: 22px;
                border-left: 1px solid #dddddd;
                border-right: 1px solid #dddddd;
            }
        </style>
    </head>
    <body>
        <div class="wrap">
            <div class="minus left" onclick=‘Minus();‘>-</div>
            <div class="count left">
                <input id=‘count‘ type="text"  />
            </div>
            <div class="plus left" onclick=‘Plus();‘>+</div>
        </div>
        <script type="text/javascript">
            function Plus(){
                var old_str = document.getElementById(‘count‘).value
                var old_int = parseInt(old_str);
                var new_int = old_int + 1
                document.getElementById(‘count‘).value = new_int
            }
            function Minus(){
                var old_str = document.getElementById(‘count‘).value
                var old_int = parseInt(old_str);
                var new_int = old_int - 1
                document.getElementById(‘count‘).value = new_int
            }

        </script>
    </body>
</html>
案例九:
当鼠标指到图片,会变成字体和边框颜色会变
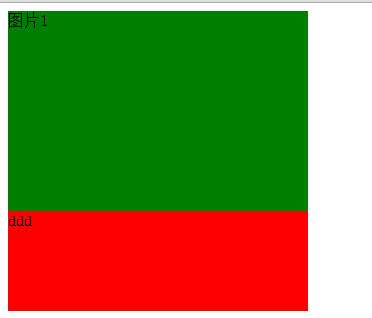
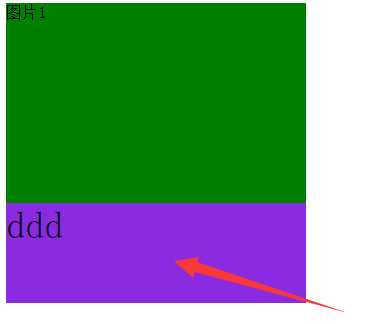

<!DOCTYPE html>
<html>
    <head>
        <meta charset="UTF-8">
        <title></title>
        <style>
            .ele{
                width: 300px;
                height: 300px;
                background-color: yellow;
            }
            .ccc{
                width: 300px;
                height: 200px;
                background-color: green;
            }
            .ddd{
                width: 300px;
                height: 100px;
                background-color: red;
            }
            .ele:hover .ddd{
                background-color: blueviolet;
                font-size: 38px;
            }
        </style>
    </head>
    <body>
        <div class="ele">
            <div class="ccc">图片1</div>
            <div class="ddd">
                ddd
            </div>
        </div>
    </body>
</html>
标签:
原文地址:http://www.cnblogs.com/renfanzi/p/5641978.html