标签:
1. Sharing Simple Data 共享简单的数据,如文本,图片,URI
2. Sharing Files 共享文件
3. Sharing Files with NFC无线传输
在写博客之前,假设 “我”是服务端App,我的“女神”是客户端App
情书是“我”想传递的数据
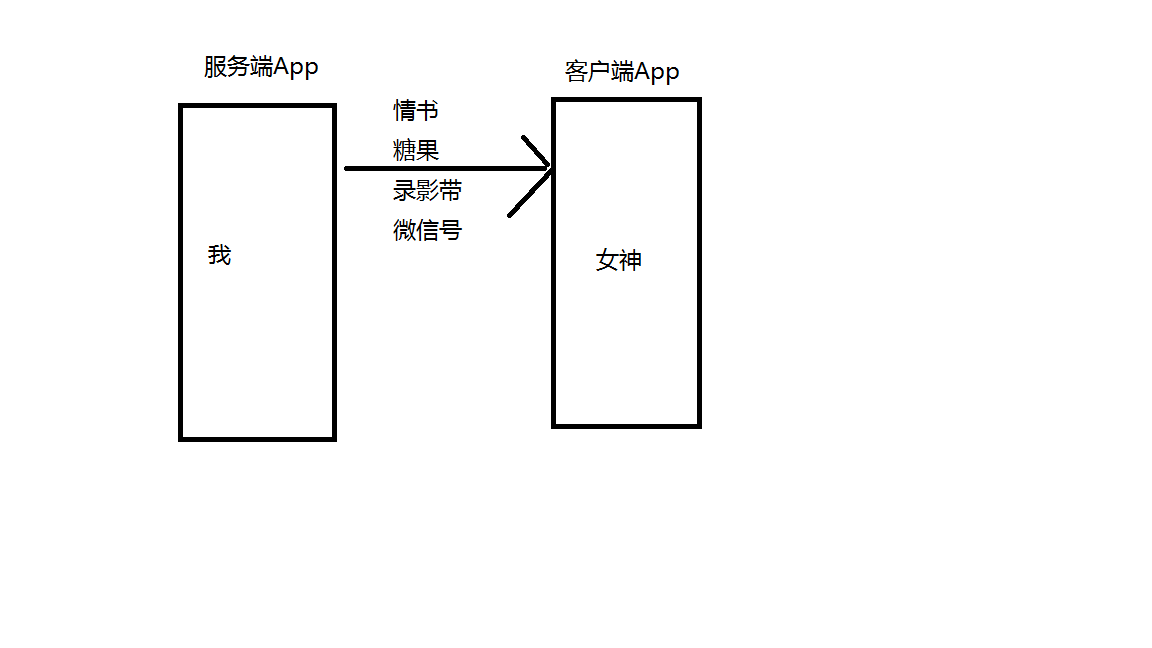
那么我该如何做呢?
对女神爱在心中口难开怎么办?如何示爱这是穷学生最纠结的心病
在Android 开发中,当我们的App想对其他App “暗送秋波”传达点数据的时候,急需一个玩意来推动一把,专业点说,就是触发,那么究竟什么能触发数据的传送呢?
答案是:包含ACTION_SEND的Intent
你可以理解为,情书写好了,需要同桌帮忙传递(SEND)
示爱短信编辑ok,需要按下发送(SEND)按钮
数据只是载体,SEND(传递)是一种行为方式
给女神写一封情书,是年少时最懵懂的念想
那么在App之间,向心仪的那个App分享文本内容,自然是最基本的功能!
Intent sendIntent = new Intent();
sendIntent.setAction(Intent.ACTION_SEND);
sendIntent.putExtra(Intent.EXTRA_TEXT, "You are my girl");
sendIntent.setType("text/plain");
startActivity(sendIntent);
会发生什么?
写一个button自己观察结果吧!
Intent好比一个信封:
setAction()中定义了它的行为->发送出去
putExtra() 中定义信中的内容:少年们最热诚的心->你是我的女孩!(跟我走)
setType() 中定义了它所携带的数据类型,好比邮戳,告诉邮递员这是一封信(text文本内容),请送到能读懂它的人手中,亦或者是一部热烈纷呈的成人动作片(视频内容)->它包含多少宅男年少的梦想
当然,有时候,女神不止一个
Intent提供了createChooser()可以满足你向众多女神群发信息的功能,
Intent sendIntent = new Intent();
sendIntent.setAction(Intent.ACTION_SEND);
sendIntent.putExtra(Intent.EXTRA_TEXT, "This is my the best love.");
sendIntent.setType("text/plain");
startActivity(Intent.createChooser(sendIntent, getResources().getText(R.string.send_to)));
通过createChooser()可以弹出一个列表内容的dialog来展示一些可以接收该数据的App,

当然Intent不仅仅只有SEND功能,它还包裹 EXTRA_EMAIL, EXTRA_CC, EXTRA_BCC, EXTRA_SUBJECT 等系统定义好的行为
这年头,做什么都要速度,发送信件这种文本信息似乎已经过时,情书未到,女神已经被隔壁班拿着Iphone 7的小帅哥抢走了-——人家可是天天跟女神打电话的!
痛定思痛,我们也决定要使用高科技传递信息->Binary 字节信息
 Uri uriImage=Uri.parse(ContentResolver.SCHEME_ANDROID_RESOURCE + "://"
                + getResources().getResourcePackageName(R.drawable.ic_launcher) + "/"
                + getResources().getResourceTypeName(R.drawable.ic_launcher) + "/"
                + getResources().getResourceEntryName(R.drawable.ic_launcher));

Intent shareIntent = new Intent();
shareIntent.setAction(Intent.ACTION_SEND);
shareIntent.putExtra(Intent.EXTRA_STREAM, uriImage);
        shareIntent.setType("image/jpeg");
//        startActivity(Intent.createChooser(shareIntent, getResources().getText(R.string.send_to)));
        startActivity(Intent.createChooser(shareIntent, "Share images to.."));
这里行为仍然是setAction中定义的Intent.ACTION_SEND
数据类型是image/jpeg
数据的内容换成了Intent.EXTRA_STREAM
发送Intent的方式也变了:createChooser来之定义可以接收到我们发出数据的 App
ArrayList<Uri> imageUris = new ArrayList<Uri>();
imageUris.add(imageUri1); // Add your image URIs here
imageUris.add(imageUri2);

Intent shareIntent = new Intent();
shareIntent.setAction(Intent.ACTION_SEND_MULTIPLE);
shareIntent.putParcelableArrayListExtra(Intent.EXTRA_STREAM, imageUris);
shareIntent.setType("image/*");
startActivity(Intent.createChooser(shareIntent, "Share images to.."));
跟之前两例代码的区别,仅仅在于setAction中定义新的行为:”Intent.ACTION_SEND_MULTIPLE“
setType中定义更大的范围”image/*“
总结:在这一节中,作为懵懂少年,我们通过Intent:
1. 用setType()定义了数据类型”image/*”, “text/plain”
2. 用setAction()定义了Intent的行为Intent.ACTION_SEND,
Intent.ACTION_SEND_MULTIPLE
3. 用putExtra()封装了数据的格式Intent.EXTRA_TEXT,EXTRA_EMAIL, EXTRA_CC, EXTRA_BCC, EXTRA_SUBJECT.
4. 最后通过startActivity将Intent“扔了出去”
关于URI是如何定义的,可以看这里URI的使用
作为校园的女神,公司的最闪亮的星星,自然会有不少男生追求,那么如何过滤掉不合适的追求呢?
通过上一节的内容,我们知道,情书的发出,需要定义ACTION_SEND 的行为,相应的,我们作为接收者,也需要定义类似的属性:
<activity android:name=".ui.MyActivity" >
    <intent-filter>
        <action android:name="android.intent.action.SEND" />
        <category android:name="android.intent.category.DEFAULT" />
        <data android:mimeType="image/*" />
    </intent-filter>
    <intent-filter>
        <action android:name="android.intent.action.SEND" />
        <category android:name="android.intent.category.DEFAULT" />
        <data android:mimeType="text/plain" />
    </intent-filter>
    <intent-filter>
        <action android:name="android.intent.action.SEND_MULTIPLE" />
        <category android:name="android.intent.category.DEFAULT" />
        <data android:mimeType="image/*" />
    </intent-filter>
</activity>
在Manifest文件里,对应的我们所期望的接收数据的Activity 下,我们通过来过滤那些“示爱信息”
<action > 要求 信息必须是SEND类型的,即发送方Intent的行为必须是ACTION_SEND,这样我们才会接受这个Intent
<category>一般为DEFAULT
<data> 定义了能接收数据类型image/* , text/plain
首先我们知道数据是通过Intent传输的,自然少不了对Intent的研究,在Activity中回调getIntent获得Intent对象,就可以操作发送过来的数据啦!
通常从其他地方发送过来的Intent不止一个怎么办?
不用怕,通过Intent的属性来区分:
比如下面的例子,就通过Intent.getAction和Intent.getType来 分类讨论
void onCreate (Bundle savedInstanceState) {
    ...
    // Get intent, action and MIME type
    Intent intent = getIntent();
    String action = intent.getAction();
    String type = intent.getType();

    if (Intent.ACTION_SEND.equals(action) && type != null) {
        if ("text/plain".equals(type)) {
            handleSendText(intent); // Handle text being sent
        } else if (type.startsWith("image/")) {
            handleSendImage(intent); // Handle single image being sent
        }
    } else if (Intent.ACTION_SEND_MULTIPLE.equals(action) && type != null) {
        if (type.startsWith("image/")) {
            handleSendMultipleImages(intent); // Handle multiple images being sent
        }
    } else {
        // Handle other intents, such as being started from the home screen
    }
    ...
}

void handleSendText(Intent intent) {
    String sharedText = intent.getStringExtra(Intent.EXTRA_TEXT);
    if (sharedText != null) {
        // Update UI to reflect text being shared
    }
}

void handleSendImage(Intent intent) {
    Uri imageUri = (Uri) intent.getParcelableExtra(Intent.EXTRA_STREAM);
    if (imageUri != null) {
        // Update UI to reflect image being shared
    }
}

void handleSendMultipleImages(Intent intent) {
    ArrayList<Uri> imageUris = intent.getParcelableArrayListExtra(Intent.EXTRA_STREAM);
    if (imageUris != null) {
        // Update UI to reflect multiple images being shared
    }
}
通过Google的代码,我们至少学会了两点:
分类讨论的思想,通过if-else if语句描述不同的情况处理办法,而具体情况的划分,是通过Intent的“ACTION”和“TYPE”类型来区分的
函数分装,当有几行代码描述一种行为的时候,就提取出来,作为一个函数,描述一种功能,比如:handleSendText,handleSendImage这样有意义的命名
值得警惕的地方:一定要额外小心 来自外部的信息,对于陌生的信息非常危险,因为陌生的东西往往是不可控的,比如有可能传递过来的是一张非常大的图片。
对于图片,或者其他URI数据,你必须使用子线程去处理他们的细节,而不是简单的接收,展示,保存等
切记不要再主线程处理某些数据类型,比如大图,或者数据流
在使用ActionBar的时候,如果加上ActionProvider效果会更棒!
android:actionProviderClass 属性代表了被声明的item具有的功能
<menu xmlns:android="http://schemas.android.com/apk/res/android">
    <item
            android:id="@+id/menu_item_share"
            android:showAsAction="ifRoom"
            android:title="Share"
            android:actionProviderClass=
                "android.widget.ShareActionProvider" />
    ...
</menu>
别高兴的太早,你还需要告诉provider 你希望去分享,把数据发送出去
为了真正实现 ShareActionProvider功能,你需要提供一个intent,关于intent如何定义,在本文第一节已经有写过:ACTION_SEND和额外的信息 EXTRA_TEXT,EXTRA_STREAM
那么如何把这个Intent发送出去?
private ShareActionProvider mShareActionProvider;
...

@Override
public boolean onCreateOptionsMenu(Menu menu) {
    // Inflate menu resource file.
    getMenuInflater().inflate(R.menu.share_menu, menu);

    // Locate MenuItem with ShareActionProvider
    MenuItem item = menu.findItem(R.id.menu_item_share);

    // Fetch and store ShareActionProvider
    mShareActionProvider = (ShareActionProvider) item.getActionProvider();

    // Return true to display menu
    return true;
}

// Call to update the share intent
private void setShareIntent(Intent shareIntent) {
    if (mShareActionProvider != null) {
        mShareActionProvider.setShareIntent(shareIntent);
    }
}
总结:
这个示例告诉我们,不仅仅只有startActivity才能发送Intent嘛!
ShareActionProvider的setShareIntent()也可以!
什么情况需要共享?
比如图片工具美图秀秀,我之前独立开发的图简(PhotoStars),都需要获取本地相册中的图片,这就要求相册的图片“共享”
接下来,我们将通过使用FileProvider提供的getUriForFile()方法来生成文件的URI索引
很遗憾,Android系统不想让开发者这么轻易的去使用它;
对于FileProvider 使用的前提是在清单文件中去配置
<manifest xmlns:android="http://schemas.android.com/apk/res/android"
    package="com.example.myapp">
    <application
        ...>
        <provider
            android:name="android.support.v4.content.FileProvider"
            android:authorities="com.example.myapp.fileprovider"
            android:grantUriPermissions="true"
            android:exported="false">
            <meta-data
                android:name="android.support.FILE_PROVIDER_PATHS"
                android:resource="@xml/filepaths" />
        </provider>
        ...
    </application>
</manifest>
对于meta-data标签下的android:resource属性,很多人看起来费解,接下来将去解释它
重点内容特别的共享路径
在res/xml目录下创建filepaths.xml文件,它就是我们打算共享出去的文件,接下来的小例子展示了如何共享位于我们App内部存储的文件filepaths.xml
<paths>
    <files-path path="images/" name="myimages" />
</paths>
接着如何用代码获得这个URI呢?
content://com.example.myapp.fileprovider/myimages/default_image.jpg关于标签的细节,可以查询 FileProvide的文档去复习。
在上一步中我们为即将共享的文件,设置好了URI作为外部访问该文件的路径。
1. 那么我们的App该如何接收来自其他App的请求呢?
<font size=3>答案是在我们的App中提供一个选择列表,当其他客户端App通过startActivityForResult() 启动 一个ACTION设置为ACTION_PICK的Intent,我们在App中响应该Intent即可
关于如何请求服务端App共享文件,在下一节会分析。
2. 在Activity中创建文件选择列表
在写Activity代码之前,首先得再manifest中声明Activity的intent-filter属性
<manifest xmlns:android="http://schemas.android.com/apk/res/android">
    ...
        <application>
        ...
            <activity
                android:name=".FileSelectActivity"
                android:label="@File Selector" >
                <intent-filter>
                    <action
                        android:name="android.intent.action.PICK"/>
                    <category
                        android:name="android.intent.category.DEFAULT"/>
                    <category
                        android:name="android.intent.category.OPENABLE"/>
                    <data android:mimeType="text/plain"/>
                    <data android:mimeType="image/*"/>
                </intent-filter>
            </activity>
老生常谈了:
intent-filter定义的是当前activity可以接收的intent类型
intent-filte指定:

 必须是action定义为PICK

 共享的数据格式MIME定义为文本 text/plain 或图像 iamge/
3. 在activity中加入代码
首先写一个类继承Activity,用于显示我们App内部存储区域中files/image/目录下能够分享的文件,这里的示例通过
public class MainActivity extends Activity {
    // The path to the root of this app‘s internal storage
    private File mPrivateRootDir;
    // The path to the "images" subdirectory
    private File mImagesDir;
    // Array of files in the images subdirectory
    File[] mImageFiles;
    // Array of filenames corresponding to mImageFiles
    String[] mImageFilenames;
    // Initialize the Activity
    @Override
    protected void onCreate(Bundle savedInstanceState) {
        ...
        // Set up an Intent to send back to apps that request a file
        mResultIntent =
                new Intent("com.example.myapp.ACTION_RETURN_FILE");
        // Get the files/ subdirectory of internal storage
        mPrivateRootDir = getFilesDir();
        // Get the files/images subdirectory;
        mImagesDir = new File(mPrivateRootDir, "images");
        // Get the files in the images subdirectory
        mImageFiles = mImagesDir.listFiles();
        // Set the Activity‘s result to null to begin with
        setResult(Activity.RESULT_CANCELED, null);
        /*
         * Display the file names in the ListView mFileListView.
         * Back the ListView with the array mImageFilenames, which
         * you can create by iterating through mImageFiles and
         * calling File.getAbsolutePath() for each File
         */
         ...
    }
    ...
}
注释已经写的很明白了,这里总结两点Google代码的规范:
1. 变量命名都用mXX的格式,小写m开头,后面都是有意义的名称比如Image,ImagesDir,ImageFiles等
2. 写一段代码之前,思路想清楚, 从注释就可以看出,写出那段示例的人 思路很清晰,一步一步写出来的
4. 响应文件的选择
一旦用户选中了listview中的某一个item,就会触发onItemClick(),通过getUriForFile(),我们就可以把File以URI的形式告诉给其他App,以URI的形式获取指定文件
 protected void onCreate(Bundle savedInstanceState) {
        ...
        // Define a listener that responds to clicks on a file in the ListView
        mFileListView.setOnItemClickListener(
                new AdapterView.OnItemClickListener() {
            @Override
            /*
             * When a filename in the ListView is clicked, get its
             * content URI and send it to the requesting app
             */
            public void onItemClick(AdapterView<?> adapterView,
                    View view,
                    int position,
                    long rowId) {
                /*
                 * Get a File for the selected file name.
                 * Assume that the file names are in the
                 * mImageFilename array.
                 */
                File requestFile = new File(mImageFilename[position]);
                /*
                 * Most file-related method calls need to be in
                 * try-catch blocks.
                 */
                // Use the FileProvider to get a content URI
                try {
                    fileUri = FileProvider.getUriForFile(
                            MainActivity.this,
                            "com.example.myapp.fileprovider",
                            requestFile);
                } catch (IllegalArgumentException e) {
                    Log.e("File Selector",
                          "The selected file can‘t be shared: " +
                          clickedFilename);
                }
                ...
            }
        });
        ...
    }
在这段Google的代码里,又有很多地方值得我们学习
在这里进行了异常判断,在获取URI的时候,有可能该文件不存在,所以要进行catch捕获—>在写代码的时候,尽可能的考虑出错的情况,进行合理的处理,比如加上判断,或者异常捕获,来提高代码质量,养成代码检查的好习惯,而不是等待bug出现了采取埋头苦恼着错误原因!
学会了FileProvider.getUriForFile()的用法,可以将“某些特殊的文件”转换成URI
5. 获得权限
现在我们已经生成URI了,下一步要做的是允许其他App可以接触这个文件
   protected void onCreate(Bundle savedInstanceState) {
        ...
        // Define a listener that responds to clicks in the ListView
        mFileListView.setOnItemClickListener(
                new AdapterView.OnItemClickListener() {
            @Override
            public void onItemClick(AdapterView<?> adapterView,
                    View view,
                    int position,
                    long rowId) {
                ...
                if (fileUri != null) {
                    // Grant temporary read permission to the content URI
                    mResultIntent.addFlags(
                        Intent.FLAG_GRANT_READ_URI_PERMISSION);
                }
                ...
             }
             ...
        });
    ...
    }
总结:
设置标记的方式 可以i安全的获得我们App中的文件,并不需要Context.grantUriPermission() 去获得权限,通过它获得的权限有可能被Context.revokeUriPermission()撤销掉
优秀的代码习惯:,在使用fileUri之前,先判断是否为空
学会了Intent.addFlags的用法,
6.共享文件至客户端App
在这一步我们要做的就是 setResult(),它将把Intent中的数据返回给之前通过startAcitivtyForResult启动的Activity
  protected void onCreate(Bundle savedInstanceState) {
        ...
        // Define a listener that responds to clicks on a file in the ListView
        mFileListView.setOnItemClickListener(
                new AdapterView.OnItemClickListener() {
            @Override
            public void onItemClick(AdapterView<?> adapterView,
                    View view,
                    int position,
                    long rowId) {
                ...
                if (fileUri != null) {
                    ...
                    // Put the Uri and MIME type in the result Intent
                    mResultIntent.setDataAndType(
                            fileUri,
                            getContentResolver().getType(fileUri));
                    // Set the result
                    MainActivity.this.setResult(Activity.RESULT_OK,
                            mResultIntent);
                    } else {
                        mResultIntent.setDataAndType(null, "");
                        MainActivity.this.setResult(RESULT_CANCELED,
                                mResultIntent);
                    }
                }
        });
在这一节
1.发送请求
通过startActivityFctivityorResult传递Intent,来启动其他App请求共享文件
public class MainActivity extends Activity {
    private Intent mRequestFileIntent;
    private ParcelFileDescriptor mInputPFD;
    ...
    @Override
    protected void onCreate(Bundle savedInstanceState) {
        super.onCreate(savedInstanceState);
        setContentView(R.layout.activity_main);
        mRequestFileIntent = new Intent(Intent.ACTION_PICK);
        mRequestFileIntent.setType("image/jpg");
        ...
    }
    ...
    protected void requestFile() {
        /**
         * When the user requests a file, send an Intent to the
         * server app.
         * files.
         */
            startActivityForResult(mRequestFileIntent, 0);
        ...
    }
    ...
}
2.如何使用文件
当服务端App返回文件的带有Uri的Intent时,这个Intent会传送至onActivityResult(),我们可以通过FileDescriptor使用这个文件
/*
     * When the Activity of the app that hosts files sets a result and calls
     * finish(), this method is invoked. The returned Intent contains the
     * content URI of a selected file. The result code indicates if the
     * selection worked or not.
     */
    @Override
    public void onActivityResult(int requestCode, int resultCode,
            Intent returnIntent) {
        // If the selection didn‘t work
        if (resultCode != RESULT_OK) {
            // Exit without doing anything else
            return;
        } else {
            // Get the file‘s content URI from the incoming Intent
            Uri returnUri = returnIntent.getData();
            /*
             * Try to open the file for "read" access using the
             * returned URI. If the file isn‘t found, write to the
             * error log and return.
             */
            try {
                /*
                 * Get the content resolver instance for this context, and use it
                 * to get a ParcelFileDescriptor for the file.
                 */
                mInputPFD = getContentResolver().openFileDescriptor(returnUri, "r");
            } catch (FileNotFoundException e) {
                e.printStackTrace();
                Log.e("MainActivity", "File not found.");
                return;
            }
            // Get a regular file descriptor for the file
            FileDescriptor fd = mInputPFD.getFileDescriptor();
            ...
        }
}请求文件并对该文件操作的时候,我们想获取该文件的信息,比如大小和类型,怎么办?
1.恢复文件的MIME Type
我们只需要通过 ContentResolver.getType()来获取
  ...
    /*
     * Get the file‘s content URI from the incoming Intent, then
     * get the file‘s MIME type
     */
    Uri returnUri = returnIntent.getData();
    String mimeType = getContentResolver().getType(returnUri);
    ...
2.恢复文件名和大小
FileProvider 提供了query()返回Cursor对象,其中包含文件名和大小,问题很清楚了,那么我们只需要了解Cursor对象的api即可!
官方文档的解释:
DISPLAY_NAME
The file’s name, as a String. This value is the same as the value returned by File.getName().
SIZE
The size of the file in bytes, as a long This value is the same as the value returned by File.length()
那么使用方法就显而易见了:
 ...
    /*
     * Get the file‘s content URI from the incoming Intent,
     * then query the server app to get the file‘s display name
     * and size.
     */
    Uri returnUri = returnIntent.getData();
    Cursor returnCursor =
            getContentResolver().query(returnUri, null, null, null, null);
    /*
     * Get the column indexes of the data in the Cursor,
     * move to the first row in the Cursor, get the data,
     * and display it.
     */
    int nameIndex = returnCursor.getColumnIndex(OpenableColumns.DISPLAY_NAME);
    int sizeIndex = returnCursor.getColumnIndex(OpenableColumns.SIZE);
    returnCursor.moveToFirst();
    TextView nameView = (TextView) findViewById(R.id.filename_text);
    TextView sizeView = (TextView) findViewById(R.id.filesize_text);
    nameView.setText(returnCursor.getString(nameIndex));
    sizeView.setText(Long.toString(returnCursor.getLong(sizeIndex)));
    ...
总结:
1. 使用了FileProvider的query()和URI 来获取Cursor对象
2. 复习了Cursor对象,以及通过Cursor获取信息
我们已经不满足于跟地球上的女神示爱了,接下来我们打算去跟月球上的嫦娥通信
那么在移动设备之间,该如何共享文件呢?
答案是通过NFC无线通信技术。
Android无线传输技术有几大特征
只有在Android4.1 API 16 及以上才可以传输大文件
想传输存储卡中的文件,你得了解如何使用存储卡(External Storage)
传输的文件必须是可读的,通过File.setReadable(true,false).来设置权限
必须将文件转换成URI的形式,FileProvider.getUriForFile可以为文件生成URI,接着我们就可以传输了
1.Manifest声明
  <uses-permission android:name="android.permission.NFC" />
  <uses-permission
            android:name="android.permission.READ_EXTERNAL_STORAGE" />
2. 指定NFC特性
<uses-feature
    android:name="android.hardware.nfc"
    android:required="true" />
3.检查设备是否支持 无线传输
<uses-feature android:name="android.hardware.nfc" android:required="false" />如果android:required 设置false,我们就必须检查设备是否支持NFC
那么代码如何写呢?
通过PackageManager.hasSystemFeature( FEATURE_NFC)返回true或false来进行后续的操作
下面是Google的代码示例
public class MainActivity extends Activity {
    ...
    NfcAdapter mNfcAdapter;
    // Flag to indicate that Android Beam is available
    boolean mAndroidBeamAvailable  = false;
    ...
    @Override
    protected void onCreate(Bundle savedInstanceState) {
        ...
        // NFC isn‘t available on the device
      if (!PackageManager.hasSystemFeature(PackageManager.FEATURE_NFC)) {
          ...
            /*
             * Disable NFC features here.
             * For example, disable menu items or buttons that activate
             * NFC-related features
             */
          ...
        // Android Beam file transfer isn‘t supported

        } else if (Build.VERSION.SDK_INT <
                Build.VERSION_CODES.JELLY_BEAN_MR1) {
            // If Android Beam isn‘t available, don‘t continue.
            mAndroidBeamAvailable = false;
            /*
             * Disable Android Beam file transfer features here.
             */
            ...
        // Android Beam file transfer is available, continue
        } else {
        mNfcAdapter = NfcAdapter.getDefaultAdapter(this);
        ...
        }
    }
    ...
}
这一节
Build类来判断系统版本,比如Build.VERSION.SDK_INT, Build.VERSION_CODES.JELLY_BEAN_MR1
PackageManager.hasSystemFeature(PackageManager.FEATURE_NFC)来判断系统特性
4.创建提供文件的回调方法
一旦我们确定手机设备支持无线传输,我们需要在activity中加入回调函数,实现 NfcAdapter.CreateBeamUrisCallback接口和 createBeamUris()
public class MainActivity extends Activity {
    ...
    // List of URIs to provide to Android Beam
    private Uri[] mFileUris = new Uri[10];
    ...
    /**
     * Callback that Android Beam file transfer calls to get
     * files to share
     */
    private class FileUriCallback implements
            NfcAdapter.CreateBeamUrisCallback {
        public FileUriCallback() {
        }
        /**
         * Create content URIs as needed to share with another device
         */
        @Override
        public Uri[] createBeamUris(NfcEvent event) {
            return mFileUris;
        }
    }
    ...
}
我们实现上述接口后,通过 setBeamPushUrisCallback().可以将回调提供给无线传输的文件。
public class MainActivity extends Activity {
    ...
    // Instance that returns available files from this app
    private FileUriCallback mFileUriCallback;
    ...
    @Override
    protected void onCreate(Bundle savedInstanceState) {
        ...
        // Android Beam file transfer is available, continue
        ...
        mNfcAdapter = NfcAdapter.getDefaultAdapter(this);
        /*
         * Instantiate a new FileUriCallback to handle requests for
         * URIs
         */
        mFileUriCallback = new FileUriCallback();
        // Set the dynamic callback for URI requests.
        mNfcAdapter.setBeamPushUrisCallback(mFileUriCallback,this);
        ...
    }
    ...
}
6.指定传输的文件
最后通过Uri.fromFile(File)将文件转换出Uri,插入Uri数组中
/*
         * Create a list of URIs, get a File,
         * and set its permissions
         */
        private Uri[] mFileUris = new Uri[10];
        String transferFile = "transferimage.jpg";
        File extDir = getExternalFilesDir(null);
        File requestFile = new File(extDir, transferFile);
        requestFile.setReadable(true, false);
        // Get a URI for the File and add it to the list of URIs
        fileUri = Uri.fromFile(requestFile);
        if (fileUri != null) {
            mFileUris[0] = fileUri;
        } else {
            Log.e("My Activity", "No File URI available for file.");
}作为客户端,我们需要做三件事
1.声明权限
这里需要注意的是 ,在intent-filter中定义action为VIEW
 <activity
        android:name="com.example.android.nfctransfer.ViewActivity"
        android:label="Android Beam Viewer" >
        ...
        <intent-filter>
            <action android:name="android.intent.action.VIEW"/>
            <category android:name="android.intent.category.DEFAULT"/>
            ...
        </intent-filter>
    </activity>
定义请求文件的权限
<uses-permission android:name="android.permission.READ_EXTERNAL_STORAGE" />如果你还想往自己的存储区存储点东西,那么你需要加上 WRITE_EXTERNAL_STORAGE 权限
WRITE_EXTERNAL_STORAGE 包含了READ_EXTERNAL_STORAGE的声明
此外,在高于Android 4.2.2 API17的版本, 文件可读权限 READ_EXTERNAL_STORAGE 是默认存在的,意思就是 不需要加入该权限,我们的App也可以读取一些本地存储的数据
2. 获得文件的目录
在拿到该文件之前,我们不确定该文件是通过带有ACTION_VIEW的Intent传输过来的,还是通过NFC无线传输过来的,这将决定我们如何处理该Intent,所以我们需要检查Intent的约束和来源
通过Uri.getScheme()可以完成上述需求
public class MainActivity extends Activity {
    ...
    // A File object containing the path to the transferred files
    private File mParentPath;
    // Incoming Intent
    private Intent mIntent;
    ...
    /*
     * Called from onNewIntent() for a SINGLE_TOP Activity
     * or onCreate() for a new Activity. For onNewIntent(),
     * remember to call setIntent() to store the most
     * current Intent
     *
     */
    private void handleViewIntent() {
        ...
        // Get the Intent action
        mIntent = getIntent();
        String action = mIntent.getAction();
        /*
         * For ACTION_VIEW, the Activity is being asked to display data.
         * Get the URI.
         */
        if (TextUtils.equals(action, Intent.ACTION_VIEW)) {
            // Get the URI from the Intent
            Uri beamUri = mIntent.getData();
            /*
             * Test for the type of URI, by getting its scheme value
             */
            if (TextUtils.equals(beamUri.getScheme(), "file")) {
                mParentPath = handleFileUri(beamUri);
            } else if (TextUtils.equals(
                    beamUri.getScheme(), "content")) {
                mParentPath = handleContentUri(beamUri);
            }
        }
        ...
    }
    ...
}
3. Get the directory from a file URI
 ...
    public String handleFileUri(Uri beamUri) {
        // Get the path part of the URI
        String fileName = beamUri.getPath();
        // Create a File object for this filename
        File copiedFile = new File(fileName);
        // Get a string containing the file‘s parent directory
        return copiedFile.getParent();
    }
    ...
4. Get the directory from a content URI
对于content URI,我们需要使用MediaStore 来处理,MediaStore用起来有些复杂,请自行查阅API
5. 决定内容 提供者
  ...
    public String handleContentUri(Uri beamUri) {
        // Position of the filename in the query Cursor
        int filenameIndex;
        // File object for the filename
        File copiedFile;
        // The filename stored in MediaStore
        String fileName;
        // Test the authority of the URI
        if (!TextUtils.equals(beamUri.getAuthority(), MediaStore.AUTHORITY)) {
            /*
             * Handle content URIs for other content providers
             */
        // For a MediaStore content URI
        } else {
            // Get the column that contains the file name
            String[] projection = { MediaStore.MediaColumns.DATA };
            Cursor pathCursor =
                    getContentResolver().query(beamUri, projection,
                    null, null, null);
            // Check for a valid cursor
            if (pathCursor != null &&
                    pathCursor.moveToFirst()) {
                // Get the column index in the Cursor
                filenameIndex = pathCursor.getColumnIndex(
                        MediaStore.MediaColumns.DATA);
                // Get the full file name including path
                fileName = pathCursor.getString(filenameIndex);
                // Create a File object for the filename
                copiedFile = new File(fileName);
                // Return the parent directory of the file
                return new File(copiedFile.getParent());
             } else {
                // The query didn‘t work; return null
                return null;
             }
        }
    }
...跟Google 学代码 :Building Apps with Content Sharing(跟女神去表白)
标签:
原文地址:http://blog.csdn.net/chivalrousman/article/details/51863586