标签:
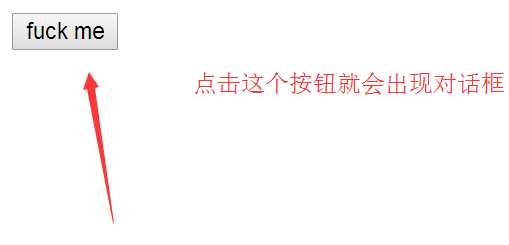
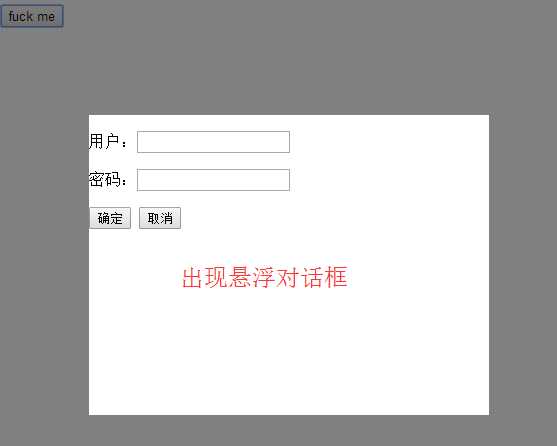
1、内容+遮罩层+悬浮对话框

 1 <!DOCTYPE html>
 2 <html lang="en">
 3 <head>
 4     <meta charset="UTF-8">
 5     <title>Title</title>
 6     <style>
 7         .hide{
 8             display: none;
 9         }
10         .c1{
11             background: rgba(0,0,0,.5);
12             position: fixed;
13             top:0;
14             left: 0;
15             right: 0;
16             bottom: 0;
17         }
18         .c2{
19             background: white;
20             width: 400px;
21             height: 300px;
22             position: fixed;
23             top:50%;
24             left: 50%;
25             margin-top: -150px;
26             margin-left: -200px;
27         }
28     </style>
29 </head>
30 <body>
31     <input value="fuck me" type="button" onclick="show()">
32 <div id="zhezhao" class="c1 hide"> </div>
33 <div id="duihua" class="c2 hide">
34     <p>用户:<input type="text" value=""></p>
35     <p>密码:<input type="text" value=""></p>
36     <input type="button" value="确定">
37     <input type="button" value="取消" onclick="hide()">
38 </div>
39
40 <script>
41     function show() {
42             document.getElementById(‘zhezhao‘).classList.remove(‘hide‘);
43 //        把遮罩层和对话框取消隐藏
44             document.getElementById(‘duihua‘).classList.remove(‘hide‘);
45     }
46     function hide() {
47         document.getElementById(‘zhezhao‘).classList.add(‘hide‘);
48         //        把遮罩层和对话框隐藏
49         document.getElementById(‘duihua‘).classList.add(‘hide‘);
50     }
51 </script>
52 </body>
53 </html>
点击后
点击取消按钮恢复原样
2、搜索框
 1 <!DOCTYPE html>
 2 <html lang="en">
 3 <head>
 4     <meta charset="UTF-8">
 5     <title>Title</title>
 6     <style>
 7         .gg{
 8             color: #7d7d7d;
 9         }
10         .bb{
11             color: black;
12         }
13     </style>
14 </head>
15 <body>
16     <input value="请输入内容" class="gg" onblur="Blur(this);" onfocus="Focus(this)">
17 <script>
18     function Blur(arg) {
19 //        鼠标离开时
20         var cc=arg.value;
21         if(cc==‘请输入内容‘||cc.trim().length==0){
22 //            如果内容是原始值或为空时 变成灰色 并且恢复原始值
23             arg.value=‘请输入内容‘;
24             arg.className=‘gg‘;
25         }
26     }
27     function Focus(arg) {
28         var cc=arg.value;
29 //        鼠标进去时 改变成白色  如果为初始值就把值变成空
30         arg.className=‘bb‘;
31         if(arg.value==‘请输入内容‘){
32             arg.value=‘‘;
33         }
34     }
35 </script>
36 </body>
37 </html>
默认样式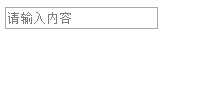 鼠标点进去
鼠标点进去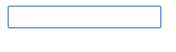
输入几个字符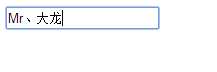 鼠标再出来
鼠标再出来
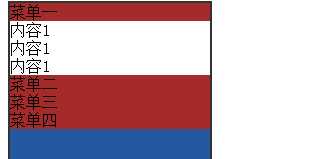
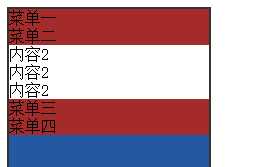
3、点击菜单出现相应的内容
 1 <!DOCTYPE html>
 2 <html lang="en">
 3 <head>
 4     <meta charset="UTF-8">
 5     <title>Title</title>
 6 </head>
 7 <body>
 8    <style>
 9         ul{
10             padding: 0;
11             margin: 0;
12         }
13         .hide{
14             display: none;
15         }
16         .menu{
17             width: 200px;
18             height: 500px;
19             background-color: #2459a2;
20             border: 2px solid #333;
21         }
22         .menu .title{
23             background-color: brown;
24             cursor: pointer;
25         }
26         .menu .content{
27             background-color: white;
28         }
29     </style>
30
31     <div class="menu">
32         <div class="item">
33             <div class="title" onclick="Show(this);">菜单一</div>
34             <div class="content">
35                 <ul>
36                     <li>内容1</li>
37                     <li>内容1</li>
38                     <li>内容1</li>
39                 </ul>
40             </div>
41         </div>
42         <div class="item">
43             <!--arg.下一个标签nex-->
44             <div class="title" onclick="Show(this);">菜单二</div>
45             <div class="content hide">
46                 <ul>
47                     <li>内容2</li>
48                     <li>内容2</li>
49                     <li>内容2</li>
50                 </ul>
51             </div>
52         </div>
53         <div class="item">
54             <div class="title" onclick="Show(this);">菜单三</div>
55             <div class="content hide">
56                 <ul>
57                     <li>内容3</li>
58                     <li>内容3</li>
59                     <li>内容3</li>
60                 </ul>
61             </div>
62         </div>
63         <div class="item">
64             <div class="title" onclick="Show(this);">菜单四</div>
65             <div class="content hide">
66                 <ul>
67                     <li>内容4</li>
68                     <li>内容4</li>
69                     <li>内容4</li>
70                 </ul>
71             </div>
72         </div>
73     </div>
74 <script>
75     function Show(arg) {
76         var father=arg.parentElement;
77                     console.log(father);
78         var sons=father.parentElement.children;
79 //        获取父标签的父标签下的所有子标签,也就是点击的标签的爸爸和爸爸的兄弟们 所有的item
80         for(var i=0;i<sons.length;i++){
81
82             var current_ele=sons[i];
83             console.log(current_ele);
84 //            给所有兄弟们添加上hide(隐藏)
85             current_ele.children[1].classList.add(‘hide‘);
86         }
87 //        然后给当前点击的这个取消隐藏
88         arg.nextElementSibling.classList.remove(‘hide‘);
89     }
90 </script>
91 </body>
92 </html>
点击菜单二
4、隐藏菜单内容
和第三个差不多,复杂了点,
 1 <!DOCTYPE html>
 2 <html lang="en">
 3 <head>
 4     <meta charset="UTF-8">
 5     <title>Title</title>
 6     <style>
 7         ul{
 8             list-style: none;
 9             padding: 0;
10             margin: 0;
11         }
12         ul li{
13             float: left;
14             background-color: #2459a2;
15             color: white;
16             padding: 8px 10px;
17         }
18         .clearfix:after{
19             display: block;
20             content: ‘.‘;
21             height: 0;
22             visibility: hidden;
23             clear: both;
24         }
25         .hide{
26             display: none;
27         }
28         .tab-menu .title{
29             background-color: #dddddd;
30         }
31         .tab-menu .title .active{
32             background-color: white;
33             color: black;
34         }
35         .tab-menu .content{
36             border: 1px solid #dddddd;
37             min-height: 150px;
38         }
39     </style>
40
41 </head>
42 <body>
43 <div class="tab-menu">
44     <div class="title clearfix">
45         <ul>
46             <li target="1" class="active" onclick="show(this);">价格趋势</li>
47             <li target="2" onclick="show(this);">市场分布</li>
48             <li target="3" onclick="show(this);">其他</li>
49         </ul>
50     </div>
51     <div id="content" class="content">
52         <div con="1">content1</div>
53         <div con="2" class="hide">content2</div>
54         <div con="3"  class="hide">content3</div>
55     </div>
56     </div>
57 <script>
58     function show(arg) {
59         borther=arg.parentElement.children;
60 //        获取所有头部
61         for(var i=0;i<borther.length;i++){
62             borther[i].classList.remove(‘active‘);
63 //            先去除掉所有头部的 active
64         }
65         var can=arg.getAttribute(‘target‘);
66 //        获取点击头部的target的值 以便寻找对应的content
67         arg.className=‘active‘;
68 //        设置点击的头部class为active
69         contens=document.getElementById(‘content‘).children;
70 //        获取并遍历所有content
71         for(var j=0;j<contens.length;j++){
72             if(contens[j].getAttribute(‘con‘)==can){
73 //                如果content的con属性的值和点击头部target的值一样 就去掉hide
74                 contens[j].classList.remove(‘hide‘)
75             }else{
76 //                给其他的content加上hide隐藏
77                 contens[j].classList.add(‘hide‘)
78             }
79         }
80     }
81 </script>
82 </body>
83 </html>
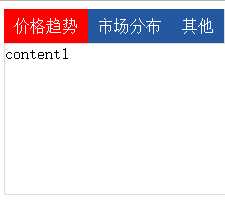 点击“市场分布”
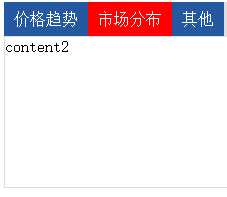
5、页面滚动条下拉后自动出现返回顶部按钮
 1 <!DOCTYPE html>
 2 <html lang="en">
 3 <head>
 4     <meta charset="UTF-8">
 5     <title>Title</title>
 6     <style>
 7         .content{
 8             height: 2000px;
 9         }
10         .gotop{
11             position: fixed;
12             right: 30px;
13             bottom:30px;
14             background: blue;
15             width: 50px;
16             height: 50px;
17             color: white;
18         }
19         .hide{
20             display: none;
21         }
22         .hover{
23             position: absolute;
24             top:0;
25             left:0;
26             right: 0;
27             bottom: 0;
28             background-color:green;
29             visibility: hidden;
30             color: white;
31         }
32         .gotop:hover .hover{
33             visibility:visible;
34         }
35     </style>
36 </head>
37 <body onscroll="show();">
38 <div class="content">Mr大龙</div>
39 <div class="gotop hide">
40     <div class="hover ">TOP</div><a>返回顶部</a></div>
41 <script>
42     function show() {
43         if(document.body.scrollTop>50){
44             //            显示出来放回顶部按钮
45             document.getElementsByClassName(‘gotop‘)[0].classList.remove(‘hide‘)
46         }else{
47             //            如果小于50则隐藏
48             document.getElementsByClassName(‘gotop‘)[0].classList.add(‘hide‘)
49         }
50     }
51     function Gotop() {
52         document.body.scrollTop=0;
53 //        使滚动条到最顶端
54     }
55 </script>
56 </body>
57 </html>
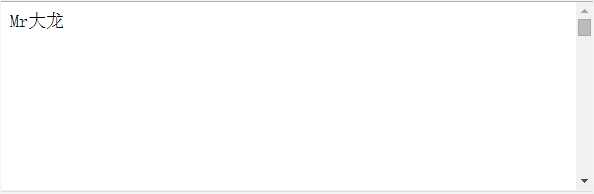
下拉超过50像素之后 出现返回顶部按钮
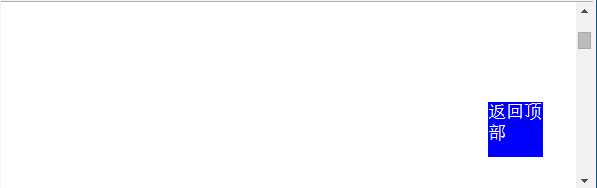
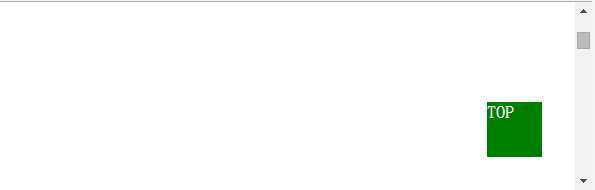
鼠标移动上去变绿色TOP,点击就会返回顶部
6、插入标签
<!DOCTYPE html>
<html lang="en">
<head>
    <meta charset="UTF-8">
    <title>Title</title>
</head>
<body>
<div>
    <input type="text">
    <input type="button" value="提交" onclick="add(this);">
    <ul id="ii">
        <li>dalong</li>
        <li>shenwenlong</li>
        <li>wenlong</li>
    </ul>
    <script>
        function add(arg) {
            cc=arg.previousElementSibling.value;
//            获取驶入的值,并清空输入框,方便下次输入
            arg.previousElementSibling.value=‘‘;
            var commentList=document.getElementById(‘ii‘);
//            找到相对于哪个标签插入
            tag=document.createElement(‘li‘);
//            创建一个标签(对象),标签里的文本是输入框的值
            tag.innerText=cc;
//            又创建了一个标签
            aa=document.createElement(‘a‘);
            aa.href=‘http://www.cnblogs.com/shenwenlong/‘;
            aa.innerText=‘Mr大龙‘;
//            如果非自闭和标签,我们可以继续插入一个标签
            tag.appendChild(aa);
//            commentList.appendChild(tag);
//            插入标签在第一个子标签之后
            commentList.insertBefore(tag,commentList.children[1]);
        }
    </script>
</div>
</body>
</html>
默认打开页面
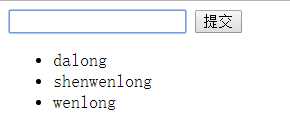
插入一个标签

7、克隆标签
 1 <!DOCTYPE html>
 2 <html lang="en">
 3 <head>
 4     <meta charset="UTF-8">
 5     <title>Title</title>
 6 </head>
 7 <body>
 8 <h2 id="h1">Mr<span>大</span><a>龙</a></h2>
 9 <div id="container">
10     <div class="item">1</div>
11     <div class="item">2</div>
12 </div>
13 <script>
14     var h=document.getElementById(‘h1‘);
15     var c=document.getElementById(‘container‘);
16 //    获取标签
17     var newH=h.cloneNode(true);
18 //    克隆一个标签,如果cloneNode为true会同时克隆后代标签,为false只克隆该标签
19     c.appendChild(newH);
20 //    插入克隆的标签
21 </script>
22 </body>
23 </html>
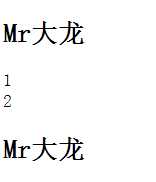 如图,上边的<h>标签是原生的,下边的是克隆后插入的
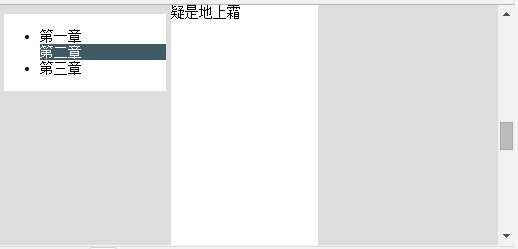
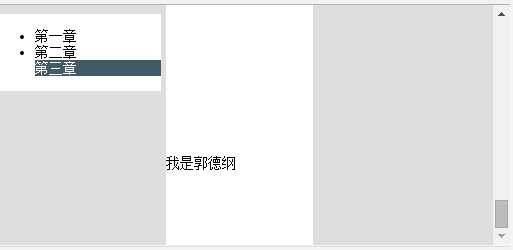
8、 自动变换菜单
  1 <!DOCTYPE html>
  2 <html lang="en">
  3 <head>
  4     <meta charset="UTF-8">
  5     <title>Title</title>
  6     <style>
  7         body{
  8             margin: 0;
  9             background-color: #dddddd;
 10         }
 11         .w{
 12             margin: 0 auto;
 13             width: 980px;
 14         }
 15         .pg-header{
 16             background-color: black;
 17             color: white;
 18             height: 48px;
 19         }
 20         .pg-body .menu{
 21             position: absolute;
 22             left: 200px;
 23             width: 180px;
 24             background-color: white;
 25             float: left;
 26         }
 27         .pg-body .menu .active{
 28             background-color: #425a66;
 29             color: white;
 30
 31         }
 32         .pg-body .fixed{
 33             position: fixed;
 34             top: 10px;
 35         }
 36         .pg-body .content{
 37             position: absolute;
 38             left: 385px;
 39             right: 200px;
 40             background-color: white;
 41             float: left;
 42         }
 43         .pg-body .content .item{
 44             height: 900px;
 45         }
 46     </style>
 47 </head>
 48 <body onscroll="Hua();">
 49     <div class="pg-header">
 50         <div class="w">
 51
 52         </div>
 53     </div>
 54     <div class="pg-body">
 55         <div id="menu" class="menu">
 56             <ul>
 57                 <li>第一章</li>
 58                 <li>第二章</li>
 59                 <li>第三章</li>
 60             </ul>
 61         </div>
 62         <div id="content" class="content">
 63             <div class="item">床前明月管</div>
 64             <div class="item">疑是地上霜</div>
 65             <div class="item" style="height: 100px">我是郭德纲</div>
 66         </div>
 67
 68     </div>
 69
 70 <script>
 71     function Hua() {
 72         var top = document.body.scrollTop;
 73         if (top > 48) {
 74 //            如果滚动条下滑超过48像素,就固定菜单栏
 75             menu = document.getElementById(‘menu‘);
 76             menu.classList.add(‘fixed‘)
 77         } else {
 78             menu.classList.remove(‘fixed‘)
 79         }
 80         var items = document.getElementById(‘content‘).children;
 81         for (var i = 0; i < items.length; i++) {
 82             var currentItem = items[i];
 83 //            获取所有内容
 84             var currentItemBodyTOP = currentItem.offsetTop + currentItem.offsetParent.offsetTop;
 85 //            自己距离伤一个定位标签的高度。这里指的也就是自己到‘content‘div距离+‘content‘div到窗口顶部的距离=自己距离文档顶端的距离
 86             var currentItemWindowTOP = currentItemBodyTOP - top;
 87 //           自己距离窗口顶端的距离-已滚动的高度=现在自己在窗口已显示出来的高度
 88             var currentHeight = currentItem.offsetHeight;
 89 //            自身的高度,也就是div本身的高度
 90             var currentItemBottomTOP = currentHeight + currentItemBodyTOP;
 91 //            自身的高度+自己距离窗口顶端的距离=自己底部距离文档顶部的高度
 92             //                console.log(document.getElementById(‘content‘).offsetHeight,top,sheng);
 93             var sheng = document.getElementById(‘content‘).offsetHeight - top;
 94 //   如果文档高度-滚动条下拉高度-窗口高度剩下的小于5像素,也就是滚动条到底部,5是上下保留误差,就让最后一个菜单显示
 95             if (sheng - document.documentElement.clientHeight < 5) {
 96                 document.getElementsByClassName(‘active‘)[0].className=‘‘;
 97                 document.getElementById(‘menu‘).children[0].lastElementChild.className=‘active‘;
 98                 return
 99             } else {
100 //                li[i].className=‘active‘;
101 //                }
102 //            console.log(currentItemWindowTOP,currentItemBottomTOP);
103                 if (currentItemWindowTOP < 0 && currentItemBottomTOP > top) {
104 //           如果自己在窗口显示的高度小于0 and 自己底部距离文档顶部的高度大于已滚动的高度 就改变对应的菜单栏
105 //          也就是说自己还在窗口显示的时候
106                     li = menu.getElementsByTagName(‘li‘);
107 //                    获取所有的菜单
108 //                console.log(li[i]);
109                     for (var j = 0; j < li.length; j++) {
110                         li[j].classList.remove(‘active‘);
111 //                        把所有菜单的active去掉,
112 //                    console.log(li[j])
113                     }
114 //                    然后给自己对应的菜单加上active,然后跳出循环,下边再循环没有必要
115                     li[i].className = ‘active‘;
116                     break
117                 }
118             }
119         }
120     }
121 </script>
122 </body>
123 </html>
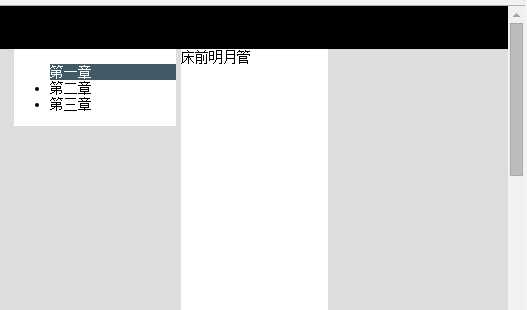
滚动超过48px
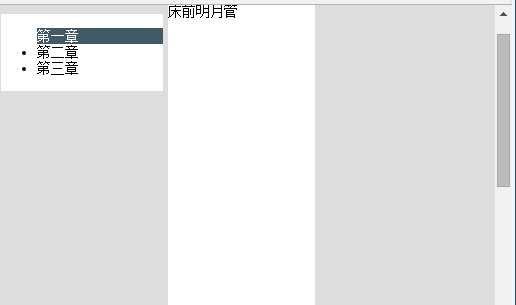
滚动超过第一个,到达第二个
特殊情况,最后一个高度低,撑不起来一个窗口的高度,拉到底部,最后一个菜单改变
标签:
原文地址:http://www.cnblogs.com/shenwenlong/p/5661853.html
