标签:
Android Wear使用跟手机一样的布局技术,但需要对特定情况进行设计。不要把手机的UI直接照搬过来。更多可查看:Android Wear Design Guidelines
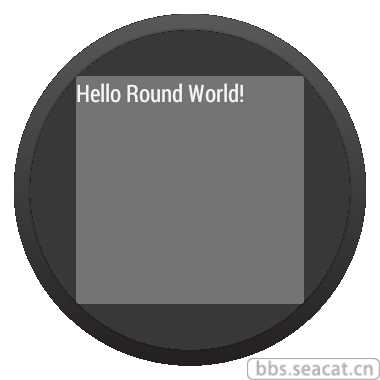
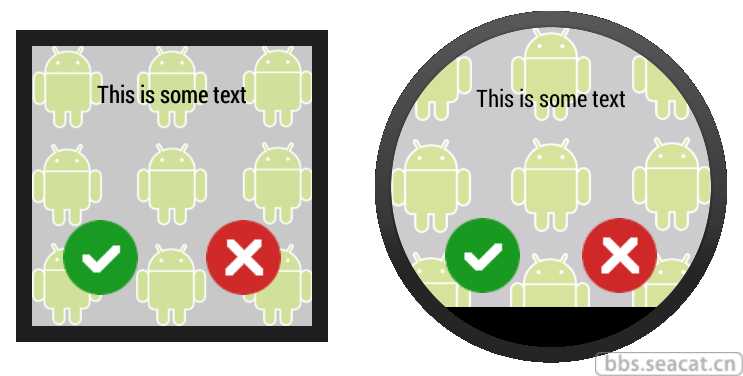
当创建android wear布局的时候,要考虑设备有两种屏幕,方形和圆形。任何位于屏幕角落的内容都会被圆形屏幕裁剪掉。
Wearable UI Library提供两种方式解决这个问题:
1、为圆形和方形屏幕的设备定义两套布局。在运行时检测设备屏幕并渲染不同的布局。
2、使用Wearable UI Library中一种特殊的布局来包住你的布局。这个布局会根据设备屏幕来加载不同的布局文件。
典型的办法是第一种,如果布局简单可以直接使用第二种。
如果使用Android studio的创建向导来创建你的工程,Wearable UI Library会默认包含在你的wear模块中。
dependencies {
compile fileTree(dir: ‘libs‘, include: [‘*.jar‘])
compile ‘com.google.android.support:wearable:+‘
compile ‘com.google.android.gms:play-services-wearable:+‘
}
Wearable UI Library中的WatchViewStub这个类可以让你为圆形和方形屏幕定义不同的布局。这个类会在运行时检测屏幕形状并渲染相应的布局。
1、在你的activity布局文件中添加WatchViewStub元素
2、使用rectLayout属性为方形屏幕指定布局文件
3、使用roundLayout属性为圆形屏幕指定布局文件
<android.support.wearable.view.WatchViewStub
xmlns:android="http://schemas.android.com/apk/res/android"
xmlns:app="http://schemas.android.com/apk/res-auto"
xmlns:tools="http://schemas.android.com/tools"
android:id="@+id/watch_view_stub"
android:layout_width="match_parent"
android:layout_height="match_parent"
app:rectLayout="@layout/rect_activity_wear"
app:roundLayout="@layout/round_activity_wear">
</android.support.wearable.view.WatchViewStub>


@Override
protected void onCreate(Bundle savedInstanceState) {
super.onCreate(savedInstanceState);
setContentView(R.layout.activity_wear);
}
渲染布局文件不是同步的,所以要设置一个回调来监听WatchViewStub渲染完成。
@Override
protected void onCreate(Bundle savedInstanceState) {
super.onCreate(savedInstanceState);
setContentView(R.layout.activity_wear);

WatchViewStub stub = (WatchViewStub) findViewById(R.id.watch_view_stub);
stub.setOnLayoutInflatedListener(new WatchViewStub.OnLayoutInflatedListener() {
@Override public void onLayoutInflated(WatchViewStub stub) {
// Now you can access your views
TextView tv = (TextView) stub.findViewById(R.id.text);
...
}
});
}

Wearable UI库中包含的类BoxInsetLayout继承自FrameLayout,能让你定义一个单一布局,来同时适用于方形和圆形屏幕
为了显示进这个区域,子view需要设定layout_box属性,top, bottom, left和right可以结合使用,例如"left|top"
在方形屏幕中,layout_box属性会被忽略。

<android.support.wearable.view.BoxInsetLayout
xmlns:android="http://schemas.android.com/apk/res/android"
xmlns:app="http://schemas.android.com/apk/res-auto"
android:background="@drawable/robot_background"
android:layout_height="match_parent"
android:layout_width="match_parent"
android:padding="15dp">

<FrameLayout
android:layout_width="match_parent"
android:layout_height="match_parent"
android:padding="5dp"
app:layout_box="all">

<TextView
android:gravity="center"
android:layout_height="wrap_content"
android:layout_width="match_parent"
android:text="@string/sometext"
android:textColor="@color/black" />

<ImageButton
android:background="@null"
android:layout_gravity="bottom|left"
android:layout_height="50dp"
android:layout_width="50dp"
android:src="@drawable/ok" />

<ImageButton
android:background="@null"
android:layout_gravity="bottom|right"
android:layout_height="50dp"
android:layout_width="50dp"
android:src="@drawable/cancel" />
</FrameLayout>
</android.support.wearable.view.BoxInsetLayout>
标签:
原文地址:http://www.cnblogs.com/zhujiabin/p/5672014.html