标签:android style blog http color java io for
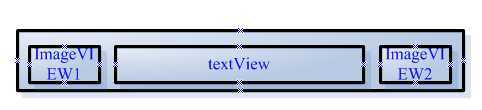
在Android开发中,常用的组件有时候无法满足我们的需求,因此我们需要自定义组件,这样可以提高组件的复用性,通过继承已有的组件,在此基础上对塔改进,下面演示简单一个一个按钮控件,塔包含2个ImageView和1个TextView。
1.组件模板
mybutton.xml
 1 <LinearLayout
 2     xmlns:android="http://schemas.android.com/apk/res/android"
 3     android:layout_width="fill_parent"
 4     android:layout_height="wrap_content"
 5     android:padding="10dip"
 6     android:orientation="horizontal">
 7     <ImageView
 8         android:id="@+id/icon"
 9         android:layout_width="0dip"
10         android:layout_height="wrap_content"
11         android:layout_weight="1"
12         android:src="@drawable/icon"
13         android:layout_gravity="left|center_vertical"
14      />
15      <TextView
16          android:id="@+id/text"
17          android:layout_width="0dip"
18          android:layout_height="wrap_content"
19          android:layout_weight="3"
20          android:layout_gravity="left|center_vertical"
21          android:textSize="18sp"
22          android:text="按钮文本"/>
23       <ImageView
24         android:id="@+id/arrow"
25         android:layout_width="0dip"
26         android:layout_height="wrap_content"
27         android:layout_weight="1"
28         android:layout_gravity="center_vertical"
29         android:src="@drawable/arrow"
30      />
31 </LinearLayout>
2.继承父组件
MyButton.java
 1 public class MyButton extends LinearLayout{
 2
 3     private ImageView imgaeView;  //图标
 4     private TextView  textView;   //文字
 5     private ImageView arrow;      //箭头
 6     public MyButton(Context context) {
 7         super(context);
 8
 9     }
10     public MyButton(Context context, AttributeSet attrs) {
11         super(context, attrs);
12         initView(context);
13     }
14     private void initView(Context context){
15         LayoutInflater inflater=(LayoutInflater) context.getSystemService(context.LAYOUT_INFLATER_SERVICE);
16         LinearLayout linearLayout=(LinearLayout) inflater.inflate(R.layout.mybutton, this);
17         imgaeView=(ImageView)linearLayout.findViewById(R.id.icon);
18         textView=(TextView) linearLayout.findViewById(R.id.text);
19         arrow=(ImageView) linearLayout.findViewById(R.id.arrow);
20     }
21     //修改icon
22     public void setImageViewResource(int resId){
23         imgaeView.setImageResource(resId);
24     }
25     //修改文本
26     public void setTextViewText(String text){
27         textView.setText(text);
28     }
29
30
31
32 }
3.Layout添加组件
 <com.forsta.weight.MyButton
        android:id="@+id/bt1"
        android:layout_width="fill_parent"
        android:layout_height="wrap_content"
        android:background="@drawable/bg"/>
4.定义背景
bg.xml
1 <selector xmlns:android="http://schemas.android.com/apk/res/android">
2     <item android:state_pressed="true" android:drawable="@drawable/bg2"></item>
3     <item android:state_pressed="false" android:drawable="@drawable/bg1"></item>
4 </selector>
bg1.xml
1 <shape xmlns:android="http://schemas.android.com/apk/res/android">
2     <gradient android:startColor="#FFFFFF"  android:endColor="#8DEEEE"/>
3 </shape>
bg2.xml
1 <shape xmlns:android="http://schemas.android.com/apk/res/android">
2     <gradient android:startColor="#EEE685" android:endColor="#DDA0DD"></gradient>
3 </shape>

Android技术15:自定义控件实现,布布扣,bubuko.com
标签:android style blog http color java io for
原文地址:http://www.cnblogs.com/forsta/p/3898123.html