标签:
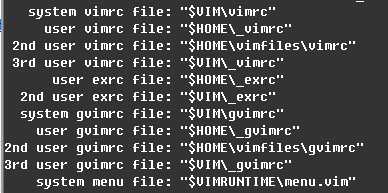
输入:version课查看vimrc文件及位置:
system vimrc file: "$VIM/vimrc"
user vimrc file: "$HOME/.vimrc“(建议放置位置)
2nd user vimrc file: "~/.vim/vimrc"
user exrc file: "$HOME/.exrc"
system gvimrc file: "$VIM/gvimrc"
user gvimrc file: "$HOME/.gvimrc"
2nd user gvimrc file: "~/.vim/gvimrc"
system menu file: "$VIMRUNTIME/menu.vim"
在$HOME/.vimrc更改设置,据说史上最强配置文件:http://amix.dk/vim/vimrc.html,将最强配置文件复制到上述vimrc文件。
sudo apt-get install ctags
"F5 在当前目录下生成tags

nnoremap <F5> :!ctags -R .<CR>

"告诉vim在当前目录找不到tags文件时请到上层目录查找

set tags=tags;/
注:要先执行到当前项目目录再执行
sudo apt-get install cscope
"cscope

"打开vim之前,先cd到项目目录

"并且执行命令cscope -Rbq

"使用quickfix窗口来显示cscope结果

":cw打开QuickFix窗口

set cscopequickfix=s-,c-,d-,i-,t-,e-

if has("cscope")

 "优先查看cscope数据库

 set csto=0

 "同时查看ctags和cscope数据库

 set cst

 "显示提示信息

 set csverb

 if filereadable("cscope.out")

   cs add cscope.out

 elseif $CSCOPE_DB != ""

   cs add $CSCOPE_DB

 endif

 set csverb

endif

"命令映射

"查找调用当前函数的函数

nmap <F3> :cs find 3 <C-R>=expand("<cword>")<CR><CR>

"查找定义

nmap <F4> :cs find 0 <C-R>=expand("<cword>")<CR><CR>
注:"打开vim之前,先cd到项目目录

   "并且执行命令cscope -Rbq
官网http://www.vim.org中查找taglist插件
http://www.vim.org/scripts/script.php?script_id=273
官方说明(加黑部分为我放置的位置):
"F8打开或者关闭taglist


nnoremap <silent> <F8> :TlistToggle<CR> F8


let Tlist_Exit_OnlyWindow=1 "关闭文件时自动关闭taglist


let Tlist_File_Fold_Auto_Close=1 "taglist window中折叠非当前文件


let Tlist_Process_File_Always=1 "taglist始终解析文件
注:快捷键是可以改变的
F8打开或者关闭taglist
装了winmanager之后可以用wm快捷键打开winmanager
winmanager包含taglist和NERDTree两个插件
在官网http://www.vim.org中查找NERDTree插件
http://www.vim.org/scripts/script.php?script_id=1658
Unzip the archive into your ~/.vim directory.
That should put NERD_tree.vim in ~/.vim/plugin and NERD_tree.txt in ~/.vim/doc.
其余的也要一起复制到~/.vim目录下,不然会出错
Run :helptags $HOME/.vim/doc
run vim and :help NERD_tree.txt for the help page.
为了让winmanager顺利打开NERDTree窗口,在.vimrc中增加下面代码,
let g:NERDTree_title=‘[NERD Tree]‘


function! NERDTree_Start()


  exec ‘NERDTree‘


endfunction


function! NERDTree_IsValid()


  return 1


endfunction
在官网中http://www.vim.org查找插件
http://www.vim.org/scripts/script.php?script_id=95
官网说明(加黑部分为我放置的位置):
1. copy the file to your $HOME/.vim or $HOME\vimfiles directory
2. unzip it (its a zip file) at that location. this should create the files
- plugin/
winmanager.vim
winfileexplorer.vim
wintagexplorer.vim
- doc/
winmanager.txt
IMPORTANT NOTE:
i . This version of winmanager ONLY works if you have the latest version
bufexplorer.vim. (vimscript #42).
The idea is that winmanager will no longer contain a duplicate copy
of bufexplorer.vim. This reduces script bloat, makes updates easier
and in genral makes the world a better place.
3. vim -c "helptags ~/.vim/doc" -c "q" (unix)
or
vim -c "helptags ~/vimfiles/doc" -c "q" (windows)
(this step should install winmanager.txt as a local help file on your
system. if this doesnt work, see ":he add-local-help" to see how to do
it).
You will also need to change the mappings you might have used with
winmanager-1.x to
map <c-w><c-f> :FirstExplorerWindow<cr>
map <c-w><c-b> :BottomExplorerWindow<cr>
map <c-w><c-t> :WMToggle<cr>
and the variable name g:bufExplorerWidth has been changed to
g:winManagerWidth just to be more consistent.
"显示NERDTree和taglist窗口,默认在左边


let g:winManagerWindowLayout=‘NERDTree|TagList‘


"wm 打开关闭winmanager


nmap wm :WMToggle<cr>


"跳到上面窗口(NERDTree)


map wf :FirstExplorerWindow<cr>


"跳到下边窗口(taglist)


map wb :BottomExplorerWindow<cr>
因为winmanager总会打开一个没有用的空窗口,不知道为什么,需要最后加q关闭它。如果是用WMToggle打开winmanager的话,要关闭这个空窗口就需要在winmanager.vim的ToggleWindowsManager函数中增加q。
function! <SID>ToggleWindowsManager()


  if IsWinManagerVisible()


    call s:CloseWindowsManager()


  else


    call s:StartWindowsManager()


    "close empty window
   exe ‘q‘


  end
endfunction
输入:version课查看vimrc文件及位置:
在$HOME/_vimrc更改设置,据说史上最强配置文件:http://amix.dk/vim/vimrc.html,将最强配置文件复制到上述vimrc文件。
http://ctags.sourceforge.net/ 下载ctags58
将压缩包解压到$VIM/vimfiles/plugin
在系统变量Path中添加$VIM/vimfiles/plugin
在$HOME/_vimrc中插入相同的代码
未安装
与Ubuntu设置类似,只是插件放置在$VIM/vimfiles目录下的plugin和doc文件下
配置代码,在$HOME/_vimrc中插入
与Ubuntu设置类似,只是插件放置在$VIM/vimfiles目录下的plugin和doc文件下
配置代码,在$HOME/_vimrc中插入
与Ubuntu设置类似,只是插件放置在$VIM/vimfiles目录下的plugin和doc文件下
配置代码,在$HOME/_vimrc中插入
http://www.cnblogs.com/coderkian/p/3823366.html
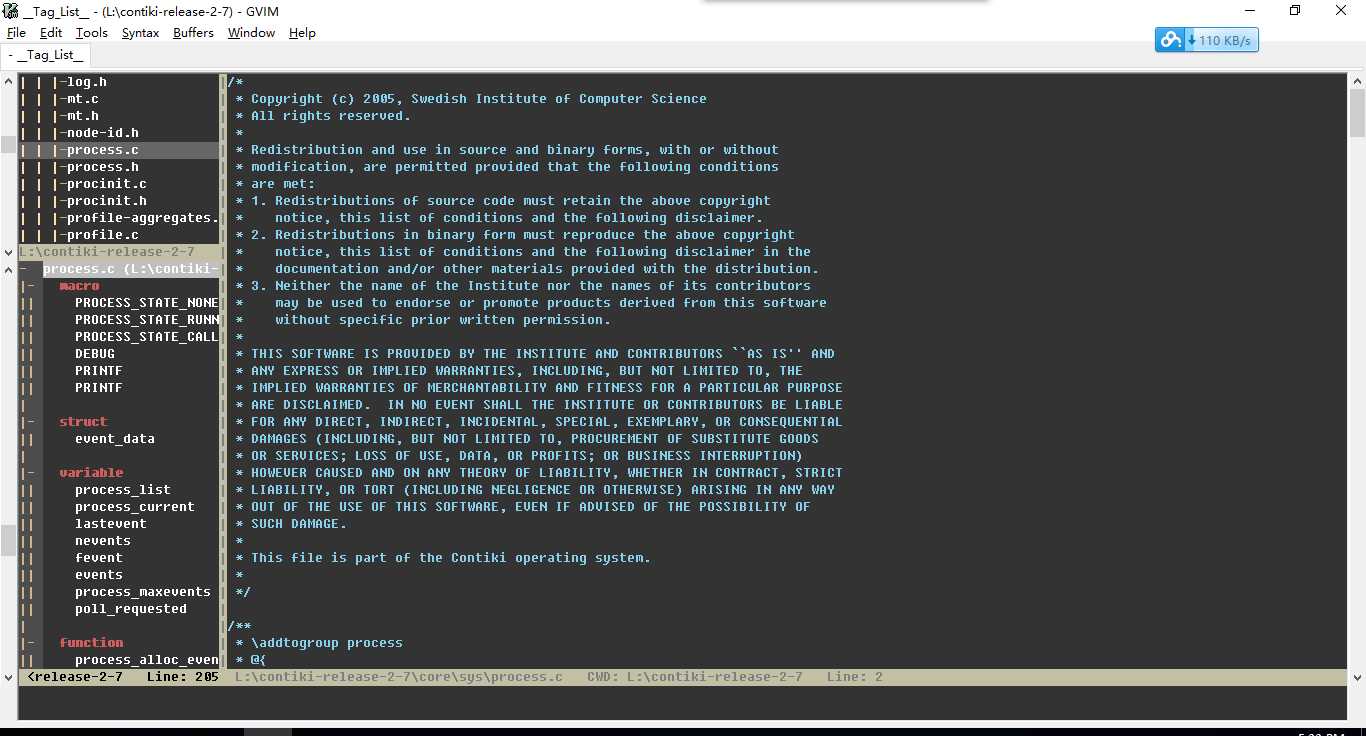
打造vim成类source insight——contiki源码阅读工具
标签:
原文地址:http://www.cnblogs.com/songdechiu/p/5764919.html