标签:
原文链接:http://blog.miguelgrinberg.com/post/easy-websockets-with-flask-and-gevent
介绍部分就先不翻了
This weekend I decided to take a short vacation from my book writing effort and spend time on a project I wanted to work on for a long time. The result of this effort is a brand new Flask extension that I think is pretty cool.
I‘m happy to introduce Flask-SocketIO, a very easy to use extension that enables WebSocket communications in Flask applications.
What is WebSocket?
WebSocket is a new communication protocol introduced with HTML5, mainly to be implemented by web clients and servers, though it can also be implemented outside of the web.
Unlike HTTP connections, a WebSocket connection is a permanent, bi-directional communication channel between a client and the server, where either one can initiate an exchange. Once established, the connection remains available until one of the parties disconnects from it.
WebSocket connections are useful for games or web sites that need to display live information with very low latency. Before this protocol existed there were other much less efficient approaches to achieve the same result such as Comet.
The following web browsers support the WebSocket protocol:
- Chrome 14
- Safari 6
- Firefox 6
- Internet Explorer 10
What is SocketIO?
SocketIO is a cross-browser Javascript library that abstracts the client application from the actual transport protocol. For modern browsers the WebSocket protocol is used, but for older browsers that don‘t have WebSocket SocketIO emulates the connection using one of the older solutions, the best one available for each given client.
The important fact is that in all cases the application uses the same interface, the different transport mechanisms are abstracted behind a common API, so using SocketIO you can be pretty much sure that any browser out there will be able to connect to your application, and that for every browser the most efficient method available will be used.
What about Flask-Sockets?
A while ago Kenneth Reitz published Flask-Sockets, another extension for Flask that makes the use of WebSocket accessible to Flask applications.
The main difference between Flask-Sockets and Flask-SocketIO is that the former wraps the native WebSocket protocol (through the use of the gevent-websocket project), so it can only be used by the most modern browsers that have native support. Flask-SocketIO transparently downgrades itself for older browsers.
Another difference is that Flask-SocketIO implements the message passing protocol exposed by the SocketIO Javascript library. Flask-Sockets just implements the communication channel, what is sent on it is entirely up to the application.
Flask-SocketIO also creates an environment for event handlers that is close to that of regular view functions, including the creation of application and request contexts. There are some important exceptions to this explained in the documentation, however.
Installation of Flask-SocketIO is very simple:
使用pip安装Flask-SocketIO
$ pip install flask-socketio
Note that Flask-SocketIO depends on gevent, so at this time it can only run on Python 2.x. Support for Python 3 is coming for gevent, so the situation is likely to improve in the near future. (Update: Flask-SocketIO version 1.0 is fully compatible with Python 2.7 and 3.3+, see bottom of the article for more information).
目前的最新状态是,Flask-SocketIO版本v1.0 可以运行在Python 2.7和 Python 3.3+上
Below is an example Flask application that implements Flask-SocketIO:
以下是一个实现了Flask-SocketIO的简单Flask应用程序
from flask import Flask, render_template
from flask.ext.socketio import SocketIO, emit

app = Flask(__name__)
app.config[‘SECRET_KEY‘] = ‘secret!‘
socketio = SocketIO(app)

@app.route(‘/‘)
def index():
    return render_template(‘index.html‘)

@socketio.on(‘my event‘, namespace=‘/test‘)
def test_message(message):
    emit(‘my response‘, {‘data‘: message[‘data‘]})

@socketio.on(‘my broadcast event‘, namespace=‘/test‘)
def test_message(message):
    emit(‘my response‘, {‘data‘: message[‘data‘]}, broadcast=True)

@socketio.on(‘connect‘, namespace=‘/test‘)
def test_connect():
    emit(‘my response‘, {‘data‘: ‘Connected‘})

@socketio.on(‘disconnect‘, namespace=‘/test‘)
def test_disconnect():
    print(‘Client disconnected‘)

if __name__ == ‘__main__‘:
    socketio.run(app)
run() method is provided by the extension. This method starts gevent, the only supported web server. Using gunicorn with a gevent worker should also work. The run() method takes optionalhost and port arguments, but by default it will listen on localhost:5000 like Flask‘s development web server.The only traditional route in this application is /, which serves index.html, a web document that contains the client implementation of this example.
To receive WebSocket messages from the client the application defines event handlers using thesocketio.on decorator.
The first argument to the decorator is the event name. Event names ‘connect‘, ‘disconnect‘,‘message‘ and ‘json‘ are special events generated by SocketIO. Any other event names are considered custom events.
The ‘connect‘ and ‘disconnect‘ events are self-explanatory. The ‘message‘ event delivers a payload of type string, and the ‘json‘ and custom events deliver a JSON payload, in the form of a Python dictionary.
在上文代码中,该应用的路由只有/,访问时返回网页index.html,包括了该例子中的客户端实现代码。
修饰符的第一个参数是事件名,‘connect‘, ‘disconnect‘, ‘message‘, ‘json‘ 等特殊事件名是由SocketIO规定的事件,其他的事件名是自定义事件。
‘connect‘ 和 ‘disconnect‘事件不必多说,‘message‘ 事件发送一段字符串类型的内容,‘json‘ 事件和自定义事件发送一段JSON内容,形式为Python的dictionary类型
Events can be defined inside a namespace by adding the namespace optional argument to thesocketio.on decorator. Namespaces allow a client to open multiple connections to the server that are multiplexed on a single socket. When a namespace is not specified the events are attached to the default global namespace.
通过在socketio.on修饰符中增加namespace可选参数,可以在一个命名空间内定义一个事件。命名空间允许一个客户端在一个socket连接上多路复用打开多个与服务器的链接。当一个事件没有指明命名空间,则事件关联到默认的全局命名空间中。
To send events a Flask server can use the send() and emit() functions provided by Flask-SocketIO. The send() function sends a standard message of string or JSON type to the client. The emit() function sends a message under a custom event name.
Flask-SocketIO提供给Flask服务器send()和emit()两个函数来发送事件。send()函数发送一个字符串或JSON类型的标准消息给客户端,emit()函数发送一个在自定义事件名之下的消息给客户端——例如代码中的 emit(‘my response‘, {‘data‘: message[‘data‘]}) 就是发送了一条‘my response‘事件的消息,消息内容主体为 {‘data‘: message[‘data‘]}
Messages are sent to the connected client by default, but when including the broadcast=Trueoptional argument all clients connected to the namespace receive the message.
消息默认发送给已连接(且此时通信的这一)的客户端,但是如果包括了可选参数及取值broadcast=True,则消息被发送给所有连接到该名字空间的客户端
Ready to try your hand at some Javascript? The index.html page used by the example server contains a little client application that uses jQuery and SocketIO. The relevant code is shown below:
$(document).ready(function(){
    var socket = io.connect(‘http://‘ + document.domain + ‘:‘ + location.port + ‘/test‘);
    socket.on(‘my response‘, function(msg) {
        $(‘#log‘).append(‘<p>Received: ‘ + msg.data + ‘</p>‘);
    });
    $(‘form#emit‘).submit(function(event) {
        socket.emit(‘my event‘, {data: $(‘#emit_data‘).val()});
        return false;
    });
    $(‘form#broadcast‘).submit(function(event) {
        socket.emit(‘my broadcast event‘, {data: $(‘#broadcast_data‘).val()});
        return false;
    });
});
The socket variable is initialized with a SocketIO connection to the server. Note how the namespace /test is specified in the connection URL. To connect without using a namespace it is sufficient to call io.connect() without any arguments.
The socket.on() syntax is used in the client side to define an event handler. In this example a custom event with name ‘my response‘ is handled by adding the data attribute of the message payload to the contents of a page element with id log. This element is defined in the HTML portion of the page.
The next two blocks override the behavior of two form submit buttons so that instead of submitting a form over HTTP they trigger the execution of a callback function.
For the form with id emit the submit handler emits a message to the server with name ‘my event‘ that includes a JSON payload with a data attribute set to the value of the text field in that form.
The second form, with id broadcast does the same thing, but sends the data under a different event name called ‘my broadcast event‘.
If you now go back to the server code you can review the handlers for these two custom events. For ‘my event‘ the server just echoes the payload back to the client in a message sent under event name ‘my response‘, which is handled by showing the payload in the page. The event named ‘my broadcast event‘ does something similar, but instead of echoing back to the client alone it broadcasts the message to all connected clients, also under the ‘my response‘ event.
You can view the complete HTML document in the GitHub repository.
To run this example you first need to download the code from GitHub. For this you have two options:
The example application is in the example directory, so cd to it to begin.
To keep your global Python interpreter clean it is a good idea to make a virtual environment:
$ virtualenv venv
$ . venv/bin/activate
Then you need to install the dependencies:
(venv) $ pip install -r requirements.txt
Finally you can run the application:
(venv) $ python app.py
Now open your web browser and navigate to http://localhost:5000 and you will get a page with two forms as shown in the following screenshot:
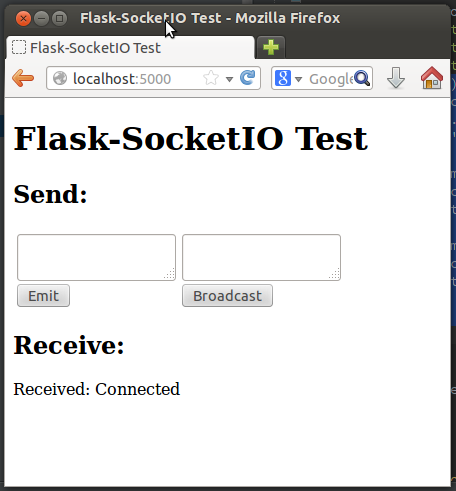
Any text you submit from any of the two text fields will be sent to the server over the SocketIO connection, and the server will echo it back to the client, which will append the message to the "Receive" part of the page, where you can already see the message sent by the ‘connect‘ event handler from the server.
Things get much more interesting if you connect a second browser to the application. In my case I‘m testing this with Firefox and Chrome, but any two browsers that you run on your machine will do. If you prefer to access the server from multiple machines you can do that too, but you first need to change the start up command to socketio.run(app, host=‘0.0.0.0‘) so that the server listens on the public network interface.
With two or more clients when you submit a text from the form on the left only the client that submitted the message gets the echoed response. If you submit from the form on the right the server broadcasts the message to all connected clients, so all get the reply.
If a client disconnects (for example if you close the browser window) the server will detect it a few seconds later and send a disconnect event to the application. The console will print a message to that effect.
For a more complete description of this extension please read the documentation. If you want to make improvements to it feel free to fork it and then submit a pull request.
I hope you make cool applications with this extension. I can tell you that I had a lot of fun implementing this extension.
If you make something with it feel free to post links in the comments below.
UPDATE: Flask-SocketIO version 0.3 adds support for rooms. This enables targeting subsets of connected users without having to use the broadcast option that sends to everyone.
UPDATE #2: Flask-SocketIO version 1.0 adds support for Python 3.3+, and offers the choice to use gevent or eventlet as web server, as well as the standard Flask server. When using the Flask server the bi-directional channel is emulated using the HTTP long-polling technique.
Miguel
“Easy WebSockets with Flask and Gevent” 翻译学习笔记 ——Flask WebSocket使用快速入门
标签:
原文地址:http://www.cnblogs.com/KattyJoy/p/5777356.html