标签:
ASP.NET Core开发系列之后台任务利器Hangfire 使用。
Hangfire 是一款强大的.NET开源后台任务利器,无需Windows服务/任务计划程序。
可以使用于ASP.NET 应用也可以使用于控制台。Hangfire 只需简单几句代码即可创建新的不同种类的任务。
目前 Hangfire 已经支持.NET Core ,现在就给大家讲解下在ASP.NET Core 里的使用。
Hangfire GitHub:https://github.com/HangfireIO/Hangfire
官网:http://hangfire.io/
相关文档介绍:http://docs.hangfire.io/en/latest/
首先我们新建一个ASP.NET Core Web Application
选择模板-》空的模板
然后添加引用:
NuGet 命令行执行
Install-Package Hangfire
添加好引用以后我们就可以来使用。
打开Startup.cs
首先在ConfigureServices 方法中注册服务:
        public void ConfigureServices(IServiceCollection services)
        {
            services.AddHangfire(r=>r.UseSqlServerStorage("Data Source=.;Initial Catalog=HangfireDemo;User ID=sa;Password=123456"));
        }
这里是配置数据库,数据库需要确保存在,这里配置的是SQL Server数据库,目前官方支持SQL Server。
然后在Configure 方法中加入HangfireServer及HangfireDashboard:
        public void Configure(IApplicationBuilder app, IHostingEnvironment env, ILoggerFactory loggerFactory)
        {
            loggerFactory.AddConsole();

            if (env.IsDevelopment())
            {
                app.UseDeveloperExceptionPage();
            }

            app.UseHangfireServer();
            app.UseHangfireDashboard();

            app.Run(context =>
            {
                return context.Response.WriteAsync("Hello from ASP.NET Core!");
            });
        }
然后选择Kestrel执行,访问地址:http://localhost:5000/hangfire
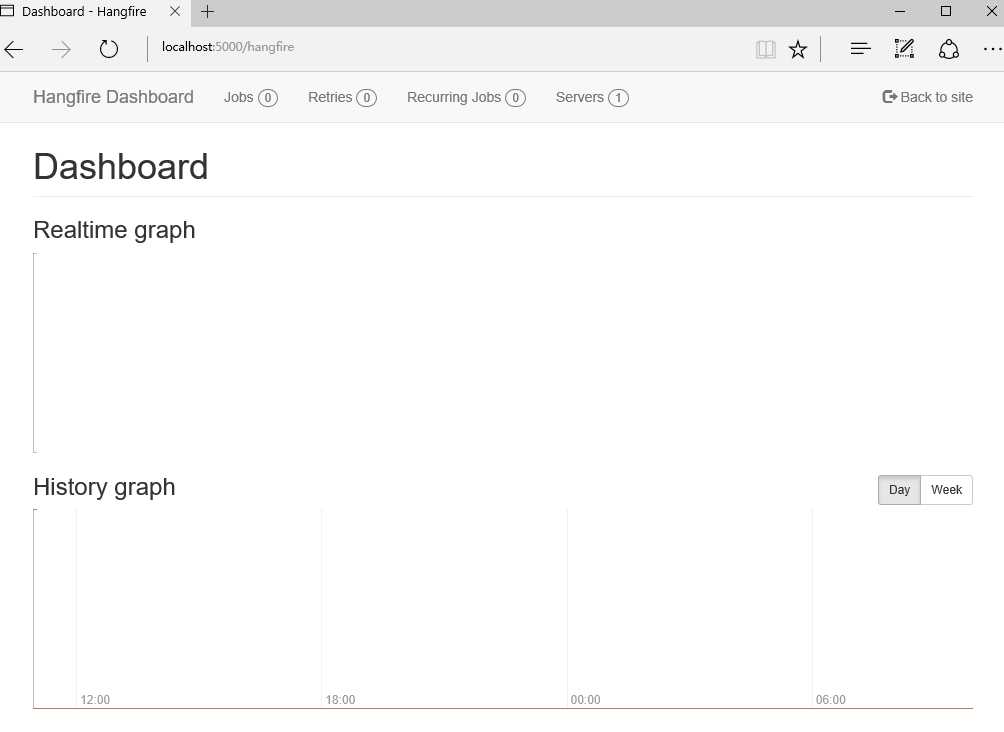
成功运行,下面我们就可以来添加任务了。
            app.Map("/index", r =>
            {
                r.Run(context =>
                {
                    //任务每分钟执行一次
                    RecurringJob.AddOrUpdate(() => Console.WriteLine($"ASP.NET Core LineZero"), Cron.Minutely());
                    return context.Response.WriteAsync("ok");
                });
            });

            app.Map("/one", r =>
            {
                r.Run(context =>
                {
                    //任务执行一次
                    BackgroundJob.Enqueue(() => Console.WriteLine($"ASP.NET Core One Start LineZero{DateTime.Now}"));
                    return context.Response.WriteAsync("ok");
                });
            });

            app.Map("/await", r =>
            {
                r.Run(context =>
                {
                    //任务延时两分钟执行
                    BackgroundJob.Schedule(() => Console.WriteLine($"ASP.NET Core await LineZero{DateTime.Now}"), TimeSpan.FromMinutes(2));
                    return context.Response.WriteAsync("ok");
                });
            });
这里创建任务只是为了方便,我们也可以在初始化的时候创建,也可以在controller 中创建。
下面我们来执行。
首先访问 http://localhost:5000/index
然后访问 http://localhost:5000/await
最后访问 http://localhost:5000/one
这样任务也就都执行起来了。

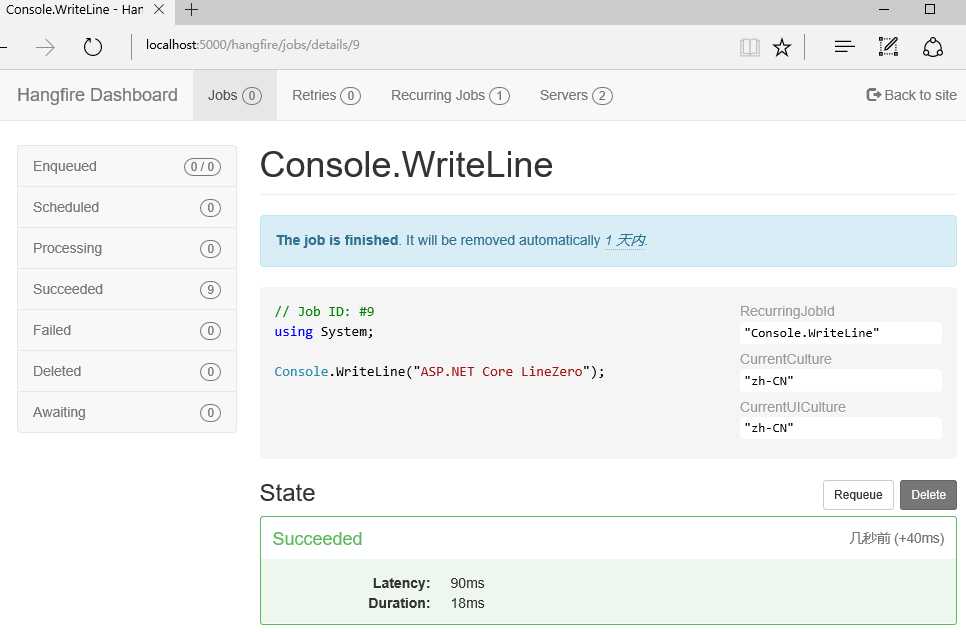
Jobs 也就是查看所有的任务,我们可以在节目界面操作运行及删除,很方便。
我们还可以点击任务,查看任务详情。以及任务执行结果。
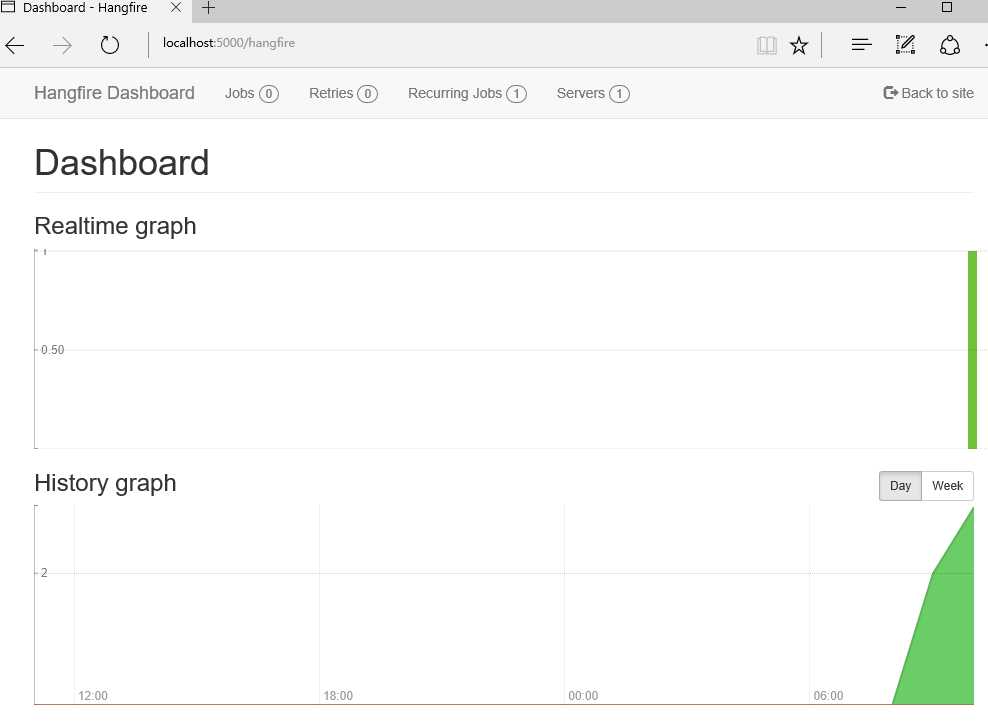
最终运行一段时间,还有图表展示
Startup.cs 完整代码:

 1     public class Startup
 2     {
 3         // This method gets called by the runtime. Use this method to add services to the container.
 4         // For more information on how to configure your application, visit http://go.microsoft.com/fwlink/?LinkID=398940
 5         public void ConfigureServices(IServiceCollection services)
 6         {
 7             services.AddHangfire(r=>r.UseSqlServerStorage("Data Source=.;Initial Catalog=HangfireDemo;User ID=sa;Password=123456"));
 8         }
 9
10         // This method gets called by the runtime. Use this method to configure the HTTP request pipeline.
11         public void Configure(IApplicationBuilder app, IHostingEnvironment env, ILoggerFactory loggerFactory)
12         {
13             loggerFactory.AddConsole();
14
15             if (env.IsDevelopment())
16             {
17                 app.UseDeveloperExceptionPage();
18             }
19             //GlobalConfiguration.Configuration.UseSqlServerStorage("Data Source=.;Initial Catalog=OrchardCMS;User ID=sa;Password=sa123456");
20
21             app.UseHangfireServer();
22             app.UseHangfireDashboard();
23
24             app.Map("/index", r =>
25             {
26                 r.Run(context =>
27                 {
28                     //任务每分钟执行一次
29                     RecurringJob.AddOrUpdate(() => Console.WriteLine($"ASP.NET Core LineZero"), Cron.Minutely());
30                     return context.Response.WriteAsync("ok");
31                 });
32             });
33
34             app.Map("/one", r =>
35             {
36                 r.Run(context =>
37                 {
38                     //任务执行一次
39                     BackgroundJob.Enqueue(() => Console.WriteLine($"ASP.NET Core One Start LineZero{DateTime.Now}"));
40                     return context.Response.WriteAsync("ok");
41                 });
42             });
43
44             app.Map("/await", r =>
45             {
46                 r.Run(context =>
47                 {
48                     //任务延时两分钟执行
49                     BackgroundJob.Schedule(() => Console.WriteLine($"ASP.NET Core await LineZero{DateTime.Now}"), TimeSpan.FromMinutes(2));
50                     return context.Response.WriteAsync("ok");
51                 });
52             });
53
54
55             app.Run(context =>
56             {
57                 return context.Response.WriteAsync("Hello from ASP.NET Core!");
58             });
59         }
60     }
通过Hangfire, 这样我们就可以很方便的在ASP.NET Core 里创建后台任务。而且提供管理界面供我们操作。
如果你觉得本文对你有帮助,请点击“推荐”,谢谢。
ASP.NET Core开发-后台任务利器Hangfire使用
标签:
原文地址:http://www.cnblogs.com/linezero/p/hangfire.html
