标签:
使用maven包管理器开发java web时,由于国内网速太慢,或者墙的缘故,创建project后,总是要等待很长时间加载所需jar包。这对于开发者而言,是一种痛苦的等待,对于企业,也是一种损失。
今天得遇高人指点,对eclipse中的maven插件做了优化配置,下面一步一步的操作示范,帮助有需要的朋友们:
linux/windows:打开eclipse后,window-》preferences-》maven
mac:eclipse偏好设置-》maven
然后选择 User Settings,如下图:
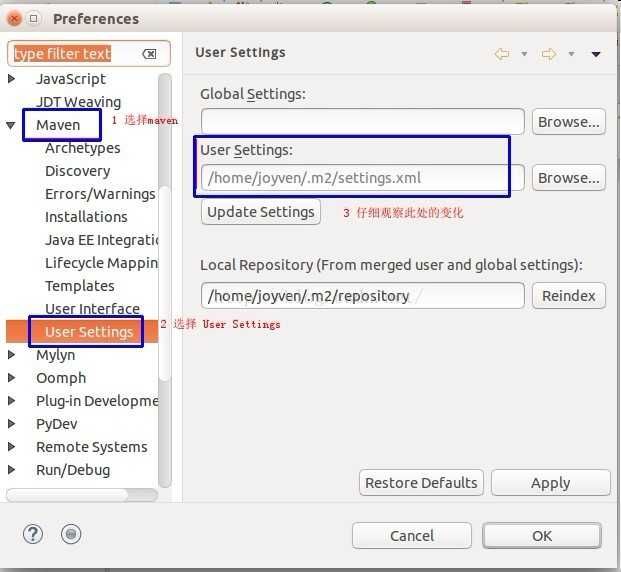
根据图中3的指示的位置,创建一个配置文件settings.xml。
linux/mac均可使用下面命令创建,先不写任何内容,然后保存,vim命令模式下是:wq,注:w是写入,q是退出,冒号是命令开始
~$ vim /home/joyven/.m2/settings.xml
windows需要在当前用户目录下,依管理员身份创建。
接着回到eclipse的操作步骤,先关闭preferences面板,再次根据前面说步骤的,打开此面板,你会看到User Settings中发生的变化,如下图:
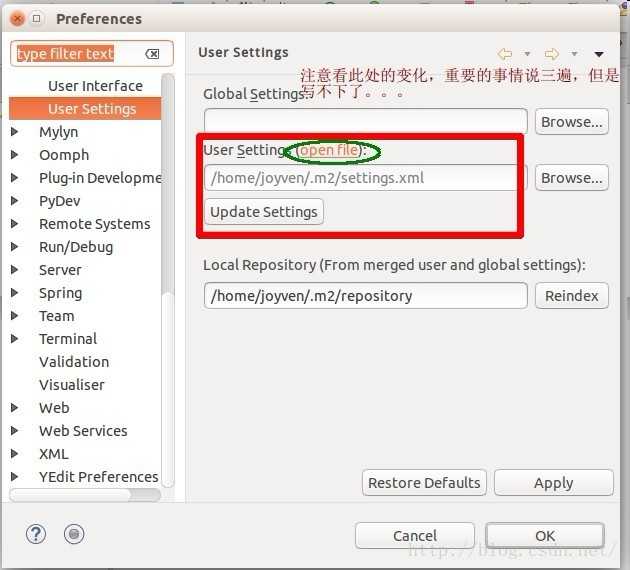
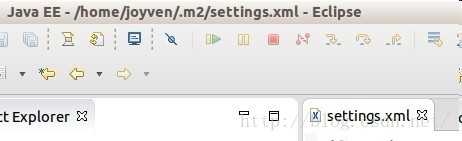
是的,你没看错,多出来了一个openfile。点击openfile,然后Apply,再OK,最后关闭此面板。此时,已经在eclipse编辑窗口打开了前面创建的settings.xml文件。
配置开始了,将下面的代码复制到settings.xml文件中,保存即可。
<settings xsi:schemaLocation="http://maven.apache.org/SETTINGS/1.0.0 http://maven.apache.org/xsd/settings-1.0.0.xsd">
	<mirrors>
		<!-- mirror | Specifies a repository mirror site to use instead of a given
			repository. The repository that | this mirror serves has an ID that matches
			the mirrorOf element of this mirror. IDs are used | for inheritance and direct
			lookup purposes, and must be unique across the set of mirrors. | -->
		<mirror>
			<id>nexus-osc</id>
			<mirrorOf>central</mirrorOf>
			<name>Nexus osc</name>
			<url>http://maven.oschina.net/content/groups/public/</url>
		</mirror>
		<mirror>
			<id>nexus-osc-thirdparty</id>
			<mirrorOf>thirdparty</mirrorOf>
			<name>Nexus osc thirdparty</name>
			<url>http://maven.oschina.net/content/repositories/thirdparty/</url>
		</mirror>
	</mirrors>

	<profiles>
		<profile>
			<id>default</id>
			<repositories>
				<repository>
					<id>nexus</id>
					<name>local private nexus</name>
					<url>http://maven.oschina.net/content/groups/public/</url>
					<releases>
						<enabled>true</enabled>
					</releases>
					<snapshots>
						<enabled>false</enabled>
					</snapshots>
				</repository>
			</repositories>
			<pluginRepositories>
				<pluginRepository>
					<id>nexus</id>
					<name>local private nexus</name>
					<url>http://maven.oschina.net/content/groups/public/</url>
					<releases>
						<enabled>true</enabled>
					</releases>
					<snapshots>
						<enabled>false</enabled>
					</snapshots>
				</pluginRepository>
			</pluginRepositories>
		</profile>
	</profiles>
</settings>
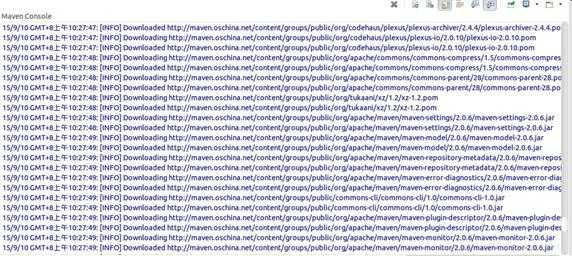
测试一下:在eclipse中创建一个maven工程,然后在eclipse的console窗口中,选择maven console。就可以看到加载的包的来源了。

右下角的倒三角箭头鼠标悬浮上去后,有很多console列表,选择maven console即,点击即可切换到maven窗口,可看到有关下载源的信息,如下图:
-------------------------------------------补充更新------------------------------------------------------------------------------
settings.xml文件中,在标签<profile>必须包含在<profiles>中,否则在使用命令行执行mvn时,会出现一些错误:
Error reading settings.xml: Unrecognised tag: ‘profile‘ (position: START_TAG seen ...</mirrors>\n\n\t<profile>... @22:11)
Line: 22
Column: 11
joyven@joyven-ThinkPad-E450:/mnt/workspace/spring-mvc$ mvn archetype:generate DgroupId=joyven -DartifactId=spring-mvc -DarchetypeArtifactId=maven-archetype-webapp
修改之后则没有了。
补充一点:
用maven创建项目:
mvn archetype:generate DgroupId=joyven -DartifactId=spring-mvc -DarchetypeArtifactId=maven-archetype-webapp
说明:maven主要依靠坐标来区分项目包。
groupId
artifactId
archetypeArtifactId
version
这四个值体现了maven包的唯一性。
标签:
原文地址:http://www.cnblogs.com/arvtie/p/5817793.html