标签:
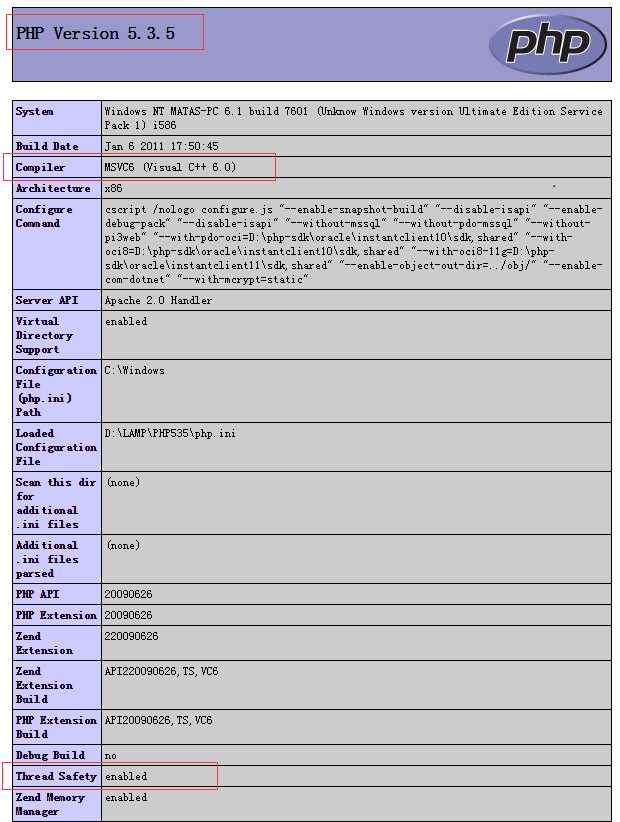
1.使用phpinfo();查看php版本信息
2.配置xdebug
2.1 根据php版本信息,下载对应的xdebug .

2.2将下载的php_xdebug-2.1.2-5.3-vc6.dll文件放到php安装目录下面ext目录中。
2.3在php.ini中添加如下配置:
[xdebug]
zend_extension = "D:/LAMP/PHP535/ext/php_xdebug-2.1.2-5.3-vc6.dll"
xdebug.remote_enable=1
xdebug.remote_handler=dbgp
xdebug.remote_host=127.0.0.1
xdebug.remote_port=9000
xdebug.remote_mode=req
xdebug.idekey=matas
xdebug.remote_log="d:\temp\xdebug\xdebug.log"
xdebug.show_exception_trace=0
xdebug.show_local_vars=9
xdebug.show_mem_delta=0
xdebug.trace_format=0
xdebug.profiler_enable  = 1
xdebug.profiler_output_dir ="d:\temp\xdebug"
2.4 重启apache服务器,通过phpinfo();查看是否有xdebug相关输出信息。
3.配置DBGp插件
3.1 下载最新版的DBGp插件 https://sourceforge.net/projects/npp-plugins/files/DBGP%20Plugin/
3.2 将解压得到的dll文件拷贝到 NotePad++安装目录下的plugins目录里,然后重新打开NotePad++。
3.3 在“插件”菜单栏下将会出现 DBGp子菜单,选择config ,进入配置。
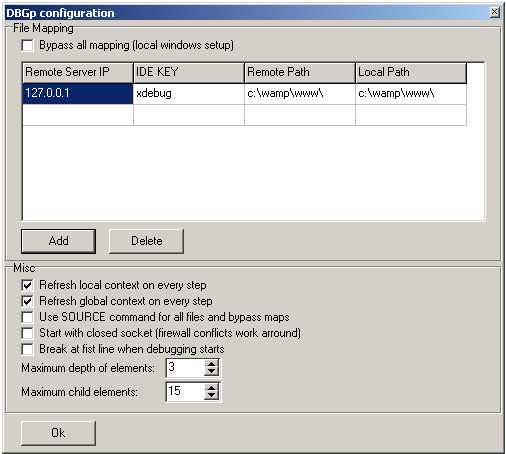
IDE KEY 和 php.ini中的xdebug.idekey配置一样。
3.4 打开 插件->DBGp->Debugger

点击红点,会在光标所在行添加断点。
3.5 在要调试的页面URL后添加 ?XDEBUG_SESSION_START=session_name
例如: http://localhost/test.php?XDEBUG_SESSION_START=abcd
参考:http://thecancerus.com/debugging-php-using-xdebug-and-notepad-part-i/
标签:
原文地址:http://www.cnblogs.com/mataszhang/p/5820009.html