标签:
每个星期一道菜,这个星期也不例外~~~
一个软件,一个产品,都是一点点开发并完善起来的,功能越来越多,性能越来越强,用户体验越来越好……这每个指标的提高都需要切切实实的做点东西出来,好比,你的这个产品做大了,用的人多了,不仅仅再是上海人用,北京人用,还有印度人用,法国人用等等,可以说这个产品已经走上了国际化的大舞台。当印度的哥们输入url访问产品时,界面上弹出“欢迎您,三哥”,估计哥们当场就蒙圈了。而这个时候,国际化就应运而生了。
要做国际化这道菜,真的没有想象中的那么复杂,反而很简单,不信你看——
1. 注入ResourceBundleMessageSource
在SpringMVC.xml添加用于国际化处理的beanResourceBundlMessageSource
|
1
2
3
|
<bean id="messageSource" class="org.springframework.context.support.ResourceBundleMessageSource"> <property name="basename" value="i18n"></property> </bean> |
这里property中的name是与注入类中的属性名一直的,这里的value决定了后面国际化文件的名称,记得是i18n,马上你就会看到它的用法。
2. 创建国际化文件
总共需要创建三个国际化属性文件
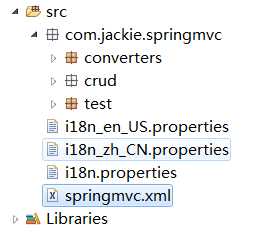
i18n.properties-默认的国际化文件
i18n_en_US.properties-用于英文环境的国际化文件
i18n_zh_CN.properties-用于中文环境的国际化文件
注意:这里为什么文件的名称都是i18n开头,因为在第一点的springmvc.xml配置文件中,配置的value值就是i18n
对于i18n.properties和i18n_en_US.properties文件的内容相同,如下
|
1
2
|
i18n.username=UserNamei18n.password=Password |
i18n_zh_CN.properties
|
1
2
|
i18n.username=\u7528\u6237\u540Di18n.password=\u5BC6\u7801 |
3.新建页面
分别新建两个页面,一个是i18n.jsp,显示用户名,同时有跳转到i18n2.jsp的超链接,另一个是i18n2.jsp,显示密码,同时有跳转到i18n.jsp的超链接。
i18n.jsp
|
1
2
3
4
5
6
7
8
9
10
11
12
13
14
15
|
<%@ page language="java" contentType="text/html; charset=UTF-8" pageEncoding="UTF-8"%><%@ taglib prefix="fmt" uri="http://java.sun.com/jsp/jstl/fmt" %><!DOCTYPE html PUBLIC "-//W3C//DTD HTML 4.01 Transitional//EN" "http://www.w3.org/TR/html4/loose.dtd"><html><head><meta http-equiv="Content-Type" content="text/html; charset=UTF-8"><title>Insert title here</title></head><body> <fmt:message key="i18n.username"></fmt:message><br><br> <a href="i18n2">i18n2</a></body></html> |
i18n2.jsp
|
1
2
3
4
5
6
7
8
9
10
11
12
13
14
15
|
<%@ page language="java" contentType="text/html; charset=UTF-8" pageEncoding="UTF-8"%><%@ taglib prefix="fmt" uri="http://java.sun.com/jsp/jstl/fmt" %><!DOCTYPE html PUBLIC "-//W3C//DTD HTML 4.01 Transitional//EN" "http://www.w3.org/TR/html4/loose.dtd"><html><head><meta http-equiv="Content-Type" content="text/html; charset=UTF-8"><title>Insert title here</title></head><body> <fmt:message key="i18n.password"></fmt:message><br><br> <a href="i18n">i18n</a></body></html> |
同时,显然我们需要在index.jsp中添加一个入口,链接到i18n.jsp页面,如下
|
1
|
<a href="i18n">i18n</a> |
为了能够直接点击就链接过去,而不需要通过handler处理并跳转到视图的套路,我们需要在springmvc.xml中添加标签
|
1
2
|
<mvc:view-controller path="/i18n" view-name="i18n"/> <mvc:view-controller path="/i18n2" view-name="i18n2"/> |
这样就能实现直接在地址栏中直接访问到i18n.jsp和i18n2.jsp页面了。

小坑:如果i18n.jsp和i18n2.jsp中的编码方式采用默认“ISO-8859-1”,就会出现页面显示乱码

当把编码改为“UTF-8”后,就能够正常显示

以上是国际化这道菜的基础做法,那么如果我还想做一道不用直接访问i18n.jsp,而是经过handler处理后呈现的i18n.jsp,或者我还想做一道不用那么麻烦还要切换语言的国际化菜,有没有可能,当然,接着看——
1. 注释之前在springmvc.xml添加对于i18n.jsp直接访问的标签
|
1
2
3
|
<!-- <mvc:view-controller path="/i18n" view-name="i18n"/> --> |
2. 在Hanlder处理类SpringMVCTest中添加处理接口
|
1
2
3
4
5
6
7
8
9
|
@Autowiredprivate ResourceBundleMessageSource messageSource;@RequestMapping("/i18n")public String testI18n(Locale locale){ String val = messageSource.getMessage("i18n.username", null, locale); System.out.println(val); return "i18n";} |
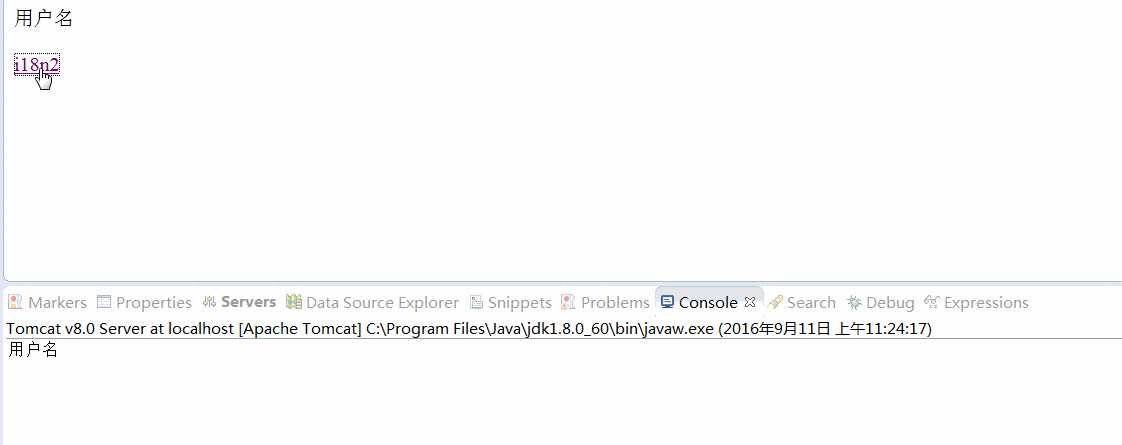
注意这里注入了国际化处理类ResourceBundleMessageSource,并使用其getMessage方法获取国际化后的属性值。
启动tomcat服务可以看到
那么如果根据自己的设定,在不同的语言环境中显示相应语言的信息呢
1. 配置SessionLocaleResolver和LocaleChangeInterceptor
|
1
2
3
4
5
6
7
|
<!-- 配置SessionLocaleResolver --><bean id="localeResolver" class="org.springframework.web.servlet.i18n.SessionLocaleResolver"></bean><!-- 配置LocaleChangeInterceptor --><mvc:interceptors> <bean class="org.springframework.web.servlet.i18n.LocaleChangeInterceptor"></bean></mvc:interceptors> |
这里的LocaleChangeInterceptor主要用于将带有locale信息的请求解析为一个Locale对象,并得到一个LocaleResolver对象
之后这里的SessionLocalResolver就会将上面的LocalResolver对象转化为Session的属性,并从中取出这个属性,也就是Locale对象,返回给应用程序。
2. 在index.jsp中添加超链接
|
1
2
3
4
|
<a href="i18n?locale=zh_CN">中文</a><br><br><a href="i18n?locale=en_US">英文</a> |
这样,我们就可以看到结果

说完国际化,再来说说SpringMVC对于json的支持。
在传统的开发过程中,我们的handler即controller层通常遵循需要转向一个JSP视图的套路;但是这样的场景并不能满足所有的要求,比如我们很多时候只需要返回数据即可,而不是一个JSP页面。那么这时候SPRING MVC3的@ResponseBody和@ResponseEntity就支持这样的功能。Controller直接返回数据(这里我们说说json数据),而不是直接指向具体的视图。这里简单的分别举一个上传和下载的例子。
1. 文件上传
1.1 使用jquery在index.jsp实现ajax请求
|
1
2
3
4
5
6
7
8
9
10
11
12
13
14
15
16
17
18
19
20
21
22
23
24
25
26
27
28
29
30
31
|
<%@ page language="java" contentType="text/html; charset=UTF-8" pageEncoding="UTF-8"%><!DOCTYPE html PUBLIC "-//W3C//DTD HTML 4.01 Transitional//EN" "http://www.w3.org/TR/html4/loose.dtd"><html><head><meta http-equiv="Content-Type" content="text/html; charset=UTF-8"><title>Insert title here</title><script type="text/javascript" src="scripts/jquery-1.9.1.min.js"></script><script> $(function(){ $("#testJson").click(function(){ var url = this.href; var args = {}; $.post(url, args, function(data){ for(var i=0; i<data.length; i++){ var id = data[i].id; var lastName = data[i].lastName; alert(id + ": " + lastName); } }) return false; }) })</script></head><body><a href="emps">list all employees</a><br/><br/><a href="testJson" id="testJson">testJson</a></body></html> |
这里核心的就是用jquery写的ajax请求
请求的url就是定义的href;
data为请求响应后返回的数据;
正常情况下,我们应该请求到所有员工的信息,并且通过这里的遍历得到每一个员工的所有信息如id、lastName等
1.2. 这里我们需要引入三个jar包
jackson-annotation-2.1.5.jar
jackso-core-2.1.5.jar
jackso-databind-2.1.5.jar
这三个主要是用于后面在返回数据的转换中用到的。
1.3. 在handler SpringMVCTest中添加接口
|
1
2
3
4
5
|
@ResponseBody@RequestMapping("testJson")public Collection<Employee> testJson(){ return employeeDao.getAll();} |
这里我的个人理解,就是将通过employeeDao查询到的所有的员工信息,作为响应返回给接口,并最终通过一系列处理得到一个json的数据形式,然后在前台页面中遍历解析。而完成这一切就是归功于注解@ResponseBody。
具体来说,是有内部的一些converter来做这些转换的,在接口方法中打断点,进入调试
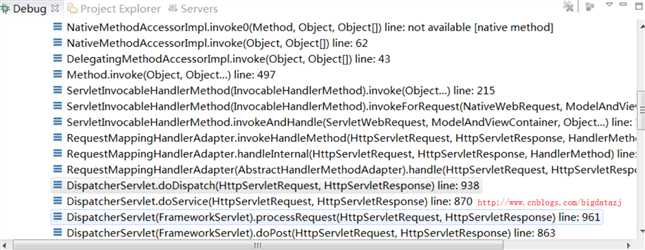
选择DispatcherServlet,找到this->handleradapters->elementData,在这个数组中找到RequestMappingHandlerAdapter,点进去找到messageConverters,便可以看到总共有7个converters
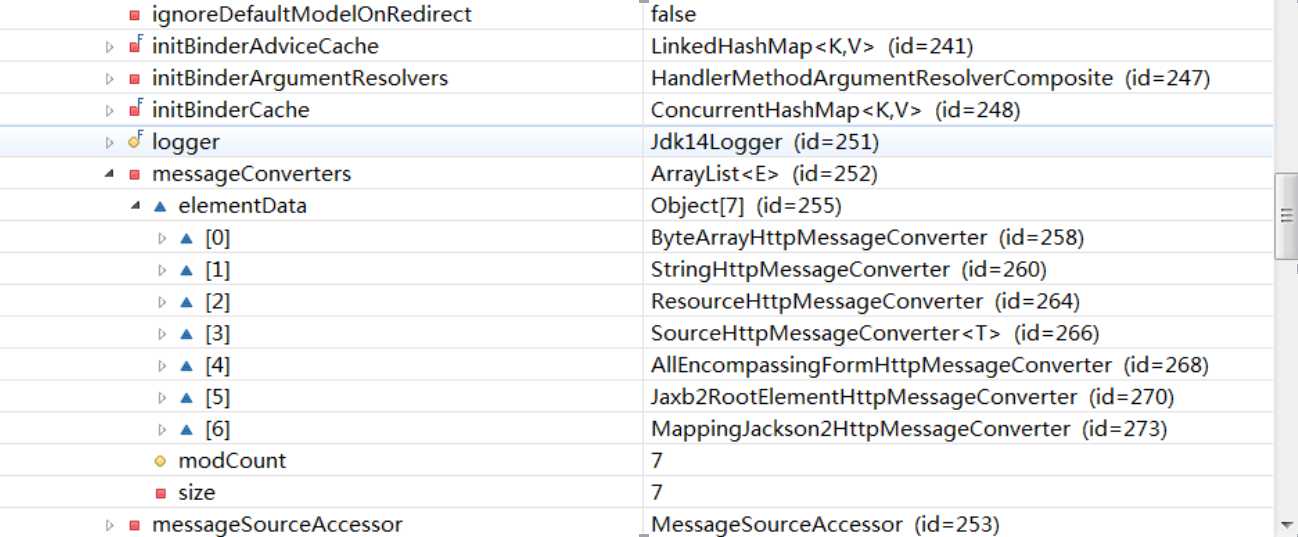
这里第7个MappingJackson2HttpMessageConverter就是我们添加了以上三个jar包后才加载进来的converter。可以看出,这里有足够过对于不同数据类型处理的转换器。
最终的上传结果如下

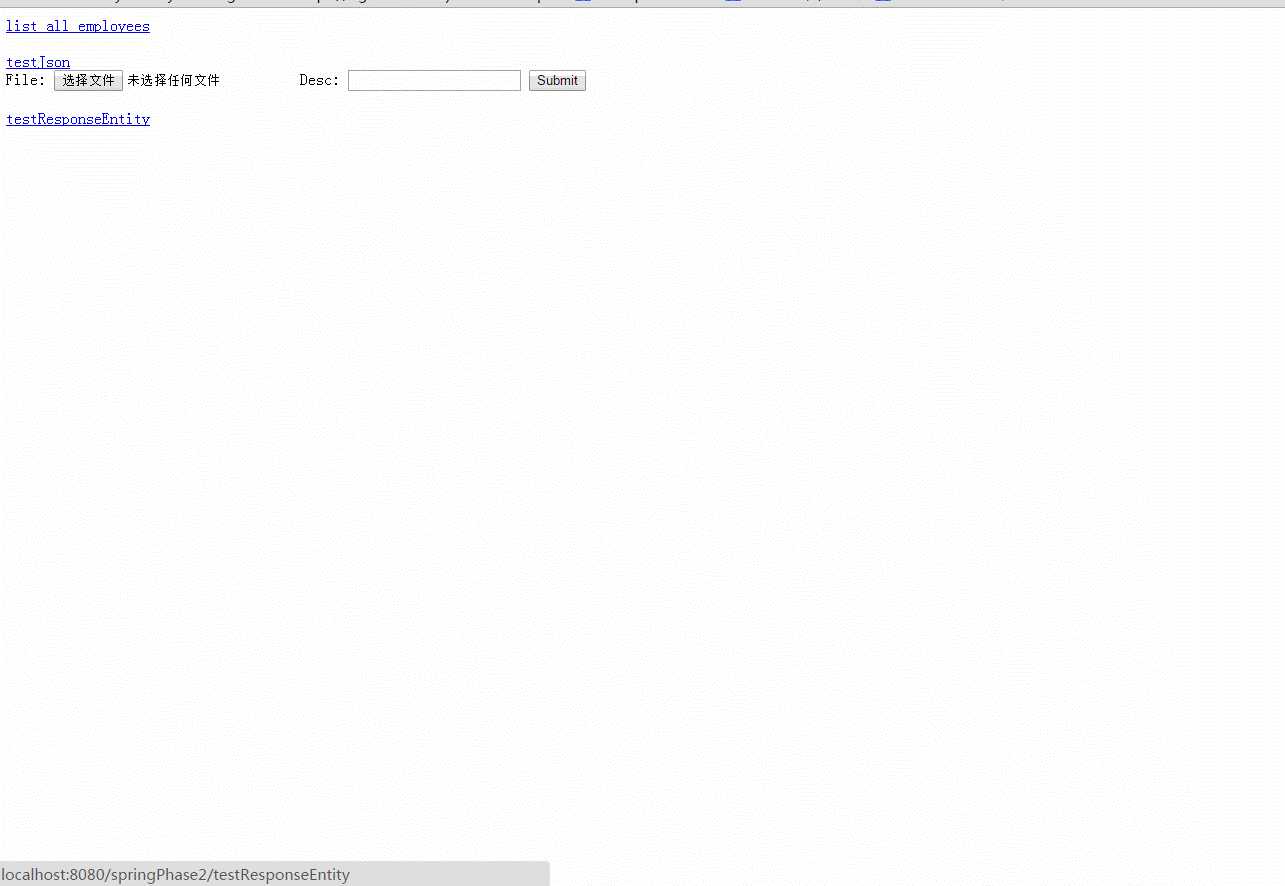
2. 文件下载
2.1 准备下载源
在WebContent下新建files目录,放入aaa.txt,作为下载源
2.2 在index.jsp添加超链接作为下载入口
|
1
|
<a href="testResponseEntity" id="testJson">testResponseEntity</a><br/> |
2.3 在handler SpringMVCTest中添加接口
|
1
2
3
4
5
6
7
8
9
10
11
12
13
14
|
@RequestMapping("testResponseEntity")public ResponseEntity<byte[]> testResponseEntity(HttpSession session) throws IOException{ byte[] body = null; ServletContext servletContext = session.getServletContext(); InputStream in = servletContext.getResourceAsStream("/files/aaa.txt"); body = new byte[in.available()]; in.read(body); HttpHeaders headers = new HttpHeaders(); headers.add("Content-Disposition", "attachment;filename=aaa.txt"); HttpStatus statusCode = HttpStatus.OK; ResponseEntity<byte[]> response = new ResponseEntity<>(body, headers, statusCode); return response;} |
启动tomcat,我们可以看到aaa.txt真的可以下载啦~~~
好了,到此为止,我们都干了啥
1. 支持国际化
2. 文件上传
3. 文件下载
http://www.cnblogs.com/bigdataZJ/p/springmvc5.html
标签:
原文地址:http://www.cnblogs.com/softidea/p/5862948.html