标签:编程语言 android version battery battery
Battery Historian
battery historian是一款用于检测与电池有关的信息和事件的工具,运行在Android 5.0 Lollipop (API level 21)及其之后。它会生成一张具有时间坐标的图纸,用户可以查看各种事件耗电时间。
安装
一、首先安装Go编程语言
点击下载【下载】;
安装Go;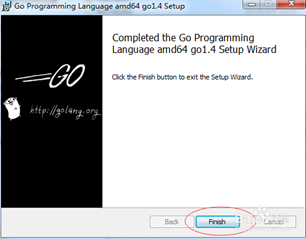
配置GOROOT和GOPATH
a. GOROOT的作用是告诉Go 命令和其他相关工具,在哪里去找到安装在你系统上的Go包,所以这里配置的是GO的安装目录
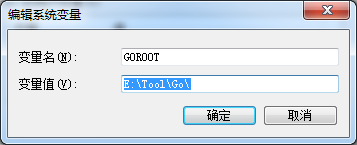
b.GOPATH可以简单理解为是工程的目录,所以创建一个GO的工程路径
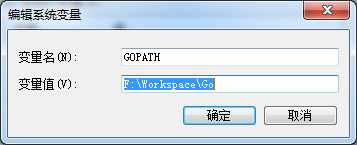
C.最后配置一下环境变量,把Go的bin目录放到path环境变量中
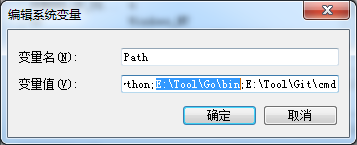
4. 检查Go是否安装成功,打开命令行输入Go version

二、安装Git
点击下载【下载】;
按照步骤安装;
安装完成检查:命令行输入git version

也可以直接打开git bash检查

三、安装Python
点击下载【下载】,注意仅支持python2.7
安装完成;
环境变量配置,添加Path的路径,是Python的安装路径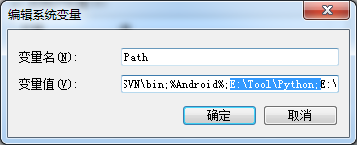
输入命令行 python –V(注意是大写V)检查是否安装成功
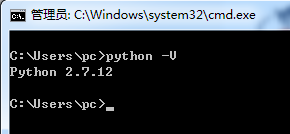
四、安装Java环境
点击下载【下载】;
完成安装。
五、下载Battery Historian源码并且运行
git目录下点击git-bash.exe,输入命令行go get -d -u github.com/google/battery-historian/...

**下载到GOPATH配置目录下
进入到$GOPATH/src/github.com/google/battery-historian目录下方
运行Battery Historian
输入 $ go run setup.go
# Compile Javascript files using the Closure compiler

等待数分钟,如果仍然没有下载成功,可以手动下载,如下操作
**下载【closure-library】和【closure-compiler】和【flot-axislabels】,解压放到GOROOT目录下third_party文件夹下方的的closure-compiler和closure-library和flot-axislabels文件夹 ../battery-historian\third_party;如果没有均手动创建
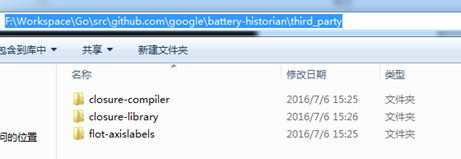
b. go run cmd/battery-historian/battery-historian.go
# Run Historian on your machine (make sure $PATH contains $GOBIN)
$ go run cmd/battery-historian/battery-historian.go [--port <default:9999>]
检查/battery-historian是否运行,登录网址 http://localhost:9999查看
生成bugreport
一、数据准备
1.windows cmd下执行以下命令,开启电池数据获取
adb shell dumpsys batterystats --enable full-wake-history
2.windows cmd下执行以下命令,重置电池数据
adb shell dumpsys batterystats --reset
二、操作应用,生成bugreport
拔掉USB,然后对待测app进行相关操作,一段时间后,插上USB,运行一下两条命令。
1.windows cmd下执行以下命令,将bugreport信息保存到相应路径下,等待执行完毕
adb bugreport > bugreport.txt
2.windows cmd 下执行以下命令,将以上txt文档转化为html文件
python historian.py -a bugreport.txt >battery.html
注:现在不知道为什么会提示错误,找不到historian.py这个文件
上面的historian.py 就是用python写的脚本,所以需要python环境,可以从github上下载,以上命令执行完后,会发现两个文件,bugreport.txt和battery.html,这个时候用谷歌浏览器输入http://localhost:9999,上传bugreport.txt或者是直接打开battery.html就可以了,视图如下:
以上是V2.0版的,你可以自己切换到1版,现在来分析下各个参数的意义:
V2.0的指标更多,因为没有相应的参考文档,后面问问相关大神。所以只能先分析V1.0,可以参考http://blog.csdn.net/itfootball/article/details/44084159
最后我们还可以看到相关进程耗费的电量(估算值):
标签:编程语言 android version battery battery
原文地址:http://7080696.blog.51cto.com/7070696/1856047